Visit my other site, For The Wing, for all things chicken-wing!
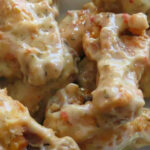
I often make my own chicken wing sauces. And then sometimes I don’t. I recently made it a goal of mine to try all of the wing sauces from the big grocery stores in our area: WalMart, Meijer, and Kroger. And far, I’ve been super impressed with the store sauces, like this Great Value Parmesan Garlic wing sauce. It’s thick enough to stick to the wings (it’s very thick, actually!) and it has great Parmesan and garlic flavor.
Great Value Parmesan garlic wing sauce isn’t just great on wings. I like to roast or grill chicken breasts, chop or slice them, and toss with a bit of this sauce. It makes for the perfect creamy chicken over a salad.
Remember that if you have to refrigerate your open bottle of wing sauce to let it sit out on the counter for at least 30 minutes before using. You don’t want to ‘shock’ hot, just-cooked wings with a cold sauce.
Note: This recipe was developed using the Char-Broil Big Easy Oil-Less Fryer. If you are cooking using the Char-Broil Smoker-Roaster Grill you should cook with the lid open and the temperature set to High. You might also need to adjust the cooking time.
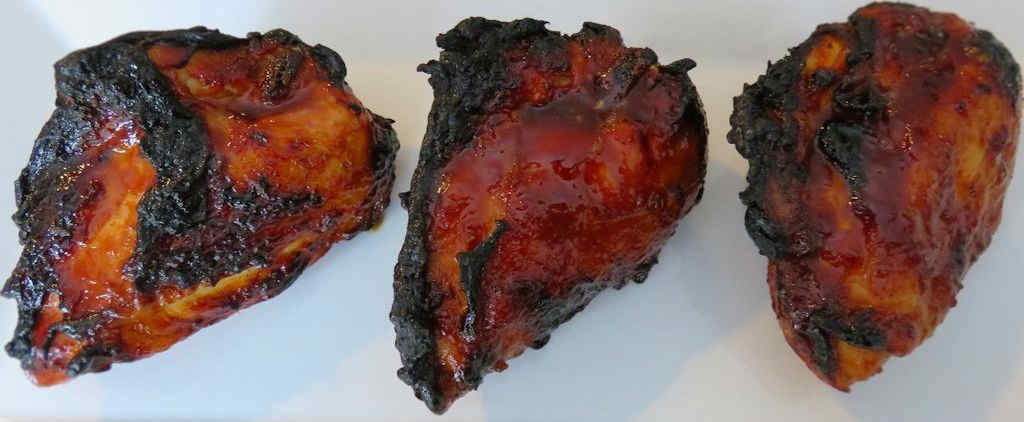
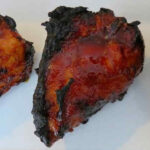
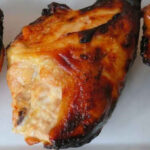
I was watching Diners, Drive-Ins and Dives when Guy Fieri made a stop at Mike’s Huli Huli Chicken in Hawaii. Traditionally, Huli Huli chicken is marinated, then roasted over a wood fire. It’s turned twice and basted. Huli means ‘turn’, so hence the name!
Amazing Chicken
It only took me a second to realize that I needed to make Huli Huli chicken on the Char-Broil Big Easy. Nothing cooks poultry as easily and as great as the Big Easy. Granted, I wasn’t going to get wood fire flavor, but oh, did I ever get great chicken. Amazing chicken. Perhaps the best chicken I’ve ever made on my oil-less fryer. It’s definitely in the Top 3! Hints of Asian flavors in a sauce that reminds you a bit of traditional American BBQ sauce.
The marinade for Huli Huli chicken on the Char-Broil Big Easy does contain sugar, so it will get a little dark when roasting on the cooker. That’s ok. In fact, it’s more than ok. The marinade is incredible. Beyond incredible.
I fully intend to use this same marinade and sauce on more than just chicken. It’ll be great on smoked or grilled ribs or pulled pork.
Place the chicken into a large resealable container.
In a large bowl, whisk together the remaining ingredients.
Add all except for 1/2 cup of the sauce to the chicken.
Cover and toss to coat.
Refrigerate the chicken and reserved sauce overnight.
Fire up your Big Easy.
Remove the chicken from the marinade and shake off the excess.
Spray your Big Easy basket and the Bunk Bed basket with non-stick spray.
Add the chicken to the baskets and cook for 1 hour.
Baste the chicken with half of the reserved marinade and flip gently. I use very long tongs to carefully flip the chicken. You might find it easier (and safer) to do by first removing the basket from the Big Easy. Then either reach in from the sides to flip the chicken or remove the Bunk Bed basket with heat proof gloves and then flip the chicken.
Cook the chicken for 15 more minutes. At this point the chicken should be around 160 F.
Brush with the remaining marinade and flip the chicken one more time.
Return the chicken to the Big Easy and continue cooking until the chicken reached 165 F as measured in several places.
Remove the chicken from the baskets and let rest 15 minutes before serving.
Notes
You’ll need a Bunk Bed basket to cook all 4 chicken breasts at once.
I backed up the truck on some Hatch chiles this year. I ended up roasting almost all of them. They’re a really wonderful thing, and I’ve found myself using them in a lot of dishes. If I had more room I’d probably get two cases next year. One of my favorite things to make that uses roasted Hatch chiles is this spicy green chile guacamole.
Different. Better.
The addition of chiles (and tomatillos) to guacamole really makes for something different. Tastier. A little thicker. And just slightly spicy. I’m not always a big fan of tomatillos, but I found that this guacamole called for just the right amount of them. I’ll be making this again and again.
I also found that this spicy green chile guacamole lasts longer than my usual guacamole recipe. I mean, lasts longer in the fridge. On the off chance that there’s leftovers, that is. It won’t last long once you serve it.
Place all ingredients into a blender or food process and process until smooth.
If the mixture is too thick add a bit more water and pulse a few times.
Notes
If you don’t have roasted chiles and tomatillos on hand, just toss fresh chiles and tomatillos on the grill (or under the broiler) until charred on all sides. Let cool slightly then remove the charred skins.
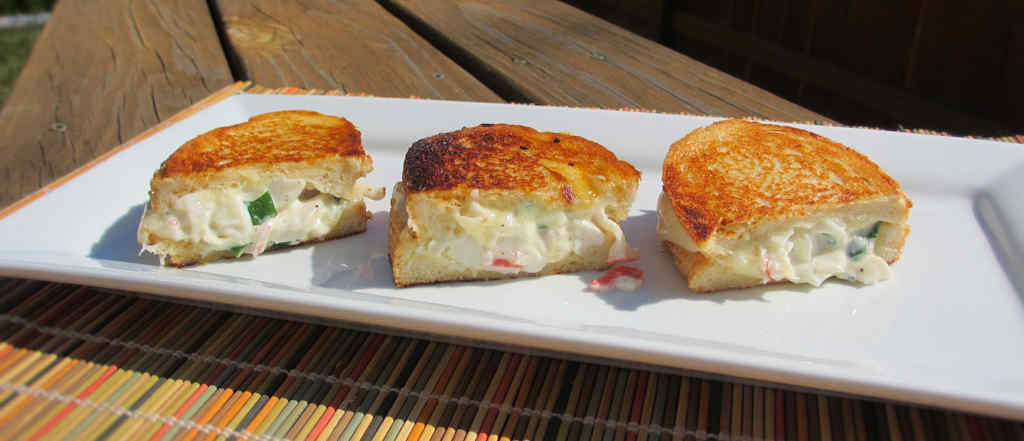
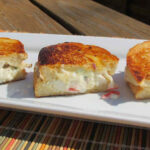
Grilled cheese sandwiches aren’t uncommon in our household, not at all. They’re easy and good and that’s all you can ask for. But, sometimes I just gotta mix things up. Not crazy mix things up, but crazy good mix things up. The filling in these crab grilled cheese sandwiches is just like a good crab salad. It just needs a little ‘help’, and that comes in the form of melted oooey gooey Swiss cheese on crispy golden bread. A nice crunch then creamy salad and cheese. Perfect.
Simple. Yet Delicious.
The crab salad inside these crab grilled cheese sandwiches is actually quite good and simple. It’d also be perfect inside appetizer sandwiches. Ya know, the fancy ones they serve at teas.
The filling in these crab grilled cheese sandwiches is just like a good crab salad. It just needs a little ‘help’, and that comes in the form of melted oooey gooey Swiss cheese on crispy golden bread.
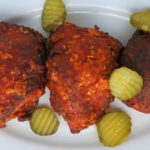
This dip-fried chicken using the Vortex is mighty darned near the same as my equally-as-crazy-good Nashville hot chicken. The crunchy skin is just a bit different. The sauce is just a bit different, and it’s mighty darned spicy to boot. But the chicken is still unbelievably moist, tender, and delicious. I’ve said it a thousand times: nothing beats ‘fried’ chicken made using the Vortex. Nothing. Every time you make fried chicken using the Vortex you’ll be amazed at how much it’s as good as deep-fried chicken (if not better!) but without the oil, the fryer and the fuss!
Nice And Spicy!
I’m a big fan of spicy foods. Not over-the-top, curled-up-on-the-floor-crying spicy. But good spicy. The kind where you can still taste the food. I thought this dip-fried chicken using the Vortex nailed the spicy factor just perfectly. But I warn you, it is spicy. I suggest that once you start eating you don’t stop. Because that’s when the burn comes and it’ll stick around for a bit, too. It’s a good burn, a tasty burn, the best kind. You might want to taste it first if you’re spice-fearful.
Sure, you can cut back on the amount of hot sauce if you wish. Or add more.
This dip-fried chicken is unbelievably moist, tender, and delicious. I’ve said it a thousand times: nothing beats ‘fried’ chicken made using the Vortex. Nothing.
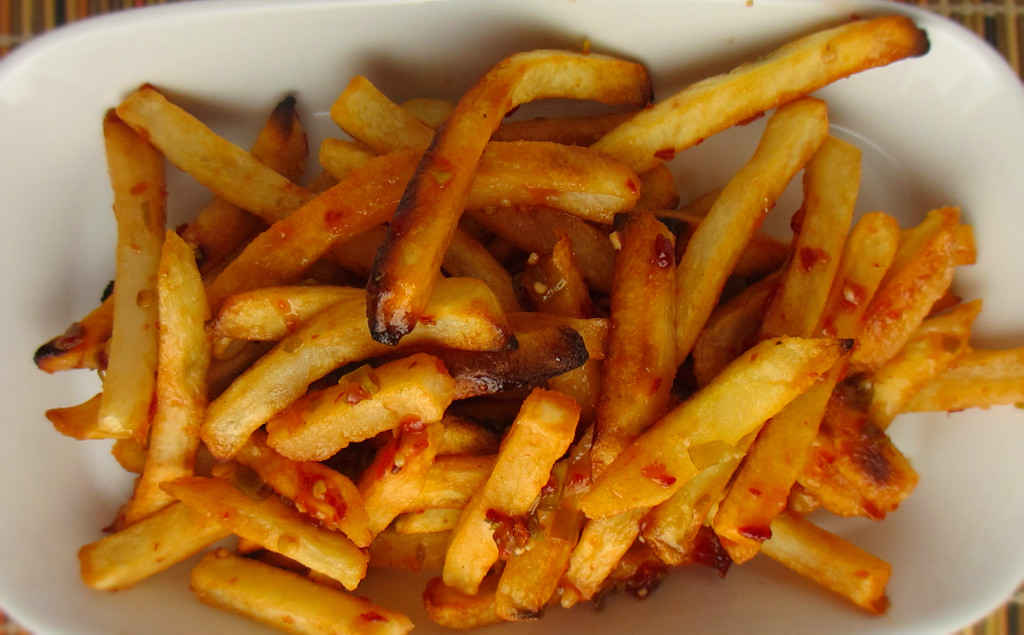
Since I was grilling up a few Asian pork burgers for dinner, I needed some fries to go with them. Something with a bit of Asian zing to it. So, I grabbed a bag of frozen fries out of the freezer, baked them up, and tossed them with a few Asian ingredients. In no time, my quick fix Asian fries were on the table, ready to be devoured.
Spicy, Yummy Fries! At Last!
These quick fix Asian fries do have a bit of a spicy kick to them. That’s probably why we loved them so much. Get your fries good and crunchy. If they sit for long in the sauce they might get a bit soggy. They really won’t last long so it’s not much of a worry.
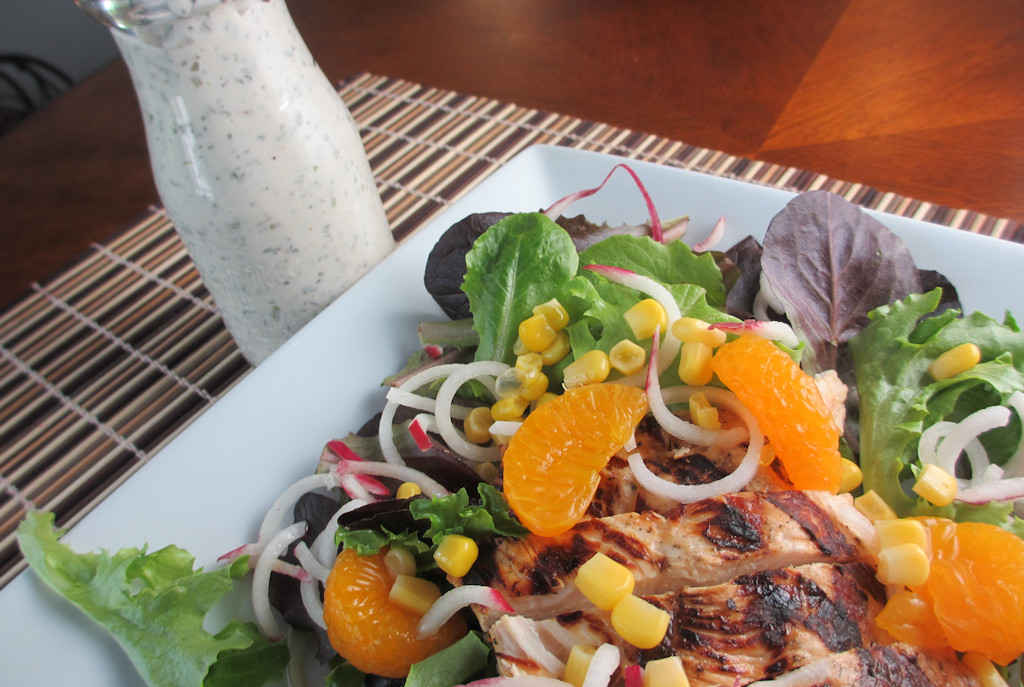
We’ve been enjoying a week of grilling marinated chicken breasts, sliced thin, served on top of fresh greens with homemade salad dressings, like this herby Ranch dressing. I also mix up the salad toppings to keep things new and exciting. In no time we have a great salad for dinner.
A Twist On The Classic Dressing
This herby Ranch dressing has the flavors of a traditional Ranch, with an extra herb kick. Fresh herbs make it the best, but you can substitute dried, like I did. Just make sure you crumble the dried herbs first. You don’t want to bite into a big ole chunk of oregano, ya know!
Check out my new site, Dress My Salad, for more great salad dressing ideas!
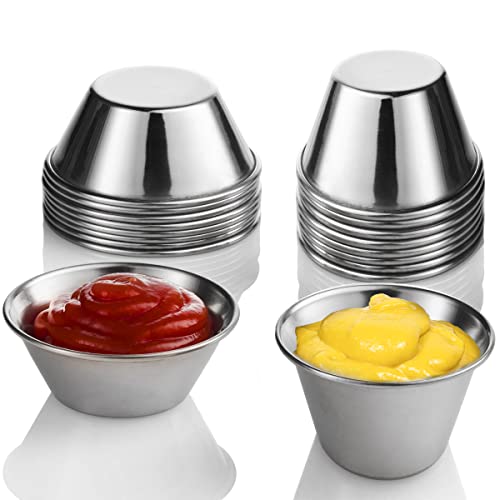
These little sauce dipping cups are great for serving salad dressings. They keep me from over-dressing my salads, which is something I’m prone to do since I’m a dressing-aholic (and in particular, a Ranch-aholic). They’re easy to clean up, too. And they’re also great for dipping nuggets, tenders or even chicken wings.
Note: This recipe was developed using the Char-Broil Big Easy Oil-Less Fryer. If you are cooking using the Char-Broil Smoker-Roaster Grill you should cook with the lid open and the temperature set to High. You might also need to adjust the cooking time.
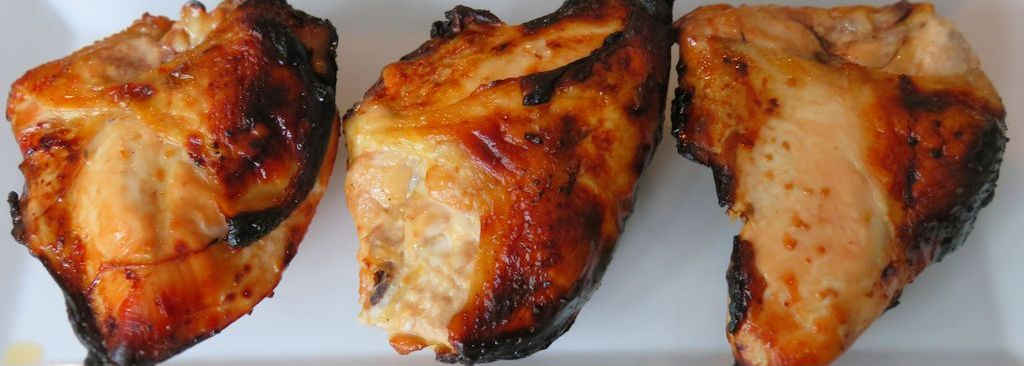
This is how chicken is meant to be. Apple juice brined chicken on the Char-Broil Big Easy is everything you could hope for. Sure, it’s packed with flavor. But it’s much more than tasty. It’s incredibly tender and juicy. You’ll actually gasp with your first bite. How can it be so good?
So, if you follow this blog you know that I make a LOT of chicken on my Big Easy, and I do mean a lot. It is always great but this Apple Juice Brined Chicken on the Char-Broil Big Easy is a step beyond great.
Hints of Asian-Inspired Flavors
The soy sauce and garlic add just the right hint of Asian flavors to this apple juice brined chicken on the Char-Broil Big Easy. The brine takes care of everything else, keeping the meat perfect. All in all, I ended up cooking 12 split chicken breasts (in batches) that were marinated in this brine. The chicken is not just good as-is, but it also makes for fantastic chicken salad.
Place the chicken in a large baggie or resealable container.
Whisk together the remaining ingredients and add to the chicken. Seal and shake to coat.
Refrigerate for 1-3 hours.
Fire up your Big Easy. Remove the chicken from the marinade and transfer to the Big Easy basket. Depending on the size of the chicken, you may have to cook them in batches or use a Big Easy bunk bed basket.
Cook for 15-20 minutes per pound, or until the chicken reaches 165 F as measured in several places.
Notes
I prefer to use bone-in split chicken breasts for this recipe.
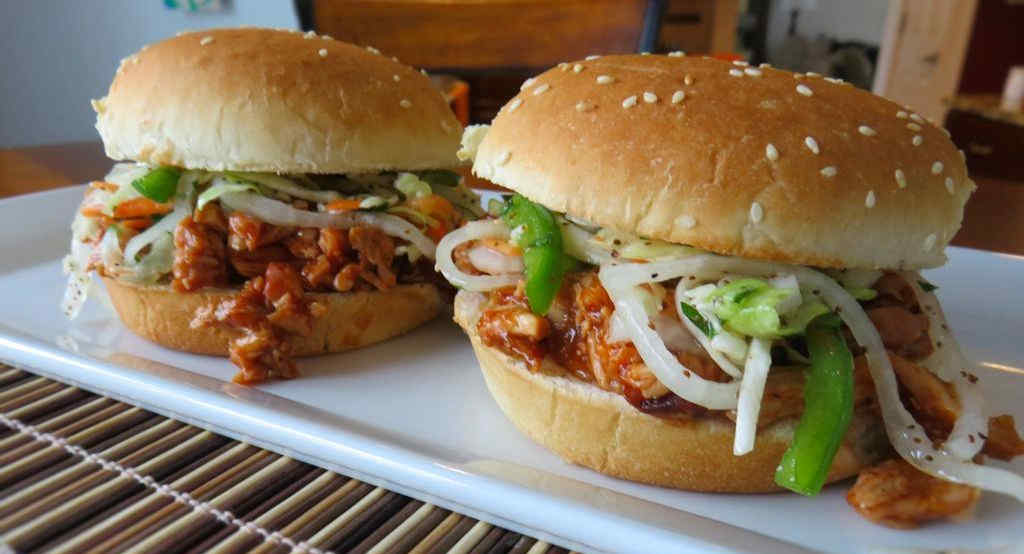
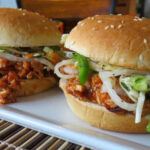
I love me some smoked meats! Beef, pork, chicken, you name it! One of my favorites is smoked chicken thighs. For me thighs are the way to go when it comes to smoking chicken. They’re more tender, juicier, and definitely more flavorful than white meat (even if you take the time to brine it). Smoked thighs shred easily, making for the perfect smoked BBQ chicken sandwiches.
Add Crunch For A Great Contrast
I like to top all of my pulled meat sandwiches with slaw. And specially my Delta slaw. It adds a great crunch and a little vinegary tang to offset the sweetness of the BBQ sauce. If I don’t have any slaw on hand then I go with my second choice: dill pickle slices. I love a little crunch with my smoked BBQ chicken sandwiches!
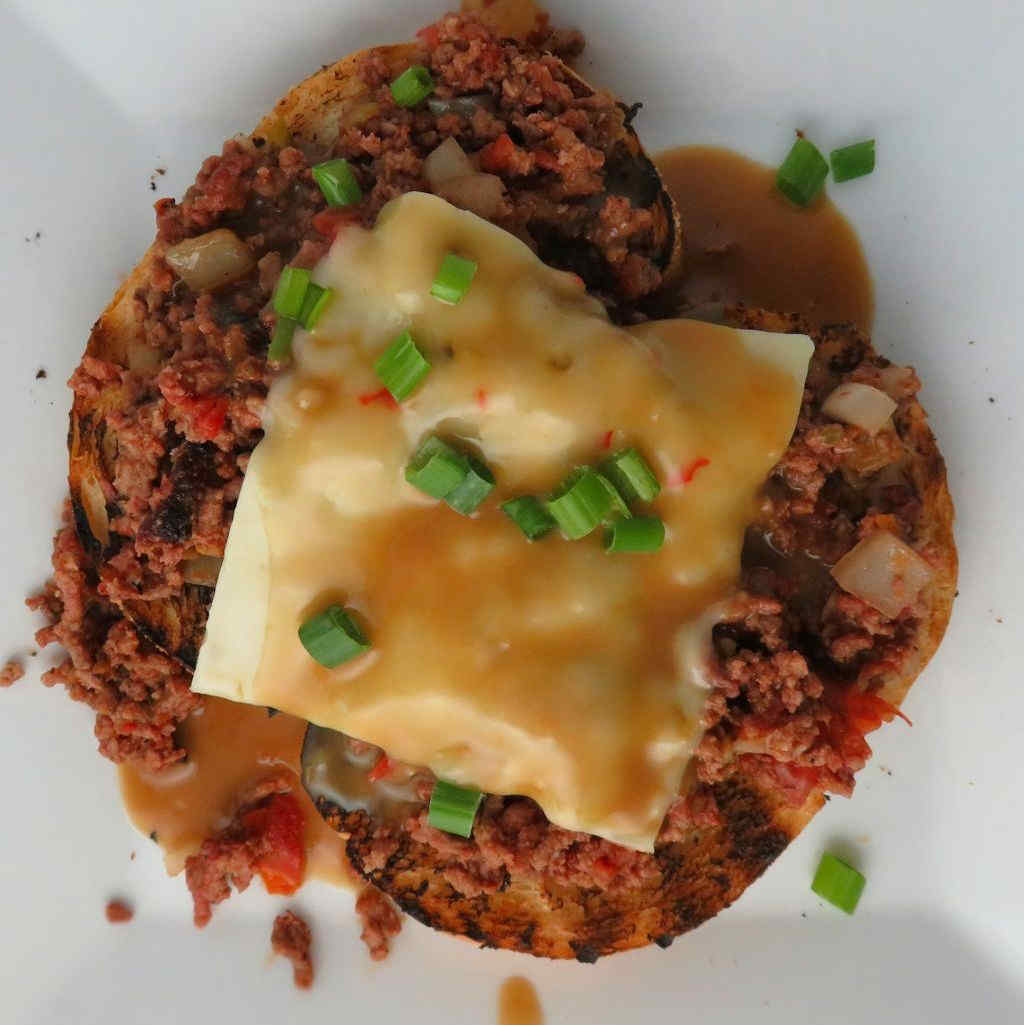
These grilled open-faced beef, cheese and gravy sandwiches just blew us away. Cooked over charcoal, the sandwiches take on a lovely light smoky flavor. The beef is tender, juicy and packed with flavor. Covered in a tasty beef gravy, every bite is just fantastic. Served over thick, hearty grilled bread, it’s the sandwich you’ve been looking for.
Burgers With A Big Twist
There’s nothing I would really change about this recipe for Grilled Open-Faced Beef, Cheese and Gravy sandwiches. It’s a great alternative to cooking your usual burgers on the grill. You could make this with ground turkey, I would think, though you might have to add a little fat (vegetable oil) to keep the turkey from getting too tough when seared. You might want to grab a bottle of pre-made turkey gravy instead of making the beef version in the recipe below.
Nothing Fancy Here, Folks
The gravy on these sandwiches isn’t anything fancy or fru-fru. It’s simple and beefy and that’s it. It gets just the right thickness to pour over your sandwiches. You’ll get plenty of everything in each and every bite. No need to worry about those dreaded ‘no gravy’ bites.
Grilled Open-Faced Beef, Cheese and Gravy Sandwiches
These grilled open-faced beef, cheese and gravy sandwiches just blew us away. Cooked over charcoal, the sandwiches take on a lovely light smoky flavor.
Fire up your grill for direct and indirect cooking. Charcoal is definitely best for this recipe.
Form the beef into equal-sized patties.
Sear over direct heat on both sides, but do not cook all the way. Remove from heat and place in a large bowl.
Add the onion, tomatoes, chiles, Italian seasoning and rub. Use a potato masher or fork to combine all ingredients and break the ground beef into chunks.
Place a large cast iron pan on your grill over indirect heat.
Add the meat mixture and spread out evenly. Use a spatula or the back of a large spoon to lightly compact the meat into the pan.
Cook for 20 minutes or until the beef is cooked and most of the liquid has evaporated.
Top mixture with the cheese slices, cover and cook another 2-3 minutes or until the cheese has melted.
Remove the pan from the grill. Lightly toast the bread slices on the grill.
Serve meat over the bread topped with the beef gravy.
For the beef gravy
Add a small skillet to the grill over direct heat. Add the butter and melt.
Add the beef broth. Bring to a boil.
Add the butter to the skillet and melt.
Add 1 1/2 cups of broth. Bring to a boil.
Combine the flour and water in a cup and whisk into the beef broth.
Continue stirring until the gravy is thickened. Remove from heat.
Notes
You’ll need a large cast iron skillet. Remember to not grab the skillet handle without a heat-proof glove once you’ve placed it onto the grill.