I was watching a new show on the Cooking Channel the other day about steaks. Who can pass up a show on cooking big ole hunks of beef over an open flame? The show, Steak Out with Kix Brooks, is hosted by Kix Brooks (duh!), of Brooks and Dunn country music fame. He travels around the country checking out popular steak joints. Steak after glorious steak. Like this one, from a very popular place, Chicago Cut Steakhouse. This is my take on the Chicago Cut’s grilled Cajun ribeye steak.
Perfect Steak With A Kick
To be fair, they use a massive, 24-ounce dry-aged steak that would put this one to shame, but mine turned out great too. The flavor is fantastic. A little heat (I used a spicy Cajun seasoning), and a whole lot of tender juicy meat.
One Nice Steak
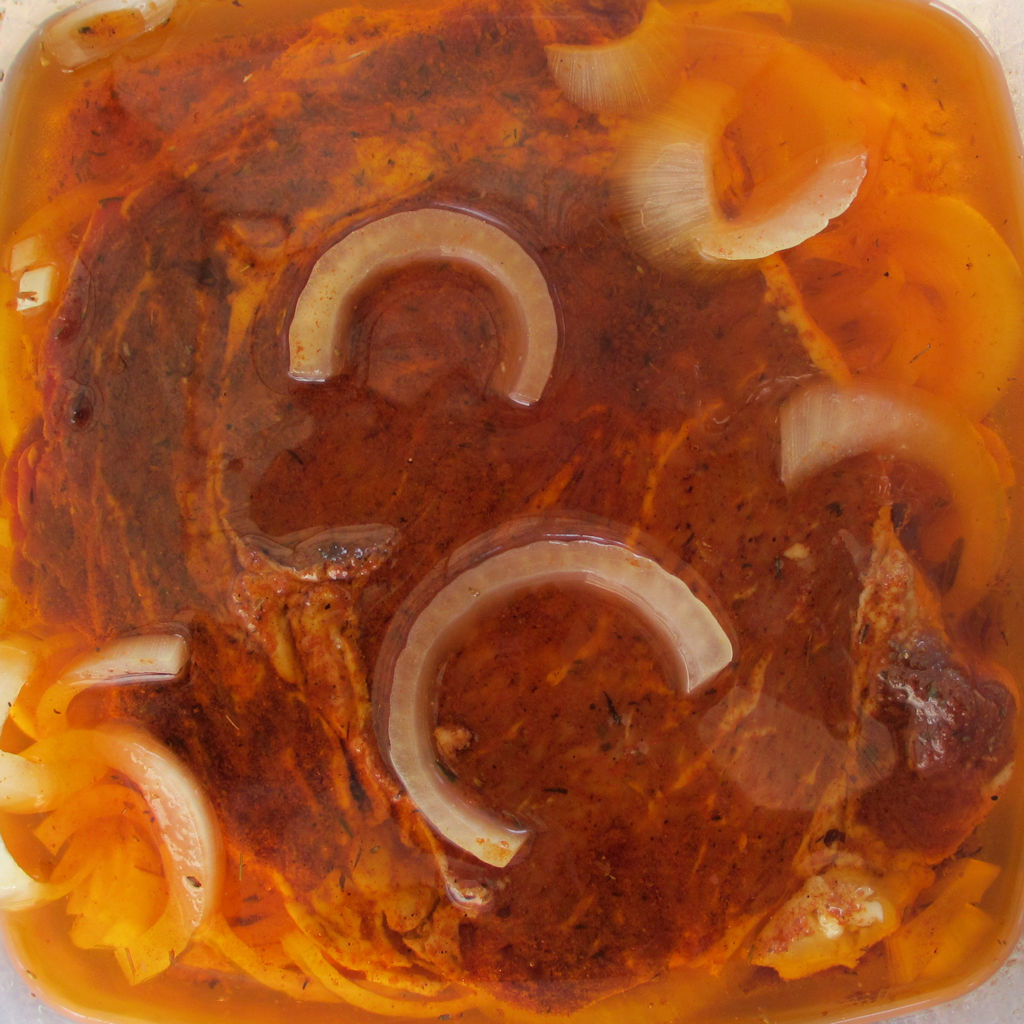
The grilled Cajun ribeye steak looked amazing as it got happy in the marinade. Great color, thanks to the paprika and cayenne in the spice mix. My homemade mix since lets me adjust the flavors (in my case, hotter) to my own tastes.
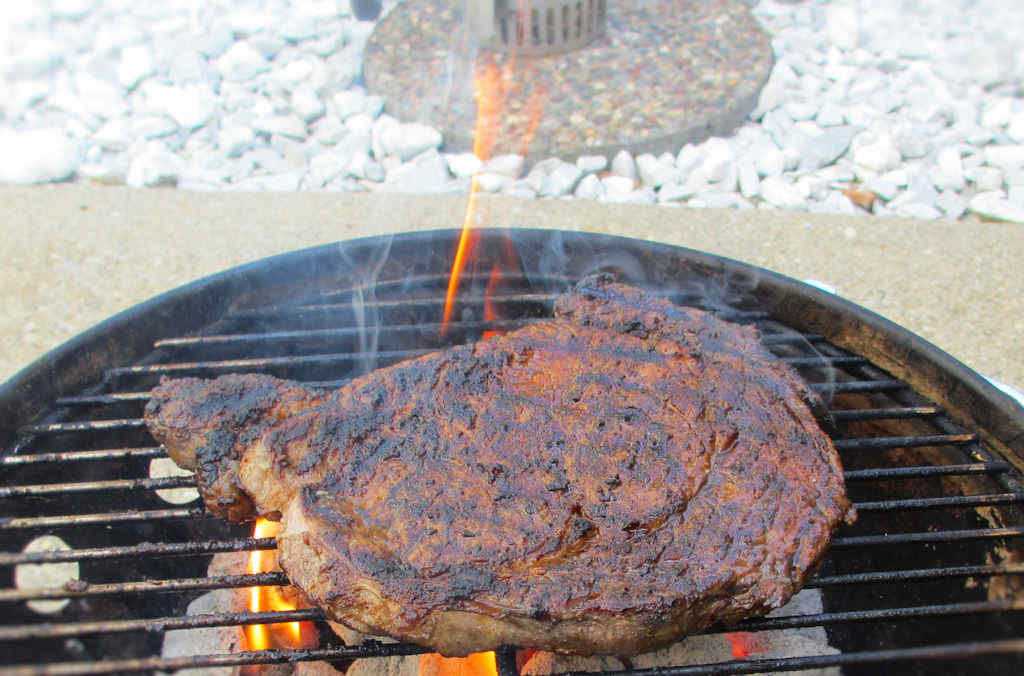
I fired up my little Weber Smokey Joe using my mini charcoal chimney. In about 45 minutes I was enjoying a tremendous steak with a great open-flame char and flavor.

I love to grill steaks over a charcoal chimney. Give it a try, you’ll love it.
Grilled Cajun Ribeye
Equipment
Ingredients
For the steak
- 1 ribeye steak at least 1 pound
- Cajun seasoning Use our homemade mix, or use store-bought
- 1 sweet onion sliced thin
- 10 cloves garlic
- vegetable oil
Instructions
- Lay the steak out on a cutting board.
- Take a fork and stab the steak everywhere, all over, on both sides. Don't be shy. Stab it. A lot. Every inch of it.
- Sprinkle the steak with the Cajun seasoning and stab some more. Get the seasoning down into every little hole.
- Place the steak into a resealable container.
- Add the onion and garlic, then add enough oil to just cover the steak.
- Seal and let marinate for at least 24 hours.
- Fire up your grill for direct cooking. You are going to cook the steak high and fast.
- While you are waiting for the grill to warm up, place the steak onto a cookie rack to drain the oil. Flip it at least once to get any oil off that may pool on the top.
- Place the steak over the hottest part of the grill and cook it quickly, turning once, to your desired temperature. Keep an eye on it as flare-ups will occur from any remaining oil.
- Remove and let rest 5 minutes before serving.
Notes
Nutrition
Nutritional values are approximate.