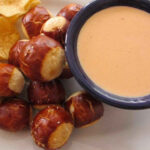
Roasted Garlic Hummus

After making a delicious roasted red pepper hummus the other day, I decided to make a variation. This roasted garlic hummus was another big hit. Perfect for game-time snacking. I also like to pack a little for my wife to take in her lunches. Hummus holds up great and tastes just as good the next day. Sure, she ended up with garlic breath. That’s the price you pay for a good garlic hummus!

Roasted Garlic Hummus

Deliciously Garlicky

I roasted the garlic for this roasted garlic hummus in my oven. I’m also a big fan of slow cooker roasted garlic. And if I have a grill fired up, I’ll just throw it onto the grill for a while instead. There is no substitute for it so take the time to do it right. It’s what this hummus is all about.

Also try my dill hummus.

Roasted Garlic Hummus
Print Pin
5 from 1 vote

Roasted Garlic Hummus

This roasted garlic hummus was a big hit. Perfect for game-time snacking. Hummus holds up great and tastes just as good the next day.
Course Appetizer
Cuisine Mediterranean
Keyword garlic, hummus, roasted
Prep Time 5 minutes
Cook Time 55 minutes
Total Time 1 hour
Servings 4
Calories 126kcal
Author Mike

Ingredients

Instructions

  • Preheat oven to 450 F.
  • Cut about 1/4″ off the bottoms (non-root side) of the garlic, exposing the cloves. Drizzle with a splash of olive oil. Wrap in foil and put into the oven for about 45 minutes or until softened. Remove and let cool. Remove the roasted garlic by squeezing on the garlic bulb.
  • Place lemon and Tahini into a food processor and puree for 1 minute.
  • Scrape down the sides of the processor and puree for another 30 seconds.
  • Add 2 tablespoons of oil, garlic, cumin, cayenne, and salt.
  • Process for 30 seconds. Scrape down the sides and puree another 30 seconds.
  • Open the can of peas. Drain the liquid into a cup, then rinse and drain well.
  • Add half of the peas to the processor and run for 1 minute.
  • Add the remaining peas and process another 1-2 minutes or until smooth.
  • Add in the roasted garlic. If the mixture is too thick, add a little bit of the reserved chickpea liquid, but not much.
  • Serve drizzled with oil.

Notes

Serve immediately.

Nutrition

Calories: 126kcal | Carbohydrates: 11g | Protein: 4g | Fat: 9g | Saturated Fat: 1g | Sodium: 71mg | Potassium: 173mg | Fiber: 2g | Sugar: 1g | Vitamin A: 88IU | Vitamin C: 20mg | Calcium: 59mg | Iron: 1mg

Nutritional values are approximate.

Herb Dipping Sauce

I made this herb dipping sauce as a sauce for rosemary chicken wings. Turns out it also makes a great salad dressing. And it’s great as a chimichurri-like sauce for grilled meats. It definitely packs a nice herby flavor. That was the point!

Rosemary Chicken Wings with Herb Dipping Sauce

A Different Kind Of Dipping Sauce

The herb dipping sauce really complemented the herby flavor of the chicken wings. You instead of dipping the chicken into the sauce you could brush it directly onto the chicken. Split chicken breasts or quarters, grilled to perfection and brushed with the sauce is absolutely divine (and different)!

I could not find fresh oregano so I used dried. Fresh would definitely go with the ‘fresh’ theme of this sauce, so if you have it, use it. Just start with a little taste to see if you need to add more.

Also try my mango-basil dipping sauce.

Rosemary Chicken Wings with Herb Dipping Sauce
Print Pin
4 from 1 vote

Herb Dipping Sauce

Although I made this herb dipping sauce as a sauce for rosemary chicken wings, it also makes a great salad dressing or a chimichurri-like sauce for grilled meats. It definitely packs a nice herby flavor. 
Course Sauce
Cuisine American
Keyword dipping sauce, herbs
Prep Time 5 minutes
Total Time 5 minutes
Servings 2 cups
Calories 183kcal
Author Mike

Ingredients

Instructions

  • Process garlic in a food processor for 20 seconds.
  • Add the remaining ingredients and process until smooth. Add more oil as desired.

Notes

Stir again before using.

Nutrition

Calories: 183kcal | Carbohydrates: 8g | Protein: 11g | Fat: 13g | Saturated Fat: 5g | Cholesterol: 22mg | Sodium: 1507mg | Potassium: 280mg | Fiber: 3g | Sugar: 1g | Vitamin A: 3072IU | Vitamin C: 47mg | Calcium: 382mg | Iron: 3mg

Nutritional values are approximate.

Southern-Style Picnic Hot Dogs

Sure, these southern-style picnic hot dogs are easy to make. And they’re good! Nothing beats the crunchy coolness of a good slaw with the heat of a nice hot chili sauce! Yum! Nothing fancy, just great! Great for a big cookout or picnic, it doesn’t get any easier. Sure, I’ve had chili dogs before. And I’ve put slaw on my dogs before. But never had I combined the two on one hot dog! Oh my goodness! What I’ve been missing all these years!

Southern-Style Picnic Hot Dogs

Great For Lunch Or Dinner Too.

These southern-style picnic hot dogs made for a quick dinner the other night. I used packaged slaw mix with Marzetti light slaw mix. While the dogs were grilling I warmed the chili.

Make sure you grab plenty of napkins when you bite into these dogs. You’re going to need them!

Also try my delicious southwestern hot dog.

Southern-Style Picnic Hot Dogs
Print Pin
5 from 1 vote

Southern-Style Picnic Hot Dogs

Sure, these southern-style picnic hot dogs are easy to make. And they’re good! Nothing beats the crunchy coolness of a good slaw with the heat of a nice hot chili sauce! Yum! Nothing fancy, just great! Great for a big cookout or picnic, it doesn’t get any easier.
Course Main
Cuisine American
Keyword hot dogs, southern
Prep Time 15 minutes
Cook Time 15 minutes
Servings 8
Calories 234kcal
Author Mike

Ingredients

  • 8 hot dogs grilled
  • 8 hot dog buns toasted
  • 2 cups coleslaw divided
  • 1 can chili without beans heated

Instructions

  • Serve dogs on buns, topped with coleslaw and chili!

Notes

Cut a long narrow slit in your dogs before cooking to give the toppings a great place to go!

Nutrition

Calories: 234kcal | Carbohydrates: 31g | Protein: 9g | Fat: 8g | Saturated Fat: 3g | Cholesterol: 20mg | Sodium: 524mg | Potassium: 150mg | Fiber: 1g | Sugar: 3g | Vitamin A: 18IU | Vitamin C: 7mg | Calcium: 91mg | Iron: 3mg

Nutritional values are approximate.

Save

Alphabet Soup

Ok, I admit it. I tried to spell “Life’s A Tomato” in my alphabet soup tonight. I gave up after I couldn’t find an “L”. Regardless, this simple soup was fun to eat. It certainly brought back childhood memories of a quick bowl of alphabet soup for a school day lunch.

Alphabet Soup

Memories in a Bowl

Who didn’t love eating this soup as a kid? Well, it’s just as good (even better) now in this homemade version. Perfect on a chilly, snowy day like today here in Indianapolis. I admit, I smiled a lot as I ate this soup. It brought back memories of being a kid at the kitchen table. Mom would open a can of soup and warm it on the stove. Good times.

I like to use my good ole trusty Dutch oven to make this soup and pretty much darned near anything like it on my stovetop. It’s nice and big and sturdy. That extra weight helps it maintain and distribute heat perfectly. As an added bonus, it’s actually pretty easy to clean up too!

Also try my old fashioned potato soup or my hearty copycat of Olive Garden’s Italian sausage soup. For an Asian-inspired dish, try my classic hot and sour soup.

Alphabet Soup
Print Pin
5 from 1 vote

Alphabet Soup

This simple soup was fun to eat. It certainly brought back childhood memories of a quick bowl of alphabet soup for a school day lunch.
Course Main
Cuisine American
Keyword pasta, soup, vegetable
Prep Time 15 minutes
Cook Time 45 minutes
Total Time 1 hour
Servings 8
Calories 71kcal
Author Based on a recipe from Emeril Lagasse

Equipment

Ingredients

Instructions

  • Heat the oil in a large pot or Dutch oven over medium-high heat.
  • Add the onion, celery, carrots and Creole seasoning. Stir and cook until all of the vegetables start to soften, about 5 minutes.
  • Add the garlic, stir, and cook another minute.
  • Add the broth, water, black pepper, and the bay leaf. Stir and bring to a boil. Reduce to a simmer and let simmer, uncovered, for 35 minutes. Season with more pepper and some salt as desired.
  • Add the pasta and let simmer another 10 minutes until cooked.
  • Serve with hot fresh-baked French bread.

Notes

You can add more broth in place of the water for a richer soup.

Nutrition

Calories: 71kcal | Carbohydrates: 13g | Protein: 3g | Fat: 1g | Saturated Fat: 0.1g | Polyunsaturated Fat: 0.2g | Monounsaturated Fat: 0.1g | Cholesterol: 5mg | Sodium: 916mg | Potassium: 249mg | Fiber: 2g | Sugar: 5g | Vitamin A: 4361IU | Vitamin C: 5mg | Calcium: 39mg | Iron: 1mg

Nutritional values are approximate.

Grilled Kung Pao Chicken and Egg-Fried Rice

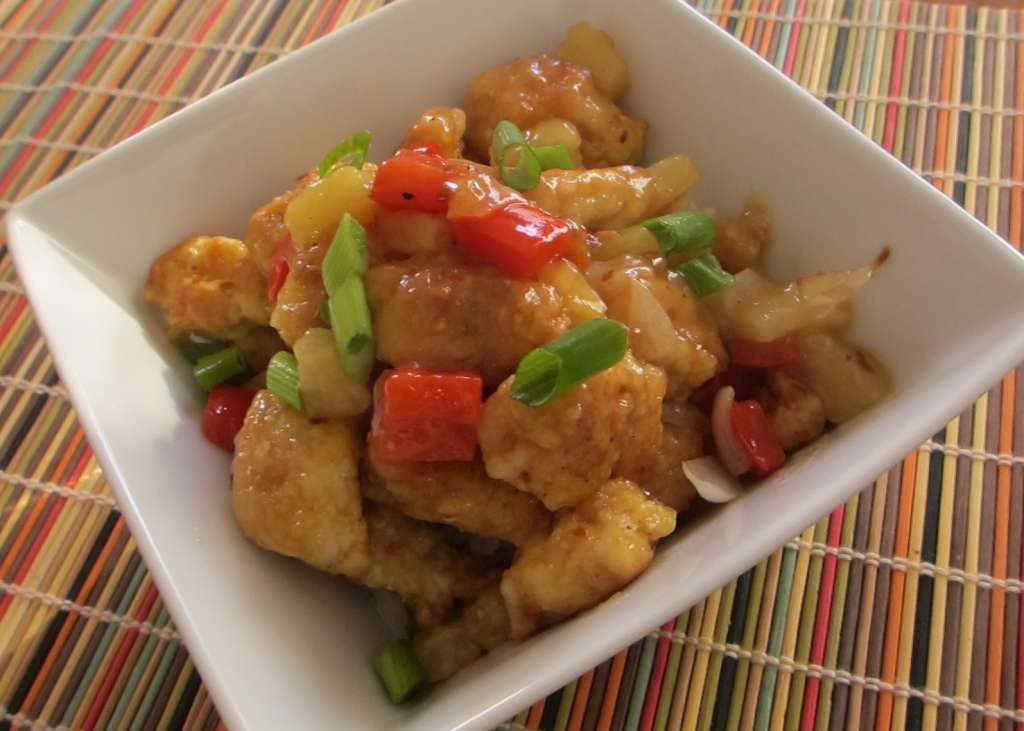
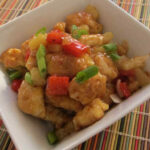
Kung Pao chicken is a great thing. Grilling (I used my Weber grill) it makes it an excellent thing. We both really enjoyed how this (easy) grilled Kung Pao chicken and egg-fried rice dish came out. There’s a hint of kick from the chicken cooled by the grilled sweetness of the grilled pineapple. Served over a simple egg-fried rice, this dish hit the spot. Despite just how simple it was to put together, it’s a real winner and something we make often.

Grilled Kung Pao Chicken and Egg-Fried Rice

Let A Grill Basket Do The Work

This grilled Kung Pao chicken and egg-fried rice dish came out tastier and easier to make than I had imagined. I found the best way to cook the chicken, mushrooms and pineapple was to throw them all into a grill basket over high heat after first searing the chicken over direct heat. I am not a fan of mixing raw chicken with anything. I prefer to cook it on its own. I’m guaranteed a properly-cooked protein that way.

Cooking was easy. Cleanup was easy.

Also try my four-pepper chicken fried rice.

Grilled Kung Pao Chicken and Egg-Fried Rice
Print Pin
4 from 1 vote

Grilled Kung Pao Chicken with Egg-Fried Rice

This grilled Kung Pao chicken and egg-fried rice dish came out tastier and easier to make than I had imagined.
Course Main
Cuisine American
Keyword chicken, fried rice
Prep Time 15 minutes
Cook Time 1 hour
Total Time 1 hour 15 minutes
Servings 6
Calories 348kcal

Ingredients

For the Kung Pao Chicken

  • ¼ cup soy sauce
  • 3 tablespoons brown sugar
  • 2 tablespoons rice vinegar
  • 1 tablespoon Sriracha or more
  • 2 cloves garlic minced
  • 1 ½ teaspoons ginger grated
  • 2 teaspoons sesame oil
  • 1 ½ pounds chicken breast boneless, skinless , cut into 1" cubes
  • ½ pound cremini mushrooms
  • 1 whole pineapple cut into 1″ cubes
  • green onions chopped, for garnish

For the egg-fried rice

Instructions

For the Kung Pao Chicken

  • Place the first 7 ingredients into a large resealable baggie along with the chicken.
  • Seal and toss to coat.
  • Let marinade for at least 30 minutes, turning every 15 minutes.
  • Heat grill to high.
  • Add chicken pieces and sear on both sides.
  • Place chicken in a grill basket along with mushrooms and pineapple.
  • Grill over high heat until the mushrooms are tender and the chicken is done.
  • Serve over egg-fried rice, garnished with green onions.

For the egg-fried rice

  • Heat a wok over a high heat and add 1 tablespoon of the oil.
  • Add the eggs and scramble for a few minutes, then remove to a plate.
  • Wipe any egg left from the wok and add the remaining oil.
  • Add the rice and break up and clumps.
  • Add the tomatoes and stir-fry for 3 minutes.
  • Add the eggs back to the wok.
  • Add soy sauce, sesame oil and pepper, to taste.
  • Serve garnished with green onions if desired.

Notes

Serve topped with roasted peanuts for nice crunch.

Nutrition

Calories: 348kcal | Carbohydrates: 28g | Protein: 32g | Fat: 11g | Saturated Fat: 5g | Trans Fat: 1g | Cholesterol: 154mg | Sodium: 1269mg | Potassium: 727mg | Fiber: 1g | Sugar: 7g | Vitamin A: 217IU | Vitamin C: 6mg | Calcium: 44mg | Iron: 2mg

Nutritional values are approximate.

White Bean Chili

I admit, I’m a huge fan of beef chili, so when I came across this recipe for white bean chili (with chicken?!) I was a little hesitant. Would I take a big spoonful and long for a nice piece of tender chuck instead? Nope. Although not the beefy chili I’m used to, I really enjoyed this version too. It is not lacking in flavor that’s for sure!

White Bean Chili

I’m A Chicken Chili Believer Now

This white bean chili is very good. It’s herby, for sure, thanks to a sizable amount of oregano and fresh cilantro. The chicken is tender and tasty. I added a dollop of sour cream to bring a nice cool contrast.

I like to use my good ole trusty Dutch oven to make this chili and pretty much darned near anything like it on my stovetop. It’s nice and big and sturdy. That extra weight helps it maintain and distribute heat perfectly. As an added bonus, it’s actually pretty easy to clean up too!

This awesome white bean chili gets even better the next day. So does my spicy white chicken chili.

White Bean Chili
Print Pin
4 from 1 vote

White Bean Chili

This chili is very good. It’s herby, for sure, thanks to a sizable amount of oregano and fresh cilantro. The chicken is tender and tasty. I added a dollop of sour cream to bring a nice cool contrast.
Course Main
Cuisine American
Keyword beans, chili
Prep Time 2 hours
Cook Time 2 hours
Total Time 4 hours
Servings 10
Calories 298kcal

Ingredients

Instructions

  • Soak beans in water for 2 hours. Rinse and drain well.
  • Place beans in a large pot or Dutch oven and add chicken stock. Bring to a boil.
  • Meanwhile, in a saucepan over medium high heat, melt the butter.
  • Add the onion and saute for 3 minutes.
  • Add the garlic and chiles and saute for another 2 minutes.
  • Add onion mixture to beans, along with remaining ingredients except for the sour cream.
  • Reduce heat to medium and let simmer for 1 1/2 hours, stirring occasionally. If the mixture gets too thin add a little bit more stock (or water).
  • Serve topped with sour cream and cilantro.

Notes

Serve with a little warmed cornbread.

Nutrition

Calories: 298kcal | Carbohydrates: 34g | Protein: 23g | Fat: 8g | Saturated Fat: 4g | Trans Fat: 1g | Cholesterol: 45mg | Sodium: 230mg | Potassium: 873mg | Fiber: 12g | Sugar: 4g | Vitamin A: 182IU | Vitamin C: 2mg | Calcium: 94mg | Iron: 4mg

Nutritional values are approximate.

Roasted Red Pepper Hummus

My wife loves hummus, so for last weekend’s race I made this fantastic roasted red pepper hummus. Hummus is good (and healthy) game-watching food! I don’t think most people think of it that way. They reach for the nacho cheese dip and chips. Or some cheese and crackers. Try this and you’ll be reaching for it instead at the next big game party!

I also like to pack a little for my wife to take in her lunches. Hummus holds up great and tastes just as good the next day. And the day after that.

Roasted Red Pepper Hummus

Easy. And Delicious.

I’m looking forward to making this roasted red pepper hummus again. It’s easy, and uses ingredients that I always have on hand.

There are a lot of options for roasting red bell peppers. Of course, there’s the oven. I also like Mezzetta’s deli sliced roasted bell pepper strips. And my other favorite, roasting peppers on my Char-Broil Big Easy.

Roasted Red Pepper Hummus
Print Pin
5 from 1 vote

Roasted Red Pepper Hummus

I’m looking forward to making this roasted red pepper hummus again. It’s easy, and uses ingredients that I always have on hand.
Course Appetizer
Cuisine Mediterranean
Keyword hummus, roasted red pepper
Prep Time 5 minutes
Cook Time 10 minutes
Total Time 15 minutes
Servings 2 cups
Calories 219kcal
Author Mike

Ingredients

Instructions

  • Place lemon and Tahini into a food processor and puree for 1 minute.
  • Scrape down the sides of the processor and puree for another 30 seconds.
  • Add 2 tablespoons of oil, garlic, cumin, cayenne, and salt.
  • Process for 30 seconds. Scrape down the sides and puree another 30 seconds.
  • Open the can of peas. Drain the liquid into a cup, then rinse and drain well.
  • Add half of the peas to the processor and run for 1 minute.
  • Add the remaining peas and process another 1-2 minutes or until smooth.
  • Add all but 1 tablespoon of the peppers and process another 1-2 minutes. If the mixture is too thick, add a little bit of the reserved chickpea liquid, but not much.
  • Serve topped with the reserved peppers plus a light drizzle of oil.

Notes

Serve immediately. Store leftovers covered in the fridge.

Nutrition

Calories: 219kcal | Carbohydrates: 15g | Protein: 7g | Fat: 18g | Saturated Fat: 2g | Sodium: 856mg | Potassium: 311mg | Fiber: 4g | Sugar: 1g | Vitamin A: 447IU | Vitamin C: 55mg | Calcium: 89mg | Iron: 2mg

Nutritional values are approximate.

Italian Herb Skillet Bread

Rhodes dinner rolls make for a great, easy accompaniment to any meal. This Italian herb skillet bread version kicks them up a bit by topping them with savory herbs. The bread is soft. It smells amazing while it’s baking. And the flavor is over-the-top fantastic. And there’s nothing easier to make, either!

Italian Herb Skillet Bread

The Perfect Rolls

You can substitute any seasonings you prefer on your Italian herb skillet bread. I found these rolls to be quite yummy with a honey-flavored BBQ rub too. If you don’t have an 8″ skillet, you can make these in a high-rimmed metal baking pan (such as a cake pan). Just make sure the roll dough balls are about 2″ apart. You have to give the rolls space to rise perfectly. Otherwise you won’t end up with perfect bread!

Also try my garlic Parmesan skillet bread and my rapid rolls, also made in the skillet.

Italian Herb Skillet Bread
Print Pin
5 from 1 vote

Italian Herb Skillet Bread

Rhodes dinner rolls make for a great, easy accompaniment to any meal. This Italian herb skillet bread version kicks them up a bit by topping them with savory herbs.
Course Bread
Cuisine American
Keyword bread, herbs, Italian, skillet
Prep Time 5 minutes
Cook Time 4 hours 15 minutes
Total Time 5 hours 20 minutes
Servings 7
Calories 847kcal

Ingredients

Instructions

  • Lightly grease an 8″ cast iron skillet with shortening (or butter).
  • Place rolls in skillet, starting with one in the middle and the rest around it in a circle. The rolls should be about 2″ apart.
  • Cover the skillet with a towel and place in a warm place.
  • Let rolls rise until touching, 4-5 hours.
  • Preheat oven to 350 F.
  • Combine the herbs with the butter.
  • Gently brush the mixture onto the tops of the rolls.
  • Bake 15-20 minutes or until golden brown.

Notes

Add a little honey to the herb butter mixture before brushing onto the tops for a sweeter bread.

Nutrition

Calories: 847kcal | Carbohydrates: 141g | Protein: 27g | Fat: 20g | Saturated Fat: 5g | Cholesterol: 3mg | Sodium: 1614mg | Potassium: 420mg | Fiber: 12g | Sugar: 6g | Vitamin A: 138IU | Vitamin C: 1mg | Calcium: 582mg | Iron: 11mg

Nutritional values are approximate.

BBQ Pigs in a Blanket

This is a simple twist to the old classic. BBQ pigs in a blanket will have your party guests wondering why anyone ever made them the ‘old way’. Great BBQ flavor, served up with a nice creamy honey mustard dipping sauce.

BBQ Pigs in a Blanket

A Tasty Twist On The Class

For ‘normal’ BBQ pigs in a blanket, I use Weber’s Original BBQ sauce. Any old-school flavored BBQ sauce works just fine. But for kicked up bites I use a spicier sauce. If I’m serving both spicy and non-spicy I’ll put a little table sign by them. That way people will know which is which.

Also try my southwestern pigs in a blanket.

BBQ Pigs in a Blanket
Print Pin
4.67 from 3 votes

BBQ Pigs in a Blanket

This is a simple twist to the old classic. BBQ pigs in a blanket will have your party guests wondering why anyone ever made them the ‘old way’. 
Course Appetizer
Cuisine American
Keyword hot dogs, treats
Prep Time 5 minutes
Cook Time 12 minutes
Total Time 17 minutes
Servings 4
Calories 199kcal
Author Mike

Ingredients

Instructions

  • Preheat oven to 350 F.
  • Place BBQ sauce and syrup into a small saute pan and heat to a slow boil.
  • Add sausages and heat through, about 5 minutes.
  • Unroll crescent rolls and divide into triangles.
  • Cut each triangle into 3 thin, long triangles.
  • Wrap dough around the weenies and pinch the ends closed.
  • Place on am un-greased baking sheet.
  • Bake 10-12 minutes or until browned.
  • Serve with dipping sauce

Notes

I like to dip these in mustard, BBQ sauce or ketchup. 

Nutrition

Calories: 199kcal | Carbohydrates: 10g | Protein: 7g | Fat: 15g | Saturated Fat: 5g | Cholesterol: 35mg | Sodium: 689mg | Potassium: 135mg | Fiber: 1g | Sugar: 8g | Vitamin A: 29IU | Vitamin C: 1mg | Calcium: 16mg | Iron: 1mg

Nutritional values are approximate.

Cajun Chicken Pasta

I’m pretty selective when it comes to which food-related shows I’ll watch on TV.  I prefer the ones where the host isn’t over-the-top and the focus is on the food. Ree Drummond’s The Pioneer Woman is just one of the shows that I do watch. I got this recipe for Cajun chicken pasta from the program.

Cajun Chicken Pasta

Great Flavor. Nice Kick.

I often end up making versions of the recipes Ree presents, and they have always come out fantastic. Like this dish. This Cajun chicken pasta has a nice spicy kick, just like I like it. I’m going to make this again, but substitute blackened chicken instead. That wouldn’t be too different but just different enough.

Also try my spicy sausage pasta.

Cajun Chicken Pasta
Print Pin
5 from 1 vote

Cajun Chicken Pasta

This Cajun chicken pasta has a nice spicy kick, just like I like it
Course Main
Cuisine Cajun
Keyword Cajun, chicken, pasta
Prep Time 15 minutes
Cook Time 20 minutes
Total Time 35 minutes
Servings 6
Calories 1972kcal

Ingredients

  • 1 pound fettuccine pasta
  • 3 teaspoons Cajun seasoning divided
  • 3 chicken breast boneless, skinless, cubed
  • 2 tablespoons butter divided
  • 2 tablespoons olive oil divided
  • 3 cloves garlic minced
  • 1 green bell pepper diced
  • 1 red bell pepper diced
  • ½ large red onion diced
  • 4 Roma tomatoes seeded, diced
  • 2 cups chicken broth
  • 1 ½ cups heavy cream
  • Pinch cayenne pepper
  • Pinch ground black pepper
  • 2 tablespoons fresh parsley chopped

Instructions

  • Cook pasta per package instructions. Drain.
  • Place the chicken into a bowl. Sprinkle with 1 1/2 teaspoons of the Cajun spice mix and toss to coat.
  • Heat a large skillet or pot over high heat. Add 1 tablespoon of the butter and 1 tablespoon of the oil. Once hot, add the chicken. Without stirring, let brown slightly on one side. Toss and brown the other side. Remove to a plate or large bowl.
  • Add the remaining butter and oil and heat.
  • Add peppers and onions and cook 2-3 minutes. Add the garlic and remaining Cajun spice mixture. Stir and cook another minute.
  • Add tomatoes and cook for 1 more minute. Remove all vegetables to a plate or bowl (you can use the same one you used for the chicken).
  • Add the chicken broth to the pan, and cook over high heat, stirring for 5 minutes to reduce.
  • Reduce heat to medium low and slowly stir in the cream.
  • Add in the cayenne pepper, black pepper and salt, to taste. Don’t be shy with the cayenne, you want the sauce to have some kick!
  • Let cook, simmering, for 5 minutes or until the sauce starts to thicken.
  • Add the chicken and vegetables back to the pan. Stir.
  • Finally, stir in the pasta, mix well, and heat through.
  • Serve garnished with chopped parsley.

Notes

A small can of diced tomatoes can be substituted for the fresh tomatoes. Just drain well first.

Nutrition

Calories: 1972kcal | Carbohydrates: 64g | Protein: 258g | Fat: 69g | Saturated Fat: 28g | Cholesterol: 773mg | Sodium: 904mg | Potassium: 4612mg | Fiber: 4g | Sugar: 5g | Vitamin A: 2539IU | Vitamin C: 56mg | Calcium: 138mg | Iron: 8mg

Nutritional values are approximate.