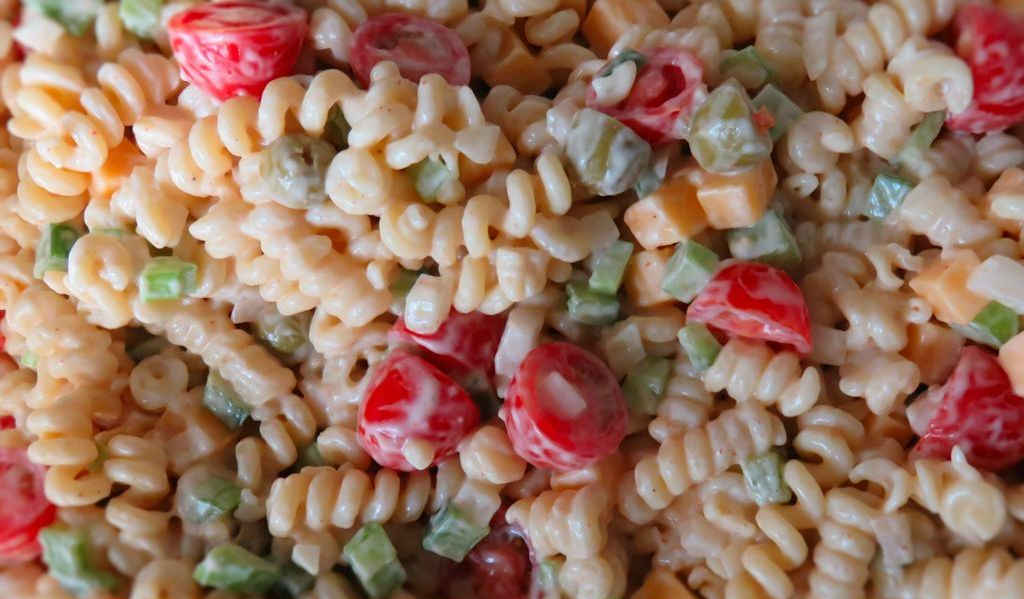
It doesn’t take a whole lot of changes to make a pretty much run-of-the-mill pasta salad different. This Creole macaroni salad has buttermilk in the dressing, giving it that wonderful tangy flavor. I love buttermilk so I instantly thought how great . Buttermilk fried chicken and this salad are a great match too. Trust me, I tried it. The salad also has tomatoes and (my wife’s favorite) olives. Her motto is: You can’t have too many olives.
Heat In A Pasta Salad Is A Good Thing
I would (and did) add more cayenne pepper to give this Creole macaroni salad even more kick. Plus, I think the dressing has a somewhat cooling effect, so a bit more heat isn’t going to hurt anything.
This recipe comes from Paul Kirk’s Championship Barbecue Cookbook, a huge book of everything barbecue. Get it. It’s packed with recipes like this great salad and whole lot more.
I almost always use Blue Plate mayonnaise in the dishes I make. I think it is the best around. If you can’t find it locally you can pick it up online for a fair price.
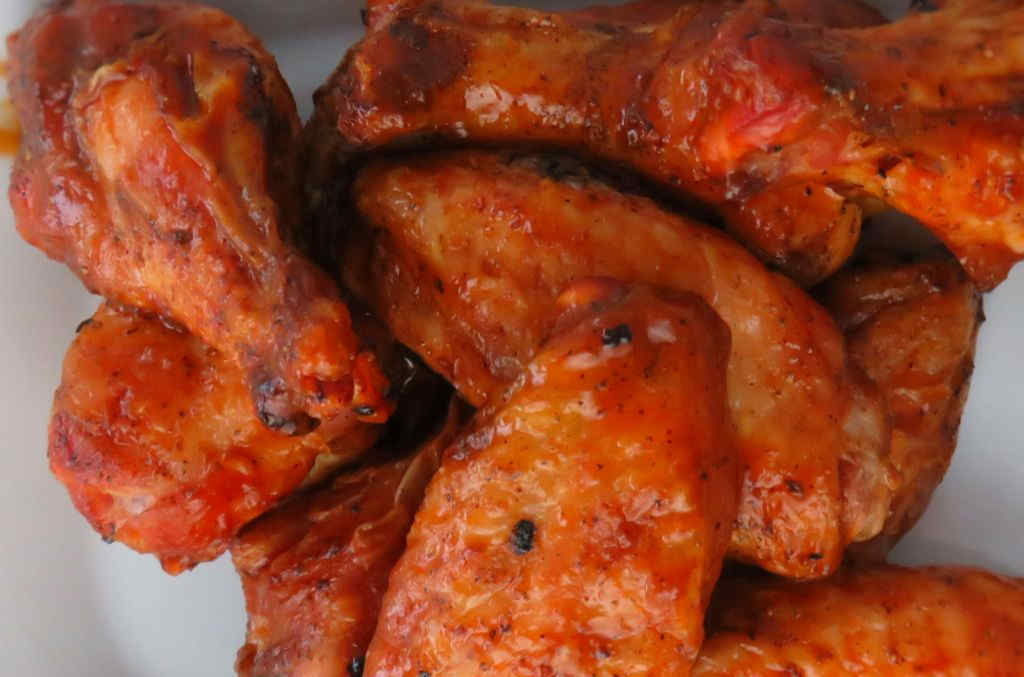
Just because it doesn’t say ‘wing sauce’ on the label doesn’t mean it isn’t going to be good on wings. And actually, Chik’N-Lik’N chicken wings aren’t just good. They’re flat-out delicious. I devoured these wings like I hadn’t eaten in weeks. A little savory, with a light mustardy tang and just a bit of spiciness, I can see why people love this sauce on more than chicken.
Visit my other site, For The Wing, for all things chicken-wing!
I didn’t use up the entire bottle of sauce on my Chik’N-Lik’N chicken wings, although I certainly could’ve made a few more batches of wings and loved every one of them. No, I saved some for roasted chicken and even burgers. The sauce was delicious on both. This is one great sauce to keep on hand, even substituting it for ketchup for fries! I also loved it on chicken roasted on my Char-Broil Big Easy.
Just because it doesn’t say ‘wing sauce’ on the label doesn’t mean it isn’t going to be good on wings. And actually, Chik’N-Lik’N chicken wings aren’t just good. They’re flat-out delicious.
Course Appetizer
Cuisine Appetizer
Keyword wings
Prep Time 1 hourhour
Cook Time 45 minutesminutes
Total Time 1 hourhour
Servings 6serving
Calories 312kcal
Ingredients
3-4poundschicken wingsflats and drumettes separated, tips discarded
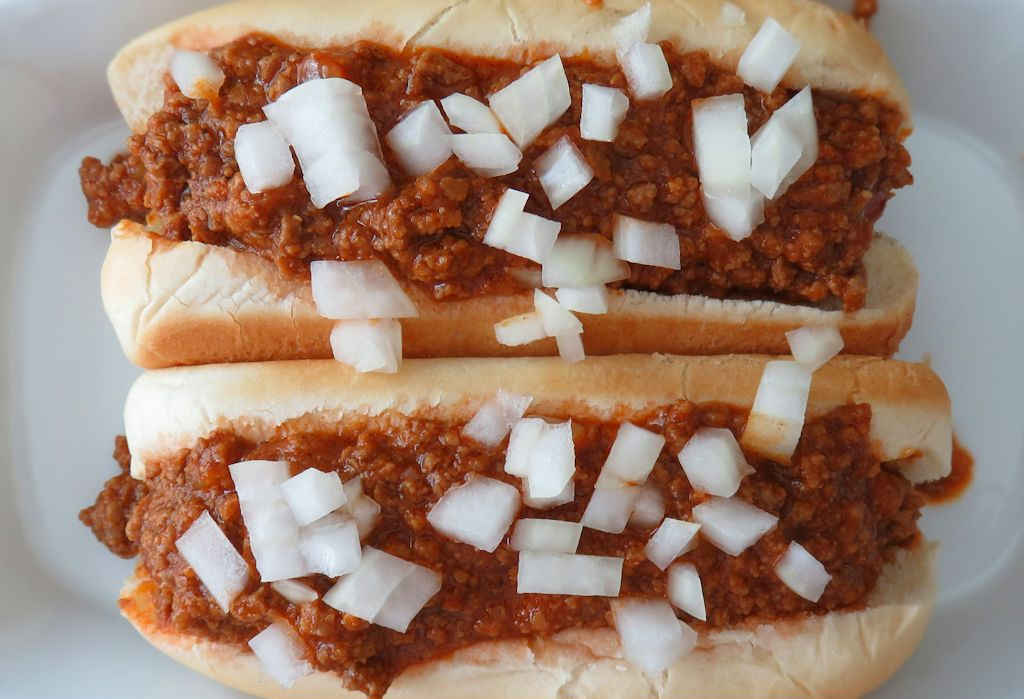
I’ll put just about anything on a hot dog. As long as it’s good. But this Home Run hot dog chili? It’s not just good. No, it’s totally amazing. It’s like the most unbelievable meat sauce I’ve ever had or made. You’ll think you’re at the ballpark for sure, and you’ll be wanting more as soon as you take that first bite. Just make sure that you have extra napkins, because things are about to get (good and) messy!
The Best Hot Dog Chili
No matter what else you want to put on your dogs, you have to start with this first. Not only does Home Run hot dog chili taste great, but it is also (very importantly) the perfect consistency. You don’t want it too thick. You definitely don’t want it too thin. This is spot-on right what it should be. No big meaty chunks to bite into. Perfect!
I like to put chopped onions on my hot dogs. I soak them in cold water for a little bit before I put them on there to take a bit of the bite out of them.
Add the tomato paste, chili powder, salt, pepper and cumin.
Stir and cook for 2 minutes.
Add the remaining ingredients. Stir.
Bring to a boil then reduce to a simmer.
Simmer until thickened, about 30 minutes.
Remove from heat and let cool for 15 minutes.
Using an immersion blender, blend the mixture just until the largest pieces of meat are blended. Do not over blend. You can also transfer the mixture to a blender and pulse until the chunks are gone.
Serve warm over hot dogs.
Notes
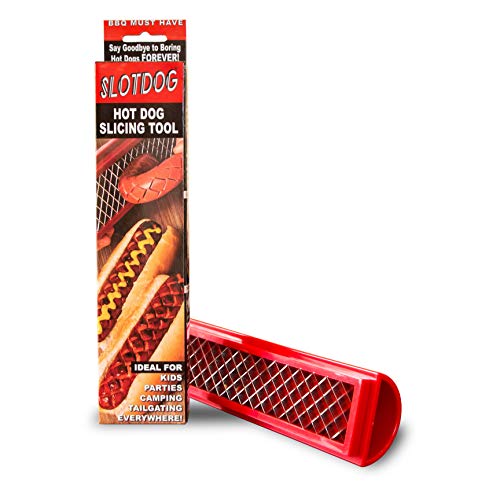
If you cut a shallow slit down the lengths of your hot dogs before cooking they will open up slightly, giving the chili a little ‘trough’ to go to.
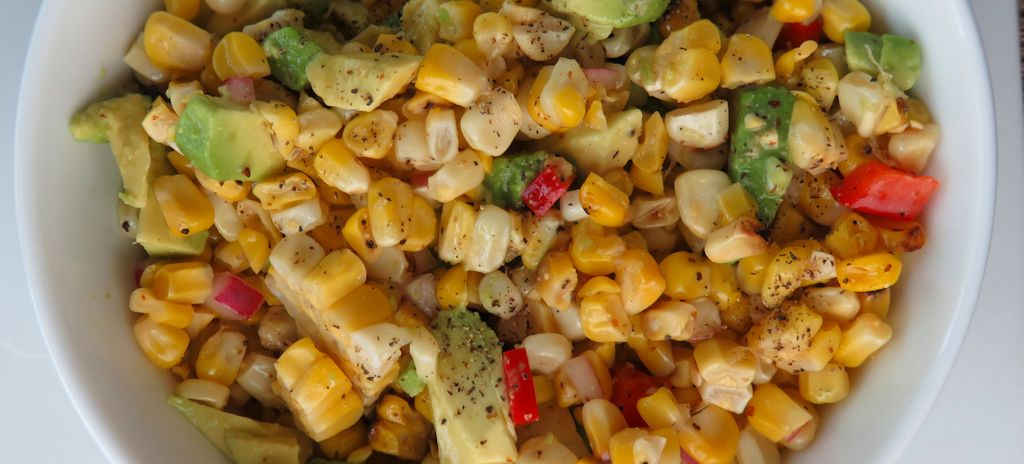
This summer corn salad is why there’s summer. This salad defines summer. I’ll be dreaming about it this winter on a cold, grey, snowy day, that’s for sure. The key, of course, is using great sweet corn. We have no shortage of great sweet corn in Indiana, thankfully. The better the corn, the better this salad is.
A Little Bit Of Everything In A Bowl
You can’t find an easier fresh side dish than this summer corn salad. It has great crunch. A bit of sweetness. A bit of kick from the onion and vinegar. All rounded out perfectly with creamy delicious avocado.
I cut the kernels off my fresh corn with either a crazy sharp knife or I use a corn peeler. Both reduce the time it takes and the mess. Mostly.
You can use corn kernels if you have to, instead of cooking fresh corn-on-the-cob. I prefer to roast my corn on my Big Easy or on the grill just to give it that extra perfect flavor.
I’m kind of picky about my sweet corn. And spoiled. Come July 4th (or so, depending on the weather of course), I head to my local farmer’s market with my little wagon and go to the My Dad’s Sweet Corn table. That’s where the good stuff is!
This summer corn salad is why there’s summer. This salad defines summer. I’ll be dreaming about it this winter on a cold, grey, snowy day, that’s for sure. The key, of course, is using great sweet corn.
Note: This recipe was developed using the Char-Broil Big Easy Oil-Less Fryer. If you are cooking using the Char-Broil Smoker-Roaster Grill you should cook with the lid open and the temperature set to High. You might also need to adjust the cooking time.
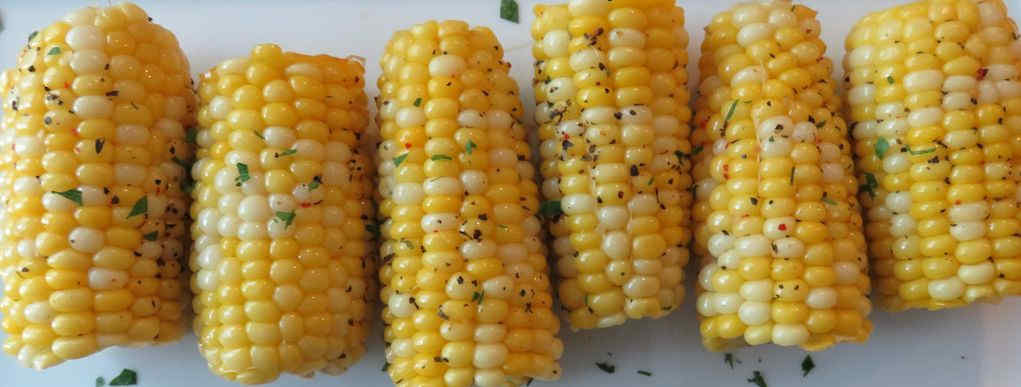
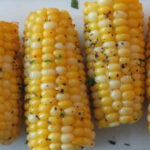
I was already addicted to sweet corn-on-the-cob before the Char-Broil Big Easy came along. The Big Easy, though, made my addiction much, much worse. I cannot get enough easy Corn-on-the-Cob on the Char-Broil Big Easy. Just like the name of the cooker, it’s easy to make. I just take a few ears of corn, shuck them, brush on a little butter and add my favorite seasonings. I often make my own seasoning, but I’ve found that McCormick’s Perfect Pinch seasonings make for the perfect corn topping.
The Timing Isn’t Super Critical
Corn-on-the-cob takes about 25 minutes in the Big Easy. It’s sort of hard to overcook so don’t be upset if you let it go a few minutes longer.
I used McCormick’s Perfect Pinch Vegetable seasoning. My wife and I both love it. It doesn’t bury that great corn flavor, just enhances it. Perfect! You can of course just use salt and pepper.
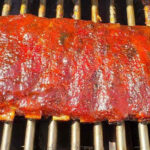
Making St Louis-style ribs on a gas grill is something I’ve been wanting to do for a while now. Yes, I have charcoal grills and I have a smoker, but not everyone else does. Which made me wonder… can it be done? Will they be as good as the ribs I cook on my other grills? Well, once I get something in my head, it’s not going away until I do it. And so I did. And you know what? These ribs were AMAZING!
Tremendous Ribs
Yes, I said it. Ribs cooked on a gas grill are fantastic. No, you can’t get that deep smoky flavor that you get from smoking them for 5 hours. But you get close. And you still get terrific, tender, moist ribs. I thought they were great.
I used my Weber Summit S-670 grill. It’s a large grill, to say the least. You don’t need to have such a big gas grill to make these ribs, but you do need one that’s big enough to hold the ribs and one that you can over indirect heat on. That means that the ribs need to sit away from the heat source. You want the spot where the ribs are to be around 250 F. And not much more. That’s essentially the same temperature as most people smoke ribs so you’re halfway there.
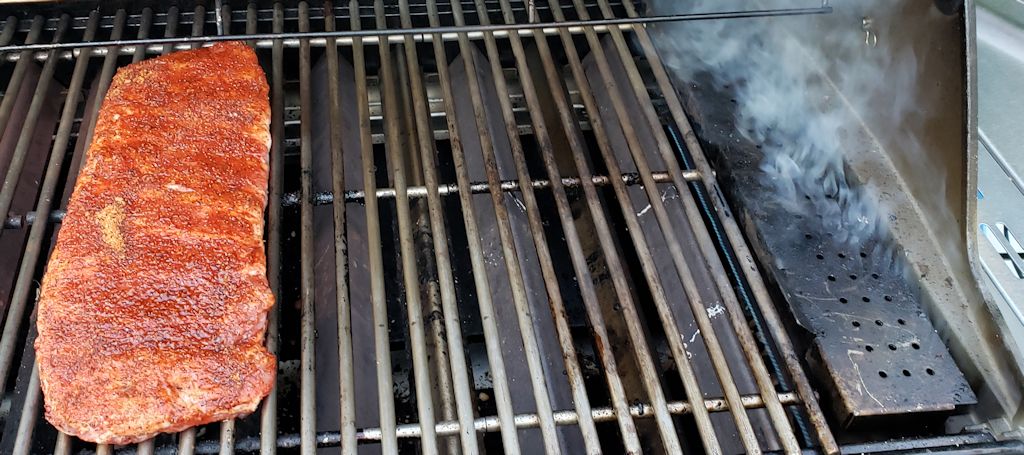
My Setup
Above you can see my initial setup. I had three burners lit: the two furthest to the right that you can see and the one under my smoke box. I filled the smoke box with apple wood pellets. If you don’t have a smoke box you can use a foil packet filled with wood chips. Just poke a few holes in it and put it over a lit burner. You’re not going to get a lot of smoke flavor, but a bit. Be happy with it. You can make up for it quite a bit by using a BBQ sauce that has a bit of smoke flavor to it.
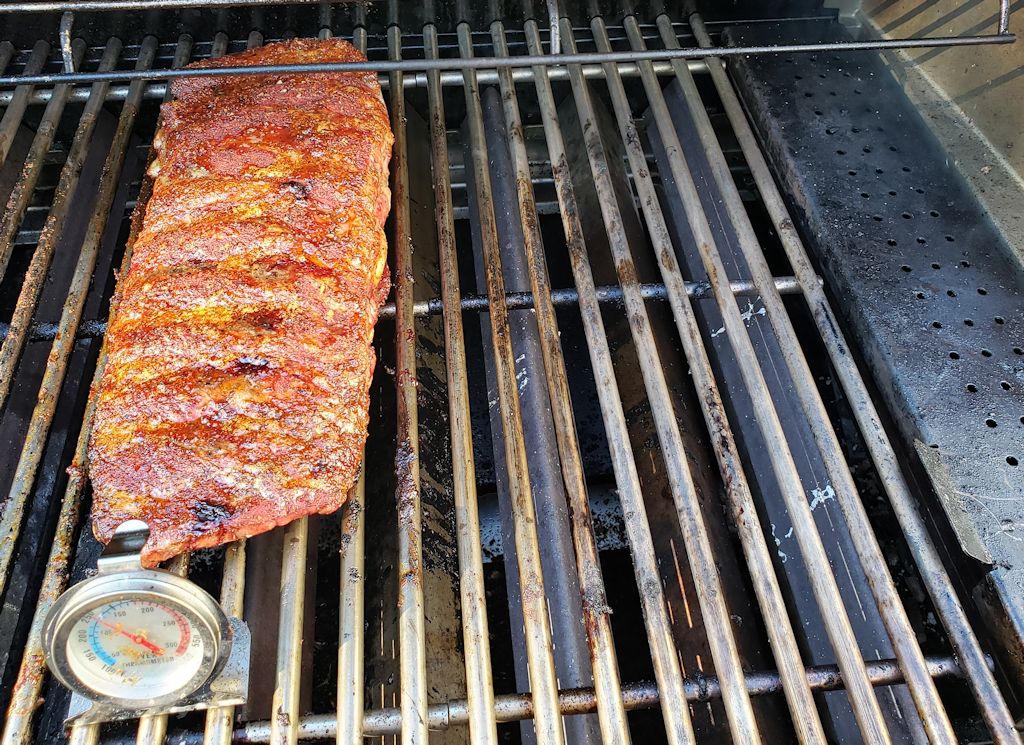
Oven Thermometers Make This Even Easier
I found that my ribs were a bit too far away from my heat source (I was running around 200 F), so I moved them one burner to the right. I still only had the three rightmost burners lit. You can see my trusty oven thermometer in the picture. Get one (or two) and you’ll never regret it.
Once you get your gas adjusted so your temperature is 225-250 F you don’t really have to mess with it any more. This was my first time doing this, so I had to tweak where I had the ribs and my burner settings. After that I nailed 250 F for hours without any adjustments. Now that I know the right placement and gas knob settings, I’ll be able to make these ribs again and again without any fuss at all.
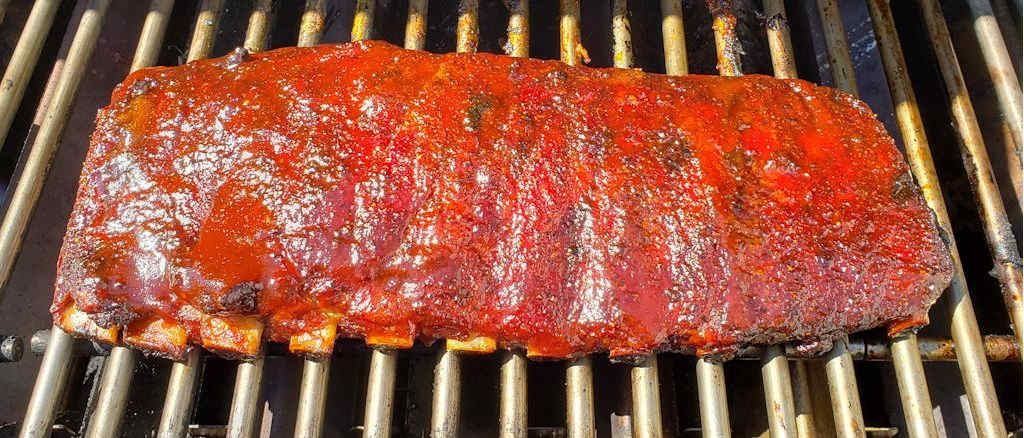
Rib Happiness
You will be totally happy with these St Louis-style ribs. I sure was. You might have to adjust the process a bit for your grill to get the right temps but once you do you’ll be making great ribs time-and-time again. I recommend taking notes on your setup so you can use the same process the next time.
Yes, I said it. Ribs cooked on a gas grill are fantastic. No, you can’t get that deep smoky flavor that you get from smoking them for 5 hours. But you get close. And you still get terrific, tender, moist ribs. I thought they were great.
Fire up your gas grill for cooking at 250 F. You will need to cook the ribs over indirect heat, so only light some of the burners. Place the ribs away from the direct fire. Add wood chips or pellets to a smoke box. If you don't have one, just place the wood on a piece of foil. Fold up and seal, then poke a few holes in the foil. Place over the direct heat to smolder and create smoke.
Season the ribs with the rub, on both sides.
Transfer to the grill over indirect heat.
Close the lid and cook for 2 1/2 hours.
Check the temperature regularly to make sure you maintain 250 F.
Remove the ribs to a large piece of aluminum foil, bone-side up.
Fold up the edges of the foil to create a 'bowl' around the ribs.
Add the vinegar to the 'bowl'.
Sprinkle the ribs with the brown sugar and top with pats of the butter.
Fold the foil around the ribs and seal tightly.
Return to the grill and continue to cook for 1 hour 15 minutes at 250 F.
Carefully open the foil (steam will escape and it will be HOT!). Poke the meat between the bones. It should be tender. Also, the meat should be pulled back about 1" from the ends of the bones. If not, cook another 15 minutes and check again.
Remove ribs from the foil and place directly onto the grill, but still over indirect heat.
Brush the tops with the sauce.
Close the lid and cook another 15 minutes to set the sauce.
Remove, let cool 10 minutes, slice and serve!
Notes
I like to use a hickory smoke-flavored sauce to give these ribs even more of that ‘hot off the smoker’ flavor.
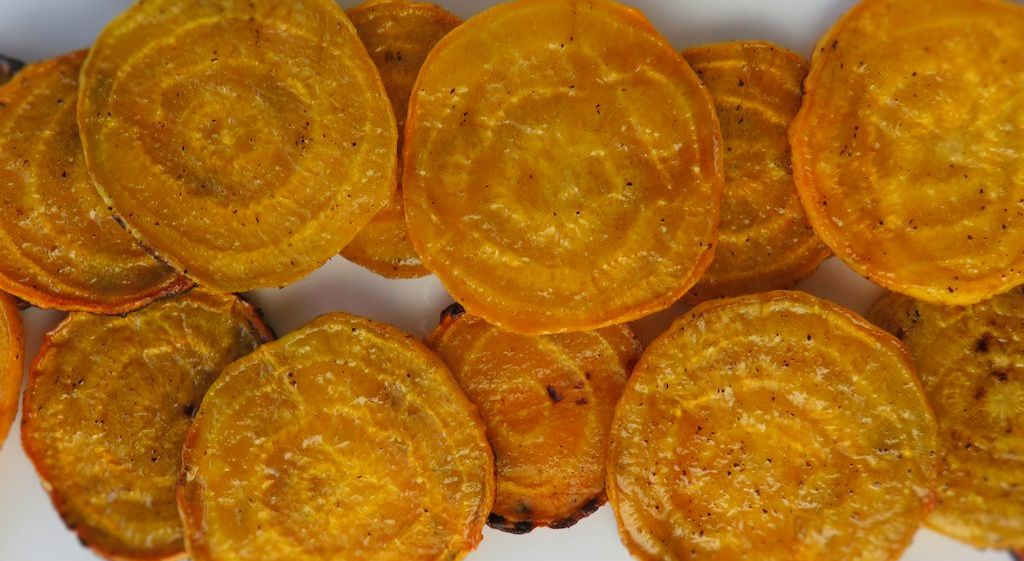
I’ve roasted good ole purple beets a few times, either in the oven or on a grill or even on a smoker and they came out great. When I came across golden beets, which I’d never had before, I had to grab a few to see how they would hold up on the grill. The grilled golden beets weren’t quite as sweet as their purple cousins, but they are a lot less earthy, which I really enjoyed a lot. I was pleasantly surprised as to how great they were. I’m more of a beet lover than I was before!
Keep It Simple
I opted for a very simple cooking method. Just oil, salt and pepper and onto the grill. I didn’t want anything to mask the great flavors of the beets.
I make a fantastic roasted beet salad that has feta and reduced balsamic vinegar, among other things. It’s a big favorite of ours. Next time I find some more golden beets I’ll make that same salad using them instead.
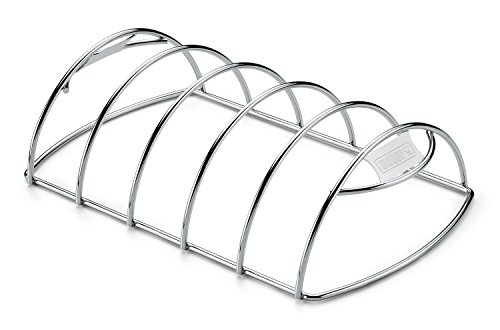
I use a grill basket to cook these beets. It makes life much easier. Clean up is easier. And I don’t have to worry about things falling thru the grill grates!
When I came across golden beets, which I’d never had before, I had to grab a few to see how they would hold up on the grill. The grilled golden beets weren’t quite as sweet as their purple cousins, but they are a lot less earthy, which I really enjoyed a lot.
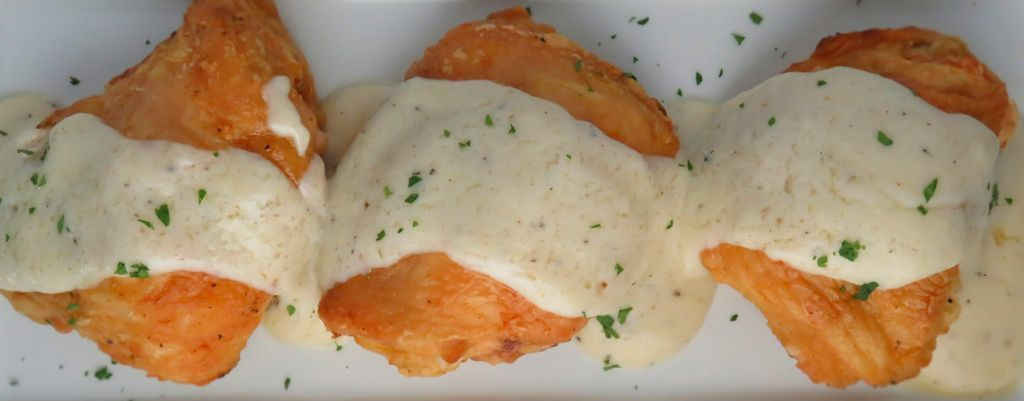
I’ve had Grandma’s fried chicken with gravy. It was crazy good. Cooked in oil in a cast-iron skillet over a hot gas stove, it was the food of dreams. I’ve now had the pleasure of enjoying that same great crunchy, moist chicken with a delicious gravy, all cooked using my Vortex insert. Fried chicken with gravy using the Vortex is amazingly great chicken, and all without deep-frying.
This Is Different
Fried chicken with gravy using the Vortex takes a bit more work than just making fried chicken on the grill. The gravy is the special addition, and to make it you need drippings from the chicken. Normally when I ‘fry’ chicken on my charcoal grill the drippings end up disappearing into the bottom of the grill. To make the gravy I had to ‘capture’ some of those drippings using disposable pans positioned underneath the chicken. I found some small aluminum pans at our grocery store that worked just fine, capturing all that dripping goodness.
To make gravy place small disposable aluminum pans under a few of the pieces of chicken.
Let the coals get just ashed over.
Remove chicken from the brine. Do not rinse.
In a pie plate or shallow bowl, combine the flour and salt and pepper to taste. Dredge the chicken pieces in the flour, coating completely.
Shake off any excess.
Transfer the chicken to the grill around the Vortex. Cover and cook 45 minutes, rotating the lid every 15 minutes. Check for near doneness (160 F for white meat, 170 F for dark meat) in several places before removing.
Lightly brush the chicken with oil and cook another 2-3 minutes to crisp the skin and finish cooking the chicken (165 F for white meat, 175 F for dark).
Remove to a plate or cooling rack.
For the gravy
Carefully remove the disposable pans containing the drippings.
Don't spill it onto the Vortex or it will flame up. You'll need 1/4 cup of the drippings.
Place drippings into a medium skillet over medium heat.
Sprinkle in the flour and whisk until browned, about 1 minute.
Add milk and whisk until thickened, about 5 minutes.
Season with salt and pepper to taste.
Serve chicken with the gravy and devour.
Notes
I found that bone-on, skin-on chicken thighs make for the best fried chicken but that’s just me! Use your favorite cuts!
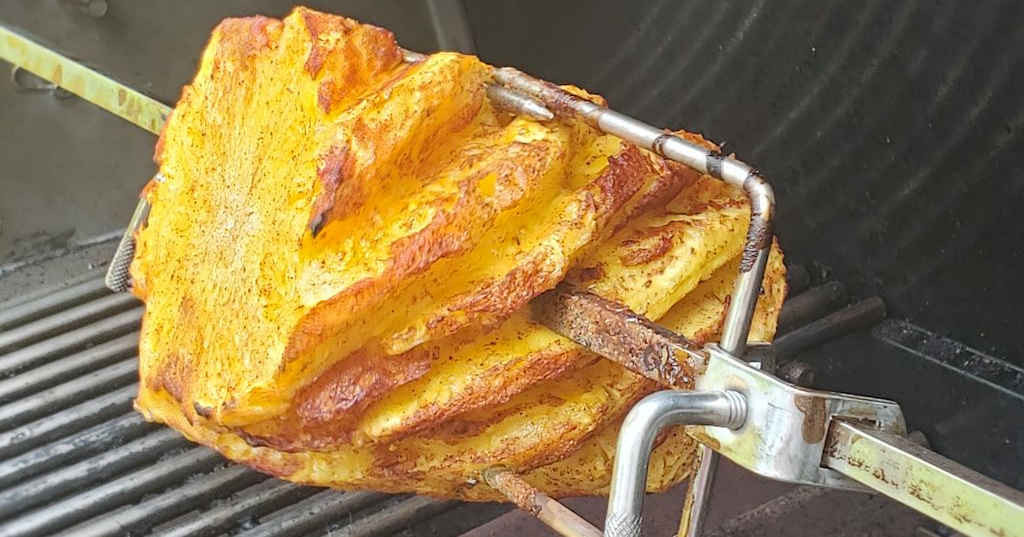
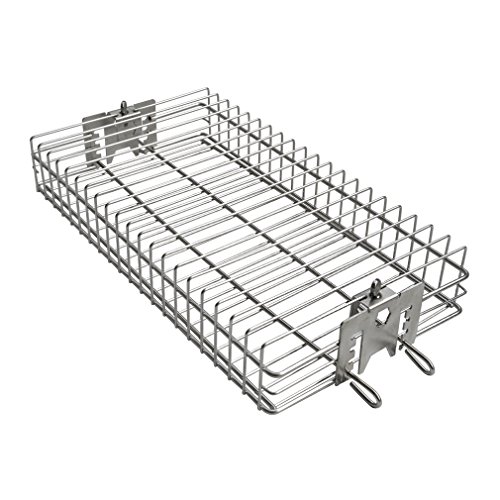
For almost 20 years I wondered why I didn’t get a rotisserie when I bought my first grill. Well, I solved that problem when I bought a Weber Summit S-670. I never knew how much I needed a rotisserie until I got one. Besides the ‘usual’ stuff like rotisserie chicken or ham, I also get to make delicious dishes like this Brazilian rotisserie pineapple. The pineapple is brushed with coconut milk then coated in cinnamon sugar. Onto the grill for a while and then sliced and served with whipped cream, it’s one delicious dessert!
You Learn Something New Every Day
One of the things I learned while making Brazilian rotisserie pineapple is that the eyes on a pineapple grow up the sides at an angle. You get a really great presentation when you remove them in a spiral pattern. And it gives the coconut milk and cinnamon sugar more places to stick to. Win!
You don’t need a massive Weber S-670 to make this. Any grill, gas or charcoal (Weber makes a rotisserie that works with their charcoal grill too!), with a rotisserie will do just fine. Just remember that you skewer the pineapple from the side and not lengthwise thru the core (which would be pretty hard to do!).
One of the things I learned while making Brazilian rotisserie pineapple is that the eyes on a pineapple grow up the sides at an angle. You get a really great presentation when you remove them in a spiral pattern. And it gives the coconut milk and cinnamon sugar more places to stick to.
Twist off the crown of the pineapple and cut off the ends. Cut down the sides to remove the rind. Then, using a sharp knife, cut spiral cuts up the sides of the pineapple to remove the eyes.
Place the sugar, cinnamon, and cloves in a bowl and stir to mix.
Fire up your Big Easy. Get that rotisserie ready!
Skewer the pineapple crosswise with the rotisserie and NOT thru the length of the core.
Brush the pineapple with the coconut milk. Dust heavily with the cinnamon sugar mix.
Roast until the pineapple starts to turn golden brown.
Remove and let cool 10-15 minutes before slicing.
Serve with whipped cream.
Notes
Depending on the size of your pineapple and how heavy handed you are with the spices, you might have enough of the cinnamon sugar mix to make 2 pineapples.
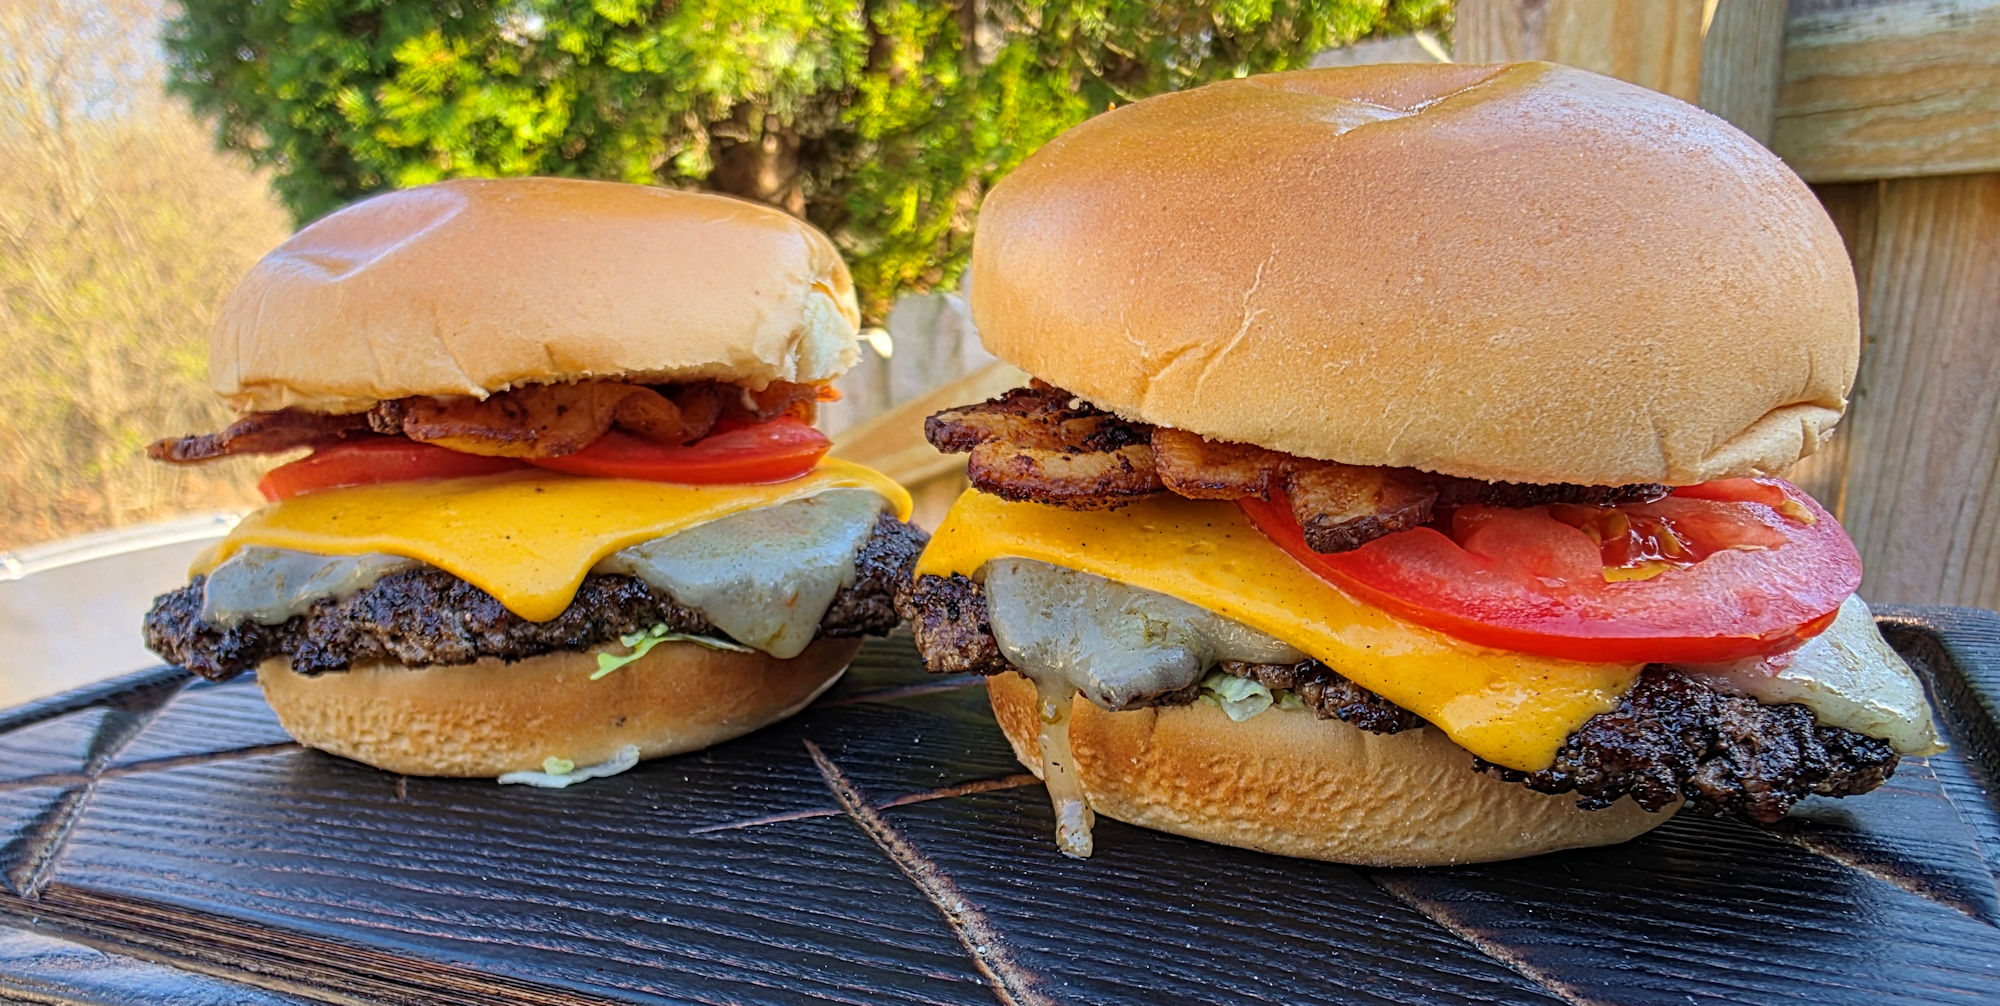
Messy and spicy. That’s all I need to know. Plenty of crispy bacon too. And a little of ‘garden’. Nothing really that fancy, just a good juicy spicy bacon burger with plenty of kick. Thanks to the spicy cheese and a very spicy sauce. It’s not over-the-top crazy spicy, but it definitely has some kick!
Delicious Burgers With The Perfect Kick
I usually cook my spicy bacon burger on the grill, but not on the grates. Instead I use a griddle insert that is made of cast iron. The insert gets screaming hot, like a griddle from a diner. You know, the diners that make great burgers. When you cook on grates the juices drip down into the grill, lost forever. When you cook on the griddle the juices hang out, flavoring the patties and keeping them moist. You can’t go wrong griddling burgers in my opinion. You can also cook the bacon on the griddle, but I usually bake my bacon.
I like to use a burger press when I make burgers. It, in combination with some patty papers, enables me to crank out a whole bunch of equally-sized burger patties in no time at all with little cleanup.
Messy and spicy. That’s all I need to know. Plenty of crispy bacon too. And a little of ‘garden’. Nothing really that fancy, just a good juicy spicy bacon burger with plenty of kick.
Divide the ground beef into 3 equally sized patties. Season well with salt and pepper.
Place bacon slices on a baking sheet lined with aluminum foil. Bake for 40 minutes, flipping once, until done but not overly crispy. Remove to a paper towel-lined plate to drain.
Fire up your grill and cook the burgers until the desired doneness is reached.
Toast the buns if desired.
Top patties with cheese and melt.
Slather the buns with the sauce. Add the patties, lettuce, tomato, red onion and cooked bacon.
For the sauce
Whisk together all ingredients until smooth.
Notes
Add a few pinches of red pepper flake to your ground beef before forming the patties for even more kick!