This blue cheese dressing was one of the first recipes I made from Brother Jimmy’s BBQ: More than 100 Recipes (a cookbook I can not longer seem to find online!). I picked it because it just so happened that I was making wings for lunch that day and I needed something (other than bottled Ranch dressing) for dipping. This was it. And this will be it from now on, because this is the easiest, best blue cheese dressing you can make. Not only great for wings, it’s great on salads or for dipping veggies. Anything.
Easy. And Great. With Just The Right Funk.
I prefer Gorgonzola versus say, Roquefort, when a recipe calls for blue cheese. It’s a little milder and doesn’t overpower the dressing.
There are so many great cookbooks, and so little time. Our local library has online checkout of literally thousands of cookbooks. They come right to my PC or Kindle. That’s great and…. sorta not! Easy access to tons and tons of cookbooks means I read them for hours and hours on end. I end up bookmarking recipe after recipe. And then my stomach starts to growl. So then I end up making recipe after recipe. And the spiral continues! Day after day!
Check out my new site, Dress My Salad, for more great salad dressing ideas!
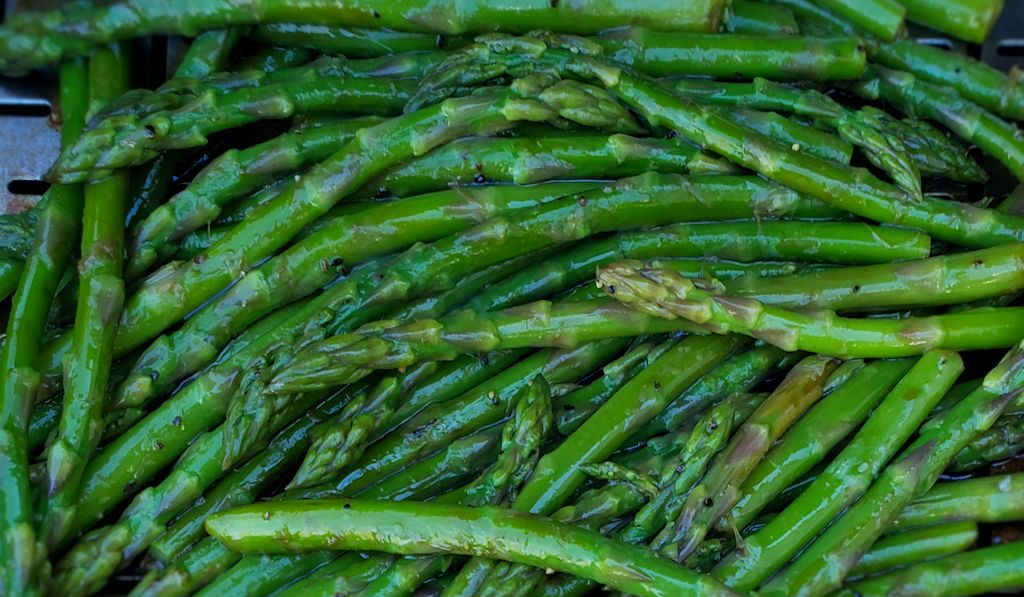
Whoa. I was not expecting greatness from this grilled marinated asparagus. I was expecting to think “well, they’re vegetables… just try to get through this moment.” But heck no! These are fantastic! The marinade doesn’t drown the asparagus. It enhances that mild earthy flavor. The asparagus have just the right crunch to them. No soggy vegetables here. That’s side dish sadness, there! Quite frankly, this may be the perfect grilled side dish.
I’ve Been Doing It Wrong All These Years
All these years I just tossed asparagus onto the grill. A little oil. Salt and pepper. Not bad, but not great either . Well no more. The key to great grilled marinated asparagus is of course the asparagus. Fresh is best. If its a bit past it’s prime it might taste a bit sour. So grab the best you can find and you’ll enjoy the heck out of this dish. We sure did.
I recommend that you use a grill basket when making this dish. It makes cooking easier and you don’t have to worry about anything falling through the grates. And cleanup is easier too!
You can also cook this dish on cedar planks on a grill. Just soak the planks for 30 minutes first. Then char them a bit over direct heat. Add the asparagus and grill 3-5 minutes per side. Be careful flipping them, they might like to roll off the plank!
Whoa. I was not expecting greatness from this grilled marinated asparagus. I was expecting to think “well, they’re vegetables… just try to get through this moment.” But heck no! These are fantastic!
Bring a large pot of lightly salted water to a boil and prepare an ice bath. I fill a large bowl with cold water and add ice. When I'm ready to use the ice bath I put whatever I am shocking (asparagus in this case) into a colander that fits into the bowl. This allows for the cold water to stop the cooking process. I can then lift the colander up and drain the vegetables.
Add the asparagus to the boiling water and boil for 3-4 minutes.
Immediately drain and transfer to the ice bath until cooled.
Drain well then dry on paper towels.
Combine the vinegar, orange juice, oil, soy sauce and pepper in a shallow baking dish with a whisk.
Add asparagus, toss to coat, and marinate for 30 minutes.
Grill asparagus for 3-5 minutes on each side or until done. I prefer to use a grill basket since it keeps the asparagus from falling thru the grates.
Serve immediately.
Notes
You may want to season the asparagus with salt and pepper after removing from the grill.
Note: This recipe was developed using the Char-Broil Big Easy Oil-Less Fryer. If you are cooking using the Char-Broil Smoker-Roaster Grill you should cook with the lid open and the temperature set to High. You might also need to adjust the cooking time.
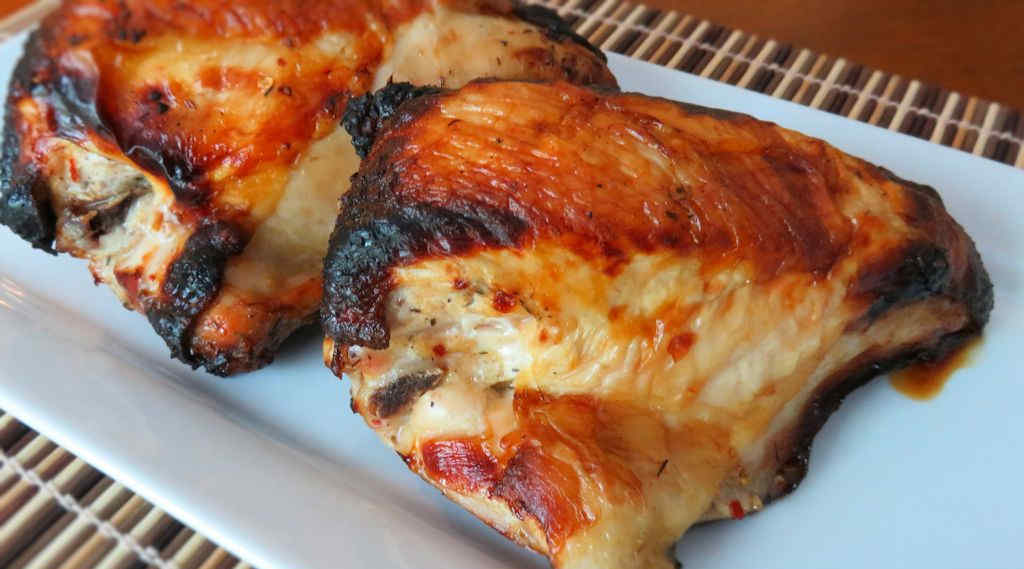
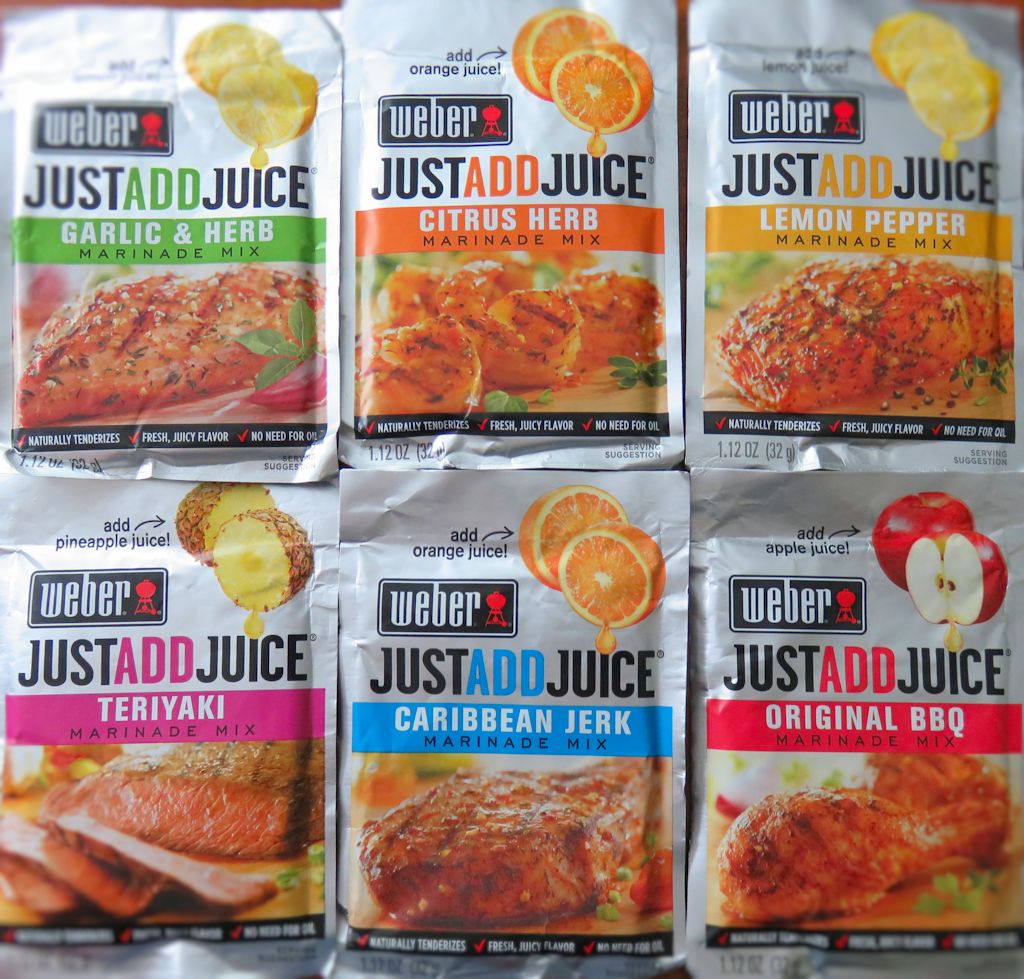
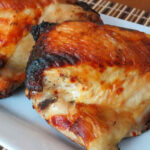
Weber has a line of marinade mixes that you add juice to that are really, really good. And they’re perfect for flavoring chicken before cooking it on the Char-Broil Big Easy. I picked up a package of each and used them to marinate my favorite, split chicken breasts. The Caribbean Jerk marinade is mixed with orange juice to produce wonderfully seasoned chicken. A hint of allspice, cinnamon, cloves and other spices, this marinade has a nice light Jerk flavor to it. Caribbean jerk marinated chicken on the Char-Broil Big Easy isn’t as spicy as if you’d sauced the chicken with a Jerk sauce. But the flavor is there.
Keep An Eye On It
Since the Big Easy cooks at a high temperature you do have to watch that your chicken doesn’t char. One way to help prevent that is to not use marinades containing substances that might burn, like sugar or honey. The other is to rinse the chicken before cooking. Now, you’re going to lose a bit of flavor doing that, but if like me you’re going to remove the skin before eating, it really doesn’t make that big of a difference. Caribbean Jerk Marinated Chicken on the Char-Broil Big Easy is great no matter what!
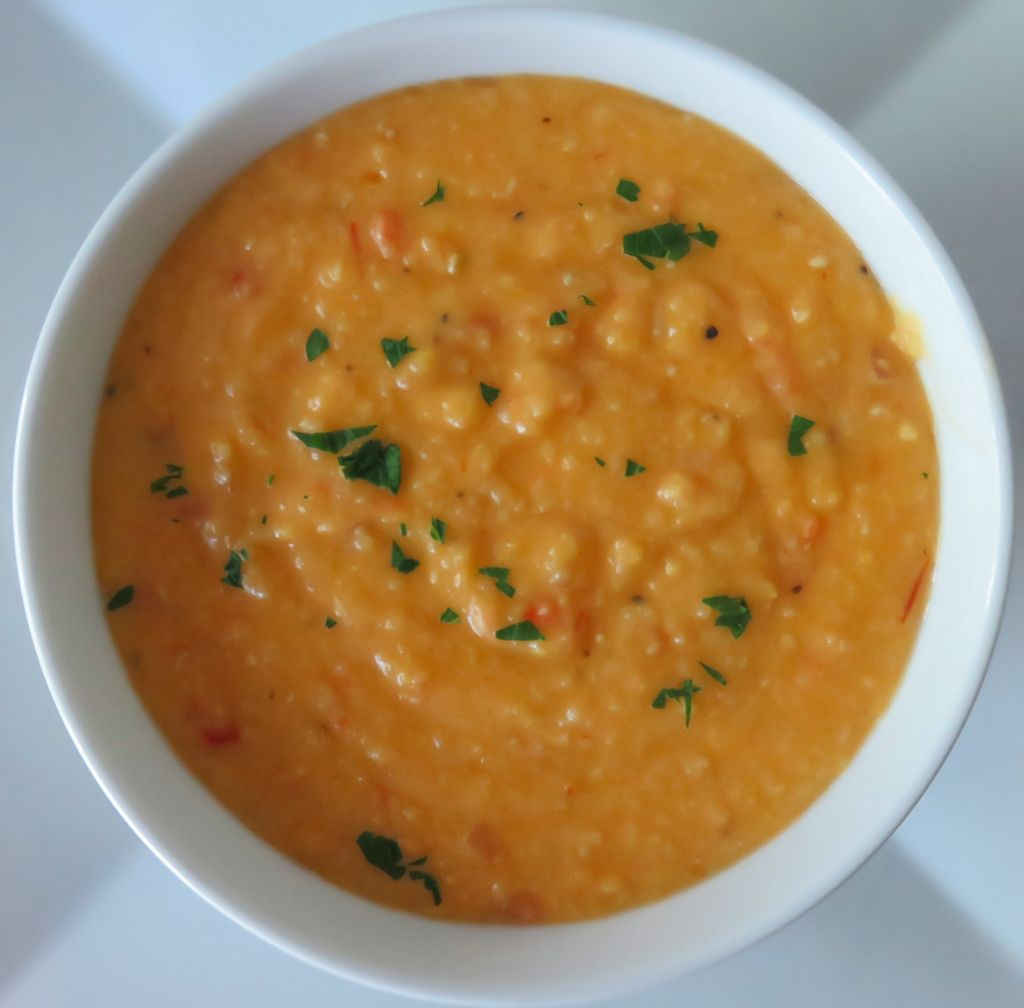
Smoked tomato pimento cheese polenta. I think I’ve whispered those words 20 days since I made this dish, smiling and remembering. Without a doubt, this was one of the best tasting sides I’ve ever had. Just a hint of smokiness from the smoked tomatoes and tons of cheesy creaminess. And polenta, my favorite thing no matter what it is mixed with. This makes a big huge batch of polenta, but you’ll find you won’t have any trouble making it disappear. This is a fantastic recipe, one we’ll be making time and time again.
Creamy Deliciousness
I like my polenta very creamy and a little on the thin side. As opposed to thick and dense. You can cook your smoked tomato pimento cheese polenta a little longer than I did if you want yours thicker. If you get it too thick, stir in a bit more cream to thin it. When reheating polenta I stir in a bit more cream to get it back to it’s original wonderfully creamy state.
I prefer to use fruit or nut woods when I smoke unless I want a heavier smoke flavor. Pecan, apple or cherry are my favorites.
Without a doubt, this was one of the best tasting sides I’ve ever had. Just a hint of smokiness from the smoked tomatoes and tons of cheesy creaminess.
Note: This recipe was developed using the Char-Broil Big Easy Oil-Less Fryer. If you are cooking using the Char-Broil Smoker-Roaster Grill you should cook with the lid open and the temperature set to High. You might also need to adjust the cooking time.
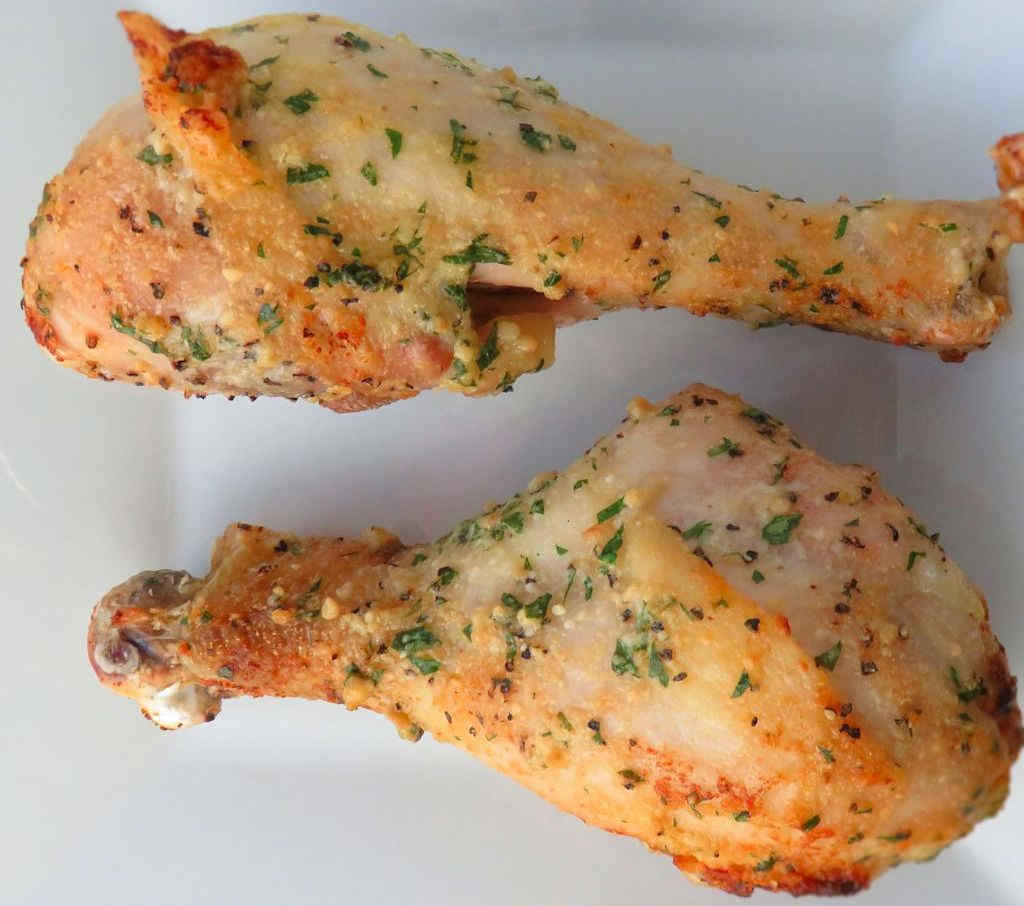
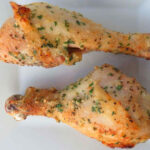
These garlic Parmesan drumsticks on the Char-Broil Big Easy are proof that it really doesn’t take many ingredients to make absolutely delicious chicken. A wonderful combination of cheese, butter, and garlic. I’m a huge fan of garlic, so I loaded it on like I like it: thick.
Drumsticks. Or Whatever.
I used drumsticks because that’s what I happened to have on hand (hey, they were on sale!) but any cuts will do. If you use split chicken breasts or even whole chickens make sure that you get the ingredients on all sides: top, sides, underneath, you name it.
Beware of Heat
The last step of cooking these garlic Parmesan drumsticks (right before devouring them) is to brush them with a mix of melted butter, garlic, Parmesan and parsley. I use a very long nylon brush for this so that I don’t burn myself. I remove the basket from the Big Easy and place it on a large baking sheet pan. That way any butter that drips down doesn’t get onto my patio. Although the nightly visitors (raccoons and possums) would thank me for that, it’s a bit messy. The pan takes care of that for me.
Garlic Parmesan Drumsticks on the Char-Broil Big Easy
These garlic Parmesan drumsticks on the Char-Broil Big Easy are proof that it really doesn't take many ingredients to make absolutely delicious chicken.
Course Main
Cuisine American
Keyword Big Easy, Char-Broil, chicken, garlic Parmesan
Combine the salt, pepper and granulated garlic and rub over all sides of the chicken pieces. I like my chicken pretty garlicky, so I used more of it than salt and pepper. Just make whatever ratio you want.
Transfer chicken to the Big Easy basket.
Place into the Big Easy and cook until done. My legs took approximately 40 minutes to reach 165 F.
Combine the butter, fresh garlic, Parmesan and parsley.
Lift up the Big Easy basket and, using a long brush, brush with the butter mixture.
Return the basket to the Big Easy and cook another 5 or so minutes or until the chicken turns golden brown.
Remove and let rest 5 minutes before serving.
Notes
This recipe is also great made using chicken breasts or thighs. Bone-in cuts always produce the tastiest, juiciest results.
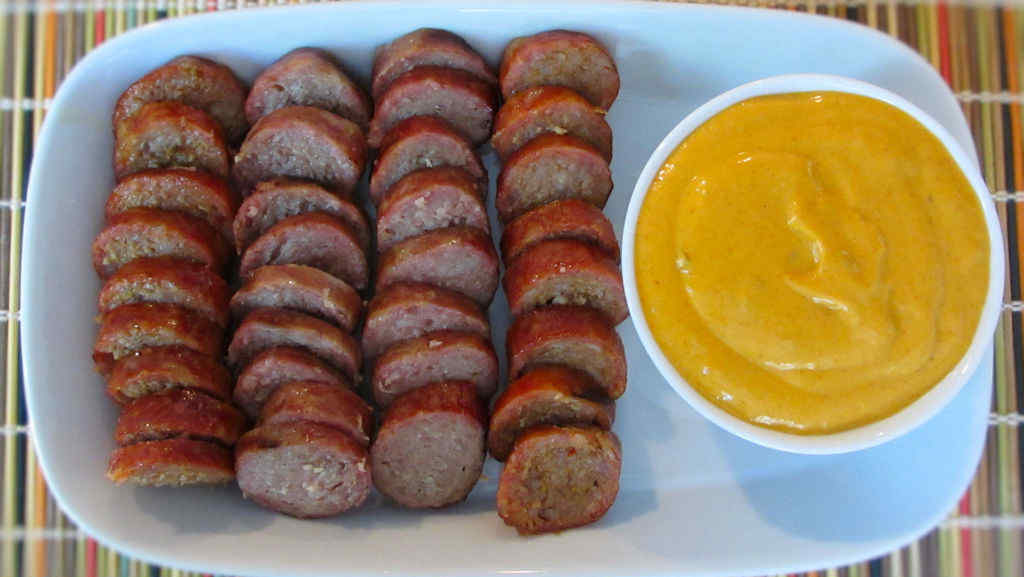
I just wrapped up a smoke session on my Weber Smokey Mountain, and since the fire was still burning hot, I decided to toss a few fresh sausages onto the smoker. While they were cooking I stirred up a very quick, but definitely spicy, mustard dipping sauce that is loaded with Sriracha goodness. Smoked sausage with Sriracha mustard sauce…. you know it was yummy.
Mix It Up A Bit
I used Italian sausage, bratwurst and andouille sausages when I made smoked sausage with Sriracha mustard sauce. My wife’s favorite were the Italian sausages. They had a nice spicy taste to them. My favorite? Andouille, of course. I could eat andouille all day. The spicier the better and andouille always packs that nice little kick that I really enjoy.
The Sauce Is Great
The Sriracha mustard sauce definitely isn’t just for dipping sausages. It’s great on sandwiches, subs, hot dogs, and hamburgers. It is creamy smooth, with a real kick to it thanks to the Sriracha and smoked jalapenos (chipotles), which also add a bit of smoky flavor. I think you could definitely use this same sauce for dipping chicken nuggets or chicken tenders. It’s different than those usual dipping sauces that are, frankly, boring!
Add the meats once the smoker is ready and cook until the internal temperatures reach 155 F. Start testing a single sausage after 1 hour (no need in poking them all and letting all of the juicy goodness drain out). Cooking time should be 1-2 hours total.
Remove from smoker and cover in foil until ready to use.
Serve with Sriracha mustard sauce, for dipping.
For the Sriracha mustard sauce
Whisk together all ingredients.
Notes
Use a combination of sausages for a better experience.
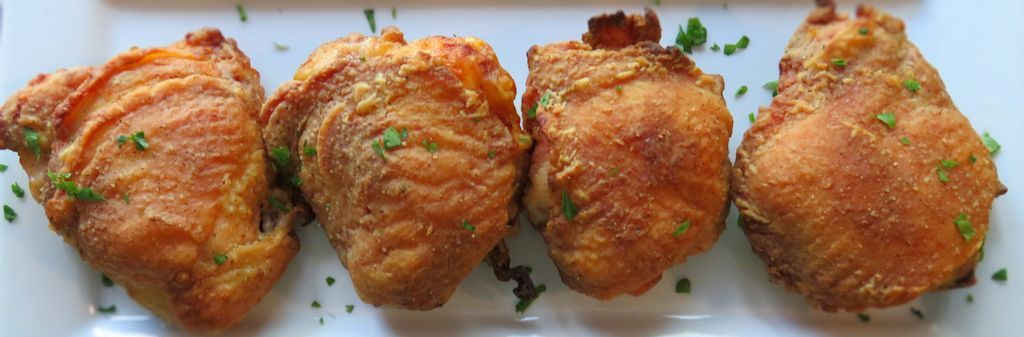
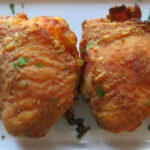
Any day that includes firing up my Weber charcoal grill outfitted with a Vortex insert and cooking ‘fried’ chicken is a good day. Actually, it’s a fantastic day. I’m willing to bet that in a blind taste test you could not tell the difference between this Louisiana crispy fried chicken using the Vortex and chicken fried in oil. And you’ll never go back to that deep-fried stuff either. This way is easier, tastier and just flat-out better.
Super Crispy. Super Delicious.
This is seriously crispy chicken. Seasoned perfectly. Moist and tender meat. Make extra because you’ll need it. And don’t expect any leftovers either.
If you want a little extra crunchy skin, brush the tops of the chicken with just a little bit of vegetable oil 5 minutes before removing them from the grill. That’s all it takes.
I’ve made fried chicken using the Vortex many, many times. Sometimes I make my own batter or coating, sometimes I just use store-bought, like the Louisiana Seasoned Crispy Fried Chicken batter I used this time. No matter what I use, it’s always fantastic. You can’t wrong with this Louisiana crispy fried chicken using the Vortex. It’ll amaze you and your guests.
Fire up your Vortex, filling it all the way with charcoal. Let the coals get good and hot, keeping both the top and bottom grill vents wide open.
Rinse the chicken pieces and pat dry.
Working in batches, place a little of the fry batter into a resealable bag or container and add a few pieces of chicken.
Seal and toss gently to coat.
Transfer chicken to the grill around the Vortex.
Cook for 45 minutes or until the chicken reaches 165 F as measured in several locations. I have not found it necessary to rotate the grill lid, but if you want to, rotate it 45 degrees every 15 minutes.
Notes
I prefer to cook ‘fried’ chicken on a 22″ grill using the Vortex. You can cook them on an 18″ grill too, but sometimes the edges nearest the Vortex get a little over-cooked.You can substitute your favorite chicken cuts.
Note: This recipe was developed using the Char-Broil Big Easy Oil-Less Fryer. If you are cooking using the Char-Broil Smoker-Roaster Grill you should cook with the lid open and the temperature set to High. You might also need to adjust the cooking time.
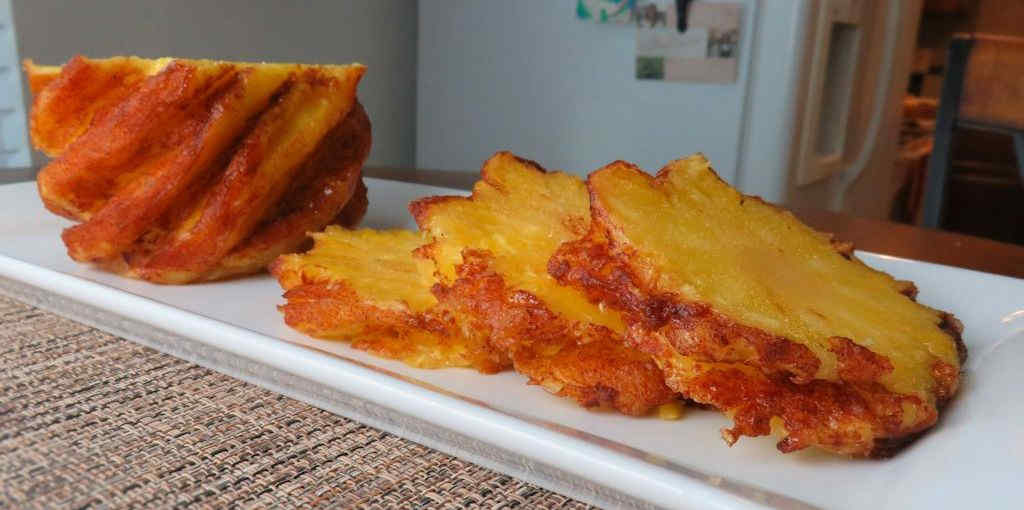
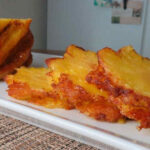
Just finished off that great Caribbean jerk chicken you cooked on your Big Easy? Well, it’s time for dessert! Time to make Brazilian pineapple on the Char-Broil Big Easy! And man, oh man, what a delightful treat it is, too! Deliciously sweet pineapple, brushed with coconut milk and sprinkled with cinnamon-infused sugar. Roasted to perfection.
Brazilian pineapple on the Char-Broil Big Easy can be sliced and eaten as-is. Nothing else is required. But it’s even better topped with some cooling whipped cream or a scoop of ice cream. This dessert is so good that we made it twice in one week!
Cutting the Pineapple
You start by cutting the ends and rind off of a pineapple. Do not remove the core! Then you remove the eyes in a spiral pattern. I never realized that the eyes grow at about a 45 degree angle on the sides of the pineapple. Just remove them using a sharp knife, creating a nice little ‘canyon’ to hold the coconut milk and cinnamon sugar.
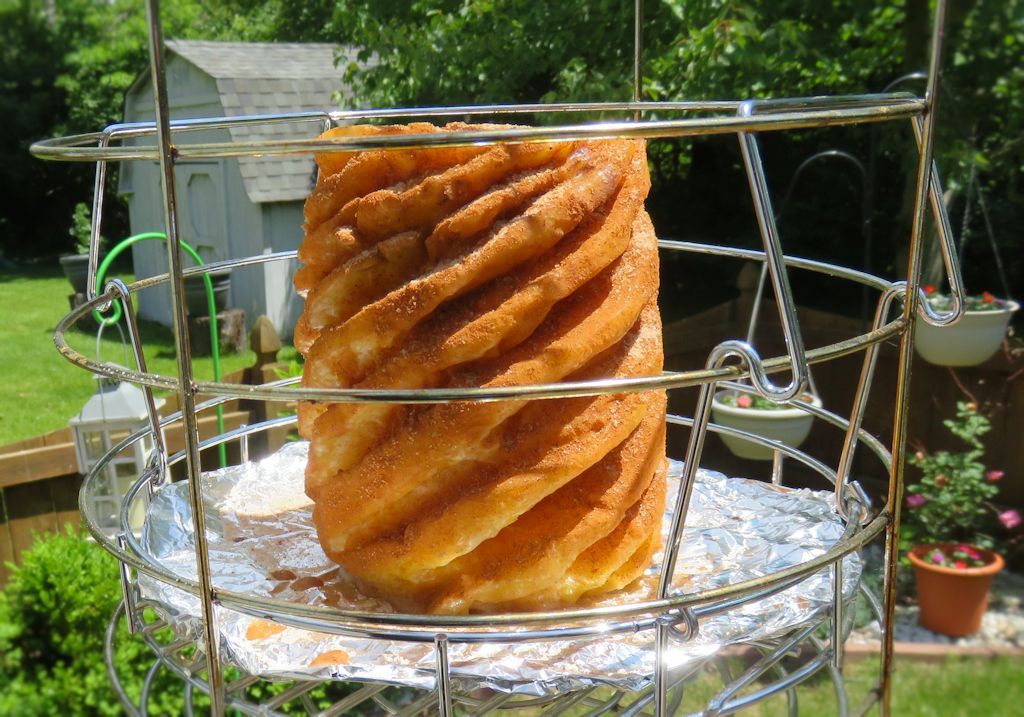
Prep your Big Easy and Get to Cookin’!
I lined a bunk-bed basket with foil to make cleanup easier. Lowered it into the Big Easy and let it go until it started to brown, about 30 minutes. Your time may vary, and you may want your pineapple to be a bit more caramelized. Use your own judgement. I don’t think you can go wrong no matter what!
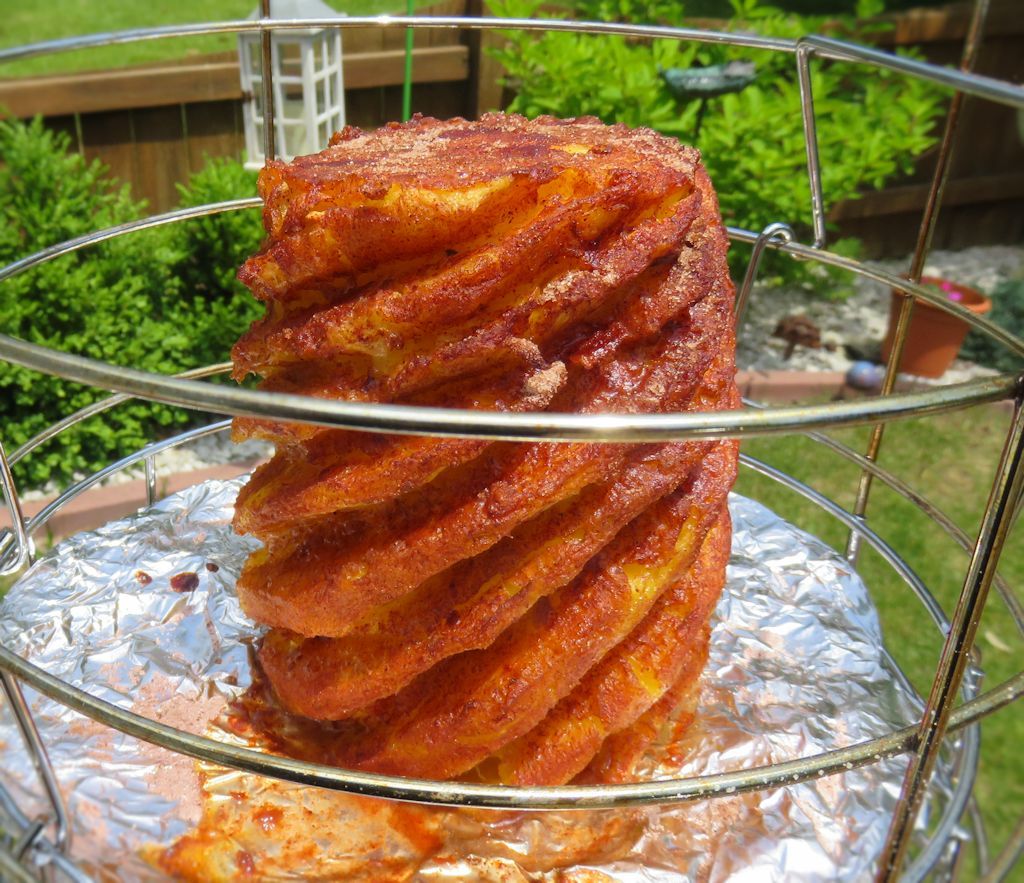
Rest and Serve!
I let the pineapple rest a bit before I sliced it. It’s pretty darned hot right out of the Big Easy! And if you don’t have a Big Easy (and really, you should have at least one!) you can also make this recipe using a gas or charcoal grill with a rotisserie.
Deliciously sweet pineapple, brushed with coconut milk and sprinkled with cinnamon-infused sugar. Roasted to perfection. Brazilian pineapple on the Char-Broil Big Easy is a win.
Twist off the crown of the pineapple and cut off the ends. Cut down the sides to remove the rind. Then, using a sharp knife, cut spiral cuts up the sides of the pineapple to remove the eyes.
Place the sugar, cinnamon, and cloves in a bowl and stir to mix.
Fire up your Big Easy.
Brush the pineapple with the coconut milk. Dust heavily with the cinnamon sugar mix. Transfer to the Big Easy basket.
Transfer basket to the Big Easy and roast until the pineapple starts to turn golden brown.
Remove and let cool 10-15 minutes before slicing.
Serve with whipped cream.
Notes
Depending on the size of your pineapple and how heavy handed you are with the spices, you might have enough of the cinnamon sugar mix to make 2 pineapples.
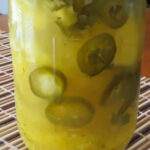
Wow, this spicy pickled pineapple was totally different. Delightfully good, with a spicy hit at the start, vinegar tartness in the middle, and finishing with pineapple sweetness in the end. I cannot recall ever eating anything like them. These are great right out of the jar, or equally fantastic chopped and then used to top hot dogs or tacos. Or even add them to a bowl of cottage cheese. Yep.
Fresh Is Best
I used a fresh pineapple, but I think you could get away with using canned slices or even chunks. You might want to cut back on the amount of sugar if you do, though. Or use canned pineapple that is in water and not a sweet juice. Although spicy pickled pineapple is already sweet, you don’t want it to be overly sweet.
I used my snazzy new little pineapple corer to cut my fresh pineapple into rings. It’s a fun little gadget!
This spicy pickled pineapple is delightfully good, with a spicy hit at the start, vinegar tartness in the middle, and finishing with sweetness in the end.
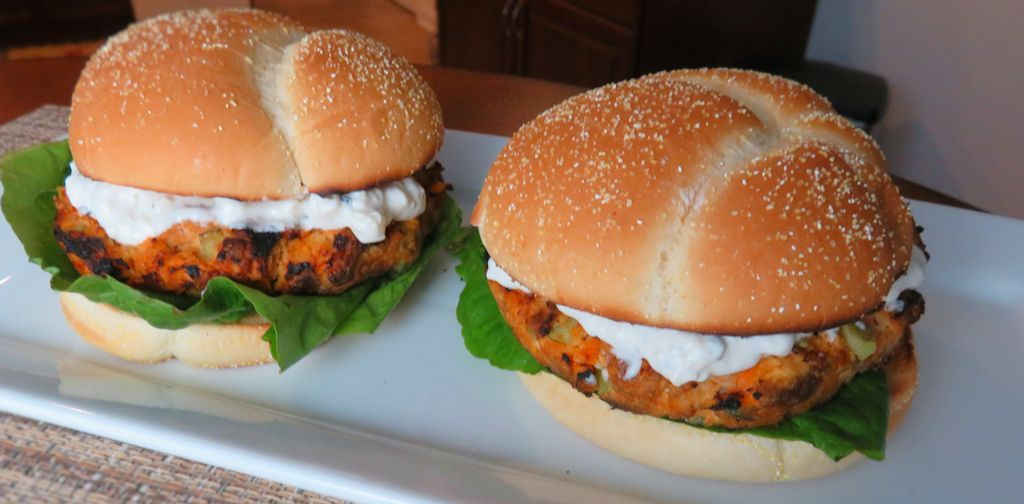
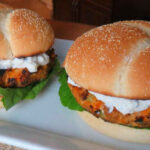
One sign that you absolutely love a dish? You make it three days in a row. Like these Buffalo chicken burgers, that I made… you guessed it… three days in a row! The burgers are so tender, so juicy, and they have just the right amount of spiciness. The heat is there, but I’d say it’s somewhere around medium spicy. Packed with celery and carrots, and topped with a wonderful blue cheese sauce, each bite really is like a fantastic chicken wing. But on a bun.
These Are Some Great Burgers
I so enjoyed making and devouring these Buffalo chicken burgers. They have found their way to the top of my gotta-make-regularly list. Not only are they very easy to make, they look and taste absolutely fantastic. I cannot wait to enjoy them again, and soon. You can skip the blue cheese sauce if you want, and just dress the burgers plainly, using mayonnaise if you want. The blue cheese adds more of a Buffalo wing experience.
I like to use a burger press when I make burgers. It, in combination with some patty papers, enables me to crank out a whole bunch of equally-sized burger patties in no time at all with little cleanup.
These Buffalo chicken burgers are so tender, so juicy, and have just the right amount of spiciness. Each bite is like a fantastic chicken wing. On a bun.