Grilled Bell Pepper Pizza

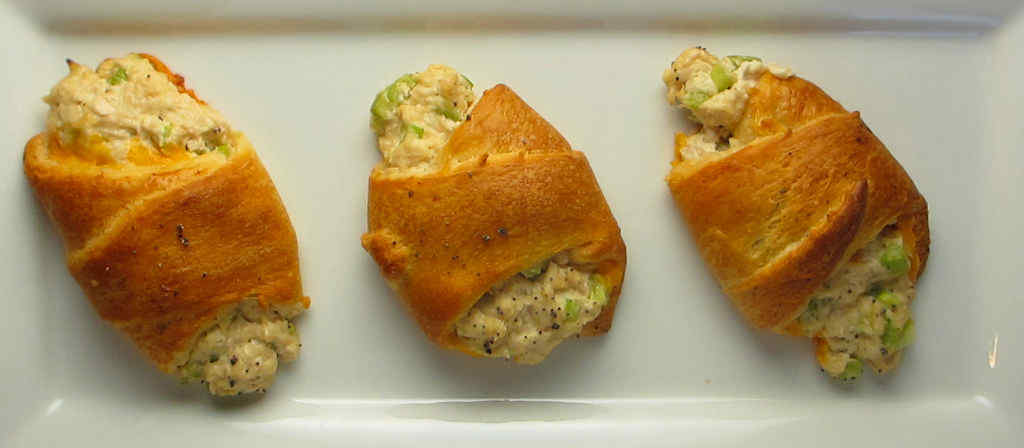
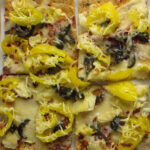
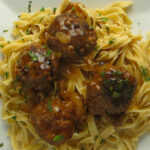
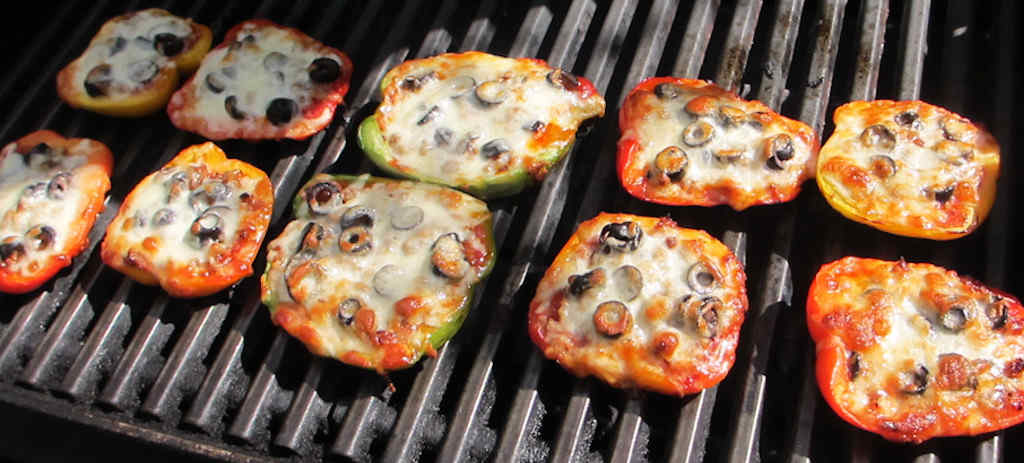
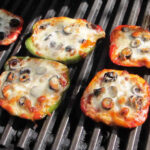
My wife and I love pizza, but we are also watching our carbohydrates. These grilled bell pepper pizzas solve that problem and then some! All of our favorite pizza toppings served on a wonderful bell pepper ‘crust’. I grilled the pizzas until the peppers were just starting to soften so they still had a bit of crunch to them. They were fantastic!

Grilled Bell Pepper Pizza

Low Carb And Still Delicious!

Grilled bell pepper pizzas will definitely become a staple in our house. They aren’t exactly zero carbs (the peppers and sauce have a few grams of carbs), but they are mighty low in carbs and that’s good enough for us! I don’t have to feel guilty about carbs when I eat too many of these. That’s not to say they’re healthy but they’re good!

I recommend that you use a grill basket when making these ‘pizzas’. It makes cooking easier and you don’t have to worry about anything falling through the grates. And cleanup is easier too!

You don’t have to grill these ‘pizzas’, either. Just pop them in a 425 F oven instead.

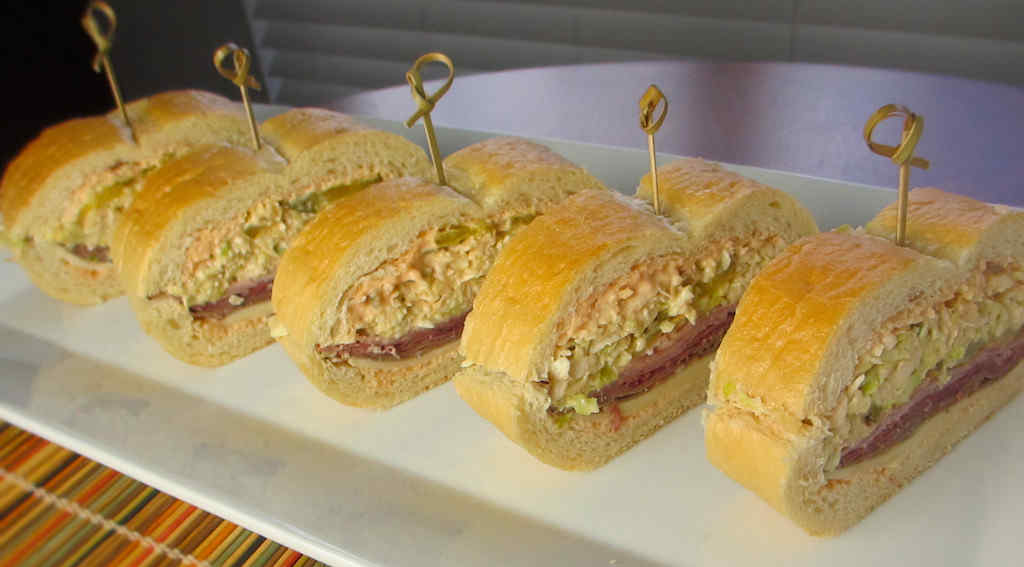
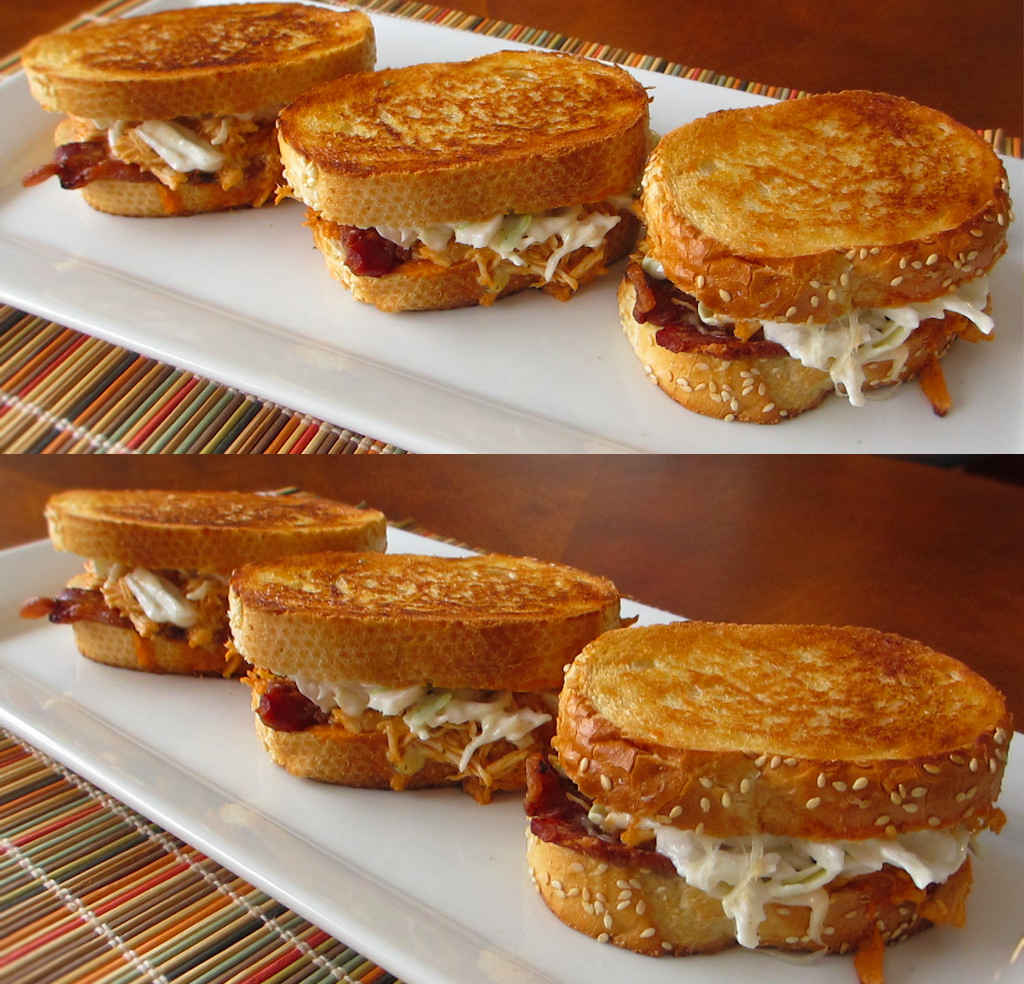
Also try my sausage-stuffed grilled sweet peppers and my grilled French bread pizzas.

Grilled Bell Pepper Pizza
Print Pin
4 from 1 vote

Grilled Bell Pepper Pizza

Course Main
Cuisine American
Prep Time 15 minutes
Cook Time 15 minutes
Total Time 30 minutes

Ingredients

  • Bell peppers various colors
  • Olive oil
  • Pizza sauce
  • Your favorite toppings black olives, crumbled cooked sausage, pepperoni, red pepper flake, etc
  • Shredded mozzarella cheese

Instructions

  • Fire up your grill for direct cooking over medium-high heat.
  • Cut the peppers so that they form little bowls. I found that cutting them in half made for deeper bowls than I wanted (too much bell pepper!) so I trimmed them down so that there was a 1/4″ – 1/2″ deep bowl.
  • Remove any seeds.
  • Brush the outsides of the peppers with the oil.
  • Add your favorite toppings up to the top of the pepper ‘bowls’.
  • Add cheese and place onto the grill.
  • Grill for 10-15 minutes or until the peppers have started to soften and the cheese is melted.

Notes

Do not overcook the peppers until they become soft. You want them to hold up to the toppings and still have a slight crunch to them.

Nutritional values are approximate.

Pulled Pork Hot Pockets

Looking for the best way (well, one of the best ways) to use leftover BBQ pulled pork? Make hot pockets! They’re crazy easy. Just about as easy as making a pulled pork sandwich. Light crispy dough. Hot oozing filling. You can even pick these pulled pork hot pockets up and devour them like little meat pies if you want.

Pulled Pork Hot Pockets

Almost Any Dough Will Do

Just about any dough can be used, from homemade to pizza to even crescent roll dough (pinch two triangles of the dough together to form one ‘pocket’). These also freeze well, making them great for a quick lunch. Just pop them into the microwave until hot (beware of the hot filling!) and it’s time to eat! Of course you can substitute smoked brisket or chicken instead. Just shred fine and you’re good to go!

I highly recommend that you shred or grate your own cheese at home. Don’t buy the pre-shredded or pre-grated stuff. It has stuff added to it to keep it from sticking together. That ‘stuff’ affects how the cheese melts. Shred it yourself and use the good stuff.

Also check out my really delicious broccoli cheddar pockets. They’re just as easy to make as pulled pork hot pockets.

Pulled Pork Hot Pockets
Print Pin
4 from 1 vote

Pulled Pork Hot Pockets

Looking for the best way (well, one of the best ways) to use leftover BBQ pulled pork? Make hot pockets! They’re crazy easy. 
Course Main
Cuisine American
Keyword pockets, pulled pork
Prep Time 15 minutes
Cook Time 15 minutes
Total Time 30 minutes
Servings 4 servings
Calories 130kcal

Ingredients

Instructions

  • Preheat oven to 425 F.
  • Spray a baking sheet with non-stick spray.
  • Lightly flour a flat surface.
  • Divide the dough into 4 equally sized pieces and roll out into 6″ x 8″ rectangles.
  • Divide the pork, onion and cheese between each piece of dough, placing the ingredients in the center.
  • Fold the 2 shorter sides of the dough over the filling, stretching to cover.
  • Fold the 2 long sides over like a burrito and pinch the edges to seal.
  • Place the pockets seam-side down on the baking sheet.
  • Beat the egg and 1 tablespoon warm water in a small bowl or glass.
  • Brush the pockets with the egg wash.
  • Bake until golden brown, about 15 minutes.

Notes

You can freeze these and reheat later.

Nutrition

Calories: 130kcal | Carbohydrates: 12g | Protein: 9g | Fat: 5g | Saturated Fat: 2g | Trans Fat: 1g | Cholesterol: 66mg | Sodium: 370mg | Potassium: 30mg | Fiber: 1g | Sugar: 9g | Vitamin A: 148IU | Vitamin C: 2mg | Calcium: 38mg | Iron: 1mg

Nutritional values are approximate.

Bacon Weave BLTs

It was a beautiful spring day here. That had me wishing it was summer and fresh tomatoes were available. I couldn’t wait any longer. I had to make a few BLTs, even if the tomatoes weren’t perfect. Sometimes, you have to do what you have to do. But to make up for the tomatoes I decided to make a simple bacon weave. Bacon Weave BLTs are elevated BLTs. Other BLTs are jealous of them.

Bacon Weave BLTs

The Bacon Bite Guarantee

I made these bacon weave BLTs two days in a row. I will never make them any other way again at least as far as the bacon goes. Making a weave out of the bacon is not only easy, the bacon stays together better. No chunks flying off when you take a bite. And the best part? You’re guaranteed bacon in every single bite. You can’t beat that.

I almost always use Blue Plate mayonnaise in the dishes I make. I think it is the best around. If you can’t find it locally you can pick it up online for a fair price.

Want all the flavor of a BLT in an appetizer? Try my chipotle BLT bites. Or go for the gusto and make a pretzel bacon cheese sandwich!

Bacon Weave BLTs
Print Pin
5 from 1 vote

Bacon Weave BLTs

I will never make BLTs any other way again at least as far as the bacon goes. Making a weave out of the bacon is not only easy, the bacon stays together better. 
Course Main
Cuisine American
Keyword bacon, sandwich, tomato
Prep Time 5 minutes
Cook Time 40 minutes
Total Time 45 minutes
Servings 1 sandwich
Calories 534kcal

Ingredients

Instructions

  • Preheat your oven to 385 F.
  • Line a baking sheet with foil or parchment paper.
  • Cut the bacon in half.
  • Make a bacon weave. If you’re unsure exactly how to do this, click this link to see the original post (with great step-by-step pictures) on Chin Deep.
  • Lay out 3 halves of the bacon in a square. Make sure the pieces are together tightly.
  • Lift up and fold back the ends of every other one on one side of the baking sheet. Place a bacon slice perpendicular (vertically) to the horizontal rows of bacon, directly on top of the bacon strips that you did not fold back. Unfold the folded bacon to cover the strip that you just placed on the baking sheet.
  • Lift up and fold back the ends of the horizontal bacon strips that are now under the vertical bacon strip to the side of the baking sheet. Place a bacon slice right next to the first vertical bacon strip, directly on top of the bacon strips that you did not fold back. Unfold the folded bacon to cover the strip that you just placed on the baking sheet. Repeat the process of alternating the vertical and horizontal bacon strips till you reach the other end of the horizontal bacon strips.
  • Bake in the oven for 30-40 minutes until crispy. Carefully remove to a paper towel-lined plate to drain.
  • Slather bread with mayonnaise.
  • Add bacon weave, lettuce, and tomato and salt and pepper to taste and serve.

Notes

You have to make these at least once for the  ‘wow’ factor.

Nutrition

Calories: 534kcal | Carbohydrates: 31g | Protein: 15g | Fat: 39g | Saturated Fat: 11g | Trans Fat: 1g | Cholesterol: 49mg | Sodium: 821mg | Potassium: 386mg | Fiber: 3g | Sugar: 5g | Vitamin A: 565IU | Vitamin C: 8mg | Calcium: 90mg | Iron: 2mg

Nutritional values are approximate.

Chicken Salad Crescents

The original recipe for chicken salad crescents on the Plain Chicken blog was for small bite-sized rolls, perfect for a party appetizer. I decided to go big and serve them as the main course for lunch, and they were perfect! The super-light crunchy dough makes for the perfect wrapper around chicken salad. You can use your own chicken salad recipe of course. However, I was particularly fond this version, which has Worcestershire sauce in it. The Worcestershire really added a great flavor dimension along with the extra sharp cheddar. They were fantastic!

Chicken Salad Crescents

Chunky Chicken Salad Is Better

If you do use your own chicken salad recipe to make these chicken salad crescents, you might want to cut down on the mayonnaise. You want the salad to be thick. Not too thick, but thick enough to stand up to 20 minutes in the oven. Too thin and it’s going to run all over the place, leaving you with a pan of sadness!

I almost always use Blue Plate mayonnaise in the dishes I make. I think it is the best around. If you can’t find it locally you can pick it up online for a fair price.

Also try my creamy smoked chicken salad sandwiches.

Chicken Salad Crescents
Print Pin
4 from 1 vote

Chicken Salad Crescents

You can use your own chicken salad recipe of course, but I was particularly fond this version, which has Worcestershire sauce in it. The Worcestershire really added a great flavor dimension along with the extra sharp cheddar. They were fantastic!
Course Appetizer or Main
Cuisine American
Keyword chicken salad, crescent rolls
Prep Time 10 minutes
Cook Time 20 minutes
Total Time 30 minutes
Servings 24 rolls
Calories 115kcal

Ingredients

Instructions

  • Preheat oven to 375 F.
  • In a bowl mix together the chicken, celery, Worcestershire, salt, pepper and mayonnaise.
  • Open crescent roll cans and separate dough into triangles.
  • Add a half slice of cheese to the center of each piece of dough.
  • Top with 2 tablespoons, more or less, of the chicken salad and roll up the dough as you would a regular crescent roll.
  • Sprinkle rolls with poppy seeds.
  • Transfer rolls to parchment paper- or Silpat-lined baking sheets and bake for 18-20 minutes or until golden brown.

Notes

These are great made with rotisserie chicken.

Nutrition

Calories: 115kcal | Carbohydrates: 1g | Protein: 4g | Fat: 11g | Saturated Fat: 4g | Trans Fat: 1g | Cholesterol: 21mg | Sodium: 238mg | Potassium: 37mg | Fiber: 1g | Sugar: 1g | Vitamin A: 170IU | Vitamin C: 1mg | Calcium: 104mg | Iron: 1mg

Nutritional values are approximate.

Copycat Steak ‘n Shake Frisco Melts

What makes a great patty melt? Well, melted cheese, of course. And a tangy sauce. A perfectly seasoned and cooked patty. Well-toasted thick slices of bread. But the most important thing is they have to be messy. Very, very messy. I want stuff dripping out. All over the plate, all over my shirt. Into my lap. Onto the table. You get the point. Messy. That’s a great patty melt, and that’s what these copycat Steak ‘n Shake Frisco melts are: great.

Copycat Steak n Shake Frisco Melts

Turn It Into A Frisco Melt Dip!

I go the extra mile to get these copycat Steak ‘n Shake Frisco melts even messier. I make a little extra sauce and put it into some small sauce bowls and dip my sandwich in it. Yep, Frisco Melt Dip. Perfect. No point in being halfway messy. Take it to the messy extreme!

There’s nothing fancy going in here. Just great flavor. I’m pretty sure that Cuisinart designed my Griddler just for these sandwiches. Sure, I could’ve gotten out a skillet and toasted these little beauties. But I appear to be challenged at flipping sandwiches in a skillet. It’s the sides that throw me off. The Griddler is just that, a griddle. Wide-open flat spaces. Plenty of room for me to flip and flip well!

Also try my copycat of Applebee’s classic Patty Melt.

Copycat Steak 'n Shake Frisco Melts
Print Pin
4 from 1 vote

Copycat Steak ‘n Shake Frisco Melts

What makes a great patty melt? Well, melted cheese, of course. And a tangy sauce. But the most important thing is they have to be messy. 
Course Main
Cuisine American
Keyword burgers, copycat, sandwich
Prep Time 20 minutes
Cook Time 40 minutes
Total Time 1 hour
Servings 4 servings
Calories 980kcal
Author Mike

Ingredients

For the Frisco Sauce

For the melts

  • ½ tablespoon canola oil
  • ½ large sweet onion sliced thin
  • 1 pound ground beef
  • 8 slices American cheese
  • 4 slices Swiss cheese
  • 8 slices sourdough bread I used Italian bread
  • 1-2 tablespoons unsalted butter softened

Instructions

For the Frisco Sauce

  • Combine the ingredients and refrigerate until ready to use.

For the melts

  • Heat the oil in a large skillet over medium heat.
  • Add the onion and caramelize, cooking for about 20 minutes, stirring often. The onions should turn a nice golden brown. Remove from the pan.
  • Divide the beef into 4 equally-sized patties. Cook them as desired in a skillet or on the grill.
  • Add 1 slice of Swiss cheese and 2 slices of American cheese to each patty and let melt.
  • Spread butter on one side of each slice of bread. Place in a large skillet over medium heat and cook until the butter has melted and the bread is golden crispy.
  • Make sandwiches by spreading Frisco sauce on the unbuttered sides of the bread. Add the patties and onions and top with another piece of bread. Serve.

Notes

Try to flatten your patties out so they cover the bread as much as possible.

Nutrition

Calories: 980kcal | Carbohydrates: 80g | Protein: 47g | Fat: 52g | Saturated Fat: 23g | Trans Fat: 2g | Cholesterol: 148mg | Sodium: 1573mg | Potassium: 600mg | Fiber: 4g | Sugar: 8g | Vitamin A: 661IU | Vitamin C: 2mg | Calcium: 662mg | Iron: 7mg

Nutritional values are approximate.

Buffalo Chicken Grilled Cheese Sandwich

I often do ‘theme weeks’ when it comes to dinners, and sometimes lunches. A recent theme was Buffalo chicken. I love the flavor of traditional Buffalo chicken wings, so I figured I’d make a large batch of chicken breasts flavored the same way. I cooked the Buffalo chicken on my Char-Broil Big Easy, but any Buffalo chicken will do. After it was cooked, I shredded the meat, added a bit more wing sauce, and got to making a week’s worth of great Buffalo chicken-flavored dishes, like this Buffalo chicken grilled cheese sandwich.

Buffalo Chicken Grilled Cheese Sandwich

Carrot And Celery. In A Sandwich?

Every great thing about Buffalo chicken is in this grilled cheese sandwich, from the sides of carrots and celery, to blue cheese crumbles. They cook up oooey gooey, and have that great Buffalo chicken kick. I could eat these sandwiches all day long. You can make the chicken mixture ahead of time. Then you only the time it takes to assemble and toss in a hot skillet. Lunch in just minutes!

I’m pretty sure that the Cuisinart Griddler was made specifically for making this sandwich and others like it. You can use a skillet instead, sure. But for easiness, you can’t beat the Griddler!

These sandwiches are great along with my Buffalo chicken soup.

Buffalo Chicken Grilled Cheese Sandwich
Print Pin
4 from 1 vote

Buffalo Chicken Grilled Cheese Sandwich

Every great thing about Buffalo chicken is in this grilled cheese sandwich, from the sides of carrots and celery, to blue cheese crumbles. They cook up oooey gooey, and have that great Buffalo chicken kick.
Course Main
Cuisine American
Keyword Buffalo, chicken, grilled cheese, sandwich
Prep Time 5 minutes
Cook Time 10 minutes
Total Time 15 minutes
Servings 2
Calories 511kcal

Ingredients

  • ½ cup Buffalo chicken warmed. I used our slow cooker version
  • 1 tablespoon mayonnaise
  • 2 tablespoons carrot grated
  • 2 tablespoons celery sliced
  • 2 tablespoons green onion sliced
  • 2 tablespoons blue cheese crumbled
  • 1 cup sharp cheddar cheese shredded
  • 4 slices bread
  • 1-2 tablespoons unsalted butter softened

Instructions

  • Gently combine the chicken, mayo, carrot, celery, onion, and cheeses in a medium bowl.
  • Butter one side of each slice of bread.
  • Heat a large skillet over medium-high heat.
  • Lay 2 pieces of bread down into the skillet, butter side down.
  • Divide chicken mixture between the two slices of bread.
  • Top with remaining bread, butter side up.
  • Cook until bread turns golden brown and crispy.
  • Gently flip sandwiches and cook until bread turns golden brown and crispy and cheese has melted.
  • Let cool slightly before slicing.

Notes

I also like to make these sandwiches using thick Texas toast!

Nutrition

Calories: 511kcal | Carbohydrates: 31g | Protein: 22g | Fat: 34g | Saturated Fat: 18g | Trans Fat: 1g | Cholesterol: 83mg | Sodium: 2642mg | Potassium: 264mg | Fiber: 3g | Sugar: 5g | Vitamin A: 3402IU | Vitamin C: 2mg | Calcium: 536mg | Iron: 3mg

Nutritional values are approximate.

Antipasto Flatbread Pizza

Dangerous. That’s one word for this antipasto flatbread pizza. I can’t be trusted around it. Everything good is on each and every slice. I could’ve used the same toppings on a ‘regular’ pizza crust, but we prefer flatbread pizzas. Crunchier. Lower in carbs (so I can eat more). And well, kind of fun to eat. They also make for great appetizers. Big honkin’ slices of thick crust pizza aren’t the best appetizers.

Antipasto Flatbread Pizza

What, No Sauce?


There’s no real sauce on this antipasto flatbread pizza. But, it is definitely not dry. Go crazy with the toppings, but if you do use lots of ‘wet’ ingredients, like marinated peppers or olives, drain them a bit before putting them onto the pizza. Flatbread can get soggy if you overload it with sauce or moist toppings.

I highly recommend that you shred or grate your own cheese at home. Don’t buy the pre-shredded or pre-grated stuff. It has stuff added to it to keep it from sticking together. That ‘stuff’ affects how the cheese melts. Shred it yourself and use the good stuff.

Also try my grilled chicken flatbread pizza.

Antipasto Flatbread Pizza
Print Pin
5 from 1 vote

Antipasto Flatbread Pizza

Dangerous. That’s one word for this antipasto flatbread pizza. I can’t be trusted around it. Everything good is on each and every slice.
Course Main or Appetizer
Cuisine American
Keyword antipasto, pizza
Prep Time 15 minutes
Cook Time 15 minutes
Total Time 30 minutes
Servings 2 pizzas
Calories 595kcal
Author Mike

Equipment

Ingredients

  • 2 flatbreads

Toppings (divide equally between the two flatbreads)

  • 2 teaspoons garlic powder
  • 1 cup cheese shredded. Mozzarella, provolone, Italian blend, whatever you prefer
  • ¼ cup Parmesan cheese grated
  • red pepper flakes
  • 8 slices Genoa salami sliced thin or chopped
  • 2 slices prosciutto sliced thin, torn or chopped
  • peperoncini sliced, to taste
  • ¼ cup artichoke hearts small, drained, chopped
  • black olives to taste, chopped or sliced

Other topping ideas

Instructions

  • Preheat oven to 375 F.
  • Place flatbreads on baking sheets and bake for 2 minutes. Flip and bake for another 2 minutes to get crusts slightly crunchy. Remove and let cool slightly.
  • Sprinkle both flatbreads with the garlic powder
  • Add remaining ingredients.
  • Bake for 10-15 minutes or until cheese has melted and crust is crunchy.
  • Place under broiler for 30 seconds or so if you want a little char on the toppings.
  • Slice and serve.

Notes

Green olives are an interesting twist to add to this pizza too!

Nutrition

Calories: 595kcal | Carbohydrates: 30g | Protein: 33g | Fat: 38g | Saturated Fat: 19g | Trans Fat: 1g | Cholesterol: 102mg | Sodium: 2348mg | Potassium: 377mg | Fiber: 5g | Sugar: 1g | Vitamin A: 859IU | Vitamin C: 17mg | Calcium: 584mg | Iron: 3mg

Nutritional values are approximate.

Salisbury Steak Meatballs

Never has the kitchen smelled so great as it did when I was cooking these Salisbury steak meatballs. The anticipation of dinner was making my stomach growl and my mouth water. Every bite was packed with savory flavors. Tender meatballs with a bit of tang from mustard. Rich beef-flavored sauce. Give me more! And more!

Salisbury Steak Meatballs

The Perfect Meatballs

I’m quite sure you’re going to see Salisbury steak meatballs on Life’s A Tomato again soon. I’m already thinking that I need to make a po’boy sandwich using these meatballs. Hmmm. Smothered in gravy. Yummy!

When I started cooking the onions a thought occurred to me: mushrooms. I think the next time I make this I’ll add a half pound of thinly sliced mushrooms in with the onions and let them cook down a bit. The earthy flavor of the mushrooms will definitely go well with the gravy.

Every time I make meatballs I think about ordering one of these. I don’t usually post something I haven’t tried, but I’m intrigued enough about it to put it here. Heck, everyone seems to like it for making big batches of meatballs!

My Italian meatballs with gravy are crazy good too. You’ll want to make them too!

Salisbury Steak Meatballs
Print Pin
5 from 1 vote

Salisbury Steak Meatballs

Never has the kitchen smelled so great as it did when I was cooking these Salisbury steak meatballs.
Course Main
Cuisine American
Keyword meatballs, Salisbury, steak
Prep Time 15 minutes
Cook Time 45 minutes
Total Time 1 hour
Servings 8 servings
Calories 643kcal

Ingredients

For the meatballs

For the sauce

Instructions

For the meatballs

  • Place all ingredients except for the butter into a large bowl and combine well with your hands.
  • Form into 2 ounce meatballs.
  • Melt the butter in a large skillet over medium-high heat.
  • Working in batches, fry the meatballs on all sides until lightly browned. You do not need to cook them through completely, just give them some color and texture. Remove meatballs to a bowl or plate.

For the sauce

  • Add the onion to the skillet that you used to cook the meatballs and saute for 2-3 minutes until starting to turn golden.
  • Add 2 cups of the beef broth, the Worcestershire sauce, ketchup and mustard and whisk to combine.
  • In a small bowl or cup combine the cornstarch and 1/2 cup of beef broth. Slowly pour into the gravy while whisking.
  • Add the meatballs to the pan. Reduce the heat to a simmer, cover, and simmer 15-20 minutes or until the meatballs are cooked through. Add more beef broth if the gravy gets too thick.
  • Meanwhile, cook the egg noodles per package instructions. Add remaining 2 tablespoons of butter and stir to melt.
  • Serve meatballs over noodles with gravy, garnished with chopped parsley.

Notes

Also great served with mashed potatoes.

Nutrition

Calories: 643kcal | Carbohydrates: 57g | Protein: 30g | Fat: 32g | Saturated Fat: 13g | Trans Fat: 2g | Cholesterol: 143mg | Sodium: 738mg | Potassium: 617mg | Fiber: 3g | Sugar: 6g | Vitamin A: 291IU | Vitamin C: 3mg | Calcium: 85mg | Iron: 4mg

Nutritional values are approximate.

Stuffed Deli Sandwich

I absolutely loved this stuffed deli sandwich. It’s a great way to make a big ole sandwich with little trouble. Sure, there’s meats and cheeses and pickle, but the star for me was the simple mix of cabbage and Thousand Island dressing. I was a big fan of the crunchiness of the cabbage. So much so that I used the same combination in a lunch wrap the next day.

Stuffed Deli Sandwich

My Go-To Sandwich For Road Trips

The stuffed loaf really needs to ‘get happy’ in the fridge overnight. If you’re looking for a way to feed a crowd, this is a great way to do it. Just make a bunch of them, toss them in the fridge, then slice and serve the next day.

This is one of my ‘go-to’ dishes any time we travel to the beach. I can make it the night before. In the morning I just slice it, re-wrap it, and toss it into the cooler. It gets better the longer it sets, so it’s perfect for that long day by the water.

If you want really, really kick up this stuffed deli sandwich, use my 18000 Island dressing. It brings the heat. Or for something more traditional, use my deli spread.

Also try my fantastic hot grinder sandwich.

Stuffed Deli Sandwich
Print Pin
5 from 1 vote

Stuffed Deli Sandwich

I absolutely loved this stuffed deli sandwich. It’s a great way to make a big ole sandwich with little trouble. Sure, there’s meats and cheeses, but the star for me was the simple mix of cabbage and Thousand Island dressing. I was a big fan of the crunchiness of the cabbage. So much so that I used the same combination in a lunch wrap the next day.
Course Main
Cuisine American
Keyword sandwich, stuffed
Prep Time 12 hours
Total Time 12 hours
Servings 6 servings
Calories 644kcal

Equipment

Ingredients

  • 1 loaf Italian bread
  • 3 cups green cabbage thinly sliced or shredded
  • ½ cup Thousand Island dressing divided
  • 4 ounces Swiss cheese sliced
  • 4 ounces rare roast beef sliced
  • 4 ounces turkey breast sliced
  • 4 ounces pastrami sliced
  • 2 large dill pickles sliced

Instructions

  • Cut 1″ off the top of the bread creating a lid.
  • Hollow out the loaf, removing all of the bread except for 1/2″.
  • Combine the cabbage and 1/4 cup of the dressing.
  • Spread the remaining dressing on the inside of the bread loaf and the lid.
  • Layer inside of loaf with the cheese and meats.
  • Spoon in the cabbage mixture and top with pickles.
  • Add the lid and wrap the loaf tightly in foil.
  • Refrigerate for 12 hours before slicing and serving.

Notes

You can substitute your favorite sandwich meats and cheese.

Nutrition

Calories: 644kcal | Carbohydrates: 47g | Protein: 24g | Fat: 41g | Saturated Fat: 19g | Trans Fat: 1g | Cholesterol: 53mg | Sodium: 1410mg | Potassium: 443mg | Fiber: 4g | Sugar: 28g | Vitamin A: 321IU | Vitamin C: 28mg | Calcium: 243mg | Iron: 3mg

Nutritional values are approximate.

Buffalo Chicken Panini

I made a nice big ole batch of slow cooker shredded Buffalo chicken the other day. One of my favorite things to make with it is Buffalo chicken panini. It takes only minutes to make yet it’s absolutely packed with flavor. Crunchy bread. Smoky bacon. Ooey gooey cheese. Tangy blue cheese (or gorgonzola if you prefer a little milder flavor). Kickin’ chicken. And cool, crunchy slaw.

Buffalo Chicken Panini

I Use My Griddler For Perfect Paninis

I could eat a Buffalo chicken panini all day long. My Cuisinart Griddler does a great job of crisping up the bread and melting the cheese. I use my Griddler for everything from breakfast to dinner. Check out my other recipes all made with the Griddler!

Also try my Buffalo chicken subs.

Buffalo Chicken Panini
Print Pin
5 from 1 vote

Buffalo Chicken Panini

One of my favorite things to make with it is Buffalo chicken panini. It takes only minutes to make yet it’s absolutely packed with flavor. 
Course Main
Cuisine American
Keyword Buffalo, chicken, sandwich
Prep Time 15 minutes
Cook Time 15 minutes
Total Time 30 minutes
Servings 2 sandwiches
Calories 618kcal
Author Mike

Ingredients

  • 4 slices bread thick slices
  • butter
  • 2 slices Swiss cheese
  • 4 slices thick bacon cooked
  • ½ cup Buffalo chicken shredded, warmed (see our slow-cooker or Big Easy recipes for making Buffalo chicken)
  • 2 tablespoons blue cheese crumbled
  • ½ cup coleslaw mix
  • 2 tablespoons Ranch dressing

Instructions

  • Preheat a panini press or skillet.
  • Spread butter on one side of each piece of bread.
  • Place two slices butter-side down on the press or in the skillet.
  • Divide cheese and bacon between sandwiches.
  • Combine the chicken with the blue cheese and divide between the sandwiches.
  • Mix the slaw and Ranch dressing and divide between the sandwiches.
  • Add remaining bread slices butter-side up and close press.
  • Cook until the bread is toasted and golden. If using a skillet flip the sandwiches once the bottom is done and cook the other side until toasted and golden.

Notes

Drizzle the sandwiches with a little Ranch or serve it on the side for dipping.

Nutrition

Calories: 618kcal | Carbohydrates: 32g | Protein: 21g | Fat: 45g | Saturated Fat: 16g | Trans Fat: 1g | Cholesterol: 73mg | Sodium: 2904mg | Potassium: 315mg | Fiber: 3g | Sugar: 5g | Vitamin A: 245IU | Vitamin C: 7mg | Calcium: 264mg | Iron: 2mg

Nutritional values are approximate.