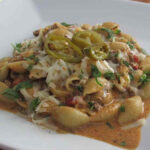
There are two things I really like to have in my chili: Italian sausage and lots of beans. I know, I know. I am violating several chili laws, specially by adding beans, but if it’s called 6-bean beef and sausage chili it’s gonna have beans in it!
Sausage Makes for Great Chili
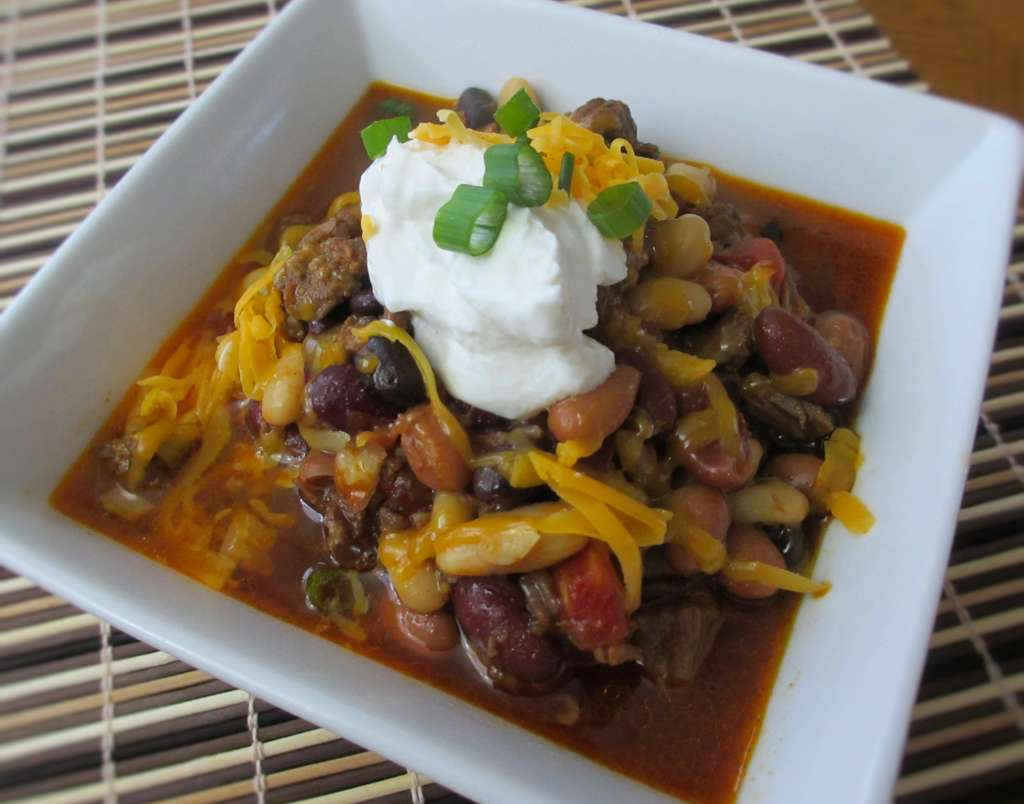
The sausage adds such a great flavor. People often aren’t expecting it. This chili has chunks of beef, like you’re looking forward to, that are countered by the different texture and bite (I used hot sausage) of the sausage. The beans, well, the more the merrier. I just love the texture and flavor, particularly when there is a large variety of beans in the bowl.
What’s This Pasta Thing?
My wife prefers her 6-bean beef and sausage chili over spaghetti. I had never seen or heard of such a thing before I moved to Indiana. But, I made her a small pot of pasta so she too could enjoy this great chili.
I like to use my good ole trusty Dutch oven to make this chili and pretty much darned near anything like it on my stovetop. It’s nice and big and sturdy. That extra weight helps it maintain and distribute heat perfectly. As an added bonus, it’s actually pretty easy to clean up too!

Also try my prime rib chili.

6-Bean Beef and Sausage Chili
Equipment
Ingredients
- 2 pounds beef chuck trimmed, cut into bite-sized pieces
- 1 pound Italian sausage removed from casings, crumbled
- 1 medium yellow onion chopped
- 1 medium green bell pepper chopped
- 3 cloves garlic minced
- 1 ½ tablespoons chili powder
- 2 teaspoons Kosher salt
- 1 ½ teaspoons ground cumin
- 1 teaspoon ground black pepper
- ½ teaspoon cayenne pepper
- ¼ teaspoon ground coriander
- ¼ teaspoon ground cinnamon
- 2 bay leaves
- 1 28 ounce diced tomatoes
- 4-6 cups beef broth
- 1 can great northern beans rinsed and drained
- 1 can pinto beans rinsed and drained
- 1 can light red kidney beans rinsed and drained
- 1 can dark red kidney beans rinsed and drained
- 1 can black beans rinsed and drained
- 1 can Navy beans rinsed and drained
- Sour cream for garnish
- cheddar cheese shredded, for garnish
- green onions chopped, for garnish
Instructions
- Brown meats in a large pot or Dutch oven. Drain if desired.
- Add onion, bell pepper, garlic, chili powder, salt, cumin, black pepper, cayenne pepper, coriander, and cinnamon and cook over medium-high heat until vegetables are starting to soften, about 6-8 minutes.
- Add bay leaves, tomatoes and beef stock. Bring to a boil then reduce to a simmer. Cover partially and simmer for 3 to 4 hours or until beef is tender, stirring occasionally.
- Add beans, stir, and cook another 30 minutes.
- Serve garnished with sour cream, cheddar, and chopped green onions.
Notes
Nutrition
Nutritional values are approximate.