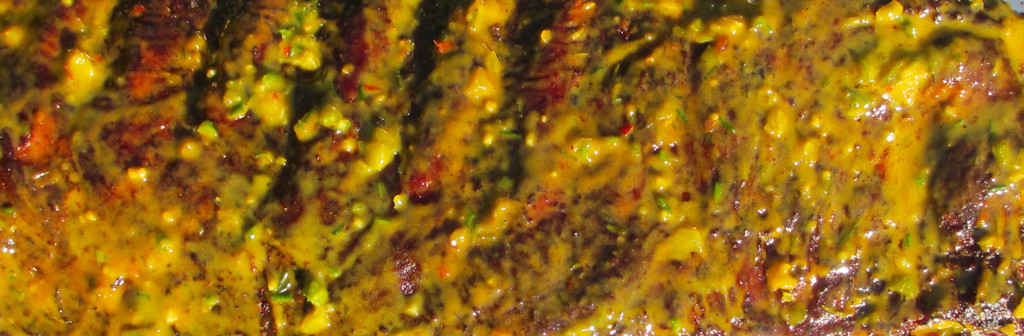
Maybe it’s because I don’t get out enough, but I’d never heard of putting Giardiniera on a meatball sandwich before. Whomever came up with the idea should be knighted (if we knighted folks in the US). Add a bit of roasted red bell pepper and you have a super-easy-to-make incredibly yummy sandwich. Perfect any time, but also great because I almost always have the ingredients to make Giardiniera meatball sandwiches on hand.

You Can Make Them Hot, Too!
I used mild Giardiniera when making these meatball sandwiches, but hot would be fantastic too. Just chop it up a bit before spooning it on top.
I did ‘cheat’ and use frozen meatballs. If I’d had more time to throw dinner together, I would’ve made a batch of my Italian meatballs. I try to keep some on hand at all times, but truth is, they are just so good that there’s just never any leftovers.

For a different twist, substitute my okra giardiniera for the ‘normal’ stuff.

Giardiniera Meatball Sandwich
Equipment
Ingredients
- 1 loaf French bread sliced horizontally
- 12 meatballs cooked, warmed (if using frozen store-bought, bake per package instructions first)
- 4 slices Provolone cheese
- Giardiniera chopped
- 1 roasted red bell pepper sliced thin
Instructions
- Hollow out as much of the bread as you can to make room for the meatballs and toppings.
- Place on a sheet pan under the broiler for a minute or two until the bread starts to get crunchy.
- Add cheese and meatballs.
- Place under the broiler for another minute or two until the cheese melts.
- Add Giardiniera and bell pepper strips.
- Slice into two 6″ sandwiches and serve.
Notes
Nutrition
Nutritional values are approximate.