Jalapeno Ranch Dressing

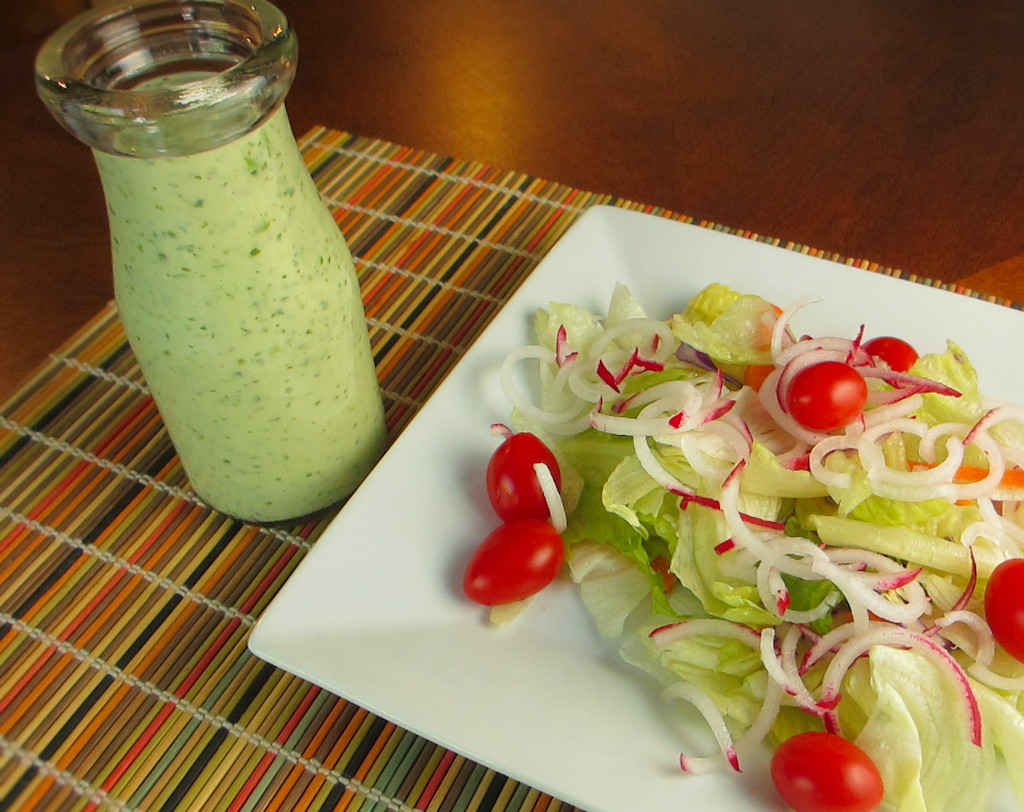
I could’ve gone the smooth, creamy, mellow Ranch dressing route. But no, I wanted a salad dressing that would sneak up on me and then hit me with a little kick. This jalapeno Ranch dressing has that bit of kick, but also a great pepper flavor. I’m not a big fan of jalapeno-infused flavors where I can’t still taste the fact that the jalapeno is a pepper. This jalapeno Ranch dressing has that and more.

Jalapeno Ranch Dressing

Ranch Elevated

The dressing thickens a bit as it sits. If it gets too thick for your liking just add a bit more buttermilk, stir, and serve. Don’t add too much at a time. You can add more, but you can’t take it out once it’s in there!

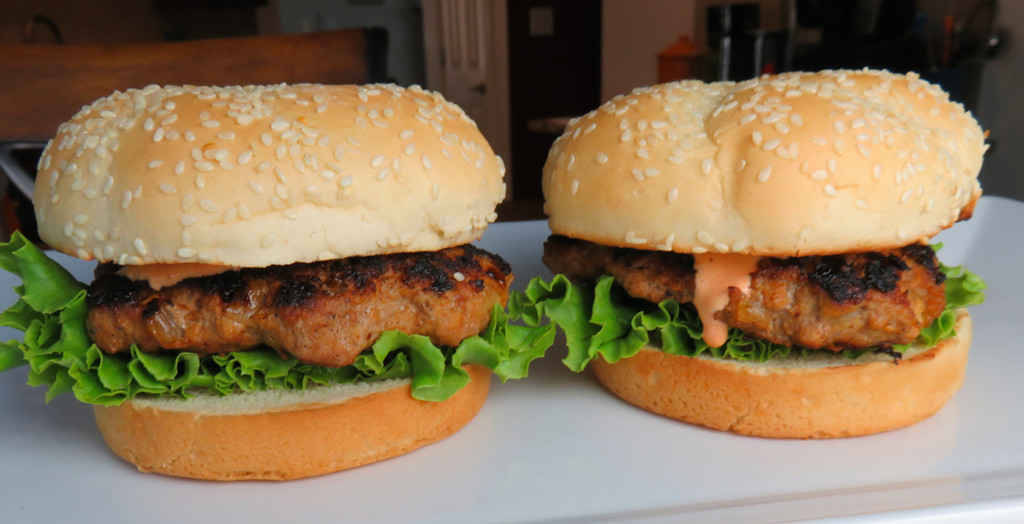
This dressing is also great as a dip for vegetables or chips. Use less buttermilk to make a thick, spicy dressing for hamburgers, wraps, or sandwiches.

Check out my new site, Dress My Salad, for more great salad dressing ideas!

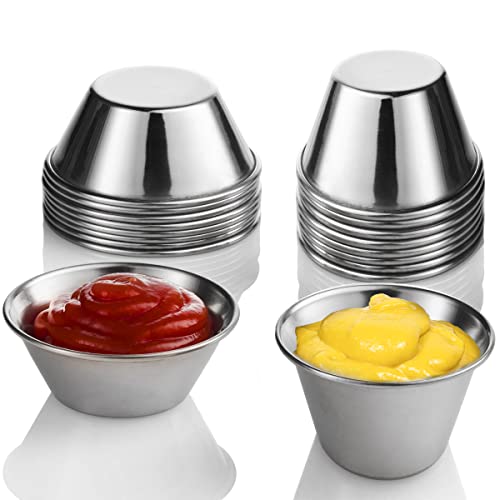
These little sauce dipping cups are great for serving salad dressings. They keep me from over-dressing my salads, which is something I’m prone to do since I’m a dressing-aholic. They’re easy to clean up, too. And they’re also great for dipping nuggets, tenders or even chicken wings.

For a little less kick, try my avocado ranch dressing.

Jalapeno Ranch Dressing
Print Pin
4 from 1 vote

Jalapeno Ranch Dressing

This jalapeno Ranch dressing has that bit of kick, but also a great pepper flavor. I’m not a big fan of jalapeno-infused flavors where I can’t still taste the fact that the jalapeno is a pepper. This jalapeno Ranch dressing has that and more.
Course Salad Dressing
Cuisine American
Keyword homemade salad dressing
Prep Time 5 minutes
Total Time 5 minutes
Servings 1 cup
Calories 882kcal
Author Mike

Ingredients

Instructions

  • Place all ingredients into a food processor or blender and process until smooth.

Notes

Stir again before serving.

Nutrition

Calories: 882kcal | Carbohydrates: 19g | Protein: 7g | Fat: 88g | Saturated Fat: 15g | Trans Fat: 1g | Cholesterol: 60mg | Sodium: 846mg | Potassium: 433mg | Fiber: 4g | Sugar: 11g | Vitamin A: 1116IU | Vitamin C: 60mg | Calcium: 203mg | Iron: 1mg

Nutritional values are approximate.

Kraut-Stuffed Sausages

For years and years I have grilled my sausages after they spent some quality time in a ‘bath’ of beer and peppers and onions. And they are great, I admit it. But these kraut-stuffed sausages, well, they’re really beyond great. Tender, moist, and just packed with flavor. Such a wonderful texture in every single bite. I couldn’t stop eating them. Topped with plenty of mustard, these are now my only go-to grilled sausages.

Kraut-Stuffed Sausages

Sausages Are Important

You have to use the right kind of sausages to make these kraut-stuffed sausages. Get the fresh sausages, with casings. You need to be able to poke your finger inside to make a cavity for the fantastic (but easy) filling. If you don’t have casings to help keep the sausage together you might end up bursting them. Then what will you do? Cry. I would. And unless your fingers are really, really long, don’t get really, really long sausages!

I suggested to my wife that we try adding other things to the stuffing, such as chopped roasted jalapenos, or poblanos or the like and she gave me a dirty look. The “don’t mess with this” look. So I won’t.

Also try my bratwurst bath. Perfect for getting brats ‘happy’ before grilling them.

Kraut-Stuffed Sausages
Print Pin
5 from 1 vote

Kraut-Stuffed Sausages

These kraut-stuffed sausages, well, they’re really beyond great. Tender, moist, and just packed with flavor. Such a wonderful texture in every single bite. I couldn’t stop eating them.
Course Main
Cuisine American
Keyword hot dogs
Prep Time 10 minutes
Cook Time 1 hour
Total Time 1 hour 10 minutes
Servings 5 servings
Calories 482kcal

Equipment

Ingredients

  • 1 pound fresh sausages Italian, Kielbasa, whichever you prefer, just make sure you get the sausages in casings. I used Johnsonville Italian sausages which come 5 to a pound
  • 4 tablespoons unsalted butter
  • 1 large sweet onion cut thin
  • 1 pound kraut plus some of the juice
  • 1 cup shredded cheese Monterey Jack, mozzarella, any good white melting cheese will work
  • 5 sausage buns
  • prepared mustard

Instructions

  • Using your fingers, make a hole down the center of each sausage, creating a cavity that runs the full length of the sausages.
  • Melt the butter in a large saucepan over medium-high heat.
  • Add the onion, kraut, and a bit of the juice from the kraut jar.
  • Stir and let cook until the onions are softened.
  • Remove from heat and let cool completely.
  • Stir in the cheese. It won’t melt but it will help bind the kraut mixture together.
  • Fire up your grill for indirect cooking.
  • Using your hands, grab some of the kraut mixture and force it into the cavity in the sausages. Just keep packing it in. Don’t worry about being all pretty and what-not, just get it in there. But don’t shove so hard that you have a blowout!
  • Place sausages over indirect heat on the grill and cook for 30 minutes until nice and dark and done.
  • Toast the buns.
  • Add cooked sausages to the buns and top with plenty of mustard.

Notes

No worries about having your toppings fall off with these sausages!

Nutrition

Calories: 482kcal | Carbohydrates: 11g | Protein: 19g | Fat: 40g | Saturated Fat: 18g | Trans Fat: 1g | Cholesterol: 105mg | Sodium: 1541mg | Potassium: 468mg | Fiber: 3g | Sugar: 5g | Vitamin A: 448IU | Vitamin C: 17mg | Calcium: 167mg | Iron: 3mg

Nutritional values are approximate.

Smoked Sweet Potatoes with Chipotle Sour Cream

I love smoked potatoes. Smoking them adds such a fantastic (but not overpowering) smokiness. And it’s cooler than just baking them in the oven. And since I also love sweet potatoes, why not just combine two of my favorite things? Smoked sweet potatoes are sweet (duh) and creamy, and oh so fluffy and tender. To counter that sweetness just a little bit I top them with a nice (also smoky) sour cream and chipotle mixture. And I add a little bit of bacon for some more smokiness and a bit of crunch. Forget Russet potatoes, smoked sweet potatoes with chipotle sour cream are better! Serve these next time along your grilled steak and get happy!

Smoked Sweet Potatoes with Chipotle Sour Cream

Use An Oven. In A Pinch.

Don’t have a smoker? You can use the technique for my perfect baked potato on sweet potatoes instead, using an oven. You won’t get all that smokiness of course, but the chipotle sour cream and bacon will help make up for that. They’ll be sorta smoked sweet potatoes with chipotle sour cream. Still creamy delicious and super tasty!

Potato Nails? What?

Potato nails help ensure that your sweet potatoes (or regular ole baked potatoes, too!) get cooked nice and evenly. And they look cool. Just remember to remove the nails before serving!

Also try my spiral sweet potatoes with pecan butter.

Smoked Sweet Potatoes with Chipotle Sour Cream
Print Pin
5 from 1 vote

Smoked Sweet Potatoes with Chipotle Sour Cream

Smoked sweet potatoes are sweet (duh) and creamy, and oh so tender. To counter that sweetness just a bit I top them with a nice (also smoky) sour cream and chipotle mixture. 
Course Side
Cuisine American
Keyword smoked, sweet potatoes
Prep Time 10 minutes
Cook Time 40 minutes
Total Time 50 minutes
Servings 4
Calories 261kcal
Author Mike

Equipment

Ingredients

Instructions

  • Fire up your smoker for cooking at 225 F.
  • Brush the potatoes with the oil and place on the smoker.
  • Smoke for 2-3 hours or until soft but not mushy.
  • Remove from the smoker and let cool slightly before slicing open. Chop the insides lightly.
  • Sprinkle the potatoes with the crumbled bacon.
  • Combine the sour cream and chipotles with some of the adobo sauce and spoon over the potatoes.
  • Garnish with the onions and serve.

Notes

The sour cream mix is great on regular baked potatoes, too!

Nutrition

Calories: 261kcal | Carbohydrates: 27g | Protein: 5g | Fat: 15g | Saturated Fat: 6g | Trans Fat: 1g | Cholesterol: 29mg | Sodium: 454mg | Potassium: 499mg | Fiber: 5g | Sugar: 7g | Vitamin A: 17096IU | Vitamin C: 5mg | Calcium: 76mg | Iron: 1mg

Nutritional values are approximate.

Easy Sausage Stromboli

This easy sausage stromboli is called easy for a reason. We’d just gotten in from a long day and we were hungry. And we were too beat to throw together a huge meal. But that doesn’t mean we’d settle for lame. Just easy and fantastic. Yummy Italian sausage (spicy sausage makes it even better), pizza sauce and lots of ooey-gooey cheese all in crispy golden brown dough. Nothing fancy, nothing fru-fru, but definitely good and filling.

Easy Sausage Stromboli

A Few Changes

Don’t be afraid to add a little chopped bell pepper to the onion while it is cooking up. Don’t get it too soft though, you’ll still want a bit of crunch to it. If you have extra pizza sauce on hand warm it up and serve it on the side for dipping your easy sausage stromboli.

I highly recommend that you shred or grate your own cheese at home. Don’t buy the pre-shredded or pre-grated stuff. It has stuff added to it to keep it from sticking together. That ‘stuff’ affects how the cheese melts. Shred it yourself and use the good stuff.

Also try my other stromboli recipe and a stromboli sandwich (yum!).

Easy Sausage Stromboli
Print Pin
5 from 2 votes

Easy Sausage Stromboli

This easy sausage stromboli is called easy for a reason. We’d just gotten in from a long day and we were hungry and too beat to throw together a huge meal. But that doesn’t mean huge and lame. Just easy and fantastic. 
Course Main
Cuisine American
Keyword stromboli
Prep Time 15 minutes
Cook Time 25 minutes
Total Time 40 minutes
Servings 4
Calories 908kcal
Author Mike

Ingredients

  • Olive oil
  • 1 medium sweet onion chopped
  • 3 cloves garlic minced
  • 1 pound spicy Italian sausage
  • 1 pound pizza dough I used a tube of Pillsbury pizza crust
  • 2 cups Mozzarella cheese shredded, divided
  • ½ cup pizza sauce plus more for dipping if desired
  • 1 tablespoon grated Parmesan cheese

For the topping

Instructions

  • Preheat oven to 425 F.
  • Saute the onion in a splash of oil in a large skillet over medium-high heat.
  • Add the garlic and cook for 1 minute.
  • Crumble in the sausage and cook until done.
  • Remove to a paper towel-lined plate to drain.
  • Flatten the dough into a rectangular shape in a 10″ x 13″ low-rimmed baking sheet lined with parchment paper or silpat.
  • Sprinkle the dough with half of the mozzarella.
  • Add sausage and drizzle with the sauce.
  • Add remaining mozzarella.
  • Roll the dough up working from the longest edge.
  • Pinch the seam and edges, and place seam-side down onto the mat.
  • Combine the topping ingredients and brush over the top of the dough.
  • Sprinkle with the Parmesan cheese and bake for 18 minutes.
  • Let rest 5-10 minutes before slicing.
  • Serve with warmed pizza sauce for dipping if desired.

For the topping

    Notes

    You can add any ingredients you want inside your stromboli, but stay away from anything that is wet. Wet ingredients should be patted dry with a paper towel first.

    Nutrition

    Calories: 908kcal | Carbohydrates: 65g | Protein: 39g | Fat: 55g | Saturated Fat: 23g | Trans Fat: 1g | Cholesterol: 139mg | Sodium: 2332mg | Potassium: 545mg | Fiber: 3g | Sugar: 13g | Vitamin A: 615IU | Vitamin C: 9mg | Calcium: 347mg | Iron: 5mg

    Nutritional values are approximate.

    Stubb’s Chicken Rub Chicken on the Char-Broil Big Easy

    Visit my other site, For The Wing, for all things chicken-wing!

    I use a lot of products from Stubb’s, from sauces to marinades. I’ve been very happy with them all. That’s why I decided to use some of Stubb’s chicken rub on a whole chicken and drop it into my (awesome) cooker, the Char-Broil Big Easy.

    The Big Easy cooked the bird in 15 minutes per pound. The Stubb’s seasoning added a little sweetness. It also added a mild mustard flavor. I’ve rubbed beef in mustard before but never added mustard flavor to chicken. It was fantastic!

    Stubbs Chicken Rub Chicken on the Char-Broil Big Easy

    Try It As Beer Can Chicken

    I did make my chicken a beer can chicken by adding a bit more Stubb’s chicken rub to a can of beer that I then inserted into the chicken. You can skip that part if you wish, or use an empty soda can with chicken broth added. There’s no wrong with Stubb’s chicken rub chicken on the Char-Broil Big Easy because the oil-less fryer cooks chicken right every time. The skin always comes out crispy and dangerously delicious, to say nothing of how tender and moist the meat is, dark or white!

    Stubb’s also makes a chicken and citrus marinade that is also great on chicken cooked in the Big Easy.

    It’s always a good idea to keep a few spare grease trays on hand for your Char-Broil Big Easy.

    Love your Big Easy as much I love mine? Check out my Big Easy Add-Ons page and my free Big Easy eCookbook!

    Stubb's Chicken Rub Chicken on the Char-Broil Big Easy
    Print Pin
    5 from 1 vote

    Stubb’s Chicken Rub Chicken on the Char-Broil Big Easy

    The Stubb’s seasoning adds a little sweetness. It also adds a mild mustard flavor. I’ve rubbed beef in mustard before but never added mustard flavor to chicken. It was fantastic!
    Course Main
    Cuisine American
    Keyword Big Easy, Char-Broil, chicken
    Prep Time 5 minutes
    Cook Time 1 hour 45 minutes
    Total Time 1 hour 50 minutes
    Servings 1 chicken
    Calories 1784kcal
    Author Mike

    Ingredients

    Instructions

    • Fire up your Big Easy.
    • Rinse the chicken and pat dry.
    • Lightly brush the chicken with olive oil.
    • Generously sprinkle the chicken with the seasoning.
    • If opting to make beer can chicken open the can and drain (er… drink) about 1/4th of the beer. Add a heaping teaspoon of seasoning to the beer. Insert beer can into the bottom of the chicken.
    • Place chicken into the basket and insert into the Big Easy.
    • Cook for 15 minutes per pound or until the chicken has hit 165 F as measured in several locations.
    • Let rest 15 minutes before removing the beer can (if using) and carving.

    Notes

    I use the Char-Broil folding chicken roaster to hold the beer or soda cans securely. If the beer you’re using is only available in a bottle, just empty the contents into an empty beer or soda can.

    Nutrition

    Calories: 1784kcal | Carbohydrates: 12g | Protein: 143g | Fat: 115g | Saturated Fat: 33g | Polyunsaturated Fat: 25g | Monounsaturated Fat: 48g | Trans Fat: 1g | Cholesterol: 571mg | Sodium: 547mg | Potassium: 1532mg | Vitamin A: 1066IU | Vitamin C: 12mg | Calcium: 97mg | Iron: 7mg

    Nutritional values are approximate.

    Buffalo Wing Burgers

    These Buffalo wing burgers are further proof that chicken or turkey burgers do not have to be boring or bland. These are definitely our go-to no-beef burgers. A little spiciness, tender patties, and oh, my favorite, Buffalo wing flavor. Topped with a dressing that is both sweet and spicy. Perfect!

    Buffalo Wing Burgers

    My Favorite Turkey Burgers

    I’ve already made these Buffalo wing burgers several times. We absolutely love them. So far, I have only made them with ground turkey, since we prefer the texture of ground turkey over chicken. Well, that and ground turkey has been on sale lately!

    I like to use a burger press when I make burgers. It, in combination with some patty papers, enables me to crank out a whole bunch of equally-sized burger patties in no time at all with little cleanup.

    Also try my campfire burgers or my crazy-great west coast burgers.

    Buffalo Wing Burgers
    Print Pin
    5 from 1 vote

    Buffalo Wing Burgers

    These Buffalo wing burgers are further proof that chicken or turkey burgers do not have to be boring or bland.
    Course Main
    Cuisine American
    Keyword Buffalo, burgers
    Prep Time 5 minutes
    Cook Time 30 minutes
    Total Time 35 minutes
    Servings 4 servings
    Calories 530kcal

    Ingredients

    For the burgers

    For the mayonnaise

    Instructions

    For the burgers

    • Melt butter with oil in a medium skillet over medium heat.
    • Add the onion and salt and cook until onion starts to turn golden.
    • Add the garlic, stir and cook another 2 minutes.
    • Add the pepper, hot sauce, thyme, and red pepper flake. Stir then remove to a large bowl to cool for at least 5 minutes.
    • Add the ground meat and combine well. Form into 4 equally-sized patties.
    • Fire up your grill. Oil your grates so that the patties do not stick.
    • Grill patties until they reach 165 F, approximately 5 minutes per side. Be careful flipping the patties if they begin to crumble.
    • Toast buns if desired.
    • Slather buns with the mayonnaise. Add lettuce (if using), the grilled patties, tomato (if using) and the top bun and serve.

    For the mayonnaise

    • Combine all ingredients.

    Notes

    Drizzle with Ranch or blue cheese for more Buffalo wing-inspired greatness!

    Nutrition

    Calories: 530kcal | Carbohydrates: 29g | Protein: 25g | Fat: 35g | Saturated Fat: 8g | Trans Fat: 1g | Cholesterol: 117mg | Sodium: 982mg | Potassium: 730mg | Fiber: 2g | Sugar: 8g | Vitamin A: 300IU | Vitamin C: 5mg | Calcium: 102mg | Iron: 3mg

    Nutritional values are approximate.

    Sun-Dried Tomatoes on the Nesco Snackmaster Pro

    Wow! I was so happy with sun-dried tomatoes on the Nesco Snackmaster Pro. The process was about as easy as you can possibly get. You end up with pliable but not leathery tomatoes that can be used anywhere jarred sun-dried tomatoes are called for. Like sun-dried tomato hummus, which I made immediately after the tomatoes were ready. I used Roma tomatoes because they are cheap and don’t require me to remove the seeds. If you use bigger tomatoes you’ll have to seed them after removing the skins.

    Sun-Dried Tomatoes on the Nesco Snackmaster Pro

    A Few Notes

    These sun-dried tomatoes on the Nesco Snackmaster Pro aren’t packed in oil like those in jars. And I opted to not season them at all, though you can surely add basil or thyme or whatever flavors you want. It takes a lot of tomatoes to make a batch of sun-dried tomatoes. I made a big batch, and froze the leftovers in vacuum-sealed bags in the freezer.

    I like to load up my dehydrator. To do that I picked up a handful of extra trays. They really add a whole lot more drying space! Since I have to rotate my trays, I write a number on each one on a piece of blue painter’s tape so I can keep track of them.

    Also try my mushroom jerky using the Nesco Snackmaster Pro.

    Sun-Dried Tomatoes on the Nesco Snackmaster Pro
    Print Pin
    5 from 1 vote

    Sun-Dried Tomatoes on the Nesco Snackmaster Pro

    Wow! I was so happy with sun-dried tomatoes on the Nesco Snackmaster Pro. The process was about as easy as you can possibly get. 
    Course Side
    Cuisine American
    Keyword dehydrator, nesco snackmaster pro, sun-dried tomato
    Prep Time 15 minutes
    Cook Time 12 hours
    Total Time 12 hours 15 minutes
    Servings 2 cups
    Calories 204kcal

    Ingredients

    • 5 pounds Roma tomatoes ripe

    Instructions

    • Fill a large bowl with ice and add water to create an ice bath.
    • Bring a large pot of water to a boil.
    • Working in small batches (4-5 tomatoes at a time), add tomatoes to boiling water and boil for 45 second to 1 minute at the most. If your tomatoes are small, 45 seconds should be enough. You aren’t trying to cook the tomatoes, only loosening the skin.
    • Remove tomatoes to ice bath and let cool for 5 minutes before removing and peeling the skin. Most of my tomatoes peeled easily, but for some I had to use (gently) a vegetable peeler.
    • Cut the tomatoes into quarters lengthwise and remove and tough green parts along with any stems.
    • Add tomatoes to the dehydrator. I used screens, but you don’t need them.
    • Turn dehydrator to 145 F and dry until the tomatoes are leathery, but not crispy. There should be no visible signs of water and no water should escape when you squeeze the tomatoes. Rotate the trays every hour to ensure consistent drying. Larger pieces may require longer drying times.
    • Let tomatoes cool before using, or freeze and vacuum pack for later use.

    Notes

    Make sure your tomatoes are nice and ripe. All of them.

    Nutrition

    Calories: 204kcal | Carbohydrates: 44g | Protein: 10g | Fat: 2g | Saturated Fat: 1g | Sodium: 57mg | Potassium: 2688mg | Fiber: 14g | Sugar: 30g | Vitamin A: 9446IU | Vitamin C: 155mg | Calcium: 113mg | Iron: 3mg

    Nutritional values are approximate.

    Black-Eyed Pea Salad

    This is it. My absolute favorite black-eyed pea salad. I could eat it all day. I could slurp up the dressing with a straw. And I could dream about it. And I have. It has everything I love in every (big) bite. A bit of heat. Hints of Creole mustard and red wine vinegar. Crunchy fresh vegetables. There’s nothing boring about this black-eyed pea salad.

    Black-Eyed Pea Salad

    Even Better The Next Day

    As with all great pea or bean salads, this one gets even better the next day. And the day after that. So make a double batch because you’ll want to have this salad on hand as long as you possibly can.

    If you weren’t raised on black-eyed peas or love them as much as I do, you could substitute kidney beans instead and you’ll be just as happy as I was using black-eyed peas.

    Also try my broccoli cauliflower salad.

    Black-Eyed Pea Salad
    Print Pin
    5 from 1 vote

    Black-Eyed Pea Salad

    This is it. My absolute favorite black-eyed pea salad. I could eat it all day. I could slurp up the dressing with a straw. And I could dream about it. 
    Course Salad
    Cuisine American
    Keyword peas, salad
    Prep Time 15 minutes
    Cook Time 1 hour
    Total Time 1 hour 15 minutes
    Servings 6 servings
    Calories 111kcal

    Ingredients

    For the salad

    • 1 10 ounce black-eyed peas rinsed, drained
    • ½ red bell pepper finely chopped
    • ½ green bell pepper finely chopped
    • ½ medium red onion chopped
    • 1 clove garlic minced
    • ¾ cup parsley chopped
    • 1 medium jalapeno seeded, minced

    For the dressing

    Instructions

    For the salad

    • Place all ingredients in a large bowl.
    • Add the dressing ingredients. Toss to coat.
    • Refrigerate for 1 hour before serving. Toss again before serving.

    For the dressing

    • Whisk together all ingredients until smooth.

    Notes

    Leave out the jalapeno if you don’t want a slight bit of spiciness.

    Nutrition

    Calories: 111kcal | Carbohydrates: 4g | Protein: 1g | Fat: 11g | Saturated Fat: 1g | Trans Fat: 1g | Sodium: 732mg | Potassium: 123mg | Fiber: 1g | Sugar: 1g | Vitamin A: 1033IU | Vitamin C: 34mg | Calcium: 25mg | Iron: 1mg

    Nutritional values are approximate.

    Cajun Shrimp-Stuffed Poblano Peppers

    Wow, talk about amazingly good. The heck with the main dish, just load me up on some of these Cajun shrimp-stuffed poblano peppers. A slight kick of heat, perfect shrimp and creamy melted cheese. What’s not to love?

    Cajun Shrimp-Stuffed Poblano Peppers

    Substitute Bell Peppers

    You could use green bell peppers instead, if you want, in these Cajun Shrimp-Stuffed Poblano Peppers. I love poblanos because they are a little spicier than a bell pepper without just completely drowning out a dish in heat.

    Kick ‘Em Up

    For extra kick, substitute shredded pepper jack cheese for the feta and mozzarella and add a few diced roasted jalapenos into the shrimp mixture. That’ll definitely liven up the party.

    I highly recommend that you shred or grate your own cheese at home. Don’t buy the pre-shredded or pre-grated stuff. It has stuff added to it to keep it from sticking together. That ‘stuff’ affects how the cheese melts. Shred it yourself and use the good stuff.

    Also try my Cajun stuffed chicken breast and my bacon cheese-stuffed peppers!

    Cajun Shrimp-Stuffed Poblano Peppers
    Print Pin
    5 from 1 vote

    Cajun Shrimp-Stuffed Poblano Peppers

    Wow, talk about amazingly good. The heck with the main dish, just load me up on some of these Cajun shrimp-stuffed poblano peppers. A slight kick of heat, perfect shrimp and creamy melted cheese. 
    Course Side
    Cuisine American
    Keyword peppers, shrimp, stuffed
    Prep Time 10 minutes
    Cook Time 45 minutes
    Total Time 55 minutes
    Servings 4 servings
    Calories 127kcal

    Ingredients

    • 2 large poblano peppers
    • ½ pound shrimp raw or pre-cooked, 24-30 count, peeled, deveined
    • 1 teaspoon olive oil if you are using raw shrimp
    • 1 tablespoon Cajun seasoning
    • ¼ cup feta cheese crumbled
    • ¼ cup Mozzarella cheese shredded
    • 2 teaspoons dried basil crumbled
    • 1 tablespoon hot sauce
    • cilantro chopped, for garnish

    Instructions

    • Note: You can use pre-cooked shrimp if you desire. Just toss the shrimp with the Cajun seasoning and do not cook.
    • Preheat oven to 375 F.
    • Cut the peppers in half lengthwise. Remove any stems or seeds.
    • If using cooked shrimp, toss the shrimp with the Cajun seasoning in a large bowl.
    • If using raw shrimp, heat the oil over medium-high heat in a skillet. Add the shrimp, sprinkle with the seasoning, and cook, turning, until done, about 5 minutes. Remove from heat.
    • Add the cheeses, basil and hot sauce to the shrimp Stir.
    • Transfer shrimp mixture to the poblanos and place on a baking sheet.
    • Place in oven and bake 30 minutes or until the cheese is melted and the peppers are softened.
    • Serve garnished with chopped cilantro.

    Notes

    Substitute jalapenos for the poblanos for an appetizer-sized kicked-up version!

    Nutrition

    Calories: 127kcal | Carbohydrates: 6g | Protein: 16g | Fat: 5g | Saturated Fat: 3g | Cholesterol: 157mg | Sodium: 698mg | Potassium: 258mg | Fiber: 2g | Sugar: 3g | Vitamin A: 1266IU | Vitamin C: 71mg | Calcium: 188mg | Iron: 2mg

    Nutritional values are approximate.

    Stromboli Sandwich

    The meat sauce in this stromboli sandwich is absolutely fantastic. It will be my go-to meat sauce from this day forward. I’ll use it for everything from lasagna, to spaghetti, and of course, more stromboli sandwiches. Nice and thick, but not too thick, it is packed with Italian-inspired flavors. Man, oh man, am I ever having flashbacks to the last stromboli I made with it. I just could not get enough! Each and every bite was oooooooh so very good!

    Stromboli Sandwich

    The Perfect Sauce

    Next time I make a batch of the sauce, I’ll probably quadruple it and store the leftovers in the freezer. A quick defrost, some cooked pasta, and I have a great main dish done in no time. You can also make this meatless and you’ll have the perfect sausage for grilled sausage sandwiches or serve it up with warmed meatballs over pasta or on French bread for a meatball sandwich.

    I highly recommend that you shred or grate your own cheese at home. Don’t buy the pre-shredded or pre-grated stuff. It has stuff added to it to keep it from sticking together. That ‘stuff’ affects how the cheese melts. Shred it yourself and use the good stuff.

    Also try my stromboli and easy sausage stromboli recipes.

    Stromboli Sandwich
    Print Pin
    5 from 1 vote

    Stromboli Sandwich

    The meat sauce in this stromboli sandwich is absolutely fantastic. It will be my go-to meat sauce from this day forward, for everything from lasagna, to spaghetti, and of course, more stromboli sandwiches.
    Course Main
    Cuisine American
    Keyword stromboli
    Prep Time 10 minutes
    Cook Time 30 minutes
    Total Time 40 minutes
    Servings 4 servings
    Calories 351kcal

    Equipment

    Ingredients

    Instructions

    • Preheat oven to 375 F.
    • In a large skillet, crumble the beef and brown along with the onion. Drain any excess fat.
    • Add the mushrooms and bell pepper and cook for 3-5 minutes or until they are just starting to get soft.
    • Add the tomato sauce, tomato soup, garlic powder, dried oregano, chili powder, tomato paste and black pepper.
    • Stir and reduce heat to a simmer and simmer for at least 10 minutes, the longer the more the flavors will meld. If the sauce gets too thick add a bit of water.
    • Cut bread in half lengthwise and scoop out as much of the bread as you can.
    • Transfer bread to a sheet of aluminum foil.
    • Fill insides with the meat mixture.
    • Top with cheese and cover in foil.
    • Place on a baking sheet and bake for 10 minutes until the cheese is melted.

    Notes

    Serve with lots of napkins.

    Nutrition

    Calories: 351kcal | Carbohydrates: 13g | Protein: 23g | Fat: 23g | Saturated Fat: 9g | Trans Fat: 1g | Cholesterol: 81mg | Sodium: 257mg | Potassium: 845mg | Fiber: 3g | Sugar: 6g | Vitamin A: 871IU | Vitamin C: 32mg | Calcium: 60mg | Iron: 4mg

    Nutritional values are approximate.