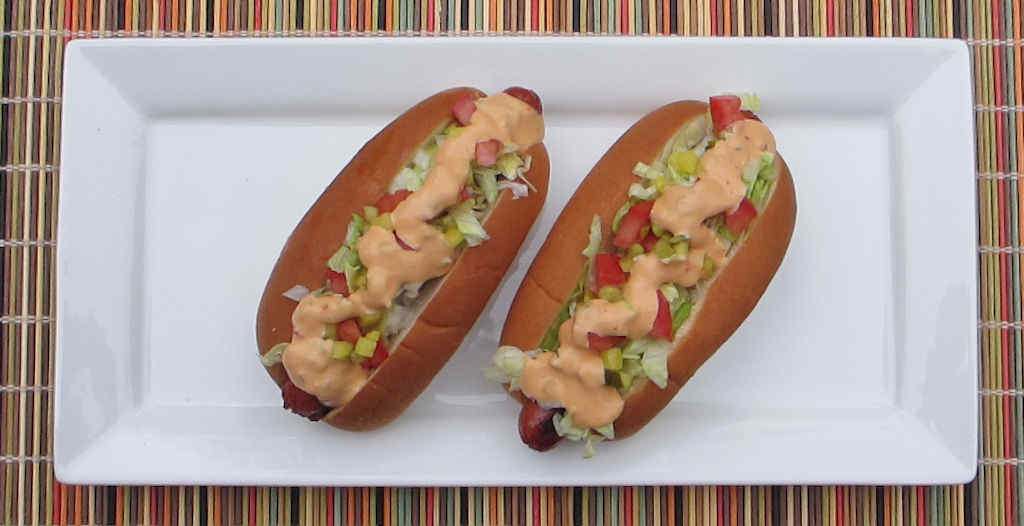
These Islander hot dogs are another example of a great dog that doesn’t take a lot of work to put together. Think hot dog. Think salad. Put them together. That’s it! My wife proclaimed these to be one of the best dogs I’ve ever made, even though they are definitely one of the easiest. There’s a great contrast between the grilled beefy dogs, crispy cold lettuce, tomato, and pickle, and tartness from the salad dressing.
Salad… On A Hot Dog?
You could add more of your favorite salad toppings to your Islander hot dogs. Like crumbled cooked bacon. Or chopped onions. Or even croutons! But I have to say that the Thousand Island salad dressing is what really makes these hot dogs different. And special. I really liked the flavor of the dressing on them. It’s something I’ll add more often that’s for sure.
These Islander hot dogs are another example of a great dog that doesn’t take a lot of work to put together. Think hot dog. Think salad. Put them together.
Visit my other site, For The Wing, for all things chicken-wing!
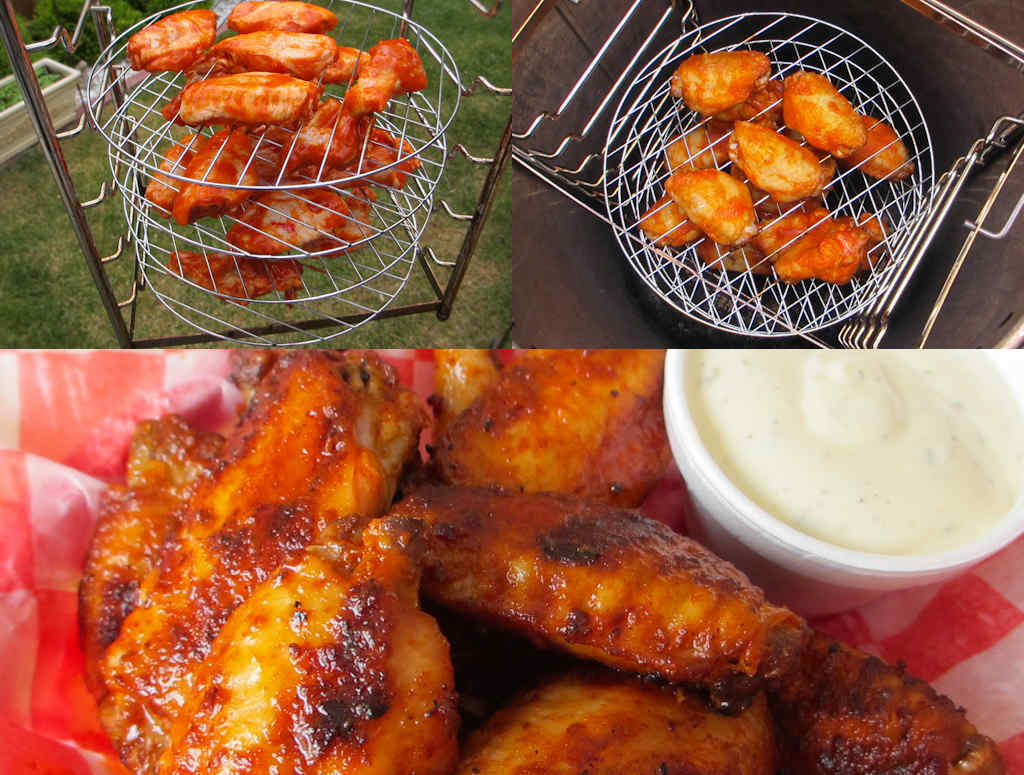
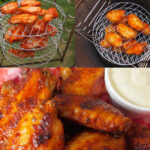
I have cooked a LOT of chicken wings on my Char-Broil Big Easy. It’s my favorite way to cook wings, other than deep frying. The Big Easy cooks wings so easily and quickly. I usually finish off the wings over a hot grill to get a bit of a crunch on the skin. Well, no more. Crispy wings on the Char-Broil Big Easy are fantastic!
Now I can get delicious, tender, moist, crunchy wings on the Big Easy without grilling them afterwards. These crispy wings are fantastic. I won’t do wings any other way again, and that includes deep frying. This is it, the way to do wings.
Dry Skin Means Crispy Skin
The key to getting the wings crispy is to dry out the skin so that takes on a good crunch under the high heat of the Big Easy. If you don’t have a Big Easy, you should get one. Until then, you can also make these crispy wings in the oven.
I used my Wingin’ator 3000 basket when I cooked up these wings so that I can cook more at once than I could with the basket that comes with the Big Easy. You can also pick up a bunk bed basket (see the link below) that doubles the amount of room you’ll have for cooking wings. You don’t want to crowd the wings into the cooker or they won’t cook evenly.
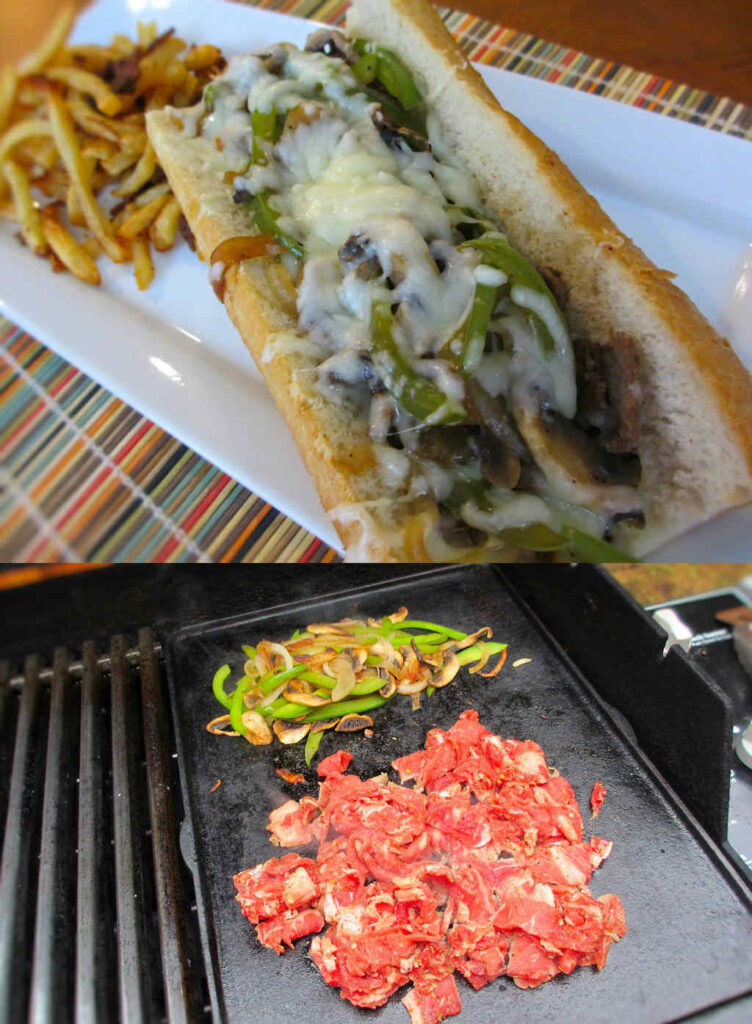
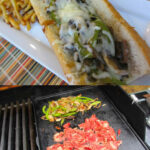
Wow, is about all I can say about this grilled Philly cheese-steak. Is it the same as or as great as the ones you can get at Pat’s or Geno’s in Philadelphia? Well, almost, and even better in its own way. And even better when done outside on the grill.
I fired up my ancient Weber Silver B gas grill with a griddle insert. If you don’t have a griddle insert for your grill get one. Weber makes them for just about every size grill they sell (and I have one for pretty much every grill I have). Check with your grill manufacturer. Chances are they have a griddle for your grill too. It’s worth every penny for everything from steak sandwiches to smash burgers to pancakes. Everything tastes better when cooked outdoors.
Thin Beef Means Great Results
The key to this great grilled Philly cheese-steak sandwich is the super-thinly sliced ribeye steak. So tender, meaty tasty. It was really perfect. If you want to up your cheese steak even more try my deluxe version, made with beef tenderloin.
Wow, is about all I can say about this grilled Philly cheese steak. Is it the same as or as great as the ones you can get at Pat’s or Geno’s in Philadelphia? Well, almost, and even better in its own way. And even better when done outside on the grill.
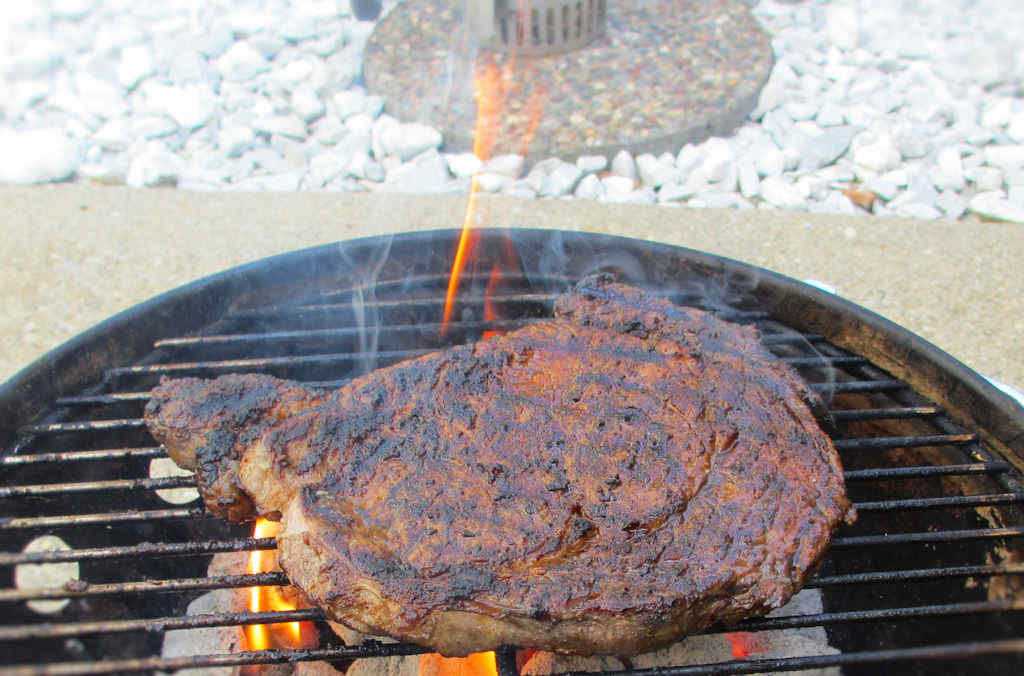
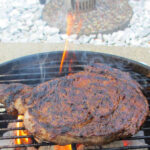
I was watching a new show on the Cooking Channel the other day about steaks. Who can pass up a show on cooking big ole hunks of beef over an open flame? The show, Steak Out with Kix Brooks, is hosted by Kix Brooks (duh!), of Brooks and Dunn country music fame. He travels around the country checking out popular steak joints. Steak after glorious steak. Like this one, from a very popular place, Chicago Cut Steakhouse. This is my take on the Chicago Cut’s grilled Cajun ribeye steak.
Perfect Steak With A Kick
To be fair, they use a massive, 24-ounce dry-aged steak that would put this one to shame, but mine turned out great too. The flavor is fantastic. A little heat (I used a spicy Cajun seasoning), and a whole lot of tender juicy meat.
One Nice Steak
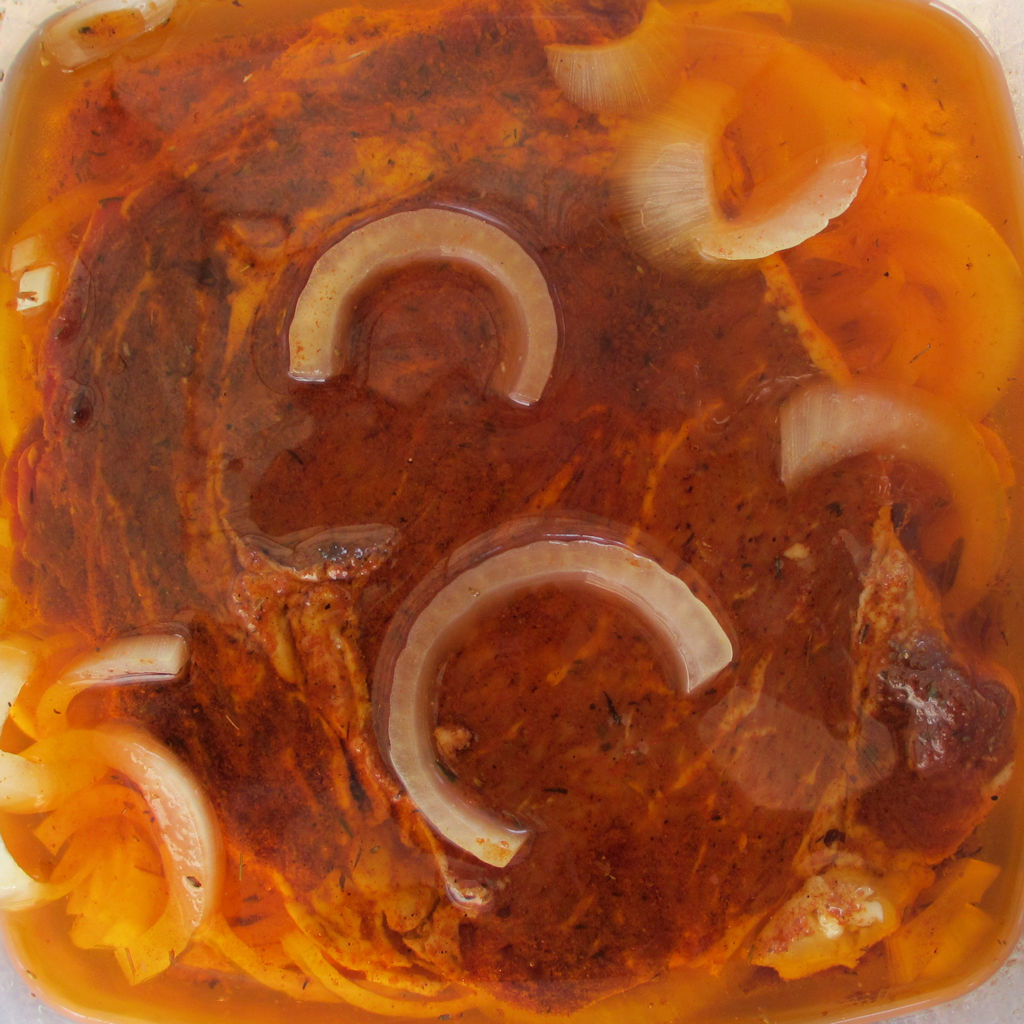
The grilled Cajun ribeye steak looked amazing as it got happy in the marinade. Great color, thanks to the paprika and cayenne in the spice mix. My homemade mix since lets me adjust the flavors (in my case, hotter) to my own tastes.
I fired up my little Weber Smokey Joe using my mini charcoal chimney. In about 45 minutes I was enjoying a tremendous steak with a great open-flame char and flavor.
The grilled Cajun ribeye steak looked amazing as it got happy in the marinade. Great color, thanks to the paprika and cayenne in the spice mix. My homemade mix since lets me adjust the flavors (in my case, hotter) to my own tastes.
Take a fork and stab the steak everywhere, all over, on both sides. Don't be shy. Stab it. A lot. Every inch of it.
Sprinkle the steak with the Cajun seasoning and stab some more. Get the seasoning down into every little hole.
Place the steak into a resealable container.
Add the onion and garlic, then add enough oil to just cover the steak.
Seal and let marinate for at least 24 hours.
Fire up your grill for direct cooking. You are going to cook the steak high and fast.
While you are waiting for the grill to warm up, place the steak onto a cookie rack to drain the oil. Flip it at least once to get any oil off that may pool on the top.
Place the steak over the hottest part of the grill and cook it quickly, turning once, to your desired temperature. Keep an eye on it as flare-ups will occur from any remaining oil.
Remove and let rest 5 minutes before serving.
Notes
I recommend using thicker cuts for this technique. High heat will overcook a thin steak very quickly.
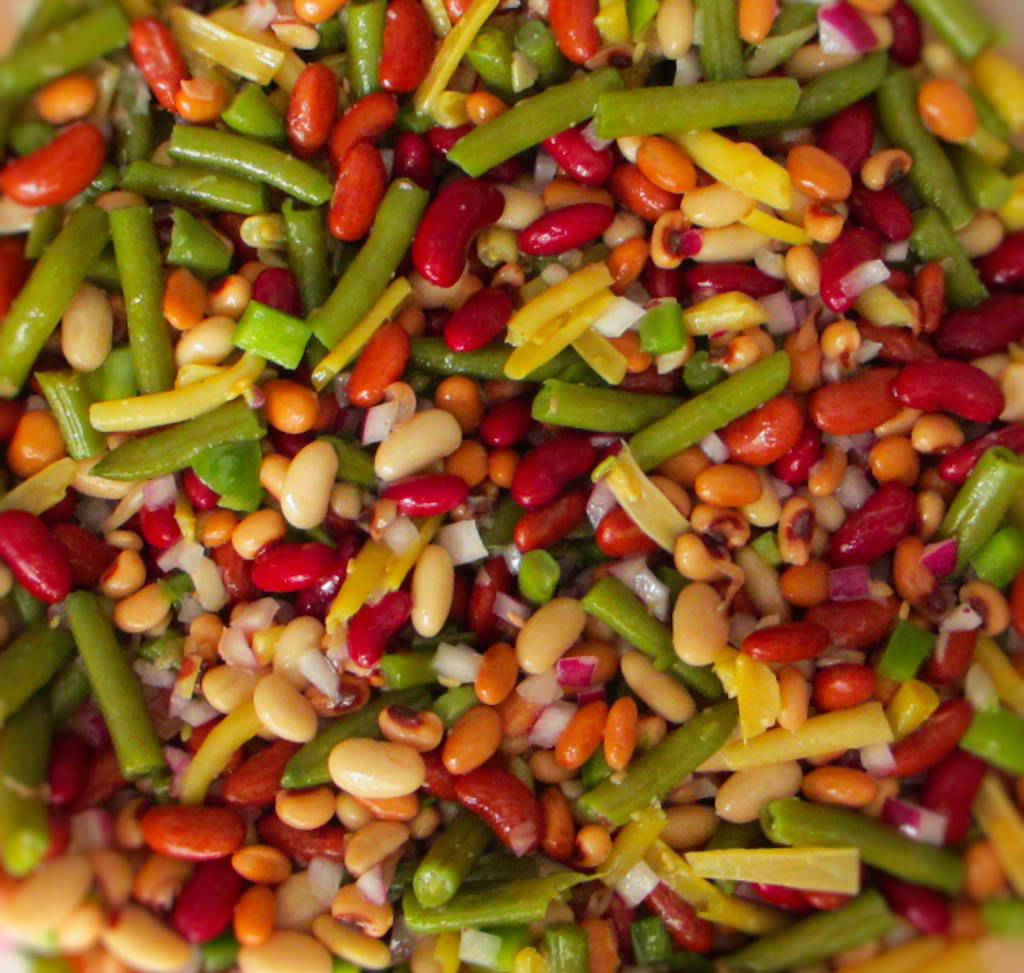
I love bean salads. That nice vinegar hit, crunchy vegetables, and a little sweet. And of course, lots and lots of beans. I make this 7 bean salad (which makes a big batch) and keep it on hand for days and days. It’ll keep up to two weeks, so it makes the perfect side dish for an easy lunch. Just toss some burgers or dogs on the grill and serve them up with this great salad.
Beans Beans and More Beans
This salad is also the perfect way to use up any old cans of beans you might have in the back of the pantry. I usually stock up on canned beans before winter (they are perfect to have on hand in case of emergencies), and try to use them by the end of the following year. You can use just about any beans (or peas) that you have on hand in this salad.