Okra Hush Puppies

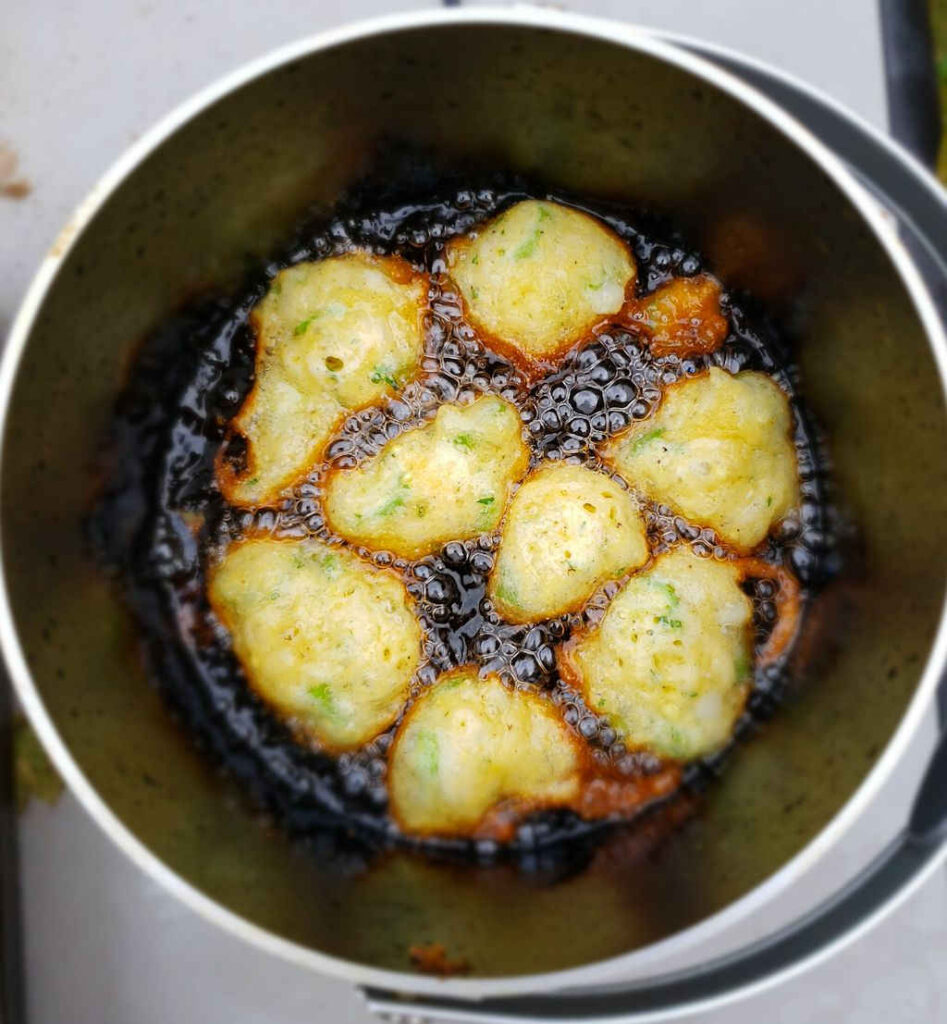
This is the first time in a long, long time that I didn’t take a picture of a dish after I plated. Why? Well, because my okra hush puppies were only on a plate for about 30 seconds. Yeah, sure, my hush puppy shaping skills are lacking, but it so didn’t matter. They were incredible. I mean just flat-out absolutely the best hush puppies ever. The perfect batter. And my favorite, fresh okra. I loved it!
Okra Hush Puppies

Fresh Okra Is Best

You pretty much gotta go with fresh when it comes to the okra for these hush puppies. You might bet away with frozen when fresh is out of season, but the color, the crunch, won’t be quite the same. It’ll still taste delicious though.

Note: Yeah, I might have eaten several of these before they even cooled off. And yeah, they were pretty darned hot but I could not control myself. You won’t be able to either.

If I’m cooking for a crowd, I’ll break out my big deep fryer. But, if it’s just the two of us, I’ll fire up my Fry Daddy fryer. It’s the perfect size for both of us. It fries everything perfectly. And as an added bonus, it doesn’t use a lot of oil, which saves me money.

I get out my big deep fryer when it’s time to fry a large batch of food. It comes to temperature quickly and it maintains that temperature perfectly. It has a built-in oil filter and storage unit so I can re-use the oil several times.
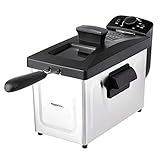
Amazon Basics 3.2-Qt (3.0L) Electric Deep Fryer…
  • FAST-HEATING & FAMILY-SIZE: This powerful…
  • ADJUSTABLE TEMPERATURE & VERSATILE COOKING: With…

Also try my copycat of the hush puppies from Long John Silver’s!
Okra Hush Puppies
Print Pin
5 from 1 vote

Okra Hush Puppies

This is the first time in a long, long time that I didn’t take a picture of a dish after I plated. Why? Well, because my okra hush puppies were only on a plate for about 30 seconds.
Course Side
Cuisine American
Keyword deep-fried, hush puppies, okra
Prep Time 10 minutes
Cook Time 20 minutes
Servings 6 servings
Calories 271kcal

Ingredients

Instructions

  • Heat oil in a deep fryer or Dutch oven to 350 F.
  • In a large bowl combine the okra, garlic powder, onion, and parsley.
  • In another bowl, whisk together the egg, buttermilk, and sugar.
  • Add to the bowl of okra and stir gently to combine.
  • Stir in the cornbread mix.
  • Add the salt and pepper and stir..
  • Working in batches, scoop out a spoonful of batter and gently drop into the hot oil. Fry for about 5 minutes or until golden brown and cooked through, flipping as they cook.
  • Remove to a wire rack to cool.

Notes

No dipping sauce required but you can use ketchup or Ranch and even mustard if you like!

Nutrition

Calories: 271kcal | Carbohydrates: 44g | Protein: 7g | Fat: 8g | Saturated Fat: 2g | Trans Fat: 1g | Cholesterol: 36mg | Sodium: 831mg | Potassium: 337mg | Fiber: 5g | Sugar: 16g | Vitamin A: 700IU | Vitamin C: 17mg | Calcium: 136mg | Iron: 2mg

Nutritional values are approximate.

Amazon Basics 3.2-Qt (3.0L) Electric Deep Fryer…
  • FAST-HEATING & FAMILY-SIZE: This powerful…
  • ADJUSTABLE TEMPERATURE & VERSATILE COOKING: With…
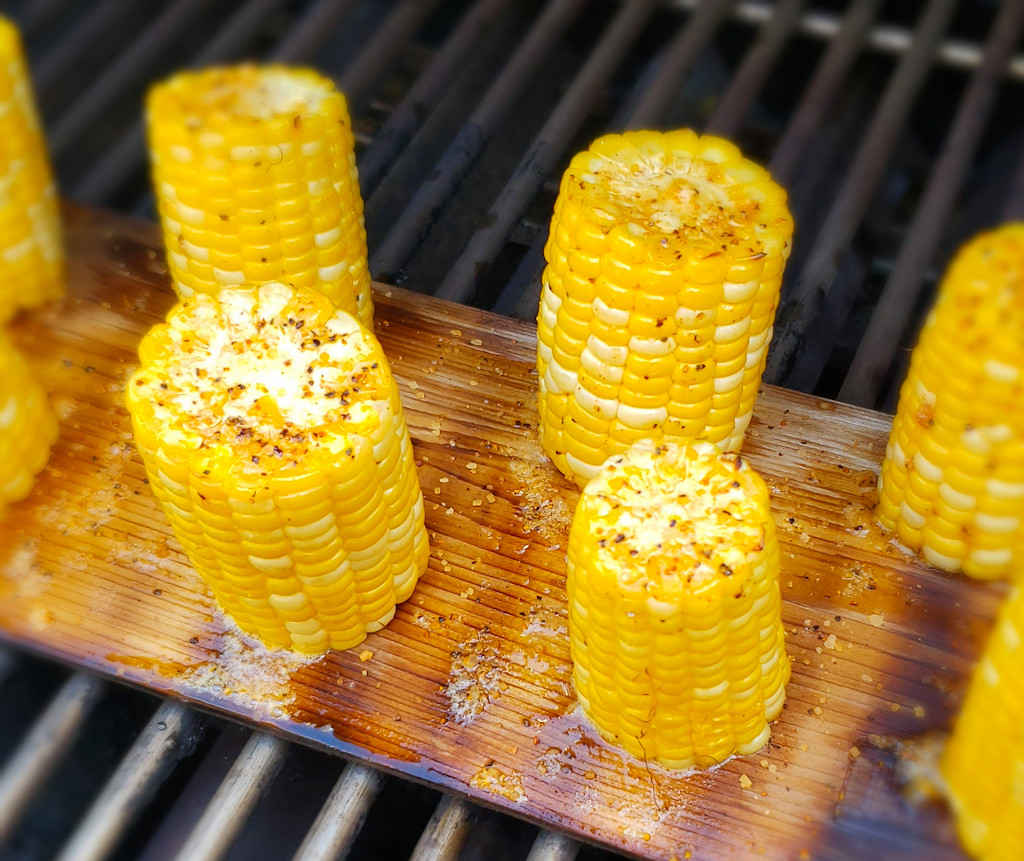
Cedar-Plank Sweet Corn

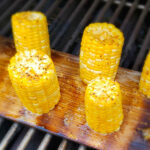
Ahhhhh. Sweet corn season. One of my favorite times of the year. Nothing beats fresh corn on the cob, especially when it’s hot off the grill. But cook that corn on a cedar plank, and you get oh so much more flavor! Whether you want a little or a lot, the cedar plank adds a little aroma and a little taste you just can’t get from ‘just’ grilling corn! Cedar-plank sweet corn is fantastic!

Cedar-Plank Sweet Corn

Perfect Corn Every Time

You can’t go wrong with plenty of salt and pepper on cedar-plank sweet corn. For a nice spicier change, I prefer to use my favorite rub from AlbuKirky Seasonings. Their red chile rub adds a nice southwestern zing to each and very delicious bite. It’s good stuff for sure!

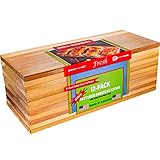
Cedar Grilling Planks – 12 Pack – Made In USA
  • Textured Grilling Planks for More Smoke and More…
  • 5.5″. x 11.00″ x 1/3″ – Upgraded Thickness!

Also try my coyote sweet corn. And my cedar-plank asparagus.

Cedar Planked Sweet Corn
Print Pin
5 from 1 vote

Cedar-Plank Sweet Corn

Ahhhhh. Sweet corn season. One of my favorite times of the year. Nothing beats fresh corn on the cob, especially when it’s hot off the grill.
Course Side
Cuisine American
Keyword cedar plank, corn-on-the-cob
Prep Time 5 minutes
Cook Time 20 minutes
Servings 4
Calories 10kcal

Equipment

Ingredients

  • 4 ears sweet corn shucked, cut in half
  • 4 tablespoons butter melted
  • seasoning salt and pepper or whatever you prefer

Instructions

  • Fire up your grill for cooking around 400 F. Depending on how much cedar flavor you want, you may want to char the cedar plank on both sides before adding the corn.
  • Combine the melted butter with your favorite seasoning.
  • Brush the corn with the butter mixture. Transfer to the plank. I like to stand the corn on end.
  • Cook for about 20 minutes or until just tender. Brush with more of the butter mixture every 5 minutes.
  • Remove and serve.

Notes

Sprinkle with a little more seasoning before serving but don’t go crazy with it. You want that wonderful corn flavor to come through!

Nutrition

Calories: 10kcal | Carbohydrates: 1g | Protein: 1g | Fat: 1g | Saturated Fat: 1g | Cholesterol: 2mg | Sodium: 16mg | Potassium: 22mg | Fiber: 1g | Sugar: 1g | Vitamin A: 27IU | Vitamin C: 1mg | Calcium: 17mg | Iron: 1mg

Nutritional values are approximate.

Cedar Grilling Planks – 12 Pack – Made In USA
  • Textured Grilling Planks for More Smoke and More…
  • 5.5″. x 11.00″ x 1/3″ – Upgraded Thickness!

Hawaiian-Style Potato Macaroni Salad

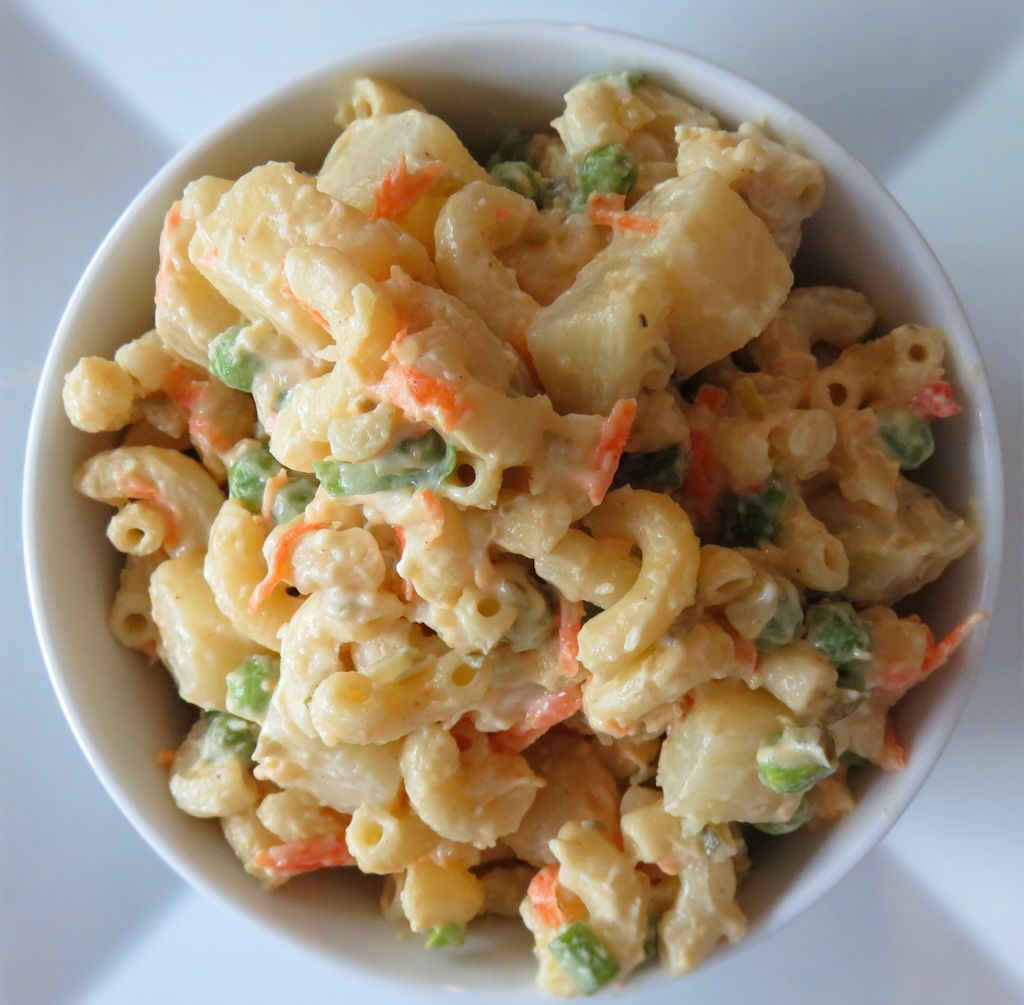
You want pasta salad. She wants potato salad. Now you both can get what you want, in one bowl! And with a little tropical twist, to boot. This Hawaiian-style potato macaroni salad is a wonderful side dish, perfect for a family get-together (it does make a pretty big batch!). It really is the combination of two favorites. It’s a great surprise for people expecting “oh that potato salad again” at a pitch-in. Because it’s definitely not boring.

Hawaiian-Style Potato Macaroni Salad

Aloha Vidalia Lovers!

What’s Hawaiian about this Hawaiian-style potato macaroni salad? Well, you’re supposed to use sweet Hawaiian onions when you make it. Sadly, I couldn’t find them, so I used good-ole Vidalia’s, my favorite onions. I don’t think it matters, because this salad turned out to be fantastic! Honestly, I doubt there’s a such thing as Hawaiian onions here in Indiana.

I almost always use Blue Plate mayonnaise in the dishes I make. I think it is the best around. If you can’t find it locally you can pick it up online for a fair price.

Blue Plate Regular Mayonnaise 30 Fl Oz (Pack of 1)
  • Real Mayonnaise Made Like Homemade: Time-honored…
  • A History of Delicious: Our simple…

Ch-Ch-Changing

This is the part of my posts where I usually ramble on a bit about how I’d change this or that. I’d had something spicy. Or whatever inspired me at that moment. Well, don’t expect that with this recipe. I loved it 100% just as it’s written. I followed every step, using every ingredient with the exact amount specified. I didn’t tweak a thing. I loved this salad. It’s common on my side dish rotation. Just as it is.

Ok… if you twisted my arm I’d use a different pasta. That’s the ONLY thing I might change. I love cavatappi at the moment. Well maybe just more than at the moment. It’s my go-to pasta in macaroni dishes now. It really likes to ‘grab’ sauces and hold on to them, much better than elbow mac does!

Also try my Creole macaroni salad.

Hawaiian-Style Potato Macaroni Salad
Print Pin
5 from 1 vote

Hawaiian-Style Potato Macaroni Salad

You want pasta salad. She wants potato salad. Now you both can get what you want, in one bowl! And with a little tropical twist, to boot.
Course Side
Cuisine American
Keyword pasta salad, potato salad
Prep Time 20 minutes
Cook Time 4 hours 20 minutes
Total Time 4 hours 40 minutes
Servings 16
Calories 436kcal

Ingredients

Instructions

  • Bring a large pot of salted water to a boil and add the potatoes.
  • Boil for 5 minutes.
  • Add the pasta and cook 6-8 minutes or until the noodles are al dente.
  • Carefully drain the potatoes and pasta into a large colander and rinse with cold water.
  • Transfer to a large bowl and add the onion, carrot, peas and green onion.
  • Combine the mayo, relish, vinegar, mustard, allspice and salt and pepper to taste.
  • Gently fold into the potato pasta mixture.
  • Cover and refrigerate for at least 4 hours before serving.

Notes

You can cook the potatoes and pasta together, but I prefer to steam my potatoes. A hard boil tends to beat up the potatoes, whereas steaming keeps that nice cube shape. To do so, place the potatoes in a steam basket over the boiling pasta and steam until tender. The potatoes will likely take longer to steam than the pasta will take to cook.

Nutrition

Calories: 436kcal | Carbohydrates: 43g | Protein: 6g | Fat: 27g | Saturated Fat: 4g | Trans Fat: 1g | Cholesterol: 15mg | Sodium: 360mg | Potassium: 464mg | Fiber: 3g | Sugar: 7g | Vitamin A: 995IU | Vitamin C: 6mg | Calcium: 27mg | Iron: 1mg

Nutritional values are approximate.

Sale
Mueller Pro-Series All-in-One, 12 Blade Mandoline…
  • Meal Prep MVP – A practical and innovative way to…
  • 12 Diverse Blades – With nine interchangeable…
OXO Good Grips 4 Piece Stainless Steel Measuring…
  • Set includes: 1/4 cup, 1/3 cup, 1/2 cup and 1 cup
  • Magnetic handles keep Cups together for storage…

Red White and Blue Cedar Planked Brie

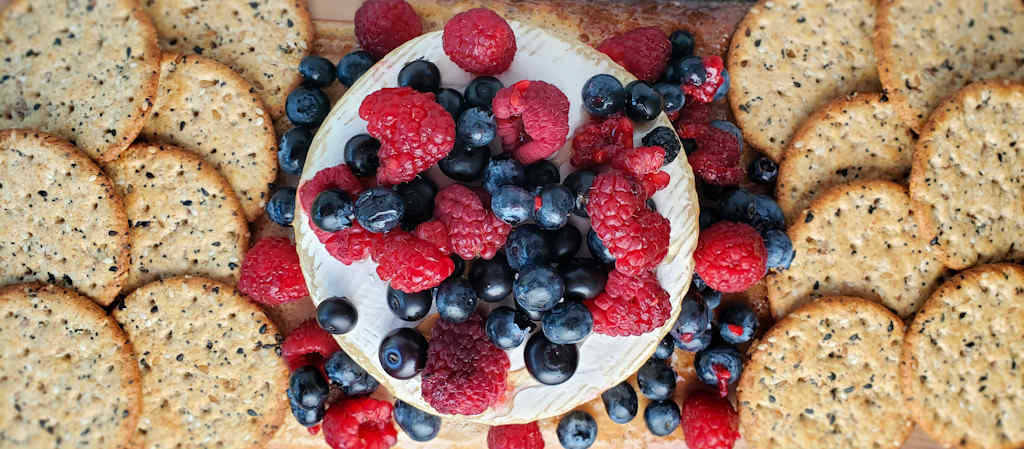
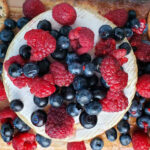
Happy Fourth of July! And what better way to enjoy the day than with red white and blue cedar planked Brie. Wonderful creamy, soft, yummy cheese. A hint of cedar aroma and flavor. Sweet honey. A combination of both roasted and fresh berries. This is the perfect appetizer, right off the grill! This makes celebrating Independence day even more fun!

Red White and Blue Cedar Planked Brie

Don’t Over-Cedar It

You can get as little or as much cedar flavor and aroma as you like. Charring the plank before adding the cheese will release some of those cedar oils. Less charring, less cedar. It’s that easy! Just don’t go crazy with it, there is a such thing as too much cedar!

Don’t buy any el cheap cedar planks for this or any other dish. Get the good stuff and you won’t ever look back. Cheap planks split, warm and have splinters. Good planks are thicker, stay flat and have smoother edges.

We both love the combination of cooked and fresh berries on this red white and blue cedar planked Brie. You get a wonderful textural difference, along with contrasting flavors. They’re really great! We used raspberries and blueberries, but really whatever berries you like will be just fine.

Cedar Grilling Planks – 12 Pack – Made In USA
  • Textured Grilling Planks for More Smoke and More…
  • 5.5″. x 11.00″ x 1/3″ – Upgraded Thickness!

Also try my cedar planked Twinkies.

Red White and Blue Cedar Planked Brie
Print Pin
5 from 1 vote

Red White and Blue Cedar Planked Brie

Wonderful creamy soft cheese. A hint of cedar. Sweet honey. Roasted and fresh berries. The perfect appetizer, right off the grill!
Course Appetizer
Cuisine American
Keyword cedar plank, cheese
Prep Time 30 minutes
Cook Time 25 minutes
Servings 6
Calories 1kcal

Equipment

Ingredients

  • 1 wheel Brie at room temperature
  • honey to taste
  • blueberries fresh, rinsed, patted dry
  • raspberries fresh, rinsed, patted dry
  • Crackers for serving

Instructions

  • Fire up your grill for high heat cooking around 400 F. I like to start my plank over direct heat then move it to indirect heat once the plank has a good char on it. If you're using a gas grill you can start over high heat then turn down the gas to finish softening the cheese.
  • Unwrap cheese and place in the center of the plank.
  • Drizzle the cheese with honey and sprinkle with berries. Use as many or as few as you want.
  • Grill for 20-25 minutes or until the Brie is nice and soft. Remove.
  • Sprinkle with more fresh berries and serve with crackers.

Notes

Serve immediately. You can use your favorite fresh berries.

Nutrition

Calories: 1kcal | Protein: 1g | Fat: 1g | Saturated Fat: 1g | Cholesterol: 1mg | Sodium: 1mg | Potassium: 1mg | Vitamin A: 1IU | Calcium: 1mg | Iron: 1mg

Nutritional values are approximate.

Cedar Grilling Planks – 12 Pack – Made In USA
  • Textured Grilling Planks for More Smoke and More…
  • 5.5″. x 11.00″ x 1/3″ – Upgraded Thickness!

Lemon Roasted Chicken on the Char-Broil Big Easy

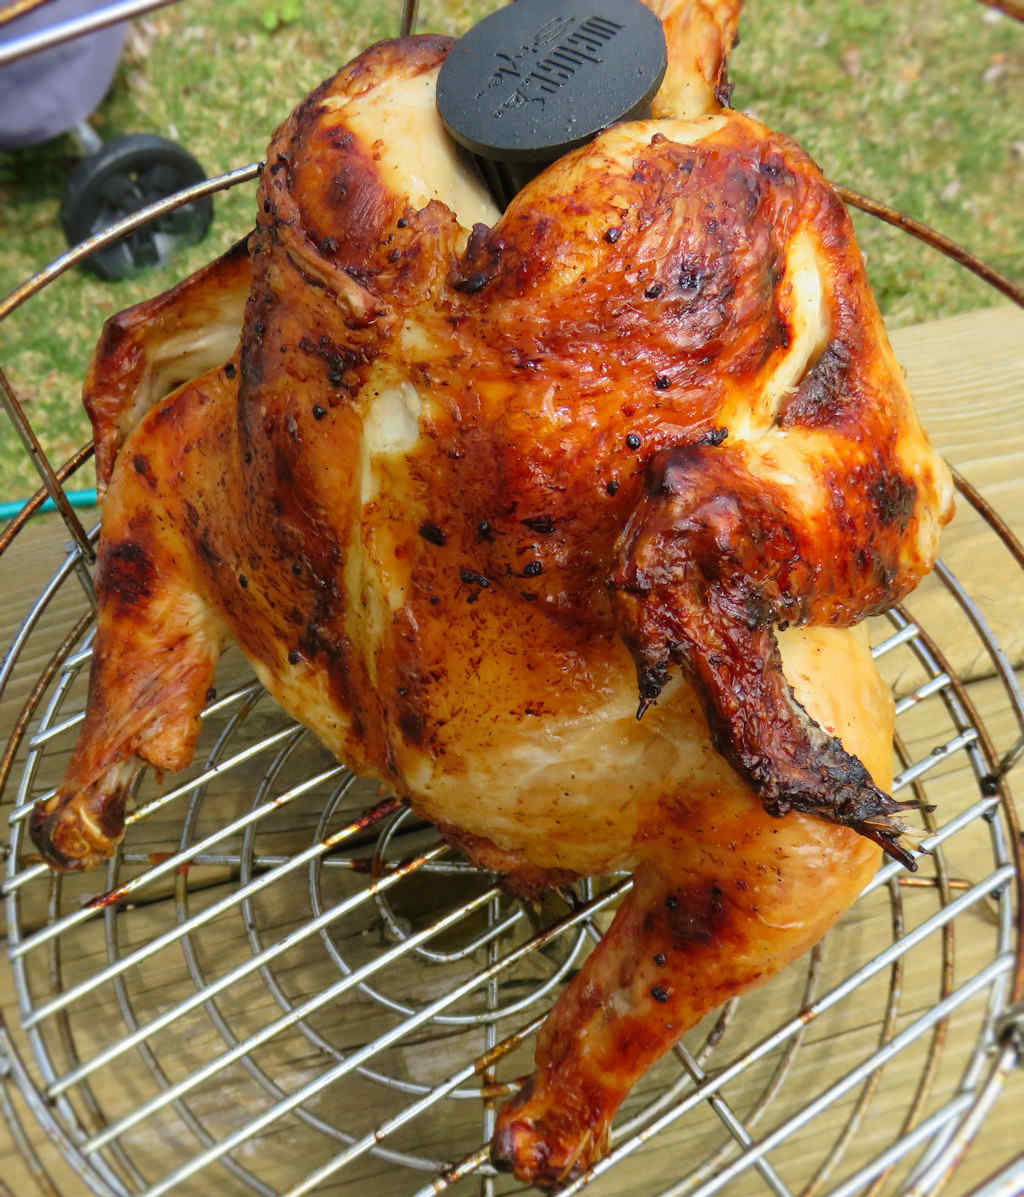
Ahhhhhh. Nothing beats roasting chicken on my Char-Broil Big Easy. From marinating, to cooking, to cleanup, it’s just about as simple a process as you can get. And you sure cannot beat the final results. Like this lemon roasted chicken that I made just the other day. I went the whole-bird route. I had my sights set on making some delicious chicken for chicken salad sandwiches. And boy did it ever satisfy!

Note: This recipe was developed using the Char-Broil Big Easy Oil-Less Fryer. If you are cooking using the Char-Broil Smoker-Roaster Grill you should cook with the lid open and the temperature set to High. You might also need to adjust the cooking time.

Lemon Roasted Chicken on the Char-Broil Big Easy

Fresh Is Best

I used fresh lemons for the marinade. Those are best, but I know, some times you just can’t find them. So reach for the bottled stuff if you have to. You’ll need about 12 tablespoons worth.

You can also make this lemon roasted chicken recipe on your Char-Broil Big Easy using split chicken breasts, legs, wings, or whatever you chicken pieces you have. A whole chicken is a little more challenging to marinate so feel free to use smaller pieces. I used a big, deep resealable container, but you can also use a super-big Ziploc baggie if you decide to go big.

Be careful removing the chicken from your cooker. It’s a tight fit and it’s easy to burn the backs of your hands against the metal frame. Use long, good-fitting heat-resistant gloves to keep from burning yourself!

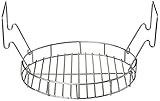
Charbroil The Big Easy Bunk Bed Basket…
  • Expands the cooking space of The Big Easy
  • Perfect for cooking two chickens at once

Roast up a batch of potatoes to serve with your chicken.

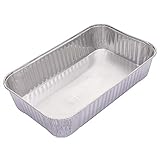
It’s always a good idea to keep a few spare grease trays on hand for your Char-Broil Big Easy.

Char-Broil 2425514W12 Big Easy Grease Tray…
  • MATERIAL: Disposable aluminum liners made…
  • SIZE: Measures 6” x 10” across the top and…

Also try my Colombian-style roasted chicken.

Love your Big Easy as much I love mine? Check out my Big Easy Add-Ons page and all 3 of my huge free Big Easy eCookbooks!

Lemon Roasted Chicken on the Char-Broil Big Easy
Print Pin
5 from 1 vote

Lemon Roasted Chicken on the Char-Broil Big Easy

Ahhhhhh. Nothing beats roasting chicken on my Char-Broil Big Easy. From marinating, to cooking, to cleanup, it’s just about as simple a process as you can get. And you sure cannot beat the final results.
Course Main
Cuisine American
Keyword Big Easy, Char-Broil, chicken
Prep Time 6 hours
Cook Time 2 hours
Servings 1 chicken
Calories 2176kcal

Ingredients

Instructions

  • Place the chicken into a large resealable bag or container.
  • In a medium bowl, juice the lemons (save the rinds), olive oil, garlic and salt and pepper to taste. Add to the chicken along with the reserved lemon rinds.
  • Cover and place in the fridge for 1-6 hours, turning or shaking every hour.
  • Fire up your Big Easy and get it up to temperature.
  • Remove the chicken from the marinade.
  • Shake off the excess and transfer the chicken to the Big Easy basket.
  • Cook until the chicken reaches at least 165 F as tested in several locations. Use 20 minutes/pound as your starting point.
  • Remove the basket from the Big Easy.
  • Remove the chicken and let rest 10 minutes before carving for serving.

Notes

Be careful removing the chicken from the basket as it will still be very hot.

Nutrition

Calories: 2176kcal | Carbohydrates: 67g | Protein: 171g | Fat: 144g | Saturated Fat: 39g | Trans Fat: 1g | Cholesterol: 653mg | Sodium: 1675mg | Potassium: 2617mg | Fiber: 21g | Sugar: 17g | Vitamin A: 1628IU | Vitamin C: 361mg | Calcium: 321mg | Iron: 12mg

Nutritional values are approximate.

Charbroil The Big Easy Bunk Bed Basket…
  • Expands the cooking space of The Big Easy
  • Perfect for cooking two chickens at once

Sweet Black Pepper Chicken on the Char-Broil Big Easy

Note: This recipe was developed using the Char-Broil Big Easy Oil-Less Fryer. If you are cooking using the Char-Broil Smoker-Roaster Grill you should cook with the lid open and the temperature set to High. You might also need to adjust the cooking time.

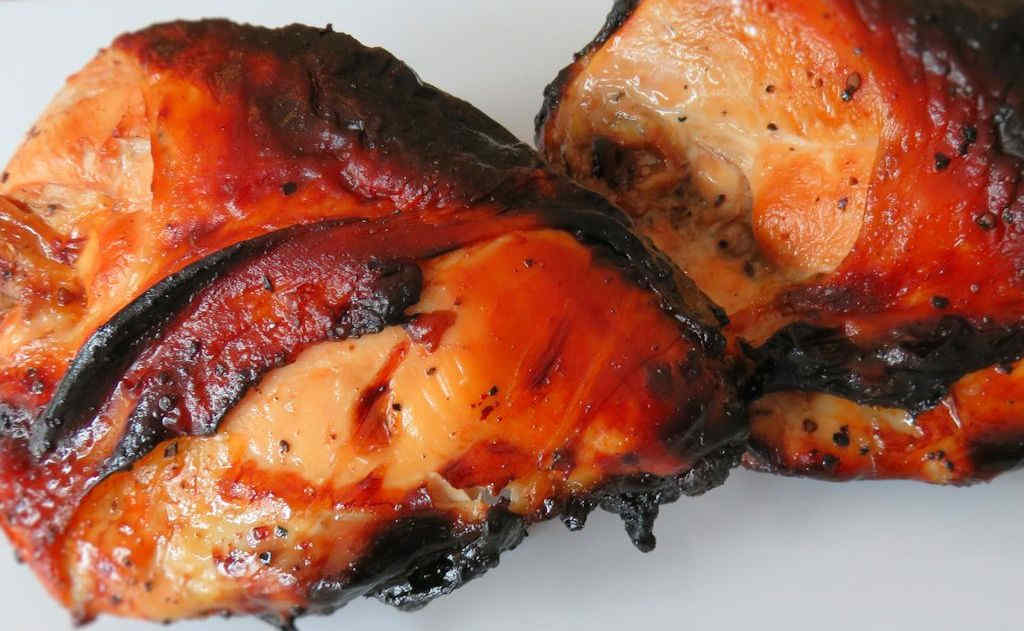
Oh, let me at it! Delicious, tender, juicy chicken, packed with peppery goodness and a hint of sweetness. Sweet black pepper chicken on the Char-Broil Big Easy proves what I’ve said time and time again. After all, nothing cooks chicken like the Big Easy. Add a little marinade like this sauce from Stubb’s and you’ve got tremendously flavorful chicken.

Sweet Black Pepper Chicken on the Char-Broil Big Easy

Flavor-Packed Easy Chicken

I’d say that nine times out of ten I use split chicken breasts when cooking chicken on the Big Easy. Because they don’t ever dry out, a problem you can run into with boneless chicken breasts. So, any time I see them on sale I pick up a few family packs and get to cooking, like this Sweet Black Pepper Chicken on the Char-Broil Big Easy. I love to have them on hand. Also, they make for an easy dinner salad: just chop up the roasted chicken and top some greens with it. Dinner. Done!

Charbroil The Big Easy Bunk Bed Basket…
  • Expands the cooking space of The Big Easy
  • Perfect for cooking two chickens at once

Also try my lemon pepper chicken.

It’s always a good idea to keep a few spare grease trays on hand for your Char-Broil Big Easy.

Char-Broil 2425514W12 Big Easy Grease Tray…
  • MATERIAL: Disposable aluminum liners made…
  • SIZE: Measures 6” x 10” across the top and…

Love your Big Easy as much I love mine? Check out my Big Easy Add-Ons page and all 3 of my huge free Big Easy eCookbooks!

Sweet Black Pepper Chicken on the Char-Broil Big Easy
Print Pin
5 from 1 vote

Sweet Black Pepper Chicken on the Char-Broil Big Easy

Oh let me at it! Delicious, tender, juicy chicken, packed with peppery goodness and a hint of sweetness.
Course Main
Cuisine American
Keyword Big Easy, Char-Broil, chicken
Prep Time 4 hours
Cook Time 1 hour 20 minutes
Total Time 5 hours 20 minutes
Servings 4 servings
Calories 258kcal
Author Mike

Ingredients

Instructions

  • Place the chicken into a resealable bag or container.
  • Add marinade to taste. Toss to coat.
  • Seal and refrigerate for at least 4 hours, turning occasionally.
  • Fire up your Big Easy.
  • Transfer the chicken to the Big Easy basket.
  • Cook for approximately 20 minutes per pound or until it reaches 165 F as checked in several places.
  • Remove and let rest 10 minutes before serving.

Notes

Nutritional values do not include Stubb’s Sweet Black Pepper Anytime Sauce.

Nutrition

Calories: 258kcal | Protein: 48g | Fat: 6g | Saturated Fat: 1g | Trans Fat: 1g | Cholesterol: 145mg | Sodium: 262mg | Potassium: 836mg | Vitamin A: 68IU | Vitamin C: 3mg | Calcium: 11mg | Iron: 1mg

Nutritional values are approximate.

Charbroil The Big Easy Bunk Bed Basket…
  • Expands the cooking space of The Big Easy
  • Perfect for cooking two chickens at once

Grilled Queso Dip

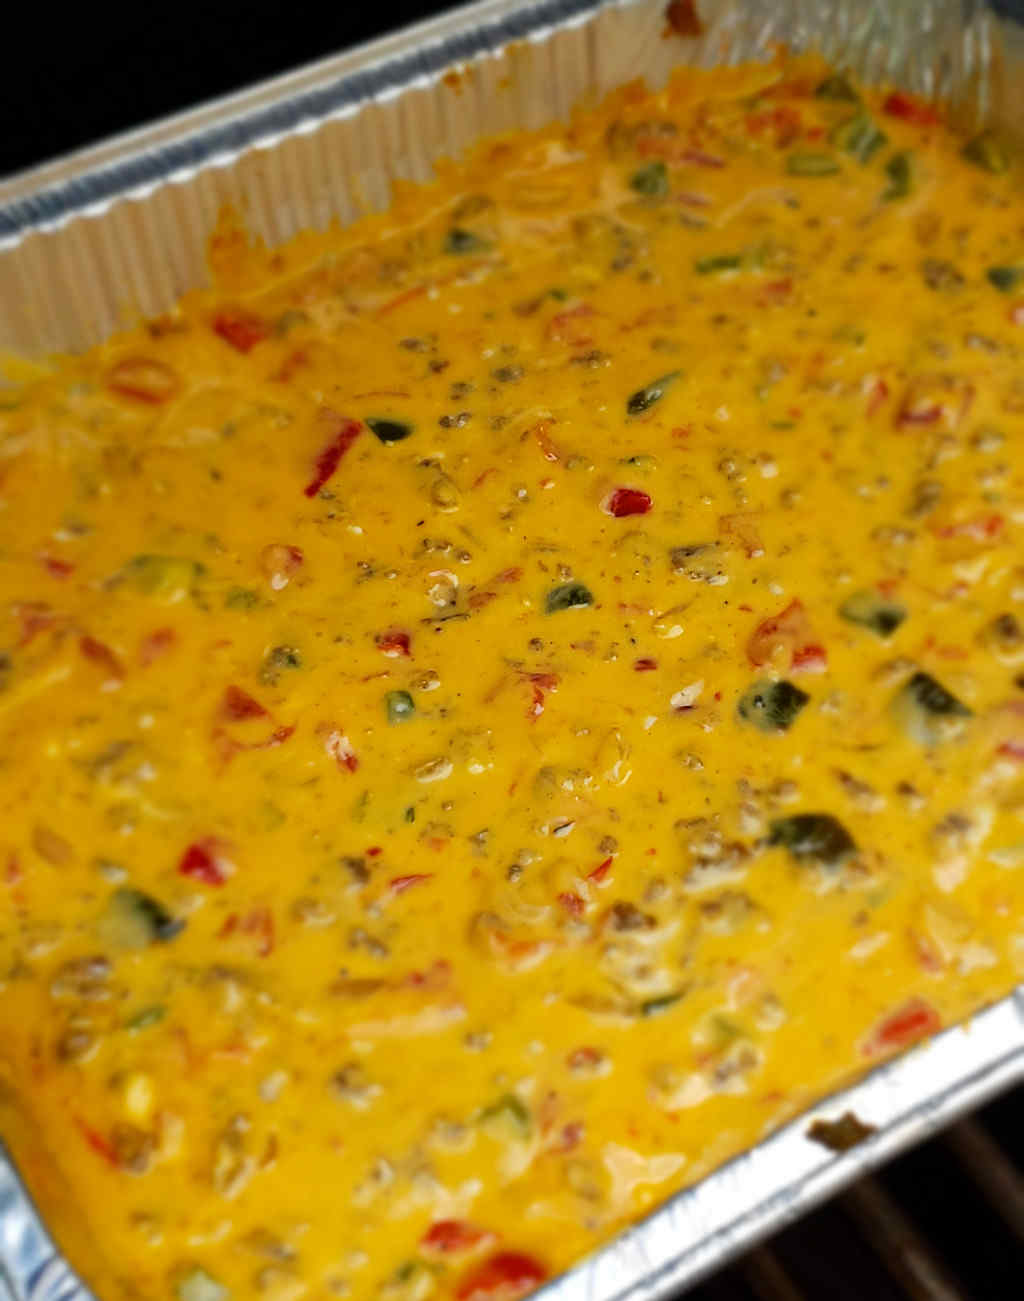
“If all of your friends jumped off a bridge would you jump too?” Well, probably not, but if all of my friends were making grilled (or smoked) queso dip, I’d make it too. And so I did. And it was oh so good. Creamy, cheese, spicy yummy good. I mean crazy good. If you’re used to making queso dip in a slow cooker, this is not that. This is so much better.

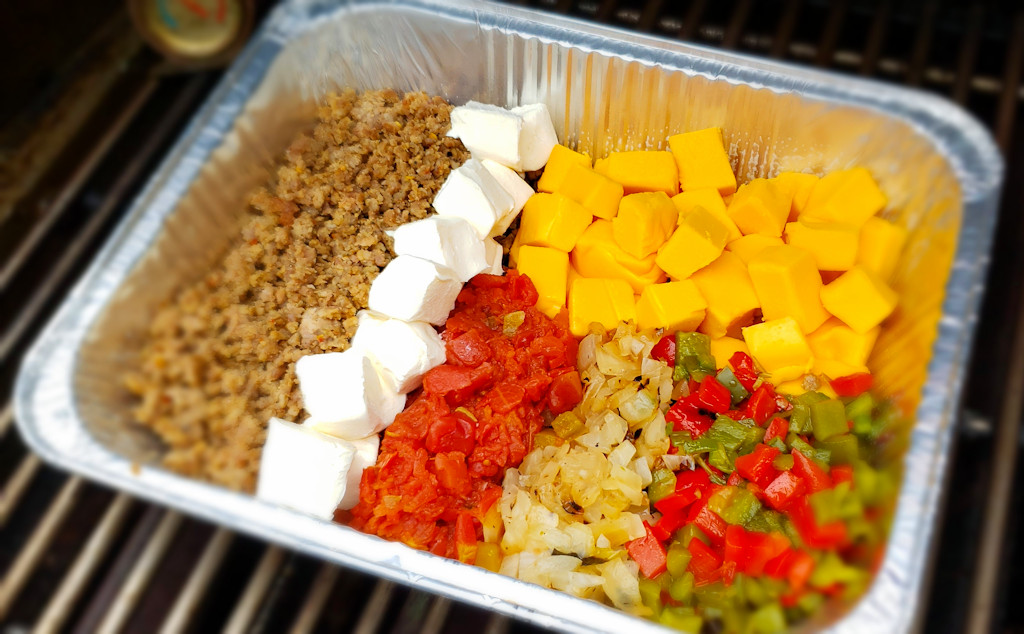
There are literally a thousand things that can go into grilled queso dip. I picked my favorites. Roasted vegetables. Spicy sausage. And the right combination of cheeses (ok, Velveeta isn’t technically cheese, but go with it for now) so everything gets nice and creamy smooth. It’s what a dip should be.

Grilled Queso Dip

Grill It. Or Smoke It.

You can make queso dip on your smoker just as easily as you can grill it. Instead of roasting the vegetables over high heat on a grill, just toss them in a 450 F oven until nice and just starting to soften and char. To make the dip, get your smoker up to 250 F over a light wood such as apple or peach. The cheeses might take a bit longer to melt, so be patient and enjoy the aroma!

Grilled Queso Dip

Indoor Options

You bet, you can make this in your oven too. Roast the vegetables on a sheet pan at 450 F oven until nice and just starting to soften and char. Put the dip together just like the recipe says. When it’s time to bake it, just put the pan in a 350 F oven for 30 minutes. Check it. Stir it. If the cheese isn’t melted go another 15 minutes and check it again. Everything in it is cooked, you’re just wanting to get it all melty and gooey.

Weber 3 Piece Stainless Steel Premium Tool Set…
  • Includes spatula, fork, and locking tongs
  • Soft-touch handles offer comfortable, non-slip…

Also try my smoked onion dip. For a delicious cheese spread, my copycat of Merkt’s is off-the-charts good.

Grilled Queso Dip
Print Pin
5 from 1 vote

Grilled Queso Dip

There are literally a thousand things that can go into grilled queso dip. I picked my favorites. 
Course Appetizer
Cuisine American
Keyword cheese, dip, grilled
Prep Time 15 minutes
Cook Time 1 hour
Servings 24
Calories 189kcal

Ingredients

Instructions

  • Crumble the sausage into a skillet over medium-high heat and cook until browned.
  • Remove to a paper towel-lined plate to drain and cool. I like to chop mine to get it nice and fine, but that's entirely up to you.
  • Fire up your grill for direct high cooking over high heat.
  • Place the onions, bell peppers and serranos into a large bowl and drizzle lightly with oil.
  • Transfer to the grill and roast over high heat until browned and just starting to soften, turning occasionally.
  • Remove to a plate to cool.
  • Chop the onion.
  • Remove the charred skins, stems and seeds from the peppers and chop coarsely.
  • Spray a 9" x 11" disposable pan with non-stick spray.
  • Add the ingredients. You can arrange them all pretty or just put them in. It's all gonna get mixed up in the end!
  • Change your grill over to indirect cooking. This just means you want a zone that isn't directly over the fire you already had going. Something around 350 F is what you want. You are just looking to melt the cheeses.
  • Place the pan over indirect heat and heat for 30 minutes to an hour, stirring occasionally once the cheese softens.
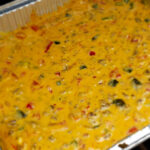
  • Once everything is melted good and gooey, it's ready to serve!

Notes

Use spicy sausage for even more delicious kick!

Nutrition

Calories: 189kcal | Carbohydrates: 8g | Protein: 11g | Fat: 12g | Saturated Fat: 6g | Trans Fat: 1g | Cholesterol: 40mg | Sodium: 755mg | Potassium: 285mg | Fiber: 1g | Sugar: 6g | Vitamin A: 781IU | Vitamin C: 18mg | Calcium: 240mg | Iron: 1mg

Nutritional values are approximate.

Sale
Weber® 3-Piece BBQ Tool Set, Stainless Steel
  • Set of 3 includes Spatula, Locking Tongs, and Cold…
  • Durable, stainless-steel construction holds up to…
Weber® Grill Grate Scrubber, Grill Cleaning…
  • Designed for heavy-duty grill cleaning
  • Contoured handle offers a firm, comfortable grip
Weber® Outdoor Grill Spray Cleaner & Degreaser…
  • This 16 oz spray bottle of Weber Grill Grate…
  • Gentle on Your Grates: Grill cleaner spray is…

Yum Yum Sauce

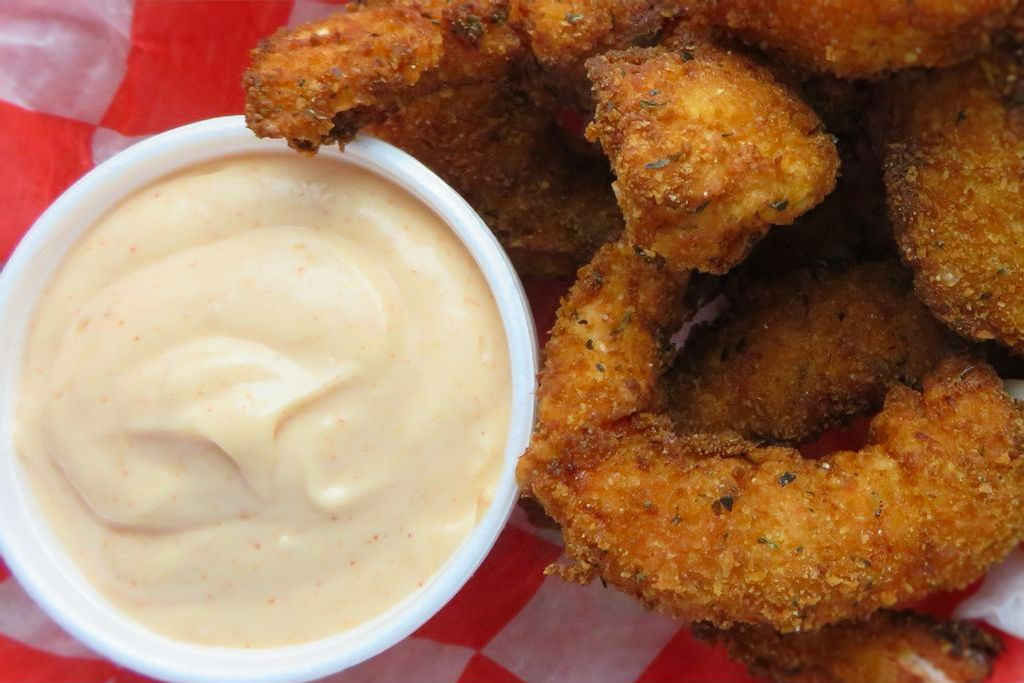
I went on a deep-fried shrimp kick the other day. It happens. Unfortunately it doesn’t happen often enough, because deep-fried shrimp are definitely one of my favorite things. I can grill shrimp all day long, but in the end, I gotta have them deep-fried. To make the shrimp even better I always make a dipping sauce or two along the side. Usually that means some sort of variation on a cocktail sauce, but this time I went with a mayonnaise-based sauce often found in Japanese Hibachi restaurants, Yum-Yum sauce. Nice and creamy with a slight vinegar twist, this sauce was perfect with the crispy shrimp.

Yum Yum Sauce

A Few Thoughts

As I note in the ingredients, you’ll want to use full-strength (not light) mayonnaise. Light mayonnaise is too thin, you want something that’ll stand up to the shrimp. I wouldn’t be afraid to add a few shakes of hot sauce, either. Or maybe a few good-sized pinches of dried pepper flake.

This sauce is also great for dipping chicken nuggets and tenders. It’s perfect for anything deep-fried.

I almost always use Blue Plate mayonnaise in the dishes I make. I think it is the best around. If you can’t find it locally you can pick it up online for a fair price.

Blue Plate Regular Mayonnaise 30 Fl Oz (Pack of 1)
  • Real Mayonnaise Made Like Homemade: Time-honored…
  • A History of Delicious: Our simple…

Also try my easy fry dipping sauce.

Yum Yum Sauce
Print Pin
5 from 1 vote

Yum Yum Sauce

Often found in Japanese Hibachi restaurants, Yum-Yum sauce is nice and creamy with a slight vinegar twist.
Course Sauce
Cuisine American
Keyword Asian, sauce
Prep Time 30 minutes
Total Time 30 minutes
Servings 1 cup
Calories 1878kcal
Author Based on a recipe from My Fridge Food

Equipment

Ingredients

Instructions

  • Whisk together all ingredients.
  • Cover and place in fridge at least 30 minutes before using.

Notes

Store leftover sauce in the fridge. Stir before using.

Nutrition

Calories: 1878kcal | Carbohydrates: 39g | Protein: 3g | Fat: 190g | Saturated Fat: 41g | Trans Fat: 1g | Cholesterol: 154mg | Sodium: 1428mg | Potassium: 79mg | Fiber: 1g | Sugar: 40g | Vitamin A: 961IU | Vitamin C: 5mg | Calcium: 29mg | Iron: 1mg

Nutritional values are approximate.

Sale
Mueller Pro-Series All-in-One, 12 Blade Mandoline…
  • Meal Prep MVP – A practical and innovative way to…
  • 12 Diverse Blades – With nine interchangeable…
OXO Good Grips 4 Piece Stainless Steel Measuring…
  • Set includes: 1/4 cup, 1/3 cup, 1/2 cup and 1 cup
  • Magnetic handles keep Cups together for storage…

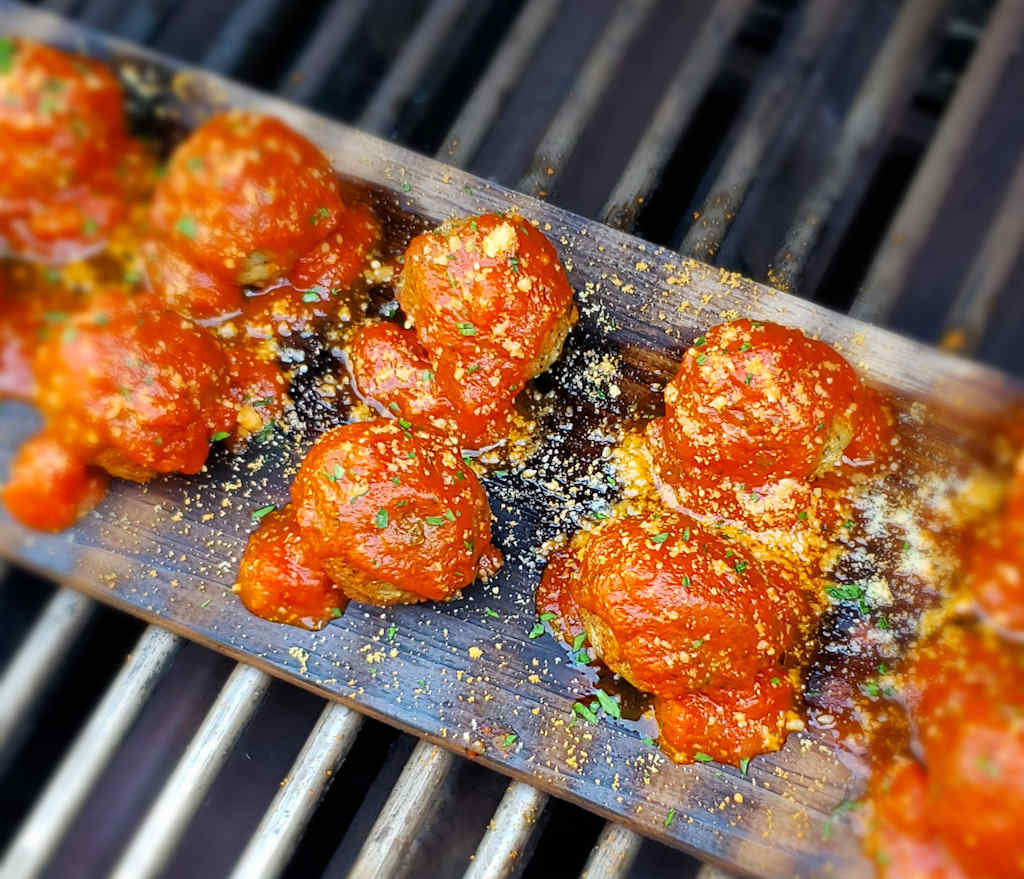
Cedar-Plank Meatballs

As simple as they are, cedar-plank meatballs are just flat-out, crazy good. Whether your meatballs are destined for pasta or in a sandwich, you’ll get a fantastic light cedar woodsy flavor in each and every bite. These can be as fancy or as un-fancy as you want. I went completely easy. Thawed frozen meatballs. Jarred sauce. Dinner was ready in no time. It looked great and tasted even better!

Cedar-Plank Meatballs

Raw Meat Meatballs Are Better

If you are using scratch-made meatballs make sure you check the internal temperature of several of them before adding the sauce. It’s ok to pre-cook them before planking them, but they’ll get more of that great cedar flavor if you cook them from raw. The raw meat loves to soak up the aroma much easier than the pre-cooked stuff will.

Don’t get el cheapo cedar planks when making cedar planked meatballs. You just won’t be happy. Get the good stuff. Trust me, I’ve tried to save money and I ended up paying for it. The planks ended up being thin, split and rough. Good planks are thicker, un-warped and won’t give you a handful of splinters.

Cedar Grilling Planks – 12 Pack – Made In USA
  • Textured Grilling Planks for More Smoke and More…
  • 5.5″. x 11.00″ x 1/3″ – Upgraded Thickness!

Also try my cedar-plank sausage sandwiches and one of our all-time-favorites, cedar-plank Buffalo chicken bites.

Cedar Planked Meatballs
Print Pin
5 from 1 vote

Cedar-Plank Meatballs

As simple as they are, cedar-plank meatballs are just flat-out, crazy good. Whether your meatballs are destined for pasta or in a sandwich, you’ll get a fantastic light cedar woodsy flavor in each and every bite.
Course Main
Cuisine American
Keyword cedar plank, meatballs
Prep Time 30 minutes
Cook Time 30 minutes
Servings 1
Calories 2504kcal

Ingredients

  • 2 pounds meatballs if using frozen meatballs thaw first
  • 2 cups marinara sauce warmed
  • Parmesan cheese freshly grated

Instructions

  • Soak your cedar plank(s) in water for at least 30 minutes while you get your grill going.
  • Fire up your grill for direct and indirect cooking. Place the planks over the direct heat and let them get good and charred on both sides. I like to char what will be the serving side first, then flip them to char the bottom. Keep a spray bottle full of water on hand to put out any fires.
  • Transfer the meatballs to the planks and let heat over direct heat for 15 minutes or until the internal temperature of the meatballs reaches 155 F. Fresh meatballs may take longer.
  • Move the planks to indirect heat (or turn down the heat if using a gas grill). Spoon the marinara sauce over the tops and heat another 10 minutes. The meatballs should be at least 160 F for frozen or fresh beef or pork meatballs, and 165 F for poultry-based meatballs.
  • Sprinkle with the Parmesan and serve. You can actually use the planks as plates, no need to transfer the meatballs to a platter.

Notes

Add a little sprinkle of red pepper flake for a nice kick!

Nutrition

Calories: 2504kcal | Carbohydrates: 26g | Protein: 160g | Fat: 193g | Saturated Fat: 72g | Cholesterol: 653mg | Sodium: 3076mg | Potassium: 4226mg | Fiber: 7g | Sugar: 21g | Vitamin A: 2185IU | Vitamin C: 41mg | Calcium: 191mg | Iron: 13mg

Nutritional values are approximate.

Cedar Grilling Planks – 12 Pack – Made In USA
  • Textured Grilling Planks for More Smoke and More…
  • 5.5″. x 11.00″ x 1/3″ – Upgraded Thickness!

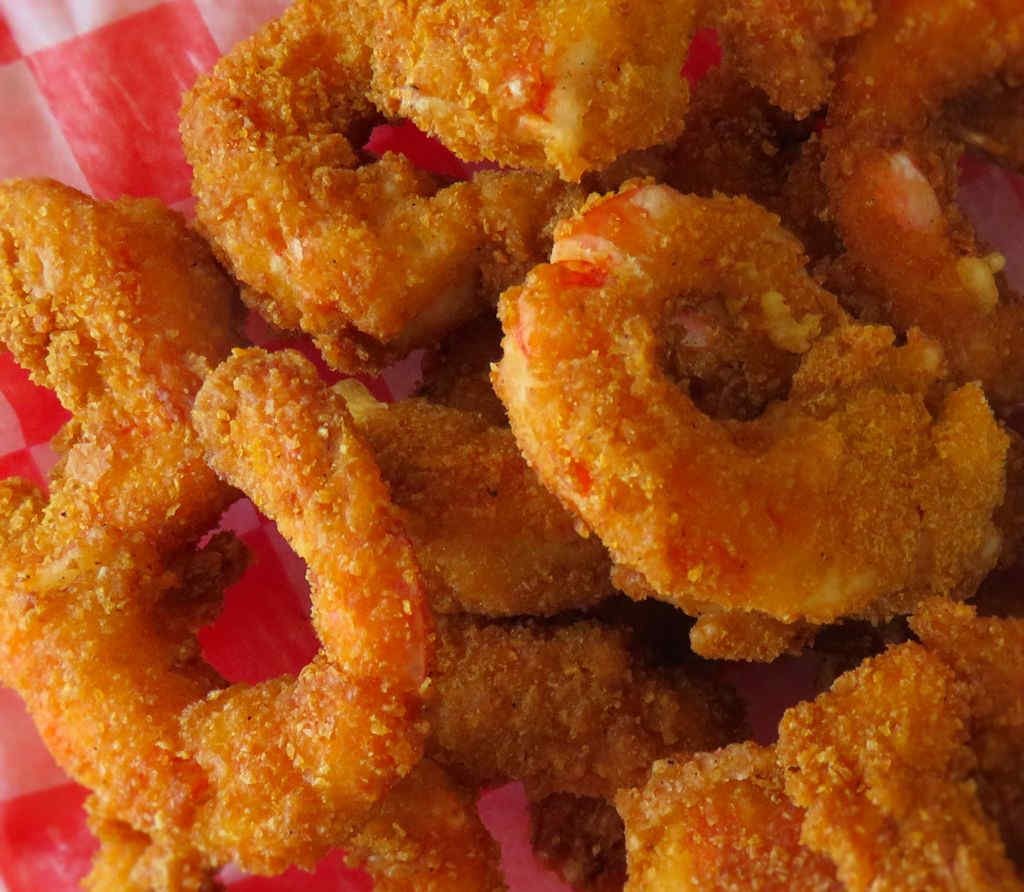
Chili’s Crispy Shrimp (Copycat Recipe)

This is how to fry up some shrimp. The perfect batter, with the perfect consistency and flavor. Not too light and not too heavy. And perfectly crunchy. And the best part of this copycat recipe for Chili’s crispy shrimp? You can still taste the shrimp. Don’t mess with perfection, follow the recipe as it is and you’ll (very) soon be enjoying fantastic shrimp.

Chili's Crispy Shrimp (Copycat Recipe)

A Big Hit In Our House

The first time I made a copycat recipe of Chili’s crispy shrimp, my wife took one bite and immediately said that I don’t need to fry shrimp in any other way. Ever again. She also told me to not change anything about it. I tend to do that. You know. A little tweak here. A little something more or less there. Nope, not with these shrimp.

If I’m cooking for a crowd, I’ll break out my big deep fryer. But, if it’s just the two of us, I’ll fire up my Fry Daddy fryer. It’s the perfect size for both of us. It fries everything perfectly. And as an added bonus, it doesn’t use a lot of oil, which saves me money.

I get out my big deep fryer when it’s time to fry a large batch of food. It comes to temperature quickly and it maintains that temperature perfectly. It has a built-in oil filter and storage unit so I can re-use the oil several times.

Amazon Basics 3.2-Qt (3.0L) Electric Deep Fryer…
  • FAST-HEATING & FAMILY-SIZE: This powerful…
  • ADJUSTABLE TEMPERATURE & VERSATILE COOKING: With…
Also try my copycat of Applebee’s peppercorn and garlic shrimp. I also make a mean copycat of Chili’s chicken crispers.

Copycat Chili's Crispy Shrimp
Print Pin
5 from 1 vote

Chili’s Crispy Shrimp (Copycat Recipe)

This is how to fry up some shrimp. The perfect batter, with the perfect consistency and flavor. Not too light and not too heavy. And perfectly crunchy.
Course Appetizer
Cuisine American
Keyword copycat, crispy, deep-fried, shrimp
Prep Time 10 minutes
Cook Time 15 minutes
Total Time 25 minutes
Servings 8
Calories 305kcal

Ingredients

For the shrimp

For the batter

Instructions

  • Heat at least 3″ of oil to 350 F in a deep fryer or Dutch oven.
  • Place the Corn Flakes crumbs in a shallow bowl.
  • Place all of the batter ingredients into a medium bowl and whisk until smooth.
  • Working in batches, coat the shrimp in the batter. Shake off any excess and then roll in the crumbs.
  • Fry 2-3 minutes until golden brown, turning once.

Notes

Serve with cocktail sauce or tartar sauce.

Nutrition

Calories: 305kcal | Carbohydrates: 28g | Protein: 27g | Fat: 9g | Saturated Fat: 6g | Cholesterol: 286mg | Sodium: 1093mg | Potassium: 139mg | Fiber: 1g | Sugar: 1g | Vitamin C: 5mg | Calcium: 183mg | Iron: 3mg

Nutritional values are approximate.