Easy Kicked-Up Tomato Soup

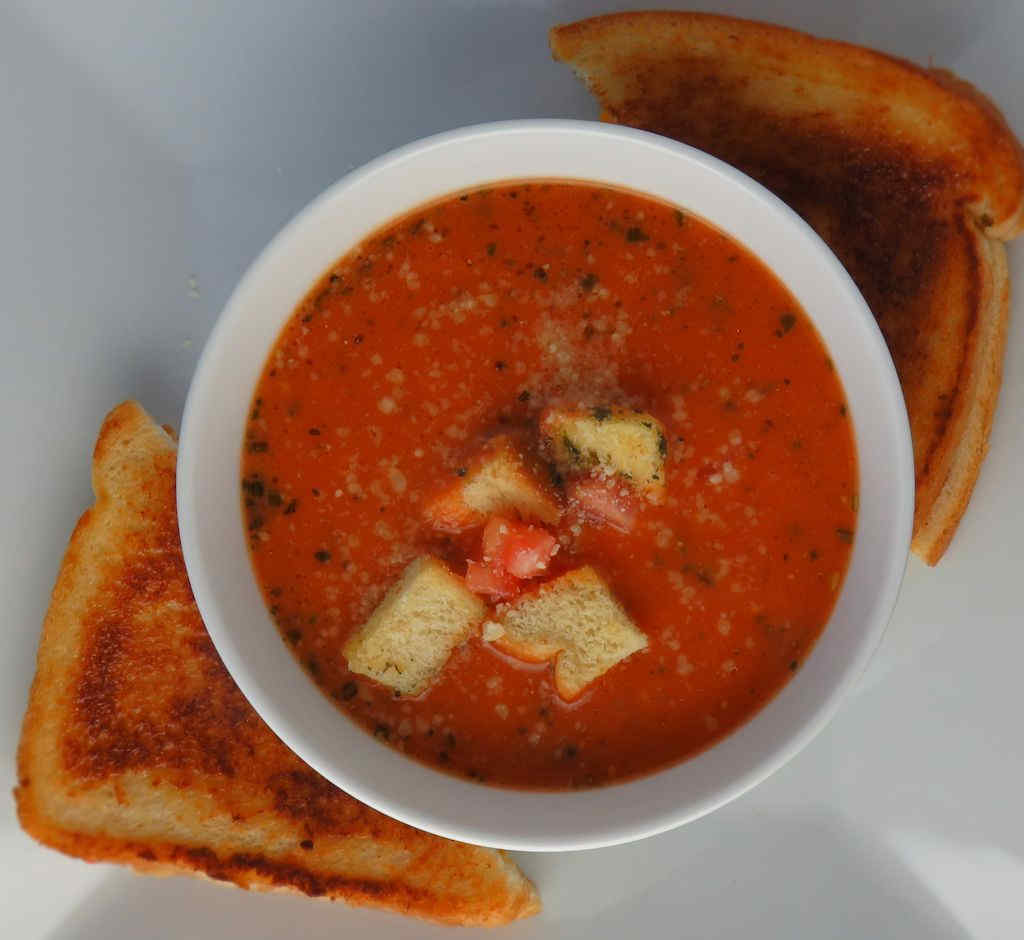
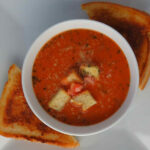
You have those cans of tomato soup just sitting there in the pantry. It’s not bad soup. But those cans have been sitting there for a reason. That soups needs a little something. A little help to make it into great soup and not ‘just’ a can of soup. This easy kicked-up tomato soup is just that. Just add a few pantry and fridge ingredients and boom, great tomato soup for a cold day!
Easy Kicked-Up Tomato Soup

Canned Soup Re-Imagined

The diced tomatoes add a nice texture and freshness to this easy kicked-up tomato soup. You can definitely leave them out. At least here in the midwest US good fresh tomatoes are impossible to find this time of year.

I like a little crunch to my soup to give it even more texture, so I added a few homemade croutons. Optional, but yummy.

I like to use my good ole trusty Dutch oven to make this soup and pretty much darned near anything like it on my stovetop. It’s nice and big and sturdy. That extra weight helps it maintain and distribute heat perfectly. As an added bonus, it’s actually pretty easy to clean up too!

Amazon Basics Enameled Cast Iron Dutch Oven Pot…
  • OVEN SAFE DESIGN: Withstand temperatures up to…
  • EXCELLENT HEAT RETENTION: This heavy-duty cast…

Also try my creamy cheese and tomato soup.
Easy Kicked-Up Tomato Soup
Print Pin
5 from 1 vote

Easy Kicked-Up Tomato Soup

You have those cans of tomato soup just sitting there in the pantry. It’s not bad soup. But those cans have been sitting there for a reason. That soups needs a little something.
Course Main
Cuisine American
Keyword soup, tomato
Prep Time 5 minutes
Cook Time 15 minutes
Servings 6 servings
Calories 177kcal

Equipment

Ingredients

  • 3 cans tomato soup 10.75 ounces
  • ¼ cup sherry
  • ¼ cup heavy cream
  • 3 tablespoons pesto
  • 2 tablespoons Parmesan grated, plus more for garnish
  • ½ cup tomatoes diced
  • olive oil

Instructions

  • Add soup to a pot over medium heat along with 3 cups of water.
  • Stir and heat.
  • Stir in the sherry, cream, pesto and Parmesan.
  • Heat through.
  • Serve sprinkled with the tomatoes, a drizzle of oil and more Parmesan.

Notes

I also like to add a few croutons.

Nutrition

Calories: 177kcal | Carbohydrates: 24g | Protein: 3g | Fat: 8g | Saturated Fat: 3g | Cholesterol: 15mg | Sodium: 656mg | Potassium: 872mg | Fiber: 2g | Sugar: 13g | Vitamin A: 990IU | Vitamin C: 21mg | Calcium: 60mg | Iron: 1mg

Nutritional values are approximate.

Sale
Mueller Pro-Series All-in-One, 12 Blade Mandoline…
  • Meal Prep MVP – A practical and innovative way to…
  • 12 Diverse Blades – With nine interchangeable…
OXO Good Grips 4 Piece Stainless Steel Measuring…
  • Set includes: 1/4 cup, 1/3 cup, 1/2 cup and 1 cup
  • Magnetic handles keep Cups together for storage…
Poblano Pepper Powder on the Nesco Snackmaster Pro

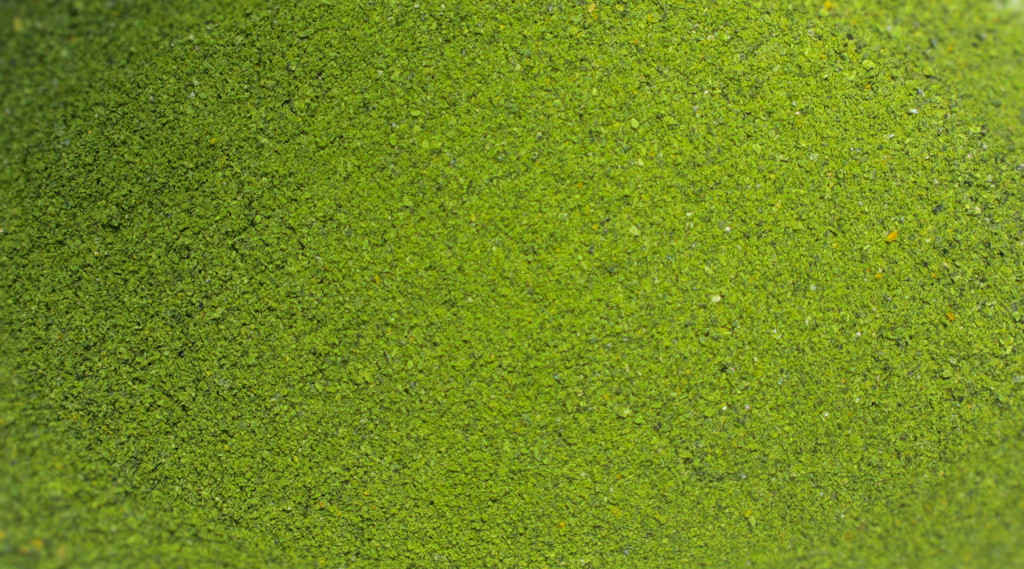
After making a big ole batch of bell pepper powder using my dehydrator I decided I need to kick things up a bit. Not crazy over-the-top kicked up, but something a bit spicier. I’m a big fan of poblano peppers. They aren’t super hot and they have such great pepper flavor. I love them stuffed, roasted, sliced on a sandwich, however. And now, I love them dried. Poblano pepper powder on the Nesco Snackmaster Pro is perfect for seasoning my favorite dishes.

Poblano Pepper Powder on the Nesco Snackmaster Pro

Spicier Than You Might Think

Dried poblanos can still pack a punch, so when you go to cutting them up make sure you wash your hands good (or use rubber gloves) when you’re done. And when you grind the dried peppers, watch out for that dust. It’ll wake you up and wake you up quick. Also if you’re really super-sensitive to it you might want to wear eye goggles. I just kept my face back from the grinder. Just be careful when you make Poblano Pepper Powder on the Nesco Snackmaster Pro!

I keep my dried powders in Mason jars that I vacuum seal using an attachment for my sealer. They keep forever. You just need to remember to re-seal the jars after removing the powder to use in a dish.

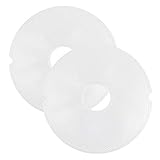
Nesco TR-2 White Plastic Round 15 1/2″ Add-A-Trays…
  • 15.5″ DIAMETER TRAYS: This Add-A-Tray 2-pack…
  • BPA FREE: Made of high-quality food grade plastic…
Nesco SLD-2-6 American Harvest 13.75″ Fruit Roll…
  • Compatible with 15½” diameter trays. This Fruit…
  • BPA FREE: Made of high-quality food grade plastic…
Sale
NESCO LM-2-6 Round Plastic Mesh…
  • IDEAL FOR SMALL AND STICKY FOODS: Removable mesh…
  • BPA FREE: Made of high-quality food grade plastic…

You can also make bell pepper powder.

Poblano Pepper Powder on the Nesco Snackmaster Pro
Print Pin
5 from 1 vote

Poblano Pepper Powder on the Nesco Snackmaster Pro

I’m a big fan of poblano peppers. They aren’t super hot and they have such great pepper flavor. I love them stuffed, roasted, sliced on a sandwich, however. And now, I love them dried. 
Course Spice Mix
Cuisine American
Keyword dehydrator, nesco snackmaster pro, peppers
Prep Time 15 minutes
Cook Time 16 hours
Total Time 16 hours 15 minutes
Servings 12 peppers
Calories 24kcal
Author Mike

Ingredients

  • 12 Poblano peppers I used a mix of 4 each of green, yellow, orange and red. I was able to fit approximately 2 peppers per Nesco Snackmaster Pro tray

Instructions

  • Set your dehydrator to 135 F.
  • Rinse the peppers.
  • Remove the stems and seeds and cut into chunks. If you are not using screen trays you'll want to cut fairly large pieces so they do not fall between the trays.
  • Dehydrate for 12-16 hours.
  • Rotate the trays every 2 hours if possible.
  • Once all the peppers are dry and a bit crisp remove and let cool.
  • Process the peppers in the grinder until they form a fine powder. If some pieces of pepper do not grind return them to the dehydrator for another hour or so until crisp.
  • Keep the powder in an air-tight container.

Notes

I place the powder in a Mason jar, cover it, then use a vacuum-sealer attachment specifically for jars to remove all of the air.

Nutrition

Calories: 24kcal | Carbohydrates: 6g | Protein: 1g | Fat: 1g | Saturated Fat: 1g | Sodium: 4mg | Potassium: 208mg | Fiber: 2g | Sugar: 3g | Vitamin A: 440IU | Vitamin C: 96mg | Calcium: 12mg | Iron: 1mg

Nutritional values are approximate.

Nesco SLD-2-6 American Harvest 13.75″ Fruit Roll…
  • Compatible with 15½” diameter trays. This Fruit…
  • BPA FREE: Made of high-quality food grade plastic…

Corned Beef using Sous Vide

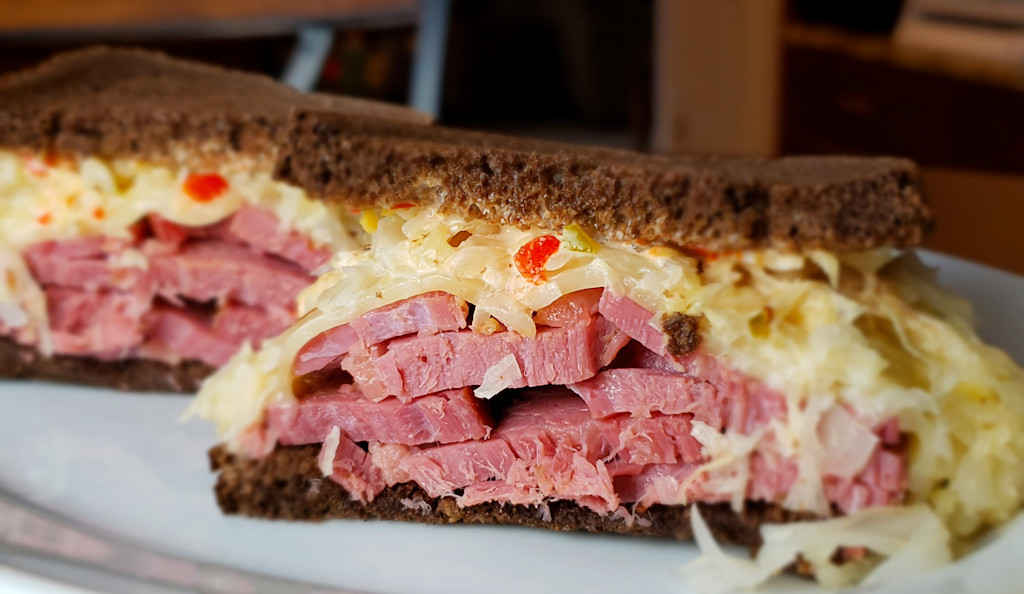
I’m very new to the world of sous vide. But, making corned beef using the technique is something I have been wanting to do for a long time. Usually, I smoke my corned beef to make ‘fauxstrami’, or as it is sometimes called, ‘cheater pastrami’. This time I was going for just classic corned beef flavor and super tender meat. And that’s what I got.

For 48 hours all I could think about was a Reuben sandwich. Sous vide corned beef on pumpernickel with a homemade Thousand Island dressing, kraut and Swiss cheese. Lunch was fantastic!

Corned Beef using Sous Vide

Beware The Spice Packet

I don’t think that the spice packet added much flavor to the corned beef. So, I would actually consider it borderline optional. I did learn that if you are using it don’t place it directly on the meat. As the vacuum seals the bag, the spices get embedded in the corned beef. And there they will stay until you scrape them off, which isn’t fun. So I pour it into a corner of the bag. It does get mixed in with the liquid from the meat, so perhaps it did add a little flavor. It certainly was not overwhelming.

I think the technique I used for sous vide corned beef can be used as a starting point for making pastrami, so that’s the next thing I will try. After the 48 hour sous vide, I will prepare the corned beef as I do my homemade pastrami, then smoke it just long enough to get a little smoke flavor to it. I will certainly post my results!

I use an Anova sous vide cooker. It’s my immersion circulator workhorse!
Sale
Anova Culinary Sous Vide Precision Cooker…
  • Pros have been doing it for years, and now you can…

Also try my sous vide turkey breast roast.

Corned Beef using Sous Vide
Print Pin
5 from 1 vote

Corned beef using Sous Vide

I was going for just classic corned beef flavor and super tender meat. And that’s what I got.
Course Main
Cuisine American
Keyword corned beef, sous vide
Cook Time 2 days
Total Time 2 days
Servings 2 pounds
Calories 1347kcal

Ingredients

  • 3 pound corned beef with the spice packet

Instructions

  • Bring your sous vide setup to 140 F.
  • Remove the corned beef from the packaging and rinse well several times under cold water.
  • If you want to use the spice packet, open it and pour it into one corner of a large sealable bag.
  • Transfer the corned beef to the bag. Seal well. I prefer to double seal for long cooks.
  • Add the bag to the sous vide and cook for 48 hours.
  • Remove corned beef from water and let cool slightly before opening and slicing against the grain.

Notes

I don’t usually use the spice packet but in this dish, I always do. It adds a lot of flavor.

Nutrition

Calories: 1347kcal | Carbohydrates: 1g | Protein: 100g | Fat: 101g | Saturated Fat: 32g | Cholesterol: 367mg | Sodium: 8280mg | Potassium: 2021mg | Vitamin C: 184mg | Calcium: 48mg | Iron: 12mg

Nutritional values are approximate.

Sale
Anova Culinary Sous Vide Precision Cooker…
  • Pros have been doing it for years, and now you can…

Blackened Fried Shrimp

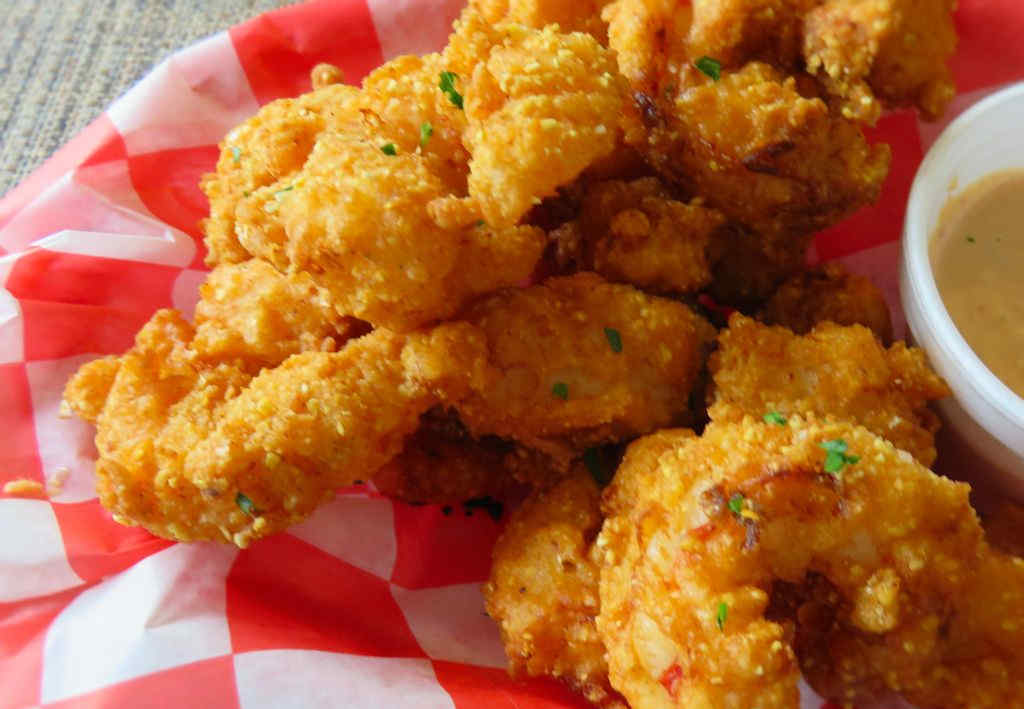
I could probably eat a ton of these blackened fried shrimp. I was already badly addicted to fried shrimp. Then along came these beyond-delicious treats and my addiction somehow got worse. I didn’t even think that was possible. Yummy crunchy batter that has a great light spiciness to it. The batter isn’t too thick. It isn’t too thin. You really just can’t stop eating them.

Blackened Fried Shrimp

More Seasoning, More Better!

For a little extra kick, sprinkle the blackened fried shrimp with more of the seasoning just after you remove them from the hot oil. You have to do it when they’re still so hot so that the seasoning adheres.

Sure, You Could Use Store-Bought Seasoning…

Why go thru the trouble of making the blackened seasoning from scratch? That store-bought stuff is just way too salty for me. But you’re certainly free to use it. I bet by now there’s a low-salt store-bought version available somewhere!

If I’m cooking for a crowd, I’ll break out my big deep fryer. But, if it’s just the two of us, I’ll fire up my Fry Daddy fryer. It’s the perfect size for both of us. It fries everything perfectly. And as an added bonus, it doesn’t use a lot of oil, which saves me money.

I get out my big deep fryer when it’s time to fry a large batch of food. It comes to temperature quickly and it maintains that temperature perfectly. It has a built-in oil filter and storage unit so I can re-use the oil several times.

Amazon Basics 3.2-Qt (3.0L) Electric Deep Fryer…
  • FAST-HEATING & FAMILY-SIZE: This powerful…
  • ADJUSTABLE TEMPERATURE & VERSATILE COOKING: With…

Also try my Cajun fried shrimp and my beer battered shrimp and fries.

Blackened Fried Shrimp
Print Pin
5 from 1 vote

Blackened Fried Shrimp

I could probably eat a ton of these blackened fried shrimp. I was already badly addicted to fried shrimp. Then along came these beyond-delicious treats and my addiction somehow got worse.
Course Appetizer or Main
Cuisine American
Keyword deep-fried, shrimp
Prep Time 15 minutes
Cook Time 15 minutes
Servings 4 servings
Calories 203kcal

Ingredients

For the blackened seasoning (may make a bit more than you'll need)

For the flour station

For the dipping station

  • 1 large egg
  • 2 tablespoons milk
  • 1 teaspoon hot sauce

Instructions

  • Place shrimp into a large bowl. Season with two teaspoons of the blackened seasoning and toss well.
  • Combine the flour and blackened seasoning. Dip the shrimp into the mixture and coat well. Transfer to a plate and place into the freezer for five minutes. Reserve the flour mixture.
  • Heat 3-4" of oil to 350 F in a deep fryer or Dutch oven.
  • Whisk together the egg, milk and hot sauce in a pie plate or shallow dish.
  • Dip the shrimp into the egg mixture and then return to the flour mixture to coat.
  • Shake off excess flour and fry 3-4 minutes or until golden brown, turning once.

Notes

Serve with your favorite tartar sauce or cocktail sauce.

Nutrition

Calories: 203kcal | Carbohydrates: 14g | Protein: 27g | Fat: 3g | Saturated Fat: 1g | Trans Fat: 1g | Cholesterol: 333mg | Sodium: 1778mg | Potassium: 177mg | Fiber: 1g | Sugar: 1g | Vitamin A: 374IU | Vitamin C: 9mg | Calcium: 198mg | Iron: 3mg

Nutritional values are approximate.

Amazon Basics 3.2-Qt (3.0L) Electric Deep Fryer…
  • FAST-HEATING & FAMILY-SIZE: This powerful…
  • ADJUSTABLE TEMPERATURE & VERSATILE COOKING: With…

Memphis-Style Muffuletta

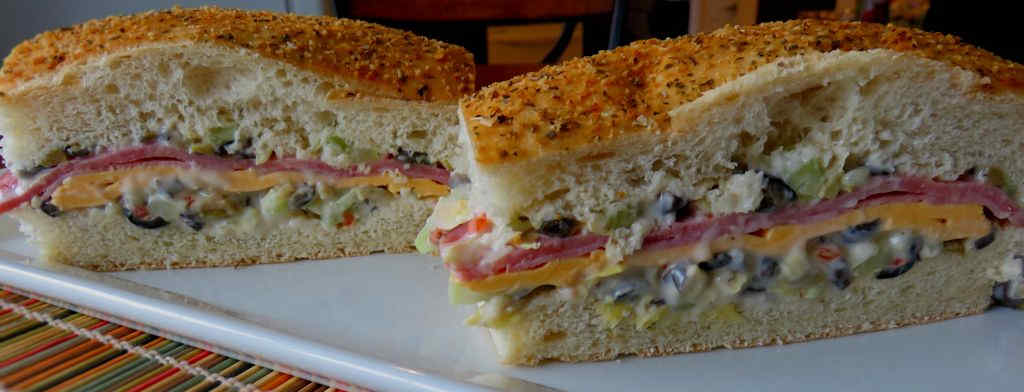
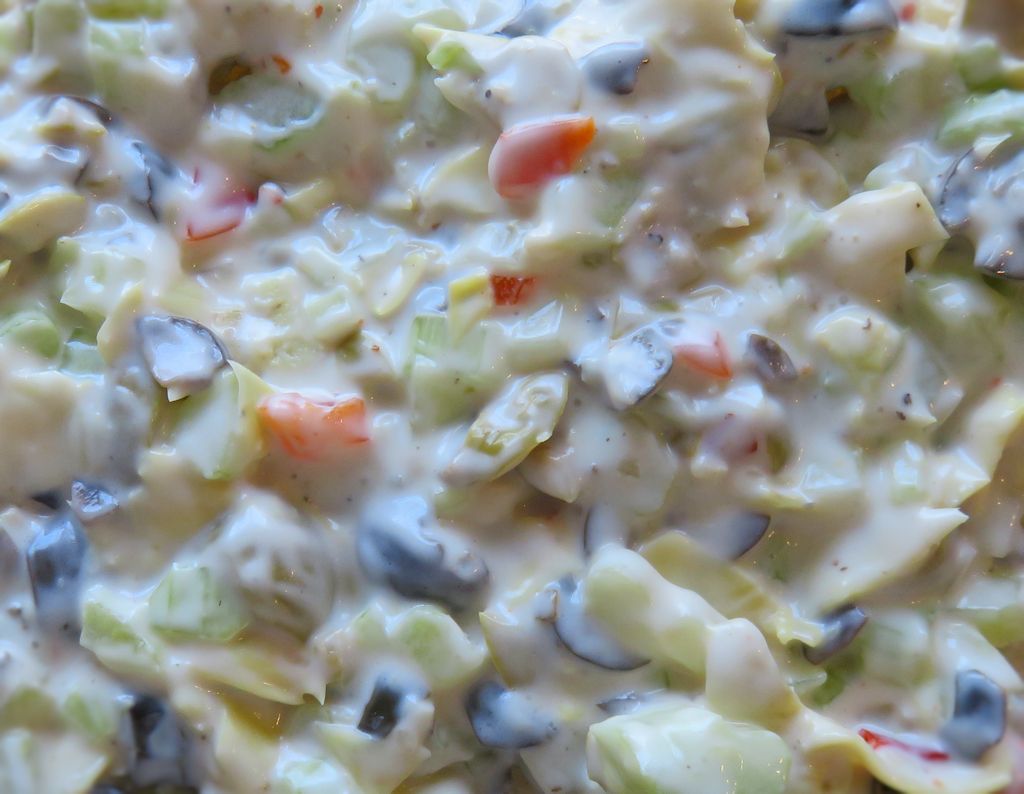
Muffuletta sandwiches are what I would have on a deserted island if I could choose only one food. I’d even go through the ‘trouble’ of making my own olive salad. When I first ran across this idea for a Memphis-style muffuletta I made a weird face. Huh? Why are you messing with my favorite? The answer was soon obvious: because this is really, really good. Similar to a muffuletta in many ways, but different too.

Memphis-Style Muffuletta

A Totally Different Olive Salad

The creamy olive salad in this Memphis-style muffuletta is totally different than a traditional muffuletta mix but it has many of the same flavors. The artichoke hearts are a totally different twist and quite honestly I might find myself adding them to my homemade muffuletta olive salad too.

Memphis-Style Muffuletta

I almost always use Blue Plate mayonnaise in the dishes I make. I think it is the best around. If you can’t find it locally you can pick it up online for a fair price.

Blue Plate Regular Mayonnaise 30 Fl Oz (Pack of 1)
  • Real Mayonnaise Made Like Homemade: Time-honored…
  • A History of Delicious: Our simple…

The olive salad mix is also great on grilled hot dogs. If you prefer the original, try my more traditional muffuletta sandwich.

Memphis-Style Muffuletta
Print Pin
5 from 1 vote

Memphis-Style Muffuletta

When I first ran across this idea for a Memphis-style muffuletta I made a weird face. Huh? Why are you messing with my favorite? The answer was soon obvious: because this is really, really good. 
Course Main
Cuisine American
Keyword sandwich
Prep Time 15 minutes
Cook Time 1 hour
Total Time 1 hour 15 minutes
Servings 6 servings
Calories 277kcal

Equipment

Ingredients

Instructions

  • Whisk together the mayonnaise and salad dressing.
  • Fold in the olives, artichoke and celery.
  • Season with the pepper.
  • Slice bread horizontally. I like to remove some of the insides of the bread, but that’s optional.
  • Spoon half of the olive mixture onto the bottom half of the bread.
  • Add the cheese and meats.
  • Top with the remaining olive mix and top bread half.
  • Wrap tightly in foil or plastic wrap.
  • Refrigerate for at least 1 hour before slicing and serving.

Notes

Stir again before using.

Nutrition

Calories: 277kcal | Carbohydrates: 5g | Protein: 1g | Fat: 28g | Saturated Fat: 4g | Trans Fat: 1g | Cholesterol: 12mg | Sodium: 977mg | Potassium: 73mg | Fiber: 2g | Sugar: 2g | Vitamin A: 230IU | Vitamin C: 1mg | Calcium: 28mg | Iron: 1mg

Nutritional values are approximate.

Sale
Mueller Pro-Series All-in-One, 12 Blade Mandoline…
  • Meal Prep MVP – A practical and innovative way to…
  • 12 Diverse Blades – With nine interchangeable…
OXO Good Grips 4 Piece Stainless Steel Measuring…
  • Set includes: 1/4 cup, 1/3 cup, 1/2 cup and 1 cup
  • Magnetic handles keep Cups together for storage…
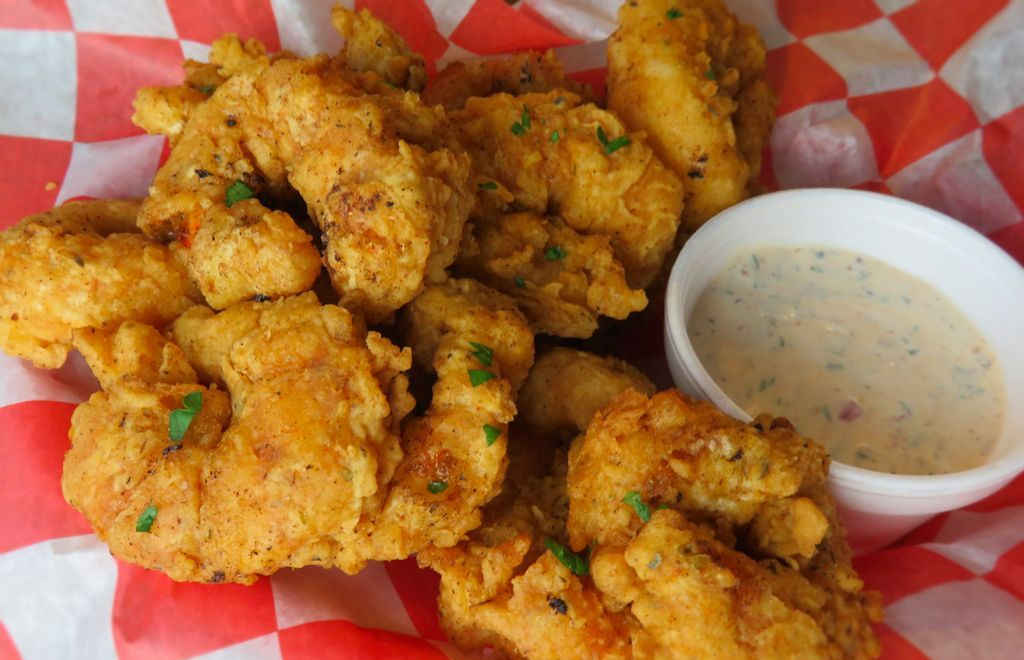
Cajun Fried Shrimp

My two biggest food obsessions? Chicken wings and fried shrimp. I could eat either one, anytime, anywhere. And lots of them. I’m not even gonna hide it or apologize for it. I’ve never had wings or shrimp that I didn’t absolutely love. Like these Cajun fried shrimp. Lightly crunchy. Stick-to-the-shrimp batter. A little heat. Perfectly cooked. Crazy tasty. And you know, they’re great looking too! You do eat with your eyes first, or so they say! I kinda think I eat with my nose first. I smell the aroma of the food often long before I see it! That’s what gets my mouth watering. And these shrimp smell amazing right out of the fryer. I was ready to dig in!

Cajun Fried Shrimp

My Kind Of Shrimp

This is shrimp done up right. The batter is amazing. I served these Cajun fried shrimp with a crazy wonderful remoulade that has ended up being a shrimp-dipping staple in our house. It’s great for dunking fries, too. It might seem like there’s a lot of ingredients and work that goes into the batter and the remoulade but they’re all ‘normal’ ingredients that you likely have on-hand. Though, if you don’t have a shallot sitting around you can use a red onion instead.

For that little extra ‘something’ sprinkle the shrimp lightly with Old Bay seasoning just before serving. Don’t go crazy with it. You don’t want it to overwhelm the already-tasty coating and the wonderful remoulade. But a little won’t hurt!

I get out my big deep fryer when it’s time to fry a large batch of food. It comes to temperature quickly and it maintains that temperature perfectly. It has a built-in oil filter and storage unit so I can re-use the oil several times.

Amazon Basics 3.2-Qt (3.0L) Electric Deep Fryer…
  • FAST-HEATING & FAMILY-SIZE: This powerful…
  • ADJUSTABLE TEMPERATURE & VERSATILE COOKING: With…

Also try my crispy fried shrimp and my blackened fried shrimp.

Cajun Fried Shrimp
Print Pin
5 from 1 vote

Cajun Fried Shrimp

I’ve never had wings or shrimp that I didn’t absolutely love. Like these Cajun fried shrimp. Lightly crunchy. Stick-to-the-shrimp batter. A little heat. Perfectly cooked.
Course Appetizer or Main
Cuisine Main
Keyword Cajun, deep-fried, shrimp
Prep Time 15 minutes
Cook Time 15 minutes
Total Time 30 minutes
Servings 6 servings
Calories 444kcal

Ingredients

For the Spicy Remoulade Sauce

Instructions

  • Heat 3-4" of oil to 350 F in a deep fryer or Dutch oven.
  • In a pie plate or shallow dish, whisk together the buttermilk, egg, and mustard.
  • In another pie plate or shallow dish, whisk together the flour, cornmeal, paprika, salt, cayenne and garlic powder.
  • Working in batches, add the shrimp to the flour mixture and coat well.
  • Shake off excess then place into the buttermilk mixture.
  • Shake off excess then return to the flour mixture, coating again.
  • Add to the hot oil and fry 3-4 minutes or until golden brown, turning once. Remove to a paper towel-lined plate to drain.
  • Serve with the spicy remoulade sauce.

For the Spicy Remoulade Sauce

  • Whisk together all ingredients in a small bowl. Refrigerate until ready to use.

Notes

Give the sauce another good stir before serving.

Nutrition

Calories: 444kcal | Carbohydrates: 22g | Protein: 29g | Fat: 26g | Saturated Fat: 5g | Trans Fat: 1g | Cholesterol: 333mg | Sodium: 2090mg | Potassium: 285mg | Fiber: 2g | Sugar: 4g | Vitamin A: 516IU | Vitamin C: 17mg | Calcium: 232mg | Iron: 4mg

Nutritional values are approximate.

Amazon Basics 3.2-Qt (3.0L) Electric Deep Fryer…
  • FAST-HEATING & FAMILY-SIZE: This powerful…
  • ADJUSTABLE TEMPERATURE & VERSATILE COOKING: With…

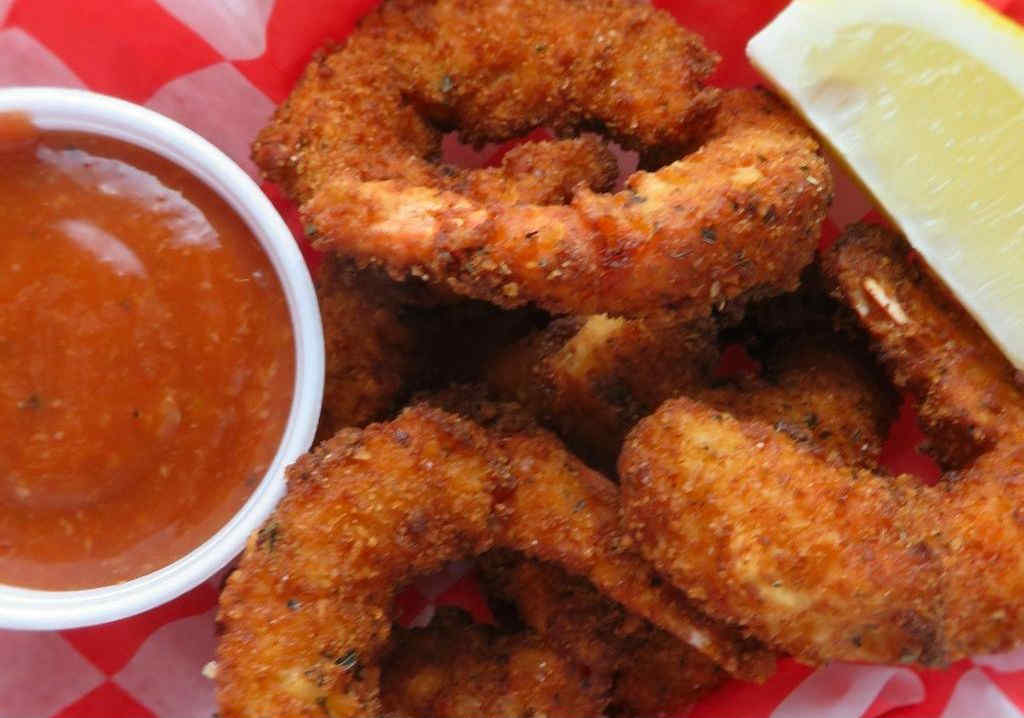
Crispy Fried Shrimp

I can eat an embarrassing amount of crispy fried shrimp. My addiction to these little goodies started as a child. Maybe once every few months we would eat out at Sizzler. I would always get the fried shrimp. I would devour them.

That tradition lives on, believe me. That’s why I make them at home. In bigger batches. These crispy fried shrimp are nice and crispy and have a fantastic lightly savory flavor. No overpowering flavors here, you can still taste the wonderful shrimp.

Crispy Fried Shrimp

Right-Sized Shrimp For The Perfect Bites

I like to use shrimp that aren’t too big or too small when I make crispy fried shrimp. For me, 21-25 count (that means 21-25 shrimp are in a pound) are the perfect size. If I can get them, I use Louisiana Gulf Shrimp. I believe they have the best flavor but you can use whatever you prefer (or can find).

I get out my big deep fryer when it’s time to fry a large batch of food. It comes to temperature quickly and it maintains that temperature perfectly. It has a built-in oil filter and storage unit so I can re-use the oil several times.

Amazon Basics 3.2-Qt (3.0L) Electric Deep Fryer…
  • FAST-HEATING & FAMILY-SIZE: This powerful…
  • ADJUSTABLE TEMPERATURE & VERSATILE COOKING: With…

You can use pre-shelled and pre-deveined shrimp but give them a once-over before using to make sure that there aren’t any shell pieces or veins left. Just in case.

If you’re looking for something super-simple for dipping your delicious crispy fried shrimp, try my quick cocktail sauce or my Carolina cocktail sauce.

Also try my Cajun fried shrimp and my panko fried shrimp.

Crispy Fried Shrimp
Print Pin
5 from 1 vote

Crispy Fried Shrimp

These crispy fried shrimp are nice and crispy and have a fantastic lightly savory flavor. No overpowering flavors here, you can still taste the wonderful shrimp.
Course Appetizer
Cuisine American
Keyword crispy, deep-fried, shrimp
Prep Time 15 minutes
Cook Time 20 minutes
Total Time 35 minutes
Servings 4 servings
Calories 629kcal

Ingredients

Instructions

  • Remove the shells from the shrimp up to the tail section.
  • Make an incision down the back and remove the vein.
  • Rinse with cold water.
  • In a large bowl or pie plate combine the egg and milk.
  • Place the flour in another large bowl or pie plate.
  • And in another large bowl or pie plate place the bread crumbs, salt, basil, parsley, garlic and onion powders.
  • Heat oil in a large Dutch oven or deep fryer to 350 F.
  • Working in batches, coat the shrimp in the egg mixture.
  • Shake off excess and then roll in flour.
  • Return shrimp to the egg mixture and coat again.
  • Shake off excess and then roll in the bread crumb mixture, coating well.
  • Transfer to hot oil and fry until golden brown, 3-4 minutes.
  • Remove to a paper towel-lined plate to let drain before serving.

Notes

Serve with cocktail sauce or tartar sauce for dipping.

Nutrition

Calories: 629kcal | Carbohydrates: 90g | Protein: 42g | Fat: 9g | Saturated Fat: 3g | Trans Fat: 1g | Cholesterol: 385mg | Sodium: 3084mg | Potassium: 390mg | Fiber: 4g | Sugar: 7g | Vitamin A: 236IU | Vitamin C: 5mg | Calcium: 363mg | Iron: 9mg

Nutritional values are approximate.

Amazon Basics 3.2-Qt (3.0L) Electric Deep Fryer…
  • FAST-HEATING & FAMILY-SIZE: This powerful…
  • ADJUSTABLE TEMPERATURE & VERSATILE COOKING: With…

Bloody Mary Rim Salt

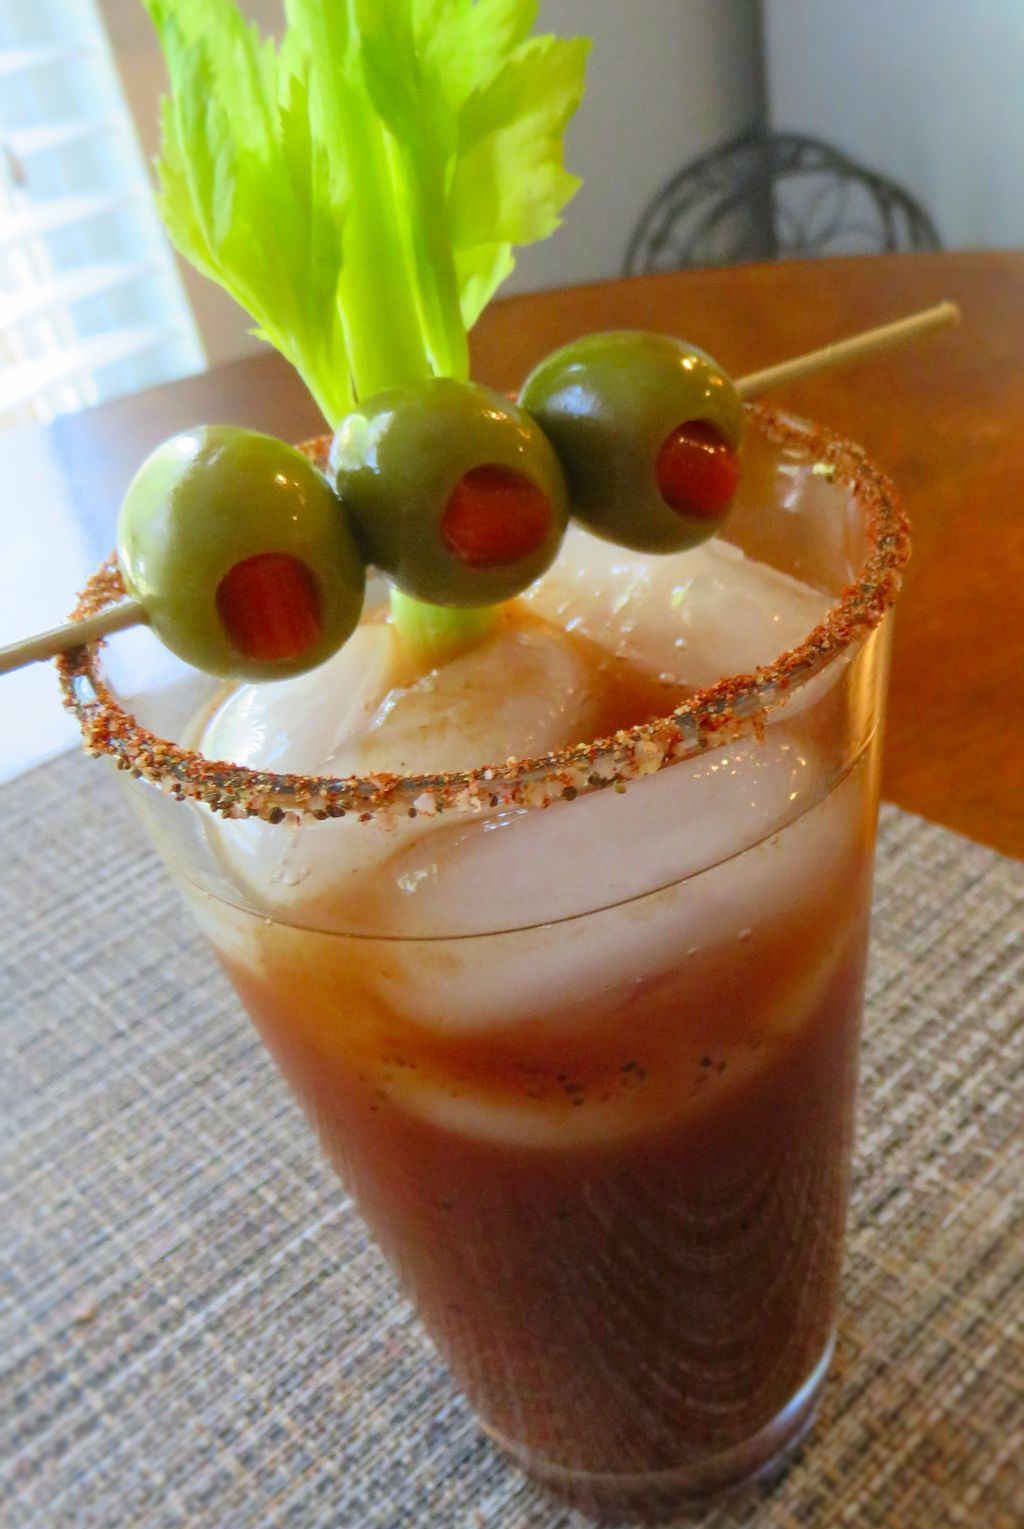
I’m not a bartender or mixologist by any stretch of the imagination. If you asked me anything about mixed drinks you’d get a blank unknowing look in response. However, I can make two drinks that my wife does enjoy: a dirty martini and a Bloody Mary. Now, we’re not talking big-time fru-fru drinks here either. My Bloody Mary isn’t like some you see on TV. You know, the ones that are garnished with bacon, sliders and hot peppers or whatever. Heck, I’ve seen them now where you can get an entire meal on a Bloody Mary, complete with burger sliders and shrimp. I keep it simple and tasty. And the key to my Bloody Mary is the rim salt. I make a big batch of it and keep it in the pantry, ready just in case someone requests a Bloody Mary.

Bloody Mary Rim Salt

Great On Wings And Steaks, Too!

Bloody Mary rim salt isn’t just for making drinks better, either. I love to sprinkle it on chicken wings hot out of the deep fryer or off the grill. It’s wonderfully different. It’s also great as a seasoning on grilled steaks.

I use one of those bar glass rimmer thingies to get the rim of our glasses moist before then using this rim salt. I feel like a real bartender when I use it. And from a distance, I probably look like I know what I’m doing. I get the sponge moist first. Then I pour some of the salt out. The glass gets pushed into the sponge, turning slightly. Then into the salt, again turning slightly. Fancy!

Plastic Spice Jars Bottle Containers with Black…
  • Premium Quality: Our plastic spice containers are…
  • Multi-Purpose: Our clear plastic jars are perfect…

If I buy my rim salt, I almost always pick some up from Pepper Palace. Their stuff is amazingly good! And of course, they have a whole heck of a lot more than rim salt. Shop them for amazing seasonings and sauces, too!

Bloody Mary Rim Salt
Print Pin
5 from 1 vote

Bloody Mary Rim Salt

My Bloody Mary isn’t like some you see on TV that are garnished with bacon, sliders and hot peppers or whatever. I keep it simple and tasty. And the key to my Bloody Mary is the rim salt.
Course Drinks
Cuisine American
Keyword Bloody Mary, seasoning
Prep Time 5 minutes
Total Time 5 minutes
Servings 16 servings
Calories 5kcal

Ingredients

Instructions

  • Combine all ingredients in a jar or sealable container. Shake to combine.
  • To rim a glass, moisten the edge of your glass then dip into the salt.

Notes

If you want a finer salt, place the salt into a spice grinder first and pulse a few times until the desired size is obtained.

Nutrition

Calories: 5kcal | Carbohydrates: 1g | Protein: 1g | Fat: 1g | Saturated Fat: 1g | Sodium: 2206mg | Potassium: 25mg | Fiber: 1g | Sugar: 1g | Vitamin A: 221IU | Vitamin C: 1mg | Calcium: 7mg | Iron: 1mg

Nutritional values are approximate.

Sale
Mueller Pro-Series All-in-One, 12 Blade Mandoline…
  • Meal Prep MVP – A practical and innovative way to…
  • 12 Diverse Blades – With nine interchangeable…
OXO Good Grips 4 Piece Stainless Steel Measuring…
  • Set includes: 1/4 cup, 1/3 cup, 1/2 cup and 1 cup
  • Magnetic handles keep Cups together for storage…

Smoked Cheetos

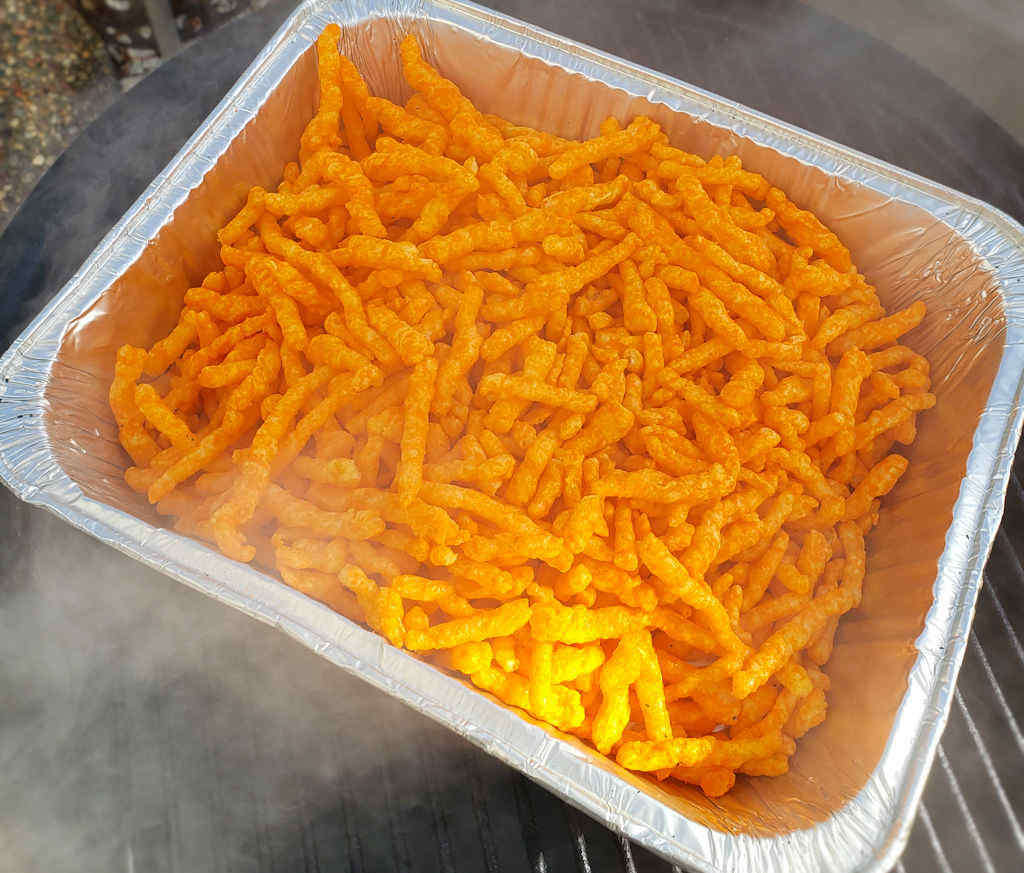
Well, yep, smoked Cheetos are different. And boy, you gotta be careful smoking them too. It doesn’t take much smoke to get these little crunchy morsels mighty smoky. I admit, my first time making them I got distracted and smoked them longer than I should have. I was able to rescue them (the longer they rest after smoking, the more mellow the smoke flavor gets) but I suggest you start with less smoke time, try them, and go from there. They come out totally new, something people won’t expect! Nice and crunchy and smoky cheesy!

To smoke Cheetos you use a cold smoking technique. You do not want high heat. You can get by with temperatures up to 180 F, but I suggest cold smoking, which is generally below 90 F.

Smoked Cheetos

Use A Smoker Tube For The Best Results

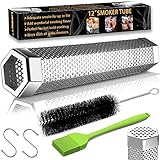
I use a pellet smoker tube when cold smoking. It gives me perfect control over the temperature and produces consistent smoke. I buy wood pellets and stuff the tube completely, then light one end. The tube stays lit for a few hours, perfect for smoking Cheetos. I highly recommend it. It’s also great for adding smoke flavor to dishes being cooked on a gas grill.

Pellet Smoker Tube -12″ Stainless Steel Wood Tube…
  • 【UP TO 5+ HOURS BILLOWING SMOKE】Just add your…
  • 【WORKS WITH ALL GRILLS AND SMOKERS】JY COOKMENT…

Since you have your cold smoke set-up going, throw on some potato chips or Chex mix too! Cheez-Its are delicious smoked also!

Smoked Cheetos
Print Pin
5 from 1 vote

Smoked Cheetos

To smoke Cheetos you use a cold smoking technique. You do not want high heat. You can get by with temperatures up to 180 F, but I suggest cold smoking, which is generally below 90 F.
Course Appetizer
Cuisine American
Keyword Cheetos, smoked
Prep Time 15 minutes
Cook Time 30 minutes
Servings 16
Calories 77kcal

Ingredients

For cold smoking (using charcoal)

  • 4 charcoal briquettes lit
  • 1 small chunk apple wood

For cold smoking (using a smoke tube)

  • wood pellets

For the smoked Cheetos

Instructions

For cold smoking (using charcoal)

  • Place the 4 lit briquettes in the bottom of your smoker.
  • Add the wood chunk.
  • Once the wood is smoking, you can add the Cheetos.

For cold smoking (using a smoke tube)

  • Fill the tube with the wood pellets. Place into the bottom of your smoker and light one end. Once the pellets produce smoke, you can add the Cheetos.

For the smoked Cheetos

  • Place the Cheetos in an aluminum pan over your cold smoke setup that is already producing smoke (from above).
  • Smoke 20-30 minutes, gently tossing once or twice, until the desired smoke taste is achieved.
  • It's best to let the smoked snacks sit out for a while before serving. The smoke flavor can be a little strong at first. A little rest time will mellow it.

Notes

Best made with the original cheesy Cheetos. You can also use cheese balls.

Nutrition

Calories: 77kcal | Carbohydrates: 7g | Protein: 1g | Fat: 5g | Saturated Fat: 1g | Trans Fat: 1g | Sodium: 68mg | Potassium: 233mg | Fiber: 1g | Sugar: 1g | Vitamin C: 3mg | Calcium: 3mg | Iron: 1mg

Nutritional values are approximate.

Smoke Tube for Pellet Smoker, 12” Smoker Tube for…
  • 【BILLOWING SMOKE AND BIG CAPACITY】 The pellet…
  • 【UNFORGETTABLE FLAVORS FOR HOT AND COLD…

Deluxe Cheddar Pretzel Bites

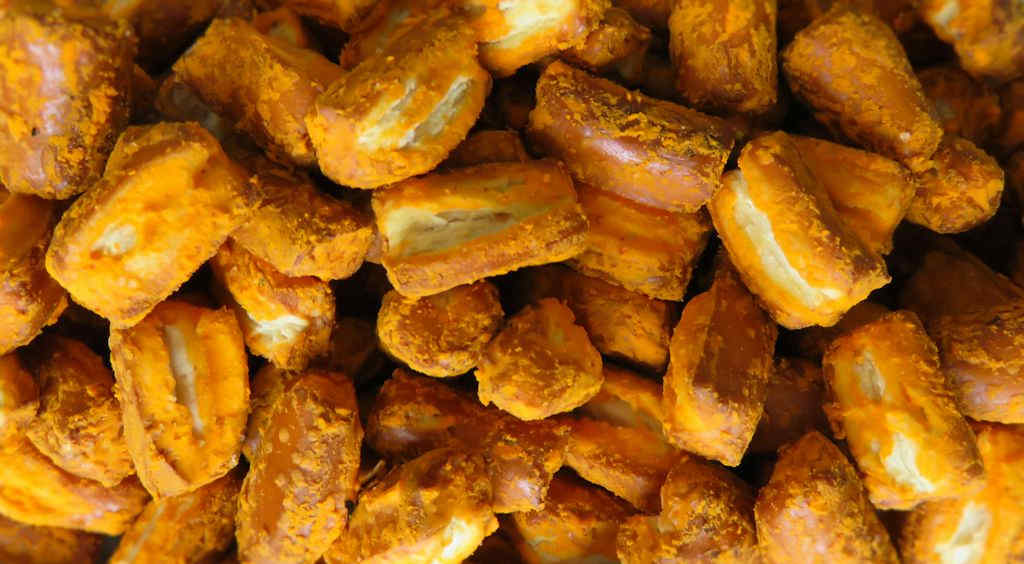
The reason I made such a big batch of these deluxe cheddar pretzel bites isn’t because I needed a huge amount for a family get-together. Sure, I needed some, but not a ton. Nope, I made a big batch because I wanted more for myself. Sorry, but it’s true. I was being selfish, but for a good reason. I love them. Crunchy, a bit buttery, and definitely cheesy. And made with real cheese!

Deluxe Cheddar Pretzel Bites

Oyster Crackers Are Great Too!

You don’t have to use pretzels to make these deluxe cheddar pretzel bites. Of course you’d have to change the name then! If you prefer, any cracker will do, especially oyster crackers or saltines. Just don’t substitute something that is strongly flavored and might not go well with the cheddar. That would make for a bowl of sadness.

No products found.

Popcorn oil from Orville Redenbacher is like magic in a bottle.

Sale
Orville Redenbacher’s Popping & Topping Buttery…
  • Six 16 fl oz bottles of Orville Redenbacher’s…
  • Popcorn buttery topping will give you that movie…

Also check out my balsamic, pizza, slow cooker garlic onion and spicy garlic ranch pretzel bites! They are all out of this world good too!

Deluxe Cheddar Pretzel Bites
Print Pin
5 from 1 vote

Deluxe Cheddar Pretzel Bites

I love these deluxe cheddar pretzel bites. Crunchy, a bit buttery, and definitely cheesy. And made with real cheese!
Course Snack
Cuisine American
Keyword cheesy, pretzel bites
Prep Time 5 minutes
Cook Time 1 hour
Total Time 1 hour 5 minutes
Servings 1 pound
Calories 1203kcal

Ingredients

Instructions

  • Preheat your oven to 200 F.
  • Place pretzel bites in large bowl.
  • In a small bowl whisk together the oil and cheddar seasoning.
  • Pour the oil mixture over the pretzels and toss to coat well.
  • Pour pretzels bites out onto a large baking pan and spread out evenly.
  • Bake for 1 hour, tossing every 20 minutes.
  • Let cool slightly before serving.

Notes

Store any leftovers in an airtight container.

Nutrition

Calories: 1203kcal | Carbohydrates: 231g | Protein: 28g | Fat: 15g | Saturated Fat: 8g | Cholesterol: 31mg | Sodium: 4382mg | Fiber: 6g | Sugar: 34g | Vitamin A: 308IU | Calcium: 123mg

Nutritional values are approximate.

Sale
Mueller Pro-Series All-in-One, 12 Blade Mandoline…
  • Meal Prep MVP – A practical and innovative way to…
  • 12 Diverse Blades – With nine interchangeable…
OXO Good Grips 4 Piece Stainless Steel Measuring…
  • Set includes: 1/4 cup, 1/3 cup, 1/2 cup and 1 cup
  • Magnetic handles keep Cups together for storage…