Roasted Carrots on the Char-Broil Big Easy

Note: This recipe was developed using the Char-Broil Big Easy Oil-Less Fryer. If you are cooking using the Char-Broil Smoker-Roaster Grill you should cook with the lid open and the temperature set to High. You might also need to adjust the cooking time.

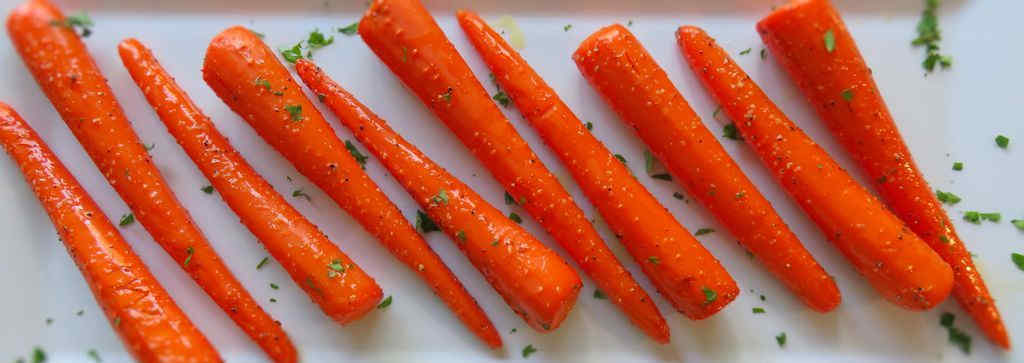
Mmmm. Lovely sweet delicious roasted carrots. Roasted carrots on the Char-Broil Big Easy are done in no time at all. Nothing fancy, nothing hard, just great flavor. You might think that your Big Easy is just for poultry or pork, but it’s great for making sides too. These carrots take no time at all, so you can toss them on your Big Easy while your turkey is resting.
Roasted Carrots on the Char-Broil Big Easy

Tender. Juicy. And Flavorful.

I like to partially cook my carrots first before putting them on the Big Easy. Cooking raw carrots over high heat  can make them dry out a bit. Cooking them just a bit first and then roasting them produces tender, juicy, flavorful carrots every single time. That’s one of the reasons that roasted carrots on the Char-Broil Big Easy are so good!

The same approach can be used with cauliflower and broccoli.

The bunk bed basket lets you double the amount of cooking space you have on your Big Easy. And it’s easy to take in and out of the cooker too!
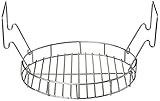
Charbroil The Big Easy Bunk Bed Basket…
  • Expands the cooking space of The Big Easy
  • Perfect for cooking two chickens at once

It’s always a good idea to keep a few spare grease trays on hand for your Char-Broil Big Easy.
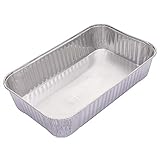
Char-Broil 2425514W12 Big Easy Grease Tray…
  • MATERIAL: Disposable aluminum liners made…
  • SIZE: Measures 6” x 10” across the top and…

Love your Big Easy as much I love mine? Check out my Big Easy Add-Ons page and all 3 of my huge free Big Easy eCookbooks!
Roasted Carrots on the Char-Broil Big Easy
Print Pin
5 from 1 vote

Roasted Carrots on the Char-Broil Big Easy

Mmmm. Lovely sweet delicious roasted carrots. Nothing fancy, nothing hard, just great flavor. 
Course Side
Cuisine American
Keyword Big Easy, carrots, Char-Broil
Prep Time 10 minutes
Cook Time 25 minutes
Total Time 35 minutes
Servings 4 servings
Calories 92kcal
Author Mike

Ingredients

Instructions

  • Bring an inch of water to a boil in a large skillet or shallow pot.
  • Add carrots and boil until just tender.
  • Drain and rinse with cold water.
  • Fire up your Big Easy.
  • Transfer the carrots to the Big Easy.
  • Roast the carrots until golden brown, 5-10 minutes.
  • Remove carrots to a plate and drizzle with the oil.
  • Season with salt and pepper.
  • Serve garnished with the chopped parsley.

Notes

I prefer to pre-cook my carrots before putting them on the Big Easy. You can skip that step and put them directly into the Big Easy if desired. Just add a few minutes to the cooking time to get them tender.

Nutrition

Calories: 92kcal | Carbohydrates: 21g | Protein: 2g | Fat: 1g | Saturated Fat: 0.1g | Polyunsaturated Fat: 0.2g | Monounsaturated Fat: 0.3g | Sodium: 762mg | Potassium: 701mg | Fiber: 6g | Sugar: 10g | Vitamin A: 36178IU | Vitamin C: 14mg | Calcium: 75mg | Iron: 1mg

Nutritional values are approximate.

Charbroil The Big Easy Bunk Bed Basket…
  • Expands the cooking space of The Big Easy
  • Perfect for cooking two chickens at once
Sugar Cookie Dum-Dum Pops

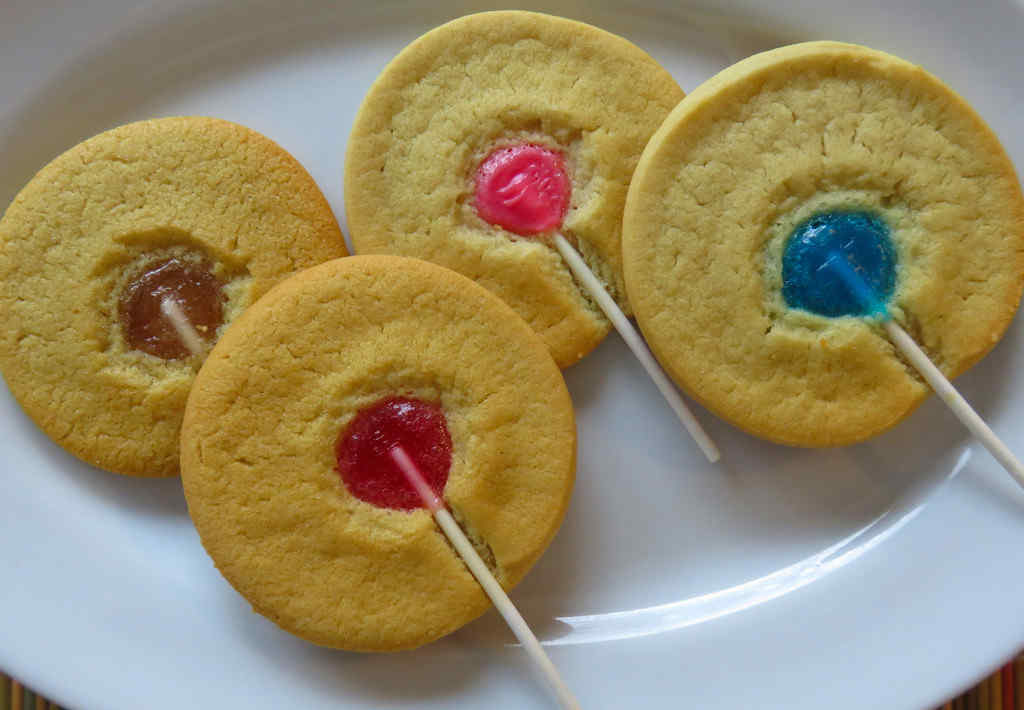
Finding uses for leftover Halloween candy is my new obsession. Ok, it’s ONE of my new obsessions. We ended up with a good amount of leftover candy this year, mostly Dum-Dums. That’s despite using them in my classic self-serve pumpkin, which is always a huge hit at Halloween. So, I made sugar cookie Dum-Dum pops. Fantastic baked sugar cookies with that light crunch, surrounding lightly melted Dum-Dums, perfect for licking after finishing off the cookie.

Sugar Cookie Dum-Dum Pops

The Key To Success

The key to making these sugar cookie Dum-Dum pops is to very, very gently press the pops into the dough. It softens while it bakes. If you push too hard the dough will crack and you’ll end up with sad (but still good) pops. After doing a few I got the technique down.

Sale
NutriChef Automatic Vacuum Air Sealing System for…
  • AUTOMATIC VACUUM FOOD SEALER WITH STARTER KIT…
  • DUAL DRY & MOIST MODES FOR EVERY FOOD TYPE…

These pops were a big hit at my wife’s office.

Also try my homemade Jolly Rancher lollipops.

Sugar Cookie Dum-Dum Pops
Print Pin
5 from 1 vote

Sugar Cookie Dum-Dum Pops

Fantastic baked sugar cookies with that light crunch, surrounding lightly melted Dum-Dums, perfect for licking after finishing off the cookie.
Course Treat
Cuisine American
Keyword cookies
Prep Time 5 minutes
Cook Time 15 minutes
Total Time 20 minutes
Servings 16 cookies
Calories 127kcal
Author Mike

Equipment

Ingredients

  • 1 tube sugar cookie dough
  • 16 Dum-Dums unwrapped

Instructions

  • Preheat oven per cookie dough package instructions.
  • Line two baking sheets with parchment paper (even though the dough package may say you don’t need to).
  • Cut the dough per the package instructions. Lay out onto the parchment paper.
  • Place pops in the center of the dough circles. VERY lightly press into the dough. Do not press hard.
  • Bake for 5 minutes then VERY lightly press the pops into the dough some more.
  • Bake another 5 minutes and check if you can press the pops even further into the dough.
  • Finish baking until golden brown, per the package instructions.
  • Let cool before removing from the parchment paper.

Notes

Store in an air-tight container.

Nutrition

Calories: 127kcal | Carbohydrates: 18g | Protein: 1g | Fat: 6g | Saturated Fat: 2g | Cholesterol: 3mg | Sodium: 85mg | Potassium: 43mg | Fiber: 1g | Sugar: 11g | Vitamin A: 11IU | Calcium: 2mg | Iron: 1mg

Nutritional values are approximate.

Sale
Mueller Pro-Series All-in-One, 12 Blade Mandoline…
  • Meal Prep MVP – A practical and innovative way to…
  • 12 Diverse Blades – With nine interchangeable…
OXO Good Grips 4 Piece Stainless Steel Measuring…
  • Set includes: 1/4 cup, 1/3 cup, 1/2 cup and 1 cup
  • Magnetic handles keep Cups together for storage…

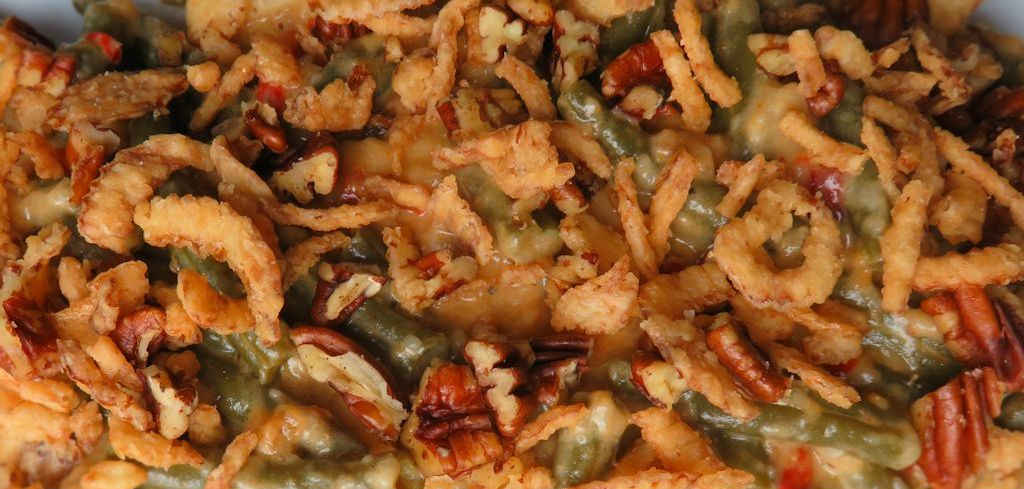
Slow Cooker Holiday Green Bean Casserole

We’ve all had it. The traditional holiday green bean casserole. Good stuff, but not much of a ‘wow’ factor. Well, scrap that and move on to this slow cooker holiday green bean casserole. Same idea, but oh, so much better.

My wife told me to make this again before we were halfway thru the first batch. There’s nothing about it that’s not great. Beans in creamy Alfredo sauce, flavored with water chestnuts, mushrooms and pimentos (or in my case, roasted red bell peppers) and a little cheese. And yes, French fried onions and toasted pecans. This slow cooker green bean casserole screams holidays.

Slow Cooker Holiday Green Bean Casserole

Forget Grandma’s Casserole (Sorry)

I made this early enough in the fall to get fresh green beans, which I blanched first. Frozen beans work just fine too. And, if you’re like me you’ll want extra French fried onions. No, they’re not for the dish. They’re for munching on while you watch everything cook in the slow cooker. I could eat them like potato chips. Just put them in a bowl and pass it on over!

Sale
Crock-Pot 7-Quart Manual Slow Cooker, Family Size…
  • Generous Capacity: 7-quart slow cooker that…
  • Cooking Flexibility: High or low slow cooking…

Also try my copycat of Stove Top’s chicken stuffing and my super-yummy Swiss vegetable medley!

If it’s Christmas time, why not also make some Christmas stocking pizzas?

Slow Cooker Holiday Green Bean Casserole
Print Pin
5 from 1 vote

Slow Cooker Holiday Green Bean Casserole

We’ve all had it. The traditional holiday green bean casserole. Well, scrap that and move on to this slow cooker holiday green bean casserole. Same idea, but oh, so much better.
Course Side
Cuisine American
Keyword casserole, crockpot, green beans, slow cooker
Prep Time 10 minutes
Cook Time 4 hours 30 minutes
Total Time 4 hours 40 minutes
Servings 8 servings
Calories 128kcal

Ingredients

Instructions

  • If using fresh green beans, first blanch the beans in boiling water for 2-3 minutes then place in an ice bath to cool. Drain well.
  • In a large bowl combine the beans, Alfredo sauce, water chestnuts, mushrooms, pimentos, Parmesan, pepper and a third of the French fried onions.
  • Lightly spray your slow cooker with non-stick spray and add the bean mixture.
  • Cover and cook on low for 4 1/2 hours, stirring occasionally.
  • Just prior to serving, toast the remaining French fried onions along with the pecans in a small skillet over medium heat.
  • Sprinkle over casserole and serve.

Notes

The pecans add a wonderful crunch.

Nutrition

Calories: 128kcal | Carbohydrates: 9g | Protein: 7g | Fat: 8g | Saturated Fat: 3g | Cholesterol: 9mg | Sodium: 209mg | Potassium: 279mg | Fiber: 4g | Sugar: 4g | Vitamin A: 888IU | Vitamin C: 14mg | Calcium: 195mg | Iron: 1mg

Nutritional values are approximate.

Sale
Reynolds Kitchens Slow Cooker Liners, Regular…
  • Package Includes: Six (6) Reynolds Kitchens Slow…
  • Easy Cleanup: These strong, reliable slow cooker…

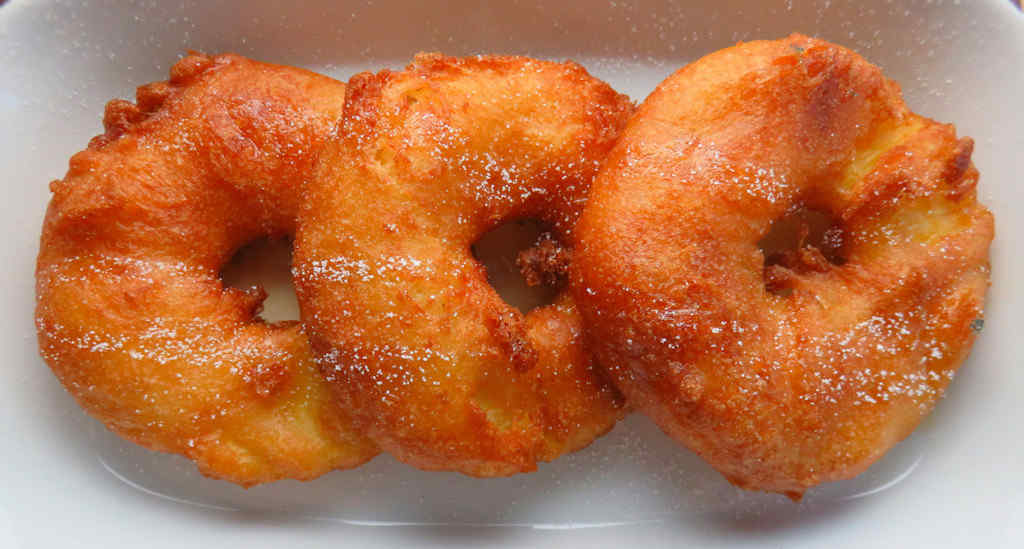
Pineapple Donuts

Wow. My mind was telling me “Hey, look! A donut!”. But my taste buds were telling me “Those aren’t donuts! Those look really different and cool!”. Pineapple donuts! Woo hoo!

Pineapple rings coated in a simple batter that cooks up golden brown delicious (GBD), reminiscent of ‘normal’ donuts, are fantastic. Drizzled with maple syrup and sprinkled with confectioners sugar, they are sweet with a crazy pineapple twist.

Pineapple Donuts

The Perfect Dessert

These little slices of heaven make for an outstandingly good dessert.

I bought this really cool pineapple corer from Amazon the other day that I’ve been just waiting to use so I picked up a pineapple on sale, got the corer out of the box, and in about a minute I had perfect fresh pineapple rings for these pineapple donuts.

The corer can also be used to make a pineapple ‘bowl’, great for serving things like fried rice and grilled shrimp with pineapple. It’s a fun little gadget.

Also try my glazed baked mini-donuts.

Pineapple Donuts
Print Pin
4 from 2 votes

Pineapple Donuts

My mind was telling me that I was about to devour donuts. But my taste buds told me that, hey, these aren't donuts!
Course Dessert
Cuisine American
Keyword deep-fried, pineapple
Prep Time 5 minutes
Cook Time 10 minutes
Total Time 15 minutes
Servings 6 servings
Calories 143kcal

Ingredients

Instructions

  • Heat 2 inches of oil in a Dutch oven or deep fryer to 365 F.
  • Whisk together the Bisquick, egg and milk.
  • Dip pineapple rings into the batter and coat completely.
  • Fry the rings until golden brown, turning once.
  • Serve immediately sprinkled with powdered sugar and drizzled with maple syrup.

Notes

A little whipped cream on top is great too!

Nutrition

Calories: 143kcal | Carbohydrates: 23g | Protein: 3g | Fat: 5g | Saturated Fat: 1g | Cholesterol: 30mg | Sodium: 275mg | Potassium: 140mg | Fiber: 1g | Sugar: 12g | Vitamin A: 100IU | Vitamin C: 5.4mg | Calcium: 72mg | Iron: 0.8mg

Nutritional values are approximate.

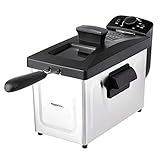
Amazon Basics 3.2-Qt (3.0L) Electric Deep Fryer…
  • FAST-HEATING & FAMILY-SIZE: This powerful…
  • ADJUSTABLE TEMPERATURE & VERSATILE COOKING: With…

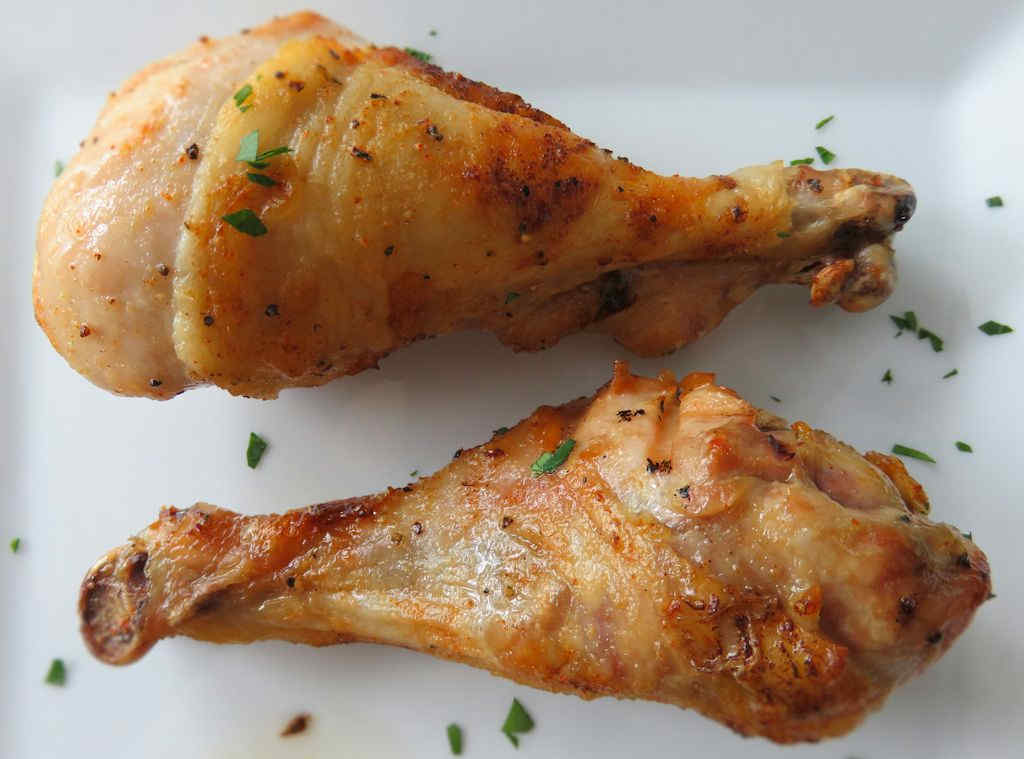
Spicy Roasted Chicken Legs on the Char-Broil Big Easy

The Kick’N chicken I made on my Big Easy not too long ago really got me jonesin’ for more legs. These spicy roasted chicken legs on the Char-Broil Big Easy have a nice little kick to them. And they also have a wonderful buttery flavor kissed with a bit of citrusy goodness. Although I’m usually a split chicken breast guy, the Big Easy cooks any cut, such as legs, absolutely perfect.

I often ignore chicken legs as a good candidate for cooking on my oil-less fryer. This recipe reminded me that I really need to pay a lot more attention to them! This dish came out tasting fantastic!

Note: This recipe was developed using the Char-Broil Big Easy Oil-Less Fryer. If you are cooking using the Char-Broil Smoker-Roaster Grill you should cook with the lid open and the temperature set to High. You might also need to adjust the cooking time.

Spicy Roasted Chicken Legs on the Char-Broil Big Easy

Perfectly Spicy

Even if you like spicy, go easy on the cayenne first as you add it to the butter. Don’t go crazy with it. Add some and give it a taste. You can add more. It’s really hard to take it back out!

No matter what, these spicy roasted chicken legs are a treat that cook up in no time on your Char-Broil Big Easy.

Having a bunk bed basket makes it easier to cook just about anything on the oil-less fryer. It doubles the amount of cooking space. For smaller things like split chicken breasts, your Big Easy is more than capable of cooking several at once. Bigger birds, well, that’s a one-at-a-time thing. But with bunk bed baskets you can add one or even two more levels of cooking to the standard basket that comes with the Big Easy. It’s a little tricky to get two in there at once, though. To help, I have a little document that will show you how!

Charbroil The Big Easy Bunk Bed Basket…
  • Expands the cooking space of The Big Easy
  • Perfect for cooking two chickens at once

Also try my nuclear chicken, made on the Big Easy.

It’s always a good idea to keep a few spare grease trays on hand for your Char-Broil Big Easy.

Char-Broil 2425514W12 Big Easy Grease Tray…
  • MATERIAL: Disposable aluminum liners made…
  • SIZE: Measures 6” x 10” across the top and…

Love your Big Easy as much I love mine? Check out my Big Easy Add-Ons page and all 3 of my huge free Big Easy eCookbooks!

Spicy Roasted Chicken Legs on the Char-Broil Big Easy
Print Pin
5 from 1 vote

Spicy Roasted Chicken Legs on the Char-Broil Big Easy

 These spicy roasted chicken legs have a nice little kick to them. And they also have a wonderful buttery flavor kissed with a bit of citrus. Although I’m usually a split chicken breast guy, the Big Easy cooks any cut, such as legs, absolutely perfect.
Course Main
Cuisine American
Keyword Big Easy, Char-Broil, chicken
Prep Time 15 minutes
Cook Time 45 minutes
Total Time 1 hour
Servings 4 servings
Calories 570kcal

Ingredients

Instructions

  • Fire up your Big Easy.
  • Place the legs into the Big Easy baskets. Try to not crowd them.
  • Melt the butter in a small saucepan.
  • Add the remaining ingredients and stir. Brush 1/3rd of the mixture over the legs and transfer to the Big Easy.
  • Cook for 30 minutes then brush with another 1/3rd of the butter mixture.
  • Cook another 15 minutes or until the chicken temperature reaches 165 F as measured in several places, making sure to not touch the bone.
  • Brush with the remaining butter mixture and cook 5 more minutes.
  • Remove and serve.

Notes

Note: You’ll need a bunk bed basket for your Big Easy to cook more than 4 legs at a time.

Nutrition

Calories: 570kcal | Carbohydrates: 3g | Protein: 43g | Fat: 42g | Saturated Fat: 12g | Trans Fat: 1g | Cholesterol: 242mg | Sodium: 386mg | Potassium: 574mg | Fiber: 1g | Sugar: 1g | Vitamin A: 380IU | Vitamin C: 4mg | Calcium: 51mg | Iron: 2mg

Nutritional values are approximate.

Charbroil The Big Easy Bunk Bed Basket…
  • Expands the cooking space of The Big Easy
  • Perfect for cooking two chickens at once
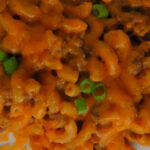
Cheeseburger Hamburger Helper (Copycat Recipe)

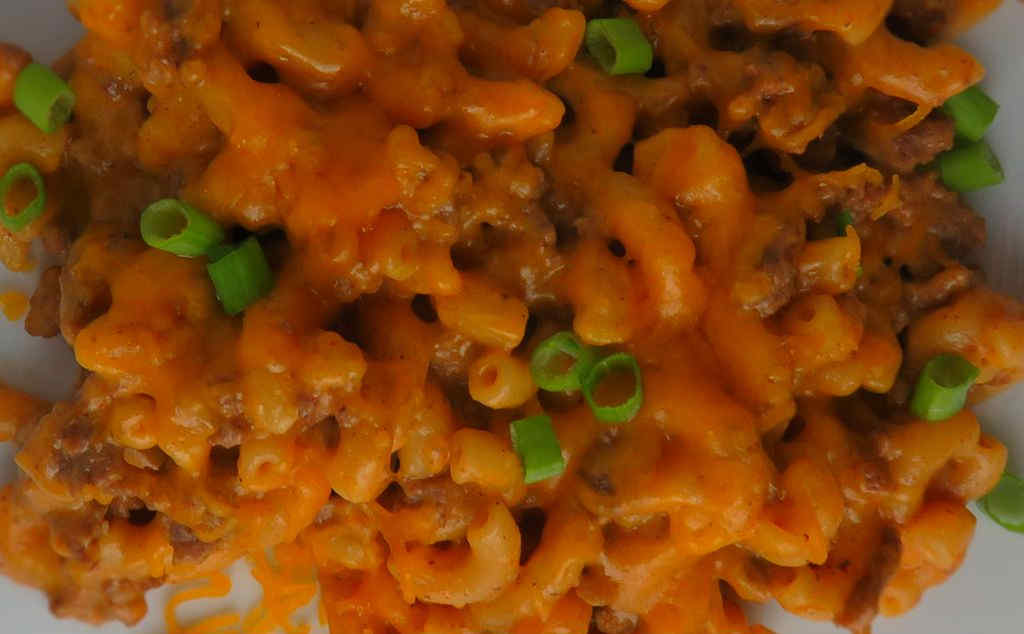
I admit that back in my bachelor gotta-make-something-for-dinner-but-I-can’t-cook days I went through my share of boxes of Hamburger Helper. Easy to make and hearty, any flavor would do. That’s why I just had to make this copycat recipe of the classic cheeseburger Hamburger Helper mix. Just as easy as the stuff out of the box and darn tasty too! Now I can make this copycat without being a bachelor!

Cheeseburger Hamburger Helper (Copycat Recipe)

It Doesn’t Have To Be Kid-Friendly

You can easily modify this copycat recipe for Cheeseburger Hamburger Helper and make your own. Add jalapenos or a dash or two of cayenne pepper for a little kick. Swap Monterey Jack cheese for the cheddar. Use ground turkey instead of ground beef and add a pinch or two of dried sage. Your copycat cheeseburger Hamburger Helper doesn’t have to be exactly like the stuff out of the box, but it’s ok if it is!

Shredded

This recipe calls for shredded cheese. Now in my younger days, that meant grab a bag of the pre-shredded stuff at the store. I never really wondered (or probably cared) why it didn’t always melt right. I just knew that it was easy and tasted pretty good. Well now I know that that stuff has … stuff… in it that keeps it from sticking together. That’s why it doesn’t always melt well. So I shred my own. It takes just minutes. And I’ve found it tastes better and melts oh so ooey-gooey well!

Geedel Rotary Cheese Grater, Kitchen Mandoline…
  • Makes Everything Simple : Just forget your bagged…
  • Premium Material : All parts of the rotary cheese…

What’s Up, Mac?

I know it seems almost wrong, but you can also make this dish using something other than elbow pasta. I know. I’m with you. Seems borderline sacrilegious doesn’t it? But here’s the thing, there are pastas out there that are made for sauce and stuff to stick to them. Yeah. Elbow mac isn’t the best at that. My suggestion if you’re feeling creative and adventurous? Cavatappi. Give it a whirl! You’ll love it!

Also try my copycat of the not-so-cheesy classic Hamburger helper.

This recipe is based on a recipe from KitchMe.

Copycat Cheeseburger Hamburger Helper
Print Pin
4 from 5 votes

Cheeseburger Hamburger Helper (Copycat Recipe)

I admit that back in my bachelor gotta-make-something-for-dinner-but-I-can’t-cook days I went through my share of boxes of Hamburger Helper. Easy to make and hearty, any flavor would do. That’s why I just had to make this copycat version of the classic cheeseburger mix. Just as easy as the stuff out of the box and darn tasty too!
Course Main
Cuisine American
Keyword copycat, Hamburger helper
Prep Time 5 minutes
Cook Time 15 minutes
Total Time 20 minutes
Servings 4 servings
Calories 688kcal

Equipment

Ingredients

Instructions

  • Crumble the ground beef into a large skillet over medium high heat and cook until done. Drain off any excess fat.
  • Stir in the all but the cheese and bring to a boil. Reduce heat to a simmer, cover, and simmer for 10-12 minutes or until the pasta is tender.
  • Stir in the cheese until melted.
  • Remove from heat, uncover and let rest 5 minutes before serving topped with additional cheese.

Notes

It’s not copycat, but I also like to make this dish using pepper jack cheese.

Nutrition

Calories: 688kcal | Carbohydrates: 49g | Protein: 37g | Fat: 37g | Saturated Fat: 17g | Trans Fat: 1g | Cholesterol: 122mg | Sodium: 889mg | Potassium: 631mg | Fiber: 2g | Sugar: 9g | Vitamin A: 558IU | Vitamin C: 3mg | Calcium: 376mg | Iron: 3mg

Nutritional values are approximate.

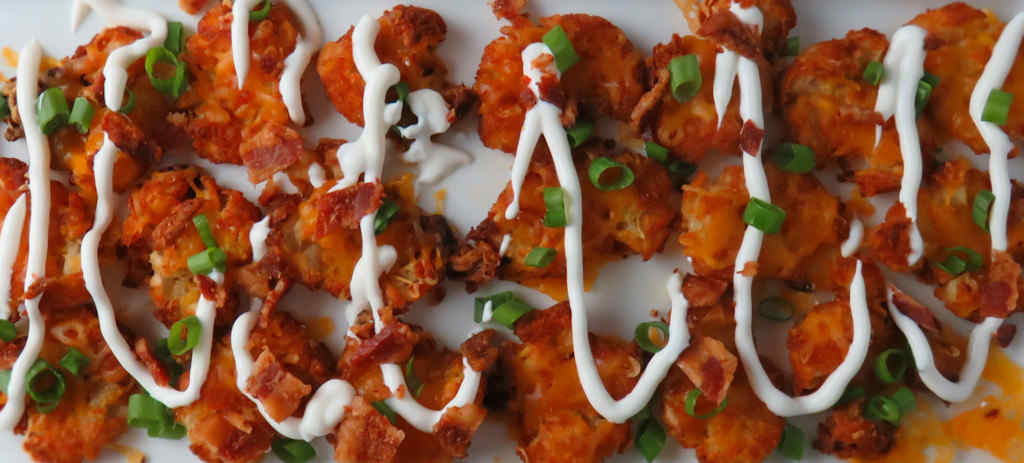
Tater Tot Potato Skins

My wife declared these as “the only way we will cook tater tots from now on”. And I am in total agreement with her too. Just like potato skins they have a crunchy side and a soft side and taste, well, potato-y. They are topped with our favorite potato skin toppings, cheese, green onion and sour cream. These tater tot potato skins can be served as appetizers at your next party. Or serve them as a side at your next grill-out. Make sure you make lots of them, though, because they are crazy addicting.

Tater Tot Potato Skins

A Few Notes

You can actually skip the thawing of the tater tots and squash the tots after they have been in the oven for 10 minutes. I found this works fine, but not quite as well as when you fully thaw the tater tots first. They don’t squash out quite as flat, but they still get super duper crispy crunchy, which is the goal.

Squirty Sour Cream

I spoon sour cream into a squirt bottle to top these tater tot potato skins nice and evenly. You can of course spoon the sour cream directly on top, but I usually end up with a little too much in one spot and not enough in another. The squirt bottle solves that problem.

I highly recommend that you shred or grate your own cheese at home. Don’t buy the pre-shredded or pre-grated stuff. It has stuff added to it to keep it from sticking together. That ‘stuff’ affects how the cheese melts. Shred it yourself and use the good stuff.

Geedel Rotary Cheese Grater, Kitchen Mandoline…
  • Makes Everything Simple : Just forget your bagged…
  • Premium Material : All parts of the rotary cheese…

Also try my tater tot nachos.

Tater Tot Potato Skins
Print Pin
5 from 1 vote

Tater Tot Potato Skins

We declared these as “the only way we will cook tater tots from now on”.
Course Appetizer
Cuisine American
Keyword potato skins, tater tots
Prep Time 5 minutes
Cook Time 30 minutes
Total Time 35 minutes
Servings 16 servings
Calories 162kcal

Equipment

Ingredients

  • 2 pounds tater tots thawed completely
  • 1 cup extra sharp cheddar cheese shredded
  • ½ cup sour cream
  • 4 green onions sliced
  • 8 slices bacon cooked, crumbled

Instructions

  • Preheat oven to 400 F.
  • Spray two large baking sheets with non-stick spray (I found that a Silpat mat works best)
  • Use the back of a large spoon to flatten the tots. Don’t press too hard if they don’t flatten immediately.
  • Place into the oven for 10 minutes. Check if any of the tots need a bit more flattening.
  • Continue baking for another 10 minutes or until the tots are turning golden brown.
  • Sprinkle with cheese and continue baking until crispy.
  • Remove from the oven.
  • Transfer to a platter and drizzle with the sour cream and sprinkle with the green onions and bacon.

Notes

Best served immediately. You don’t want the toppings to make the tots soggy.

Nutrition

Calories: 162kcal | Carbohydrates: 15g | Protein: 4g | Fat: 10g | Saturated Fat: 4g | Trans Fat: 1g | Cholesterol: 15mg | Sodium: 361mg | Potassium: 196mg | Fiber: 1g | Sugar: 1g | Vitamin A: 149IU | Vitamin C: 5mg | Calcium: 69mg | Iron: 1mg

Nutritional values are approximate.

Sale
Mueller Pro-Series All-in-One, 12 Blade Mandoline…
  • Meal Prep MVP – A practical and innovative way to…
  • 12 Diverse Blades – With nine interchangeable…
OXO Good Grips 4 Piece Stainless Steel Measuring…
  • Set includes: 1/4 cup, 1/3 cup, 1/2 cup and 1 cup
  • Magnetic handles keep Cups together for storage…

Pepper Onion Beer Sauce

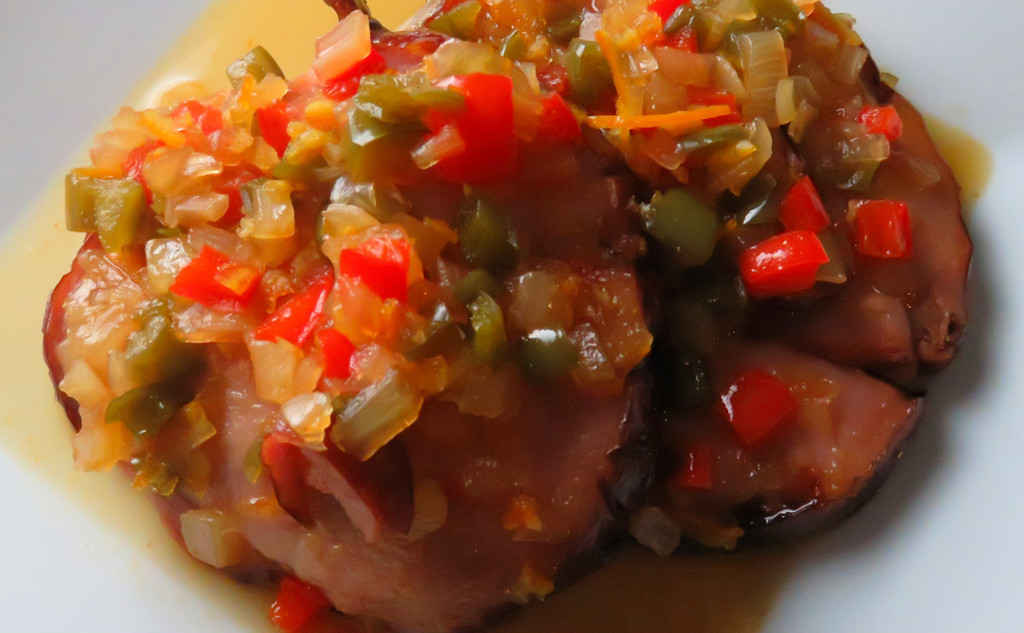
I had a bunch of ham leftover from cooking a big ham on my Char-Broil Big Easy. And I do mean a bunch. I could’ve made more sandwiches. Or I could dice up some ham for omelets. Instead, I decided to warm up some nice thick slices and top them with this wonderful pepper onion beer sauce. It looks like your pretty standard vegetable topping, but with a twist: orange marmalade. Whoa! I wasn’t expecting that!

Pepper Onion Beer Sauce

A Great Sauce For Chicken, Too!

This pepper onion beer sauce really goes well with ham, but I also think it’d complement grilled chicken just as well. Don’t like orange marmalade? I bet you could substitute your favorite marmalade or preserves.

I like to use my good ole trusty Dutch oven to make this sauce and pretty much darned near anything like it on my stovetop. It’s nice and big and sturdy. That extra weight helps it maintain and distribute heat perfectly. As an added bonus, it’s actually pretty easy to clean up too!

Amazon Basics Enameled Cast Iron Dutch Oven Pot…
  • OVEN SAFE DESIGN: Withstand temperatures up to…
  • EXCELLENT HEAT RETENTION: This heavy-duty cast…

Also try my cherry sauce glazed ham.

Pepper Onion Beer Sauce
Print Pin
4 from 1 vote

Pepper Onion Beer Sauce

I decided to warm up some nice thick slices of ham and top them with this wonderful pepper onion beer sauce. It looks like your pretty standard vegetable topping, but with a twist: orange marmalade.
Course Sauce
Cuisine American
Keyword beer, sauce, vegetable
Prep Time 10 minutes
Cook Time 15 minutes
Total Time 25 minutes
Servings 4 servings
Calories 177kcal

Equipment

Ingredients

Instructions

  • Heat the oil in a large skillet over medium-high heat
  • Add the bell peppers and onion and saute for 5 minutes
  • Add the beer, orange marmalade, soy sauce and hot sauce.
  • Bring to a boil then reduce to a simmer and continue simmering until the vegetables are softened and the sauce is reduced.
  • Serve over sliced ham or grilled chicken.

Notes

Also great on hot dogs!

Nutrition

Calories: 177kcal | Carbohydrates: 33g | Protein: 1g | Fat: 4g | Saturated Fat: 1g | Trans Fat: 1g | Sodium: 280mg | Potassium: 146mg | Fiber: 1g | Sugar: 27g | Vitamin A: 546IU | Vitamin C: 35mg | Calcium: 29mg | Iron: 1mg

Nutritional values are approximate.

Sale
Mueller Pro-Series All-in-One, 12 Blade Mandoline…
  • Meal Prep MVP – A practical and innovative way to…
  • 12 Diverse Blades – With nine interchangeable…
OXO Good Grips 4 Piece Stainless Steel Measuring…
  • Set includes: 1/4 cup, 1/3 cup, 1/2 cup and 1 cup
  • Magnetic handles keep Cups together for storage…

Cauliflower Popcorn

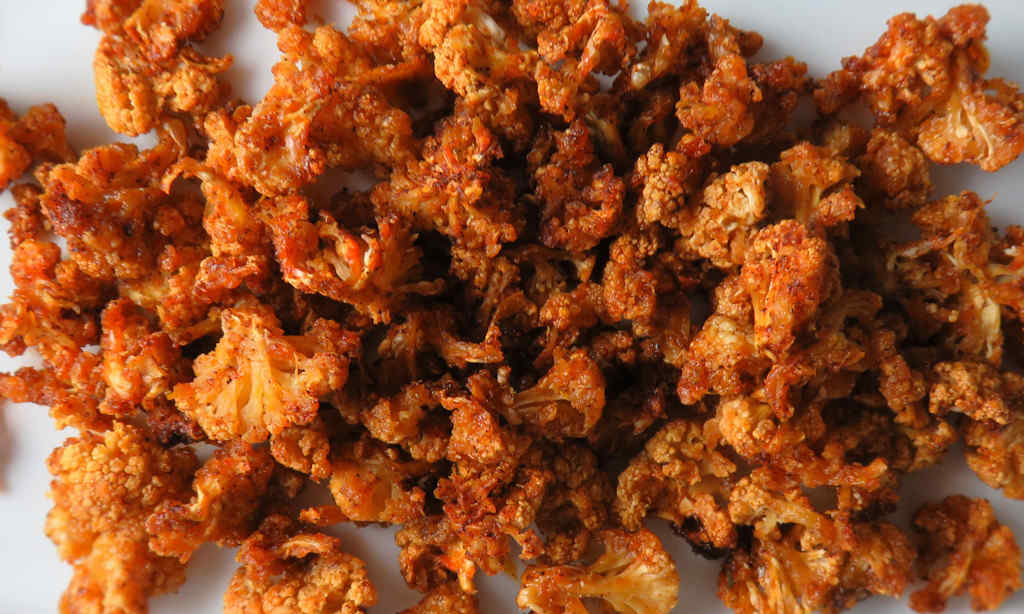
I loved the flavor of this cauliflower popcorn, made using a Nesco Snackmaster Pro dehydrator. The cumin and chili powder add a nice southwestern, earthly flavor. The nutritional yeast (which I’d never used before) made me think of cheddar cheese flavoring. I was pleasantly surprised by it.

Cauliflower Popcorn

Eat ‘Em Quick For The Best Crunch

Now, let’s talk ‘popcorn’. That makes you think crunchy, and if you eat this cauliflower raw that’s just what you’ll get. You can also pop (sorry) them into a dehydrator for 12 or so hours. Right out of the dehydrator they have a nice crunch to them, but I found that that crunch doesn’t last. The seems get a bit soft…. and not popcorn-y. But the flavor was still great!

I’m looking forward to other ways to use nutritional yeast. For us, I’d recommend this cauliflower popcorn, but honestly I’d enjoy them more raw and save the dehydrator time. That’s up to you. I’m a big texture guy, and for me, the texture of the raw cauliflower was better.

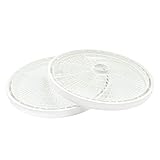
I like to load up my dehydrator. To do that I picked up a handful of extra trays. They really add a whole lot more drying space! Since I have to rotate my trays, I write a number on each one on a piece of blue painter’s tape so I can keep track of them.

Nesco TR-2 White Plastic Round 15 1/2″ Add-A-Trays…
  • 15.5″ DIAMETER TRAYS: This Add-A-Tray 2-pack…
  • BPA FREE: Made of high-quality food grade plastic…
Nesco SLD-2-6 American Harvest 13.75″ Fruit Roll…
  • Compatible with 15½” diameter trays. This Fruit…
  • BPA FREE: Made of high-quality food grade plastic…
Sale
NESCO LM-2-6 Round Plastic Mesh…
  • IDEAL FOR SMALL AND STICKY FOODS: Removable mesh…
  • BPA FREE: Made of high-quality food grade plastic…

Also try crispy green beans from the Nesco Snackmaster Pro.

Cauliflower Popcorn
Print Pin
4 from 1 vote

Cauliflower Popcorn

I loved the flavor of this cauliflower ‘popcorn’. The cumin and chili powder add a nice southwestern, earthly flavor. The nutritional yeast (which I’d never used before) made me think of cheddar cheese flavoring. I was pleasantly surprised by it.
Course Appetizer
Cuisine American
Keyword cauliflower, popcorn
Prep Time 5 minutes
Cook Time 12 hours
Total Time 12 hours 5 minutes
Servings 8 servings
Calories 26kcal

Ingredients

Instructions

  • Place the cauliflower into a large bowl.
  • Add the olive oil, yeast, cumin, chili powder and salt and toss to coat.
  • Serve raw, or if desired, place into a dehydrator and dry for 12 hours.

Notes

For best results, serve immediately.

Nutrition

Calories: 26kcal | Carbohydrates: 4g | Protein: 2g | Fat: 1g | Saturated Fat: 1g | Sodium: 46mg | Potassium: 249mg | Fiber: 2g | Sugar: 1g | Vitamin A: 159IU | Vitamin C: 35mg | Calcium: 23mg | Iron: 1mg

Nutritional values are approximate.

Nesco SLD-2-6 American Harvest 13.75″ Fruit Roll…
  • Compatible with 15½” diameter trays. This Fruit…
  • BPA FREE: Made of high-quality food grade plastic…

Smoked Habanero Flake on the Nesco Snackmaster Pro

Not too long ago I made a fantastic batch of red pepper flake using my dehydrator, a Nesco Snackmaster Pro. I use the spicy flakes on just about everything. But, I thought, nothing wrong with making an even tastier, hotter version. So I grabbed a big bag of nice, ripe red habaneros and proceeded to make smoked habanero flake on the Nesco Snackmaster Pro.

Smoked Habanero Flake on the Nesco Snackmaster Pro

Complex Heat. And Lots Of It.

Smoking the habaneros, though not required, gives the flakes a fantastic slightly-smoky flavor and aroma, much more complex than if you just ground dried habaneros. And oh, yes, these flakes are mighty hot. You have to be careful handling the peppers, and trust me, when you grind them, do NOT put your face over the grinder when you remove the lid. I speak the truth here, it’ll get you! This is the real deal here. Wear rubber gloves if you have issues handling hot peppers. This smoked habanero flake on the Nesco Snackmaster Pro means business!

Grab A Few Extra Trays

I like to load up my dehydrator. To do that I picked up a handful of extra trays. They really add a whole lot more drying space! Since I have to rotate my trays, I write a number on each one on a piece of blue painter’s tape so I can keep track of them.

Nesco TR-2 White Plastic Round 15 1/2″ Add-A-Trays…
  • 15.5″ DIAMETER TRAYS: This Add-A-Tray 2-pack…
  • BPA FREE: Made of high-quality food grade plastic…
Nesco SLD-2-6 American Harvest 13.75″ Fruit Roll…
  • Compatible with 15½” diameter trays. This Fruit…
  • BPA FREE: Made of high-quality food grade plastic…
Sale
NESCO LM-2-6 Round Plastic Mesh…
  • IDEAL FOR SMALL AND STICKY FOODS: Removable mesh…
  • BPA FREE: Made of high-quality food grade plastic…

Also make red pepper flake on your Nesco Snackmaster Pro!

Smoked Habanero Flake on the Nesco Snackmaster Pro
Print Pin
5 from 2 votes

Smoked Habanero Flake on the Nesco Snackmaster Pro

Smoking the habaneros, though not required, gives the flakes a fantastic slightly-smoky flavor and aroma, much more complex than if you just ground dried habaneros. And oh, yes, these flakes are mighty hot.
Course Appetizer
Cuisine American
Keyword dehydrator, nesco snackmaster pro, peppers, smoked
Prep Time 10 minutes
Cook Time 14 hours 30 minutes
Total Time 14 hours 40 minutes
Servings 1 pound
Calories 363kcal
Author Mike

Ingredients

  • 2 pounds habaneros ripe, any color, preferably all roughly the same size

Instructions

  • Fire up your smoker. Add a few chunks of stronger wood, such as hickory. Do not use a fruity wood such as apple, peach, etc.
  • Add the habaneros to the smoker and smoke for 2 hours. You’re not looking to dry them (though you could given plenty of time), just get a nice smoke flavor.
  • Remove the habaneros and transfer to your dehydrator, set to 165 F.
  • Dry the habaneros until crispy, 8-12 hours (or more if they are large, less if they are smaller). Rotate the trays every 2 hours to ensure even drying.
  • Remove the habaneros and let cool slightly.
  • Remove the stems from the peppers.
  • Working in batches, transfer the peppers to a spice grinder with blades (do not use a burr grinder) and grind until the desired sized flakes are achieved.
  • Store in an air-tight container.
  • Note: The flakes will be mighty hot, so use sparingly.

Notes

You’ll need a smoker (wood, charcoal, or electric), a dehydrator, and a spice grinder (I use a blade-style coffee grinder) to make these smoked habanero flakes.

Nutrition

Calories: 363kcal | Carbohydrates: 80g | Protein: 17g | Fat: 4g | Saturated Fat: 1g | Sodium: 82mg | Potassium: 2921mg | Fiber: 14g | Sugar: 48g | Vitamin A: 8636IU | Vitamin C: 1304mg | Calcium: 127mg | Iron: 9mg

Nutritional values are approximate.

Nesco SLD-2-6 American Harvest 13.75″ Fruit Roll…
  • Compatible with 15½” diameter trays. This Fruit…
  • BPA FREE: Made of high-quality food grade plastic…