Black Pepper Strawberries

Don’t you just love when an incredibly simple dish comes out so fantastic? I was looking for a little something to take to dinner at my wife’s sister’s house. Nothing big, just something fresh. Since strawberries were in season I picked up a few pints and made these delicious black pepper strawberries. The perfect combination of citrus and berry with a nice peppery twist. I even added a bit more pepper than the recipe called for (because I love freshly ground black pepper). Yummy!

Black Pepper Strawberries

Don’t Rush Things

You can’t skip on the time these black pepper strawberries need to sit in the fridge before you serve them. They need that hour to absorb some of pepper and citrus-flavored juices. Toss them just before serving.

Ray Lampe knows BBQ. And side dishes like this.

You can use a sugar substitute if you wish.

Sale
NutriChef Automatic Vacuum Air Sealing System for…
  • AUTOMATIC VACUUM FOOD SEALER WITH STARTER KIT…
  • DUAL DRY & MOIST MODES FOR EVERY FOOD TYPE…

Also try my strawberry cheesecake salad.

Black Pepper Strawberries
Print Pin
5 from 1 vote

Black Pepper Strawberries

The perfect combination of citrus and berry with a nice peppery twist. I even added a bit more pepper than the recipe called for (because I love freshly ground black pepper). Yummy!
Course Dessert
Cuisine American
Keyword strawberry
Prep Time 5 minutes
Cook Time 1 hour
Total Time 1 hour 5 minutes
Servings 8
Calories 69kcal

Ingredients

  • 2 pints strawberries rinsed, dried, hulled and quartered
  • ½ lemon juiced
  • 1 large orange juiced
  • 3 tablespoons sugar
  • 1 ½ teaspoon ground black pepper
  • Whipped cream

Instructions

  • Whisk the lemon juice, orange juice, sugar and pepper in a large bowl until combined.
  • Add the strawberries.
  • Toss gently to coat.
  • Cover and refrigerate for 1 hour.
  • Serve topped with whipped cream.

Notes

Best when served immediately.

Nutrition

Calories: 69kcal | Carbohydrates: 17g | Protein: 1g | Fat: 1g | Saturated Fat: 1g | Sodium: 1mg | Potassium: 237mg | Fiber: 3g | Sugar: 13g | Vitamin A: 69IU | Vitamin C: 85mg | Calcium: 32mg | Iron: 1mg

Nutritional values are approximate.

Sale
Mueller Pro-Series All-in-One, 12 Blade Mandoline…
  • Meal Prep MVP – A practical and innovative way to…
  • 12 Diverse Blades – With nine interchangeable…
OXO Good Grips 4 Piece Stainless Steel Measuring…
  • Set includes: 1/4 cup, 1/3 cup, 1/2 cup and 1 cup
  • Magnetic handles keep Cups together for storage…

Quick Fix BBQ Beans

You can make BBQ beans at home in no time. Really great beans at that. So why grab a can of BBQ beans from the store? Sure, I’ve made scratch baked beans before (on the smoker and they were fantastic!). These aren’t those beans. Quick to fix, these BBQ beans still pack in the flavor.

Quick Fix BBQ Beans

The Sauce Makes The Beans

You can make these quick fix BBQ beans taste however you like just by changing which BBQ sauce you add. From smoky to spicy, you can’t go wrong. And speaking of spicy, for a little extra kick add a few sliced jalapenos. And for extra crunch, chop half of a medium sweet onion and toss that in too. You really cannot make a boo-boo when you make these beans.

If I’m reaching for a bottled BBQ sauce, I often go for Sweet Baby Ray’s.

Sweet Baby Ray’s Varierty Pack, 1 Original…
  • Includes 4 Signature Flavors: Original, Hickory…
  • Award-Winning Taste: Sweet Baby Ray’s Original…

If you have more time, try making my best BBQ beans on the planet (really, they are), Dinosaur-style BBQ beans, Peach BBQ beans, slow cooker beans and wieners and Tangy Pit Beans.

Print Pin
5 from 1 vote

Quick Fix BBQ Beans

Why grab a can of pre-made BBQ beans at the store when you can make your own in no time at all.
Course Side
Cuisine American
Keyword barbecue, BBQ, beans
Prep Time 5 minutes
Cook Time 45 minutes
Total Time 50 minutes
Servings 8 servings
Calories 78kcal
Author Mike

Equipment

Ingredients

Instructions

  • Preheat oven to 375 F.
  • Combine all ingredients and pour into an 8″ x 8″ baking dish that has been sprayed with non-stick spray.
  • Bake for 45 minutes.
  • Let cool slightly before serving as the sauce will be very hot.

Notes

Feel free to add some minced jalapeno for a little kick.

Nutrition

Calories: 78kcal | Carbohydrates: 19g | Protein: 1g | Fat: 1g | Saturated Fat: 1g | Sodium: 389mg | Potassium: 127mg | Fiber: 1g | Sugar: 15g | Vitamin A: 403IU | Vitamin C: 14mg | Calcium: 17mg | Iron: 1mg

Nutritional values are approximate.

Sale
Mueller Pro-Series All-in-One, 12 Blade Mandoline…
  • Meal Prep MVP – A practical and innovative way to…
  • 12 Diverse Blades – With nine interchangeable…
OXO Good Grips 4 Piece Stainless Steel Measuring…
  • Set includes: 1/4 cup, 1/3 cup, 1/2 cup and 1 cup
  • Magnetic handles keep Cups together for storage…

Corn on the Cob Maque Choux

This corn on the cob maque choux is a fun twist on the classic southern Louisiana dish. Lightly caramelized onions and peppers cooked with spicy tasso, served over grilled fresh corn on the cob. Every bite is a combination of sweetness and smokiness with just a hint of spicy.

Corn on the Cob Maque Choux

Great Tastes In Every Bite

The topping on the corn on the cob maque choux is also great on other dishes, such as grilled hamburgers or hot dogs. It’s really packed with flavor and takes almost no time to make.

Tasso may be hard to find depending on where you live. You can substitute bacon, or if you have a smoker (I use my Weber smoker), make your own. It takes a little time and effort to make, but oh boy is it ever worth it.

If you use a particularly spicy tasso you might want to cut back on the Cajun seasoning.

Slap Ya Mama Cajun Seasoning from Louisiana…
  • CLASSIC ORIGINAL SEASONING: Slap Ya Mama’s unique…
  • VERSATILE AND EASY TO USE: Not too spicy and full…

Also try my spiced corn on the cob.

Corn on the Cob Maque Choux
Print Pin
4 from 1 vote

Corn on the Cob Maque Choux

This corn on the cob maque choux is a fun twist on the classic southern Louisiana dish. Lightly caramelized onions and peppers cooked with spicy tasso, served over grilled fresh corn on the cob. 
Course Side
Cuisine American
Keyword corn-on-the-cob
Prep Time 5 minutes
Cook Time 15 minutes
Total Time 20 minutes
Servings 3 servings
Calories 261kcal
Author Mike

Equipment

Ingredients

  • 6 ears corn cooked however you wish

For the topping

  • 1 teaspoon olive oil
  • 1 medium yellow onion sliced
  • 1 medium bell pepper green or red, sliced
  • 4 ounces tasso ham chopped
  • 2 cloves garlic minced
  • ½ stick unsalted butter
  • 1 teaspoon Cajun seasoning

Instructions

  • While the corn is cooking heat the oil in a medium skillet over medium-high heat.
  • Add the onion and bell pepper and saute for 2 minutes.
  • Add the tasso (or bacon) and cook for 5 minutes.
  • Add the garlic, butter and Cajun seasoning. Stir until the butter melts and the vegetables and tasso get lightly caramelized.
  • Spoon generously over cooked corn.

Notes

You can substitute bacon for the tasso.

Nutrition

Calories: 261kcal | Carbohydrates: 7g | Protein: 9g | Fat: 22g | Saturated Fat: 12g | Polyunsaturated Fat: 1g | Monounsaturated Fat: 7g | Trans Fat: 1g | Cholesterol: 64mg | Sodium: 480mg | Potassium: 278mg | Fiber: 2g | Sugar: 3g | Vitamin A: 2054IU | Vitamin C: 54mg | Calcium: 24mg | Iron: 1mg

Nutritional values are approximate.

Sale
Mueller Pro-Series All-in-One, 12 Blade Mandoline…
  • Meal Prep MVP – A practical and innovative way to…
  • 12 Diverse Blades – With nine interchangeable…
OXO Good Grips 4 Piece Stainless Steel Measuring…
  • Set includes: 1/4 cup, 1/3 cup, 1/2 cup and 1 cup
  • Magnetic handles keep Cups together for storage…

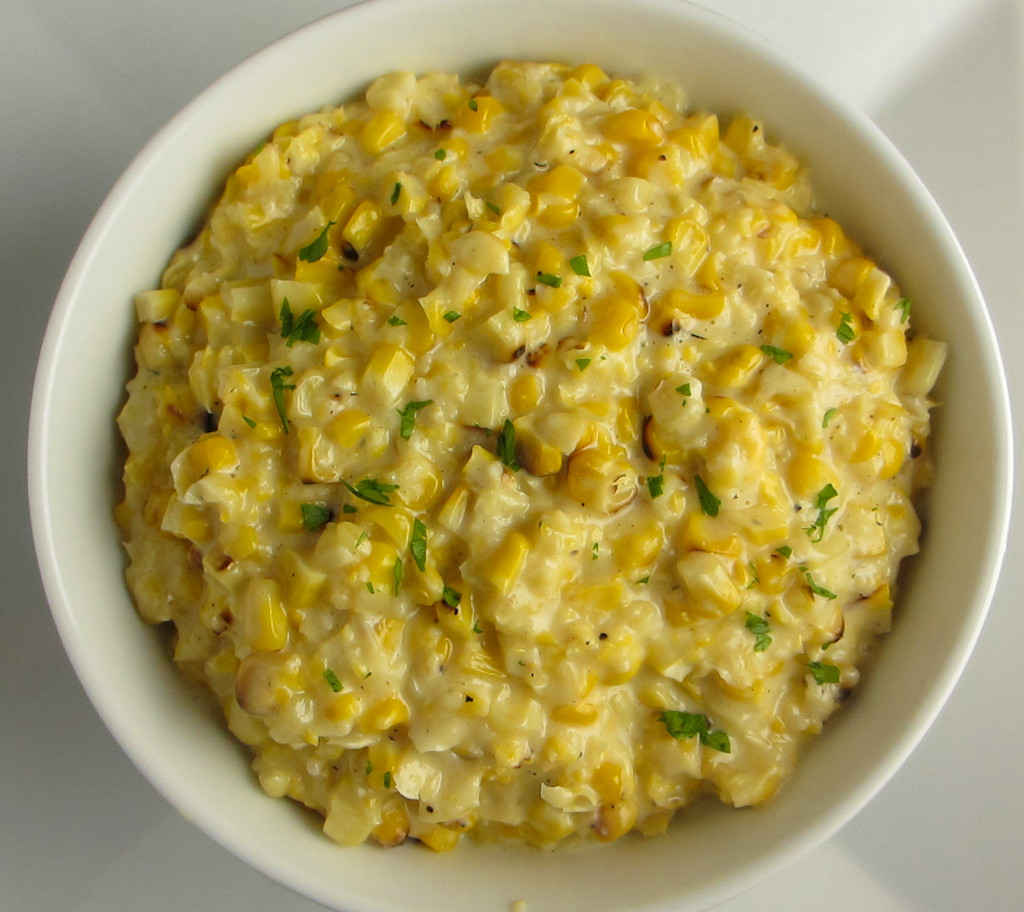
Grilled Cream Corn with Gorgonzola Cheese

Wow. I grew up eating a lot of canned cream corn. This isn’t that cream corn. This is something completely special and beyond delicious. From the first bite my wife and I just looked at each other. It was the ‘oh my goodness this is fantastic’ look. Grilled cream corn with a creamy Gorgonzola cheese sauce that is incredible. I can’t say enough just how much we enjoyed this dish.

Grilled Cream Corn with Gorgonzola Cheese

No Fresh Corn? No Problem.

If you can’t get fresh corn-on-the-cob you can substitute canned corn. You can still make a delicious grilled cream corn with Gorgonzola cheese. Just drain it well first and spread it out on a baking dish and place under the broiler until it starts to char just a bit. Or you can actually skip the roasting and just use the corn right out of the can (after draining).

I like to use my good ole trusty Dutch oven to make this corn and pretty much darned near anything like it on my stovetop. It’s nice and big and sturdy. That extra weight helps it maintain and distribute heat perfectly. As an added bonus, it’s actually pretty easy to clean up too!

Amazon Basics Enameled Cast Iron Dutch Oven Pot…
  • OVEN SAFE DESIGN: Withstand temperatures up to…
  • EXCELLENT HEAT RETENTION: This heavy-duty cast…

I love grilled corn. Try my corn-on-the-cob slathered with Sriracha mayonnaise and my corn with southwestern butter.

Grilled Cream Corn with Gorgonzola Cheese
Print Pin
5 from 1 vote

Grilled Cream Corn with Gorzgonzola Cheese

This is something completely special and beyond delicious. From the first bite my wife and I just looked at each other. It was the ‘oh my goodness this is fantastic’ look. 
Course Side
Cuisine American
Keyword corn-on-the-cob, grilled
Prep Time 10 minutes
Cook Time 45 minutes
Total Time 55 minutes
Servings 8
Calories 217kcal

Ingredients

Instructions

  • Fire up your grill for cooking over direct heat.
  • Lightly brush the corn with oil and season with salt and pepper.
  • Place over direct heat and grill until just tender and lightly charred, rotating often.
  • Remove corn and let cool slightly before cutting off the kernels using a sharp knife.
  • Melt the butter in a large skillet over medium heat.
  • Add the corn. Add more salt and pepper, to taste, if needed.
  • Stir and cook until the corn is completely tender, 3-4 minutes.
  • Stir in the cornstarch and cook another minute.
  • Add the cream and bring to a simmer. Stir for 2-3 minutes until thickened.
  • Pour half of the corn mixture into a blender. Let cool slightly then puree until smooth. Return to the skillet with the rest of the corn.
  • Add the milk and cheese and stir.
  • Serve warm garnished with chopped parsley.

Notes

You can use regular blue cheese instead of the gorgonzola.

Nutrition

Calories: 217kcal | Carbohydrates: 3g | Protein: 2g | Fat: 22g | Saturated Fat: 14g | Trans Fat: 1g | Cholesterol: 74mg | Sodium: 127mg | Potassium: 61mg | Fiber: 1g | Sugar: 1g | Vitamin A: 824IU | Vitamin C: 1mg | Calcium: 65mg | Iron: 1mg

Nutritional values are approximate.

Sale
Weber® 3-Piece BBQ Tool Set, Stainless Steel…
  • Set of 3 includes Spatula, Locking Tongs, and Cold…
  • Durable, stainless-steel construction holds up to…
Weber® Grill Grate Scrubber, Grill Cleaning…
  • Designed for heavy-duty grill cleaning
  • Contoured handle offers a firm, comfortable grip
Weber® Outdoor Grill Spray Cleaner & Degreaser…
  • This 16 oz spray bottle of Weber Grill Grate…
  • Gentle on Your Grates: Grill cleaner spray is…

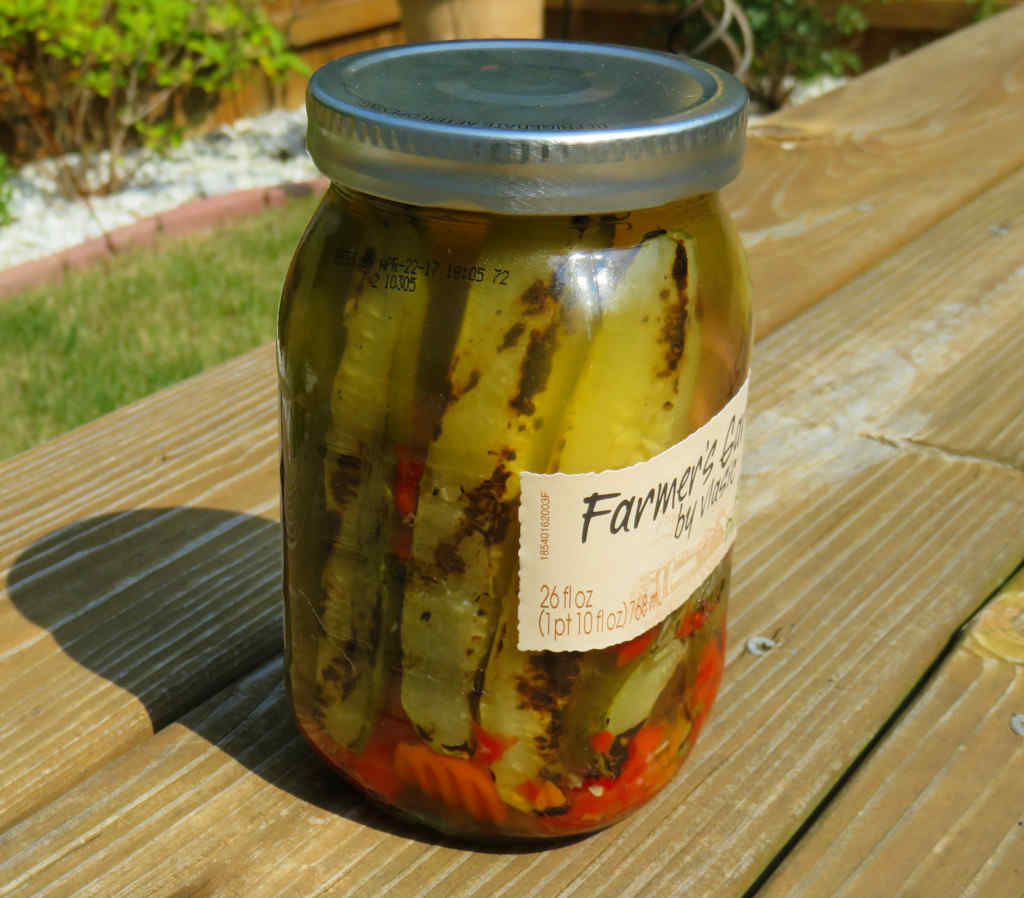
Jarred Grilled Pickles

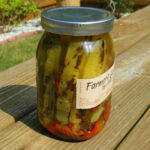
Want to surprise everyone at your next picnic or get-together? Bring jarred grilled pickles. Everyone will want to know how you did it. You don’t have to admit how easy it was, unless you really want to. The pickles do get a little char flavor, but not much. They still taste like, well, dill pickles, but when you bite into them they have just slightly less crunch. The grilled red onions do add a nice light onion flavor and bite.

Jarred Grilled Pickles

What Pickles Should Be

These jarred grilled pickles are good for 5 days. My guess is that you won’t have to worry about rushing to eat them on the last day that they’re good. And don’t feel like you have to grill only spears. Sliced pickles or even whole pickles can be grilled just as well. If you don’t want to grill the pickles but still want a hint of grilled flavor, just grill some red onion and then add that to a jar of pickles and refrigerate overnight. You’ll get that hint of smoke but the pickles themselves will be totally crispy.

If you can’t fit all of the pickles back into the original jar just grab some Mason jars instead.

Ball – 32oz Wide Mouth Jars with Lids & Bands…
  • WHAT’S INCLUDED: With this purchase, you’ll…
  • FERMENT WITH PEACE OF MIND: Our wide mouth jars…

If that’s enough, try pickling hot dogs too. They’re definitely different. And good!

Jarred Grilled Pickles
Print Pin
5 from 1 vote

Jarred Grilled Pickles

Want to surprise everyone at your next picnic or get-together? Bring a jar of grilled pickles. Everyone will want to know how you did it.
Course Side or Appetizer
Cuisine American
Keyword grilled, pickles
Prep Time 5 minutes
Cook Time 15 minutes
Total Time 20 minutes
Servings 1 jar
Calories 56kcal

Ingredients

  • 1 26 ounce dill pickle spears
  • 1 red onion cut into 8 small wedges (you can keep the root end on to help keep the onion wedges together)
  • 1 tablespoon olive oil

Instructions

  • Drain the brine from the jar into a large bowl.
  • Remove the pickles and lay onto a few sheets of paper towels.
  • Dab with the paper towels to dry as well as you can.
  • Transfer the pickles to another large bowl.
  • Add the onion and drizzle with the oil.
  • Toss gently to coat.
  • Fire up your grill.
  • Place pickles and onions onto the grill and grill on all sides until you get grill marks.
  • Remove and let cool slightly before returning pickles to the jar.
  • Add the onions and the reserved brine.
  • Seal and refrigerate until ready to use.

Notes

Use within 5 days.

Nutrition

Calories: 56kcal | Carbohydrates: 11g | Protein: 1g | Fat: 1g | Saturated Fat: 1g | Sodium: 138mg | Potassium: 165mg | Fiber: 2g | Sugar: 5g | Vitamin A: 35IU | Vitamin C: 8mg | Calcium: 30mg | Iron: 1mg

Nutritional values are approximate.

Sale
Weber® 3-Piece BBQ Tool Set, Stainless Steel…
  • Set of 3 includes Spatula, Locking Tongs, and Cold…
  • Durable, stainless-steel construction holds up to…
Weber® Grill Grate Scrubber, Grill Cleaning…
  • Designed for heavy-duty grill cleaning
  • Contoured handle offers a firm, comfortable grip
Weber® Outdoor Grill Spray Cleaner & Degreaser…
  • This 16 oz spray bottle of Weber Grill Grate…
  • Gentle on Your Grates: Grill cleaner spray is…

Save

Black-Eyed Pea Salad

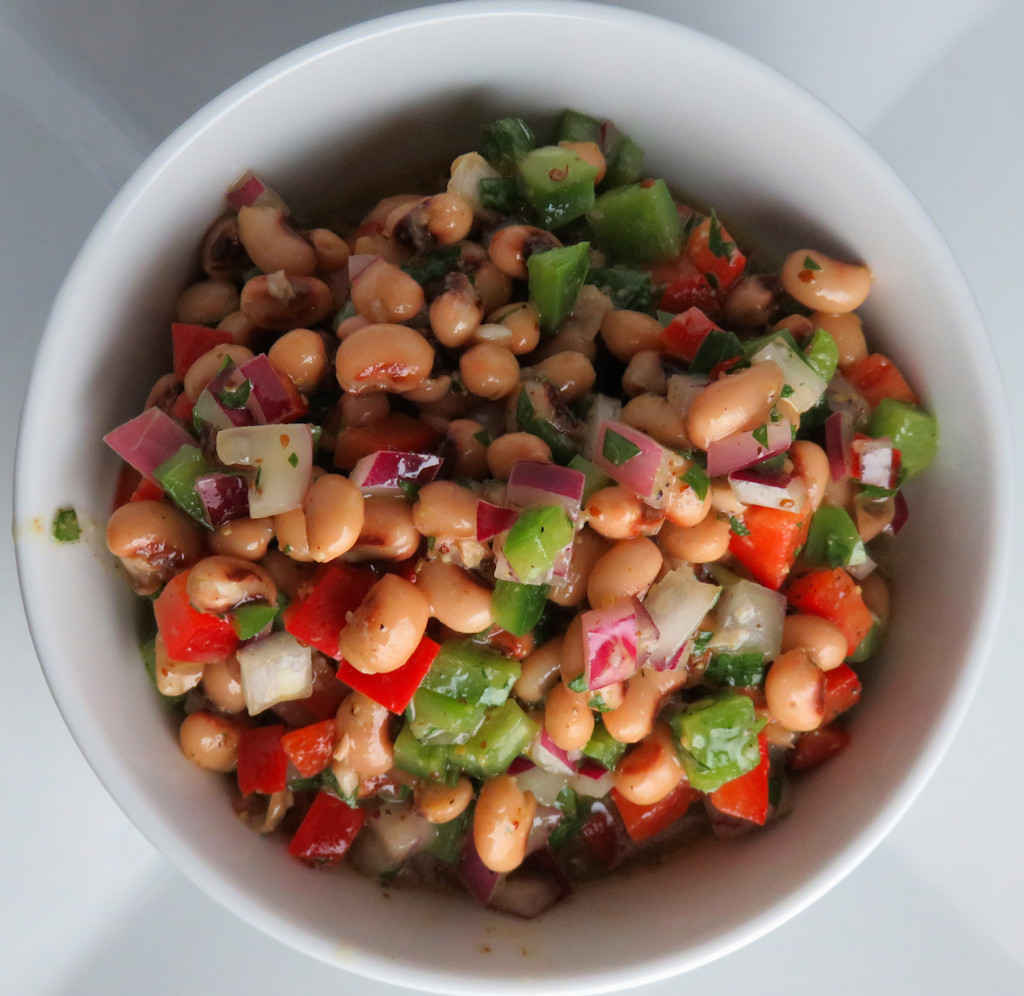
This is it. My absolute favorite black-eyed pea salad. I could eat it all day. I could slurp up the dressing with a straw. And I could dream about it. And I have. It has everything I love in every (big) bite. A bit of heat. Hints of Creole mustard and red wine vinegar. Crunchy fresh vegetables. There’s nothing boring about this black-eyed pea salad.

Black-Eyed Pea Salad

Even Better The Next Day

As with all great pea or bean salads, this one gets even better the next day. And the day after that. So make a double batch because you’ll want to have this salad on hand as long as you possibly can.

If you weren’t raised on black-eyed peas or love them as much as I do, you could substitute kidney beans instead and you’ll be just as happy as I was using black-eyed peas.

Pompeian Gourmet Red Wine Vinegar – 30 fl oz…
  • RED WINE VINEGAR: Expertly crafted by The Olive…
  • BOLD & FRUITY TASTE: Pompeian Red Wine Vinegar is…
Pompeian Gourmet White Wine Vinegar, Bright…
  • WHITE WINE VINEGAR: Expertly crafted by The Olive…
  • CRISP & DRY TASTE: Pompeian White Wine Vinegar is…

Also try my broccoli cauliflower salad.

Black-Eyed Pea Salad
Print Pin
5 from 1 vote

Black-Eyed Pea Salad

This is it. My absolute favorite black-eyed pea salad. I could eat it all day. I could slurp up the dressing with a straw. And I could dream about it. 
Course Salad
Cuisine American
Keyword peas, salad
Prep Time 15 minutes
Cook Time 1 hour
Total Time 1 hour 15 minutes
Servings 6 servings
Calories 111kcal

Ingredients

For the salad

  • 1 10 ounce black-eyed peas rinsed, drained
  • ½ red bell pepper finely chopped
  • ½ green bell pepper finely chopped
  • ½ medium red onion chopped
  • 1 clove garlic minced
  • ¾ cup parsley chopped
  • 1 medium jalapeno seeded, minced

For the dressing

Instructions

For the salad

  • Place all ingredients in a large bowl.
  • Add the dressing ingredients. Toss to coat.
  • Refrigerate for 1 hour before serving. Toss again before serving.

For the dressing

  • Whisk together all ingredients until smooth.

Notes

Leave out the jalapeno if you don’t want a slight bit of spiciness.

Nutrition

Calories: 111kcal | Carbohydrates: 4g | Protein: 1g | Fat: 11g | Saturated Fat: 1g | Trans Fat: 1g | Sodium: 732mg | Potassium: 123mg | Fiber: 1g | Sugar: 1g | Vitamin A: 1033IU | Vitamin C: 34mg | Calcium: 25mg | Iron: 1mg

Nutritional values are approximate.

Sale
Mueller Pro-Series All-in-One, 12 Blade Mandoline…
  • Meal Prep MVP – A practical and innovative way to…
  • 12 Diverse Blades – With nine interchangeable…
OXO Good Grips 4 Piece Stainless Steel Measuring…
  • Set includes: 1/4 cup, 1/3 cup, 1/2 cup and 1 cup
  • Magnetic handles keep Cups together for storage…

Cajun Shrimp-Stuffed Poblano Peppers

Wow, talk about amazingly good. The heck with the main dish, just load me up on some of these Cajun shrimp-stuffed poblano peppers. A slight kick of heat, perfect shrimp and creamy melted cheese. What’s not to love?

Cajun Shrimp-Stuffed Poblano Peppers

Substitute Bell Peppers

You could use green bell peppers instead, if you want, in these Cajun Shrimp-Stuffed Poblano Peppers. I love poblanos because they are a little spicier than a bell pepper without just completely drowning out a dish in heat.

Kick ‘Em Up

For extra kick, substitute shredded pepper jack cheese for the feta and mozzarella and add a few diced roasted jalapenos into the shrimp mixture. That’ll definitely liven up the party.

I highly recommend that you shred or grate your own cheese at home. Don’t buy the pre-shredded or pre-grated stuff. It has stuff added to it to keep it from sticking together. That ‘stuff’ affects how the cheese melts. Shred it yourself and use the good stuff.

Geedel Rotary Cheese Grater, Kitchen Mandoline…
  • Makes Everything Simple : Just forget your bagged…
  • Premium Material : All parts of the rotary cheese…

Also try my Cajun stuffed chicken breast and my bacon cheese-stuffed peppers!

Cajun Shrimp-Stuffed Poblano Peppers
Print Pin
5 from 1 vote

Cajun Shrimp-Stuffed Poblano Peppers

Wow, talk about amazingly good. The heck with the main dish, just load me up on some of these Cajun shrimp-stuffed poblano peppers. A slight kick of heat, perfect shrimp and creamy melted cheese. 
Course Side
Cuisine American
Keyword peppers, shrimp, stuffed
Prep Time 10 minutes
Cook Time 45 minutes
Total Time 55 minutes
Servings 4 servings
Calories 127kcal

Ingredients

  • 2 large poblano peppers
  • ½ pound shrimp raw or pre-cooked, 24-30 count, peeled, deveined
  • 1 teaspoon olive oil if you are using raw shrimp
  • 1 tablespoon Cajun seasoning
  • ¼ cup feta cheese crumbled
  • ¼ cup Mozzarella cheese shredded
  • 2 teaspoons dried basil crumbled
  • 1 tablespoon hot sauce
  • cilantro chopped, for garnish

Instructions

  • Note: You can use pre-cooked shrimp if you desire. Just toss the shrimp with the Cajun seasoning and do not cook.
  • Preheat oven to 375 F.
  • Cut the peppers in half lengthwise. Remove any stems or seeds.
  • If using cooked shrimp, toss the shrimp with the Cajun seasoning in a large bowl.
  • If using raw shrimp, heat the oil over medium-high heat in a skillet. Add the shrimp, sprinkle with the seasoning, and cook, turning, until done, about 5 minutes. Remove from heat.
  • Add the cheeses, basil and hot sauce to the shrimp Stir.
  • Transfer shrimp mixture to the poblanos and place on a baking sheet.
  • Place in oven and bake 30 minutes or until the cheese is melted and the peppers are softened.
  • Serve garnished with chopped cilantro.

Notes

Substitute jalapenos for the poblanos for an appetizer-sized kicked-up version!

Nutrition

Calories: 127kcal | Carbohydrates: 6g | Protein: 16g | Fat: 5g | Saturated Fat: 3g | Cholesterol: 157mg | Sodium: 698mg | Potassium: 258mg | Fiber: 2g | Sugar: 3g | Vitamin A: 1266IU | Vitamin C: 71mg | Calcium: 188mg | Iron: 2mg

Nutritional values are approximate.

Sale
Mueller Pro-Series All-in-One, 12 Blade Mandoline…
  • Meal Prep MVP – A practical and innovative way to…
  • 12 Diverse Blades – With nine interchangeable…
OXO Good Grips 4 Piece Stainless Steel Measuring…
  • Set includes: 1/4 cup, 1/3 cup, 1/2 cup and 1 cup
  • Magnetic handles keep Cups together for storage…

Slow-Cooked Lima Beans

I have been devouring Chef Vivian Howard’s book, Deep Run Roots. Every recipe in the book sounds so great that I just cannot slow down. These slow-cooked Lima beans are an excellent example not only of the great flavors Chef Howard conjures, but also the simplicity of the recipes. Lightly smoky tender beans. That’s it. Nothing fancy, but mighty good, especially on a cold day.

Slow-Cooked Lima Beans

Cook Them Longer. Or Don’t.

Depending on how you like your beans, you may want to cook your slow-cooked Lima beans a little longer or a little less. I like mine pretty tender, bordering on falling apart. Some folk like a little more ‘bite’ to theirs so they don’t cook them quite as much.

For extra smokiness (and a bit more seasoning meat) I used a smoked pork shank instead of the usual hock. I prefer shanks because I think they add more flavor than does a ham hock.

Sale
Crock-Pot 7-Quart Manual Slow Cooker, Family Size…
  • Generous Capacity: 7-quart slow cooker that…
  • Cooking Flexibility: High or low slow cooking…

Oh, did I mention that these beans are perfect over a big piece of cornbread? Just like my creamy butter beans are.

Slow-Cooked Lima Beans
Print Pin
5 from 1 vote

Slow-Cooked Lima Beans

 Lightly smoky tender beans. That’s it. Nothing fancy, but mighty good, specially on a cold day.
Course Side
Cuisine American
Keyword beans, crockpot, slow cooker
Prep Time 5 minutes
Cook Time 3 hours
Total Time 3 hours 5 minutes
Servings 8
Calories 288kcal

Equipment

Ingredients

Instructions

  • Preheat oven to 300 F.
  • Place all ingredients into a large Dutch oven.
  • Add enough water to cover the ingredients by an inch. Bring to a simmer over medium heat.
  • Transfer to the oven and cook 2 1/2 – 3 hours or until the beans are tender.
  • Check the water level every 30 minutes and add water if needed.

Notes

Great served with (or over) cornbread.

Nutrition

Calories: 288kcal | Carbohydrates: 37g | Protein: 20g | Fat: 7g | Saturated Fat: 2g | Cholesterol: 30mg | Sodium: 79mg | Potassium: 1102mg | Fiber: 11g | Sugar: 5g | Vitamin A: 7IU | Vitamin C: 1mg | Calcium: 58mg | Iron: 5mg

Nutritional values are approximate.

Lodge Silver 12 Inch Aluminum Foil Dutch Oven…
  • YOUR NEW GO-TO DUTCH OVEN LINERS: The Lodge Dutch…
  • WHAT’S COMPATIBILE? This dutch oven liner pairs…
IPROUDER Cast Iron Trivet 2 PCS Set, 8-inch, Meat…
  • Made of cast iron and seasoned with natural…
  • Raises meats, sourdough bread, pies, and other…

Spicy Broccoli Cheese Wonton Cups

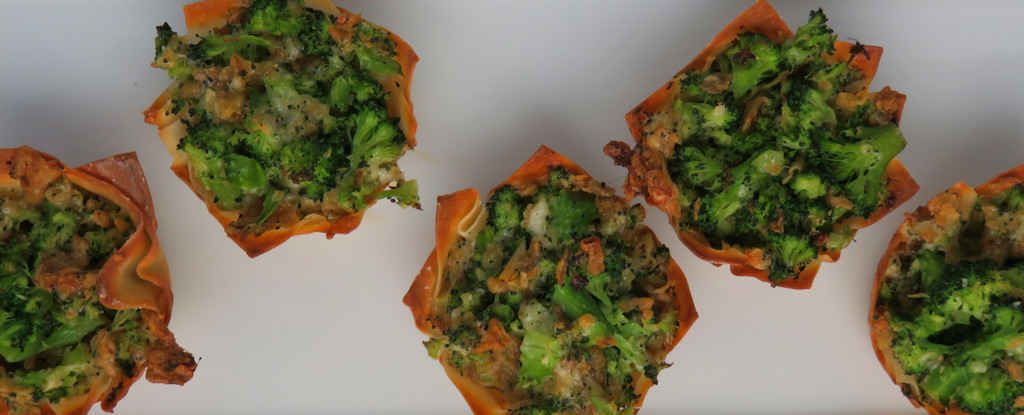
My wife flat-out loved these spicy broccoli cheese wonton cups. I have to admit, they are definitely a non-boring way to serve vegetables. It always seems like you have to do more and more every day to keep from serving boring sides! Well, a nice kick from habanero Jack cheese and fried jalapenos really makes up for what would’ve been ‘just’ broccoli. Oh, and love that crunch from the wonton cups, too. You need that difference. These cups are quite tasty and well, kinda cool looking too! Heck, I think you could serve them as appetizers!

Spicy Broccoli Cheese Wonton Cups

Un-Spicy Them

If you don’t like spicier foods like we do, substitute shredded mozzarella or provolone for the habanero Jack cheese and French fried onions for the crispy jalapenos. Spicy broccoli cheese wonton cups are great without the spicy. I think blanched carrots or cauliflower would work just fine. Or heck, use them all and make mixed vegetable cups.

I highly recommend that you shred or grate your own cheese at home. Don’t buy the pre-shredded cheese. It has stuff added to it to keep it from sticking together. That ‘stuff’ affects how the cheese melts. Shred it yourself and use the good stuff.

Geedel Rotary Cheese Grater, Kitchen Mandoline…
  • Makes Everything Simple : Just forget your bagged…
  • Premium Material : All parts of the rotary cheese…

Also try my jalapeno popper wonton cups.

Spicy Broccoli Cheese Wonton Cups
Print Pin
4 from 2 votes

Spicy Broccoli Cheese Wonton Cups

A nice kick from habanero Jack cheese and fried jalapenos really makes up for what would’ve been ‘just’ broccoli. Oh, and love that crunch from the wonton cups, too. You need that contrast.
Course Side
Cuisine American
Keyword broccoli, spicy, wontons
Prep Time 5 minutes
Cook Time 40 minutes
Total Time 45 minutes
Servings 12 cups
Calories 116kcal

Ingredients

Instructions

  • Preheat your oven to 375 F.
  • Prepare an ice bath by filing a large bowl halfway with ice then add water. Note: You can skip the ice bath and rinse the cooked broccoli under cold water, but I find that you lose some of the broccoli doing it that way, so I prefer to use an ice bath.
  • Bring a large pot of lightly salted water to a boil.
  • Add the broccoli and boil for 1 1/2 minutes.
  • Drain the broccoli and place into the ice bath to stop the cooking.
  • Chop the cooked broccoli and transfer to a bowl.
  • Add the cheese, jalapenos, egg and salt and pepper and stir gently to combine.
  • Spray a muffin pan with non-stick spray.
  • Press 2 wonton wrappers into each pan cup. I like to add one wrapper then place another on top, rotated 45 degrees from the bottom one to better fill the cup.
  • Divide the broccoli mixture between the cups.
  • Bake for 25 minutes or until golden brown.

Notes

Serve immediately.

Nutrition

Calories: 116kcal | Carbohydrates: 13g | Protein: 6g | Fat: 5g | Saturated Fat: 2g | Trans Fat: 1g | Cholesterol: 23mg | Sodium: 178mg | Potassium: 185mg | Fiber: 2g | Sugar: 1g | Vitamin A: 410IU | Vitamin C: 45mg | Calcium: 103mg | Iron: 1mg

Nutritional values are approximate.

Sale
Mueller Pro-Series All-in-One, 12 Blade Mandoline…
  • Meal Prep MVP – A practical and innovative way to…
  • 12 Diverse Blades – With nine interchangeable…
OXO Good Grips 4 Piece Stainless Steel Measuring…
  • Set includes: 1/4 cup, 1/3 cup, 1/2 cup and 1 cup
  • Magnetic handles keep Cups together for storage…

Poutine

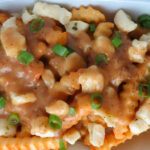
My wife and I recently grabbed lunch at one of my favorite Indianapolis food trucks, Scratch Truck. For a side, we opted for the poutine, a first for both of us. I’ve seen poutine hundreds of times on TV food shows, but never had the opportunity to try it until then, and boy, did we ever absolutely love it. French fried potatoes, topped with cheese curds (oh my!) and gravy. Really, what could be better? Poutine always looked decadent on TV. It’s even more decadent in person!

Poutine

Drowning In Deliciousness

The gravy is the real start of this dish. Though let’s face it, cheese curds are pretty much wondrous on their own. After quite a bit of research, I settled on a gravy that is a mix of beef and chicken gravies. It’s crazy smooth and packed with flavor. The gravy wasn’t just great, it was fantastic. It would also be stellar on a chicken-fried steak. So you know what that means. Yep, I’ll be making chicken-fried steak soon.

If you don’t have cheese curds where you live, you can substitute block (not shredded) mozzarella. Just tear or chop it into small pieces.

Sale
NutriChef Automatic Vacuum Air Sealing System for…
  • AUTOMATIC VACUUM FOOD SEALER WITH STARTER KIT…
  • DUAL DRY & MOIST MODES FOR EVERY FOOD TYPE…

Got leftover cheese curds? Make my copycat of Culver’s cheese curds. Man, are they ever delicious!

Print Pin
5 from 1 vote

Poutine

French fried potatoes, topped with cheese curds (oh my!) and gravy. Really, what could be better?
Course Side Dish or Appetizer
Cuisine American
Keyword fries, gravy
Prep Time 5 minutes
Cook Time 15 minutes
Total Time 20 minutes
Servings 1
Calories 3648kcal

Equipment

Ingredients

For the poutine

  • 2 pounds French fries deep-fried and drained (if frozen, cooked per package instructions)
  • 1 cup cheese curds or more
  • garnishes optional. I used sliced green onions, but chopped parsley, fresh sage, thyme, etc are also great.

For the gravy

Instructions

For the poutine

  • Layer fries on a serving platter.
  • Sprinkle fries with the curds (you may have to separate the curds first).
  • Add lots of gravy and garnish as desired.

For the gravy

  • Dissolve the cornstarch in the water in a small bowl or glass.
  • Melt the butter in a large sauce pan.
  • Whisk in the flour and continue cooking, whisking often, for 5 minutes or until the flour has turned golden brown.
  • Add the garlic, stir and cook another 30 seconds.
  • Whisk in the beef and chicken broths (careful when first starting to add the broths as the mixture will steam a bit. Keep your hands and face back.)
  • Bring mixture to a boil then reduce to a simmer and continue simmering, whisking constantly, for 5 minutes or until the gravy is thickened.
  • Add pepper to taste and stir and serve.

Notes

Best served immediately.

Nutrition

Calories: 3648kcal | Carbohydrates: 316g | Protein: 67g | Fat: 242g | Saturated Fat: 105g | Polyunsaturated Fat: 13g | Monounsaturated Fat: 97g | Trans Fat: 3g | Cholesterol: 307mg | Sodium: 8507mg | Potassium: 4356mg | Fiber: 42g | Sugar: 1g | Vitamin A: 2106IU | Vitamin C: 59mg | Calcium: 973mg | Iron: 15mg

Nutritional values are approximate.

Sale
Mueller Pro-Series All-in-One, 12 Blade Mandoline…
  • Meal Prep MVP – A practical and innovative way to…
  • 12 Diverse Blades – With nine interchangeable…
OXO Good Grips 4 Piece Stainless Steel Measuring…
  • Set includes: 1/4 cup, 1/3 cup, 1/2 cup and 1 cup
  • Magnetic handles keep Cups together for storage…