I wasn’t sure how I was going to word this post on black pepper honey. I mean, yeah, it’s just honey, salt and pepper. It’s not like there are 50 ingredients and 25 kitchen gadgets involved here. But boy, was this honey ever good on a few toasted English muffins. I never thought about just how much salt and pepper really could make honey even better than it already is. It’s just that easy. Great anywhere you use “regular” honey, but out of this world great on a crunch English muffin!
Fresh Honey Is Better
My great uncle kept bees for a while when I was younger. I was (and still am) fascinated by them. It’s amazing how much different fresh honey tastes than the mass-produced honey you find in the grocery store. It’s like night and day. But, the store-bought stuff is a bit easier to find!
As an aside, we now have a number of bee keepers in my housing development. The bees are an important part of the environment. Look around, maybe you have a few keepers too!
I wasn’t sure how I was going to word this post on black pepper honey. I mean, yeah, it’s just honey, salt and pepper. But boy, was it ever good on a few toasted English muffins.
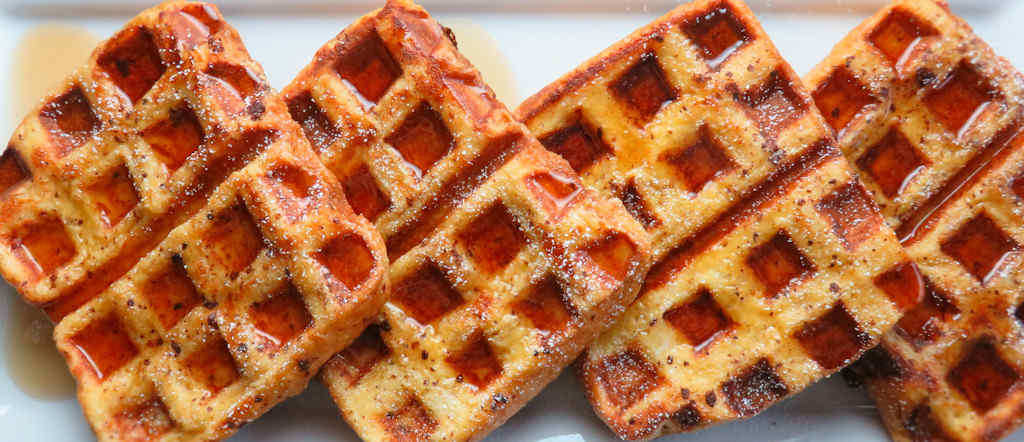
I love Texas toast. And I love French toast. And of course I love waffles. That sums up how I feel about these amazing Texas toast French toast waffles! Incredibly easy to make and beyond yummy. Self-control was very challenging with a platter of these little tasty beauties in front of me. I have a really bad addiction to anything that has nooks and crannies in it where butter and syrup and go. I cannot resist them.
The French Toast Of My Dreams
Sweet, with a hint of cinnamon and vanilla, you can substitute any bread you like, but I prefer Texas toast because it can more than handle the job of holding up to an egg batter and a waffle iron.
I often contemplate what I would do differently to a recipe after I make it. A little twist or something. I can honestly say there is absolutely nothing I would change about Texas toast French toast waffles. Except to maybe double the recipe.
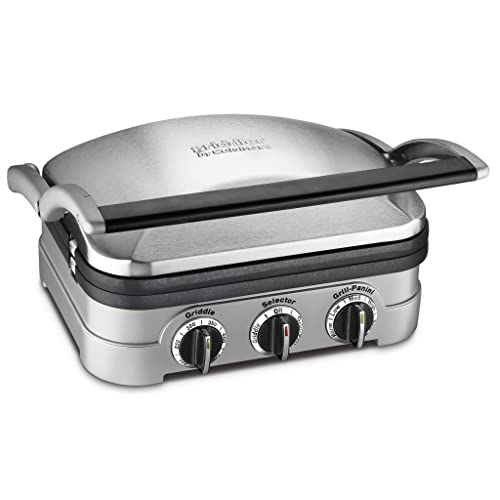
I use my Cuisinart Griddler to make these waffles. It’s a cooking beast for everything from breakfast to dinner to desert.
I love Texas toast. And I love French toast. And of course I love waffles. That sums up how I feel about Texas toast French toast waffles! Incredibly easy to make and beyond yummy. Self-control was very challenging with a platter of these little tasty beauties in front of me.
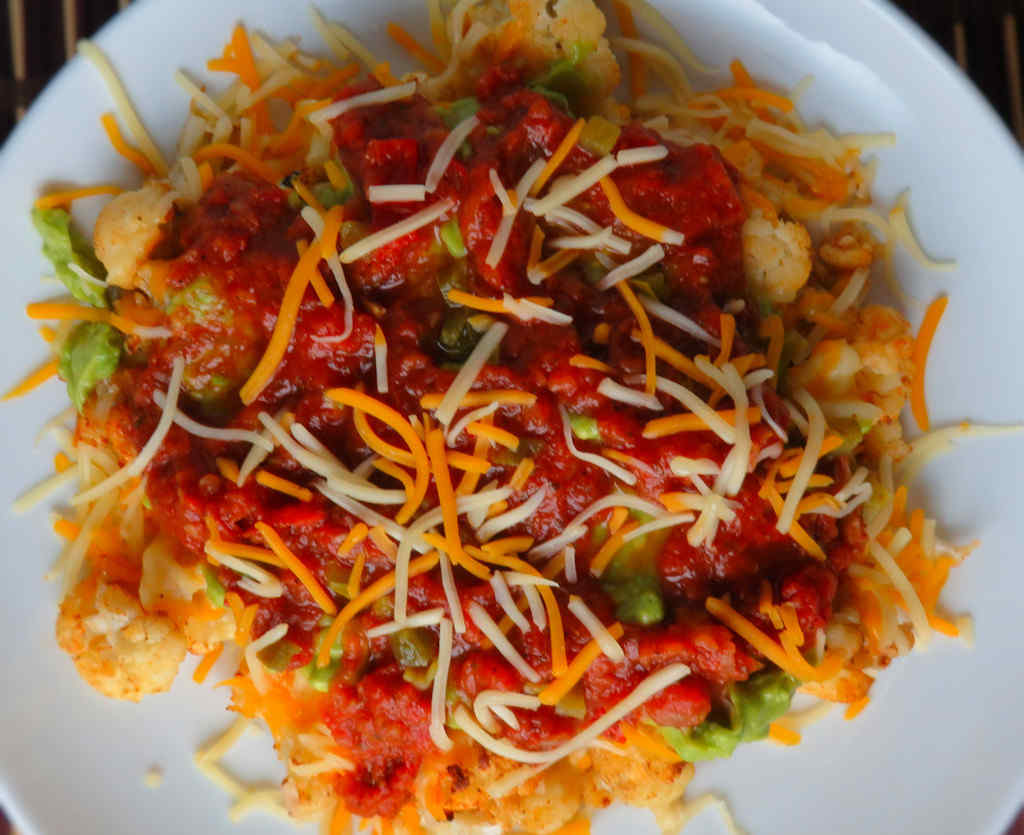
Who needs all the carbs you find in traditional nachos? Well, here’s the solution if you’re watching your carbohydrates. Perfectly roasted cauliflower topped with your favorite nacho toppings, such as cheese, guacamole, and salsa! Heck, you don’t even have to be counting carbs to enjoy these cauliflower nachos. And you might not even miss the traditional layer of crispy tortilla chips. If you’re really hankering for the ‘real’ thing, I’d suggest using as many toppings as possible to ‘hide’ the fact that the chips are no longer there.
Low Carb And Tasty. Say What?
These remind me of another low-carb version of a dish: mashed cauliflower. Just like the potato version, but without the carbs. We make them often and always enjoy folk’s reaction when we tell them they aren’t eating mashed potatoes.
Pico de gallo is another great thing to put on nachos. Ditto black olives.
I highly recommend that you shred or grate your own cheese at home. Don’t buy the pre-shredded or pre-grated stuff. It has stuff added to it to keep it from sticking together. That ‘stuff’ affects how the cheese melts. Shred it yourself and use the good stuff.
Who needs all the carbs you find in traditional nachos? We’ll, here’s the solution if you’re watching your carbohydrates. Perfectly roasted cauliflower topped with your favorite nacho toppings.
I would’ve liked to have made this slow cooker tomato sauce using tomatoes from our garden. For some reason, our tomatoes just didn’t produce this year. Usually I have to worry about the raccoons stealing them but not this time. They just didn’t come out. So, Plan B, I picked up a big batch of ripe tomatoes at the grocery store. The end result came out very, very flavorful. Quite honestly, I had my sights set on using this sauce to make pizza sauce, but it’s so good by itself you could easily serve it as-is as tomato soup.
Use Ripe Tomatoes Only
I used Roma tomatoes because I like how they taste. You can substitute any good tomato, just make sure they’re good and ripe. Do not use those hard-as-cardboard tomatoes you often find at your grocery store. If you’re lucky enough to be near a farmer’s market, it’s well worth the trip. When tomatoes are at peak you’ll want to make several batches of this slow cooker tomato sauce and freeze it for later.
I would’ve liked to have made this slow cooker tomato sauce using tomatoes from our garden. For some reason, our tomatoes just didn’t produce this year.
Note: This recipe was developed using the Char-Broil Big Easy Oil-Less Fryer. If you are cooking using the Char-Broil Smoker-Roaster Grill you should cook with the lid open and the temperature set to High. You might also need to adjust the cooking time.
I can eat a scary amount of crab legs. Fortunately, I don’t have to tell you just how much a ‘scary amount’ is, but when the crab legs are as great as these Old Bay crab legs cooked on my Char-Broil Big Easy, I cannot control myself. From the moment they go into the cooker the aroma hits you and your stomach will start growling. In just minutes you too can be enjoying nice big ole meaty crab legs covered in Old Bay seasoning. For dipping, I made a bit of clarified butter, which is also something I cannot control myself around. This was a bonus meal for sure!
Great Snow Crab Legs Too!
You can make Old Bay snow crab legs too, if you wish, but you’ll probably want to cut back on the heating time. It doesn’t take long to re-heat the already-steamed thawed crab legs.
I can eat a scary amount of crab legs. Fortunately, I don’t have to tell you just how much a ‘scary amount’ is, but when the crab legs are as great as these Old Bay crab legs cooked on my Char-Broil Big Easy, I cannot control myself.
Break the crab legs at the joints if necessary so that they fit into the Big Easy basket.
Take a pair of kitchen scissors and make a cut along the full length of the bottoms of the legs.
Melt 1/4 cup of the butter in a small saucepan and add Old Bay to taste. Stir.
Brush butter mixture over the legs. Don't be afraid to separate the cuts you made a bit to get some of the butter inside.
Place legs into the Big Easy basket and lower into the cooker.
Heat for 6-8 minutes. Heat less if using snow crab or smaller legs, more for bigger legs. Remember the legs are already cooked, you’re just re-heating them.
For the clarified butter
Place the butter in a small saucepan over medium heat.
Once the butter has melted reduce the heat to the lowest setting possible and then increase to maintain a very slight boil.
Heat for 45 minutes.
Scoop out the top clear portion of melted butter and run thru a fine sieve.
Discard the solids that remain at the bottom of the pan.
Serve hot.
Notes
The clarified butter takes longer to make than do the crab legs, so you’ll want to start that first. You can also make the clarified butter ahead of time and just warm it for serving.
What’s better than spiral ham? Bacon-glazed spiral ham, of course. It’s spiral-ham-sale-time here, so I backed up the truck and grabbed a nice big smoked ham. Of course, they’re easy to reheat. And just as easy to glaze during the last 30 minutes. The bacon glaze adds a bit more smokiness, but also some sweetness, a little tartness and a little tang thanks to two different kinds of mustard. I don’t usually use the bag of glaze that comes with many hams. It kinda scares me, to tell the truth. I’d rather use something that I made at home so I know what’s in it!
A Great Tasting Glaze
You can substitute pretty much any jelly you want in place of the Creole mustard, but I’d stay away from ‘darker’ ones, such as blueberry or the like. Go for lighter colors. And don’t be afraid to use a spicy jelly such as jalapeno pepper jelly. You may also want to double the amount of bacon-glaze, serving any leftover glaze as a drizzle over the sliced ham when you serve it. Bacon-glazed spiral ham is a wonderful thing and more glaze is… more wonderful!
As much as I love turkey around the holidays, it’s the dressing and gravy that I love the most. Dressing (especially this ciabatta and sausage dressing) has so many different flavors and textures and colors. Turkey? Meh… not so much. Not that the turkey is a bad thing, it’s just that I much prefer a plate with a lot of dressing and just a bit of turkey.
Sausage Dressing Equals Greatness
I had never had a dressing that contained sausage until this one. I was blown away by just how much flavor the sage sausage adds. The ciabatta adds such wonderful texture and flavor too. There’s no question, this baked ciabatta and sausage dressing is just fantastic.
As much as I love turkey around the holidays, it’s the dressing and gravy that I love the most. Dressing (specially this ciabatta and sausage dressing) has so many different flavors and textures and colors.
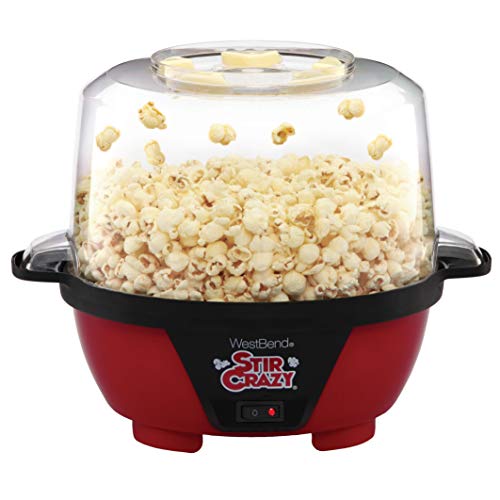
We had a sort-of-good turnout this year at Halloween. Trick-or-treaters came in waves, but not big waves like we had last year. That means we were left with a big ole bowl (actually, three bowls) of leftover Halloween candy. I’m a big fan of Skittles candies, so we had lots of Skittles… so I made Skittles popcorn! Fun to make, the popcorn tastes a bit like caramel corn, but with the sweetness cranked up a few notches. Tangerine, lemon, berry, grape and pear flavors exploded everywhere!
A Big Bowl Of Colorful Sweetness!
Skittles popcorn is mighty darned tasty (and sweet). It doesn’t get super-duper crunchy like caramel corn but it’s still a great treat. And it doesn’t take a whole lot of Skittles candies to make a whole lot of popcorn, either. You’ll want to make extra because this stuff is great!
The recipe makes a single batch of your favorite color. Make several batches, using a different color of Skittles for each one. Then combine for the full rainbow effect!
Pop your corn according to package instructions. Place in a bowl and set aside.
Rip a sheet of waxed paper (about 8" – 10' long) and place on your counter.
Melt butter and brown sugar on the stove on medium heat. Stir frequently to avoid scorching.
Pour in the Skittles candies. Stir until melted (you might need to mash them down to help them dissolve). Add food coloring if you desire more color.
Once done melting pour the hot candy mixture over the top of the popcorn.
Use a spatula and fold in the mixture throughout the popcorn until will covered.
Dump the popcorn onto the waxed paper and spread thinly to allow to cool.
If you wish to make popcorn balls, allow mixture to cool for 3 – 4 minutes (or until you can touch it). Then, spray cooking spray or butter your hands and form the popcorn into balls shapes. Set aside.
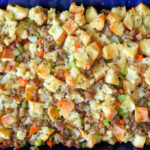
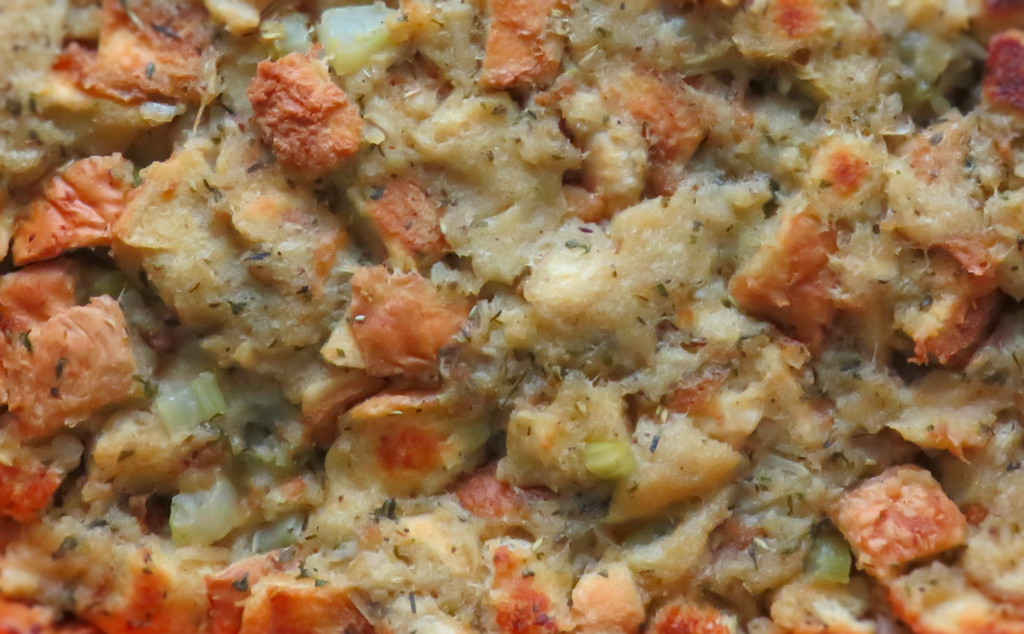
I’ve made my share of Stove Top Chicken Stuffing. It’s fast, easy, cheap and good. In my bachelor days you’d always find a box or two in my pantry. Now that I cook a lot more from scratch, I decided it was time to give making a version of the classic boxed stuffing a shot. And you know what? Man, was this copycat Stove Top chicken stuffing as good as the boxed stuff and mighty fun and easy to make! I was very happily surprised as to how great this was.
Make Extra. You’ll Need It.
I will definitely double (or triple) this recipe for copycat Stove Top Chicken Stuffing next time. I admit, as much as I love Thanksgiving turkey, I’m really more partial to the baked stuffing and mashed potatoes, each loaded up with tons of gravy. And for me, my go-to gravy is my make-ahead holiday gravy. I don’t just double the gravy recipe either. More like 6 times as much as the recipe states. Maybe 7. Or 8. Like I said, I love gravy.
Now that I cook a lot more from scratch, I decided it was time to give making a copycat of the classic boxed stuffing a shot. And you know what? Man, was it ever as good as the boxed stuff and mighty fun and easy to make!
Spread the bread pieces out on a large baking sheet. Lay the sheet on the counter top for one day, stirring occasionally. You want the bread to get slightly crunchy and dry.
Preheat oven to 375 F. Note: Baking is only required if you desire a stuffing with a more crunchy texture.
In a pan or pot large enough to hold all of the bread, melt the butter over medium heat.
Add the celery and saute for 5 minutes.
And all remaining ingredients (do not add the bread yet). Bring to a boil, then reduce to a simmer and simmer for 5 minutes.
Remove from heat. Stir in the bread crumbs and gently stir to coat. Cover and let rest for 10 minutes.
Remove lid and fluff the mixture and let sit for another 5 minutes.
If baking, transfer to a 9″ x 9″ baking dish that has been sprayed with non-stick spray and bake for 20 minutes or until the desired color and texture has been achieved.
Notes
Reheat any leftovers in the oven at 400 F for around 10 minutes or until hot. Add a bit of broth or water if the stuffing gets too dry.
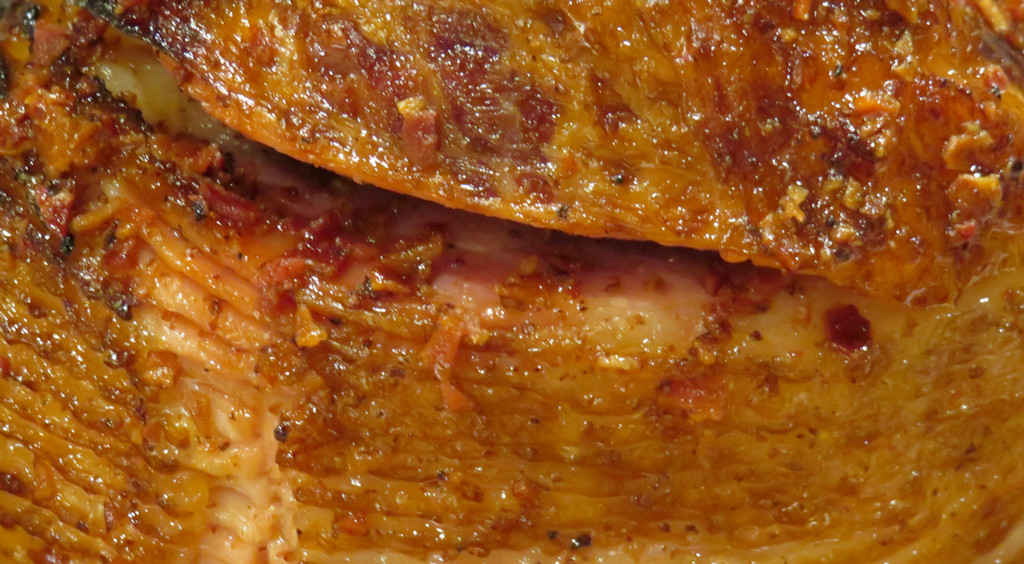
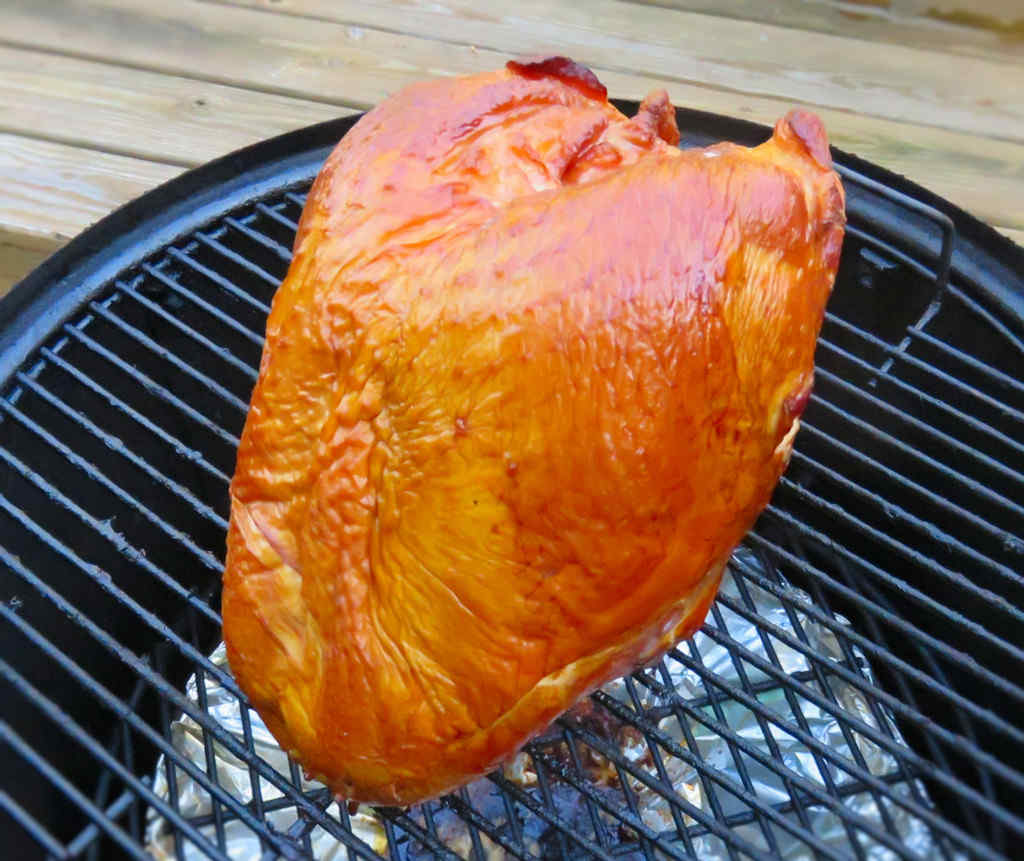
I set out to prove to myself just how easy it can be to smoke a turkey for Thanksgiving. That meant no brining, no basting, no rubs, no oils, no injecting. Nothing. Just an easy smoked turkey breast.
I used a turkey breast that was already in a basting solution to speed things along and keep the ‘easy’ theme. Turkeys that are already pre-brined (or ‘pumped’) are common and they do save you a lot of time and hassle.
Smoked Happiness
I was very, very happy with this easy smoked turkey breast. It was completely fuss-free. The skin was nice and crunchy. The meat was tender and moist. I used plenty of wood to get plenty of smoky flavor. I think that made up for the spices or basting sauce I would normally add. If you’re making a turkey for a crowd this is the way to go. You’ll have plenty of free time for other things.
I prefer to use fruit or nut woods when I smoke unless I want a heavier smoke flavor. Pecan, apple or cherry are my favorites. I used apple for this turkey.
This recipe uses a ‘pumped’ turkey breast, or one that has already been brined. The package will state ‘contains up to 8% of a solution of water, salt, spices to enhance tenderness and juiciness’. Normally I would use a natural turkey that does not contain such a solution, but the goal was to make as easy a turkey breast as possible.
Fire up your smoker for cooking at 325 F. If you’re using a Weber Smokey Mountain smoker (or any smoker that uses a water pan), line the water pan with foil and do not add water.
Use a fruit wood or lighter wood such as hickory.
Place the turkey breast meat side up in the center of the smoker.
Smoke until the meat reaches 165 F as measured in several locations.
Remove and let rest 30 minutes before slicing.
Notes
Do not cover the turkey breast with foil as it rests as this will cause the skin to get soggy.