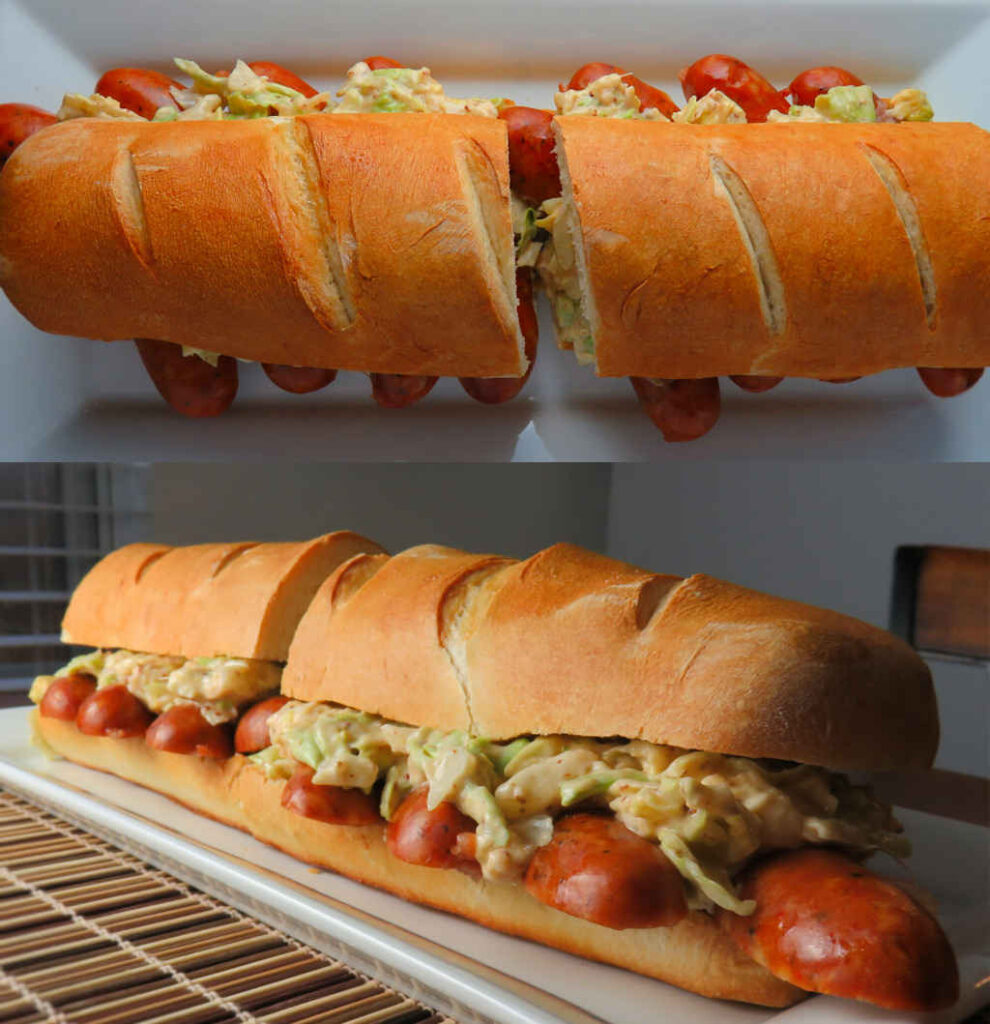
I was looking for a quick-and-simple meal idea when I came across this recipe for bacon cheddar pinwheels. Lucky me, I had everything I needed to make them on-hand. You can make any variation you want, substituting any kind of cheese or meats, but I went with the classic combination of ham and cheddar. With bacon, of course. I wouldn’t skip the bacon. You could, I guess, but that crunch really makes the pinwheels a little extra special.
Make Them Your Way
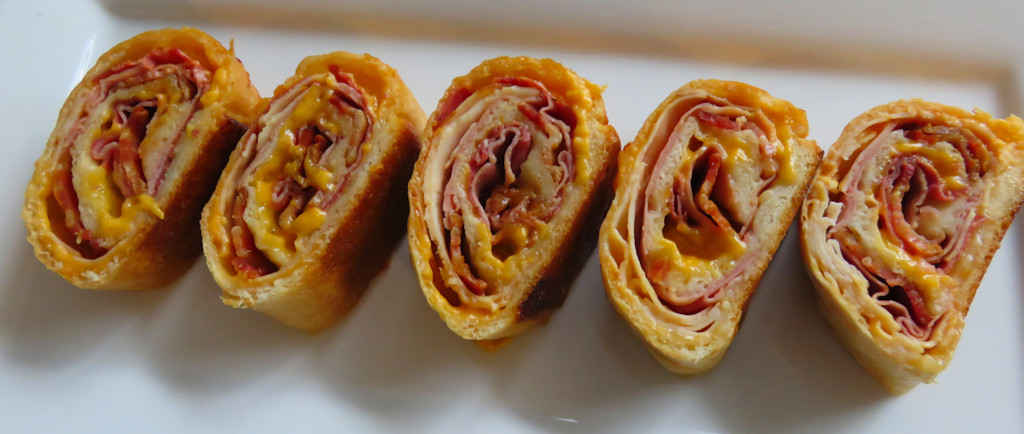
You can add a bit (and I do mean just a bit) of mustard or sandwich spread on top of the meats before rolling the dough up into a loaf, but don’t go overboard. You don’t want the dough to get soggy and begin to burst open while it’s baking. These can always be served with mustard, mayonnaise, or whatever you prefer, on the side.
I highly recommend that you shred or grate your own cheese at home. Don’t buy the pre-shredded or pre-grated stuff. It has stuff added to it to keep it from sticking together. That ‘stuff’ affects how the cheese melts. Shred it yourself and use the good stuff.

I cut our bacon cheddar pinwheels fairly thick since we were eating them as a main dish. If you serve them as appetizers you can cut them smaller and get a lot more servings. You can make the ‘logs’ ahead of time and bake them just in time for your guests to arrive so they are hot and ooey gooey.
Also try my BBQ pinwheels.

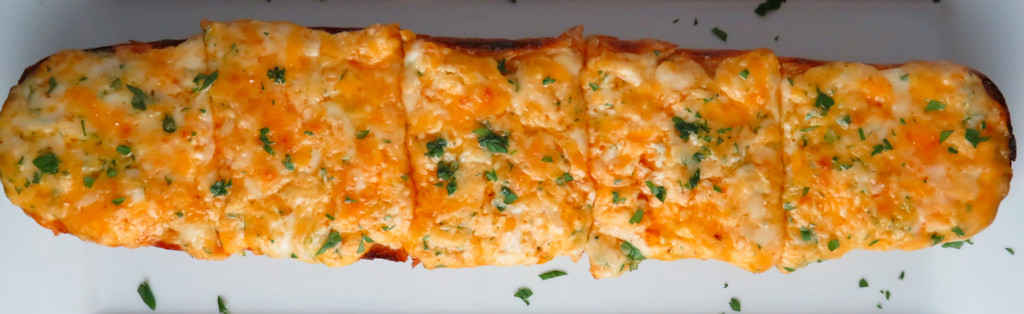
Bacon Cheddar Pinwheels
Equipment
Ingredients
- 6 slices bacon
- 11 ounce French bread dough you can also use canned or fresh pizza dough
- 1 cup extra sharp Cheddar cheese shredded
- 18 slices sandwich meat
Instructions
- Preheat oven to 390 F.
- Line a baking sheet with aluminum foil.
- Add the strips of bacon (do not overlap) and place in oven for 15 minutes.
- Flip bacon and cook another 10-15 minutes or until crispy. Remove to a paper towel-lined plate to drain.
- Reduce oven to 350 F.
- Remove foil from pan (if there’s lots of grease you may wish to dab it up first with a paper towel), wad up and dispose.
- Spray the pan with non-stick spray.
- Open the can of dough and unroll. Use a rolling pin if needed to smooth it out into a square or rectangle (mine wanted to be a square), but don’t let the dough get too thin. If desired, take a pizza wheel and cut off any jagged edges (but only if you’re picky like I am).
- Sprinkle the cheese around the dough, leaving a 1″ border around all edges.
- Add the sandwich meats and cooked bacon.
- Starting on one edge, roll the dough up into a tight log.
- Seal the ends and seam by pinching the sides together.
- Cut a few small slits into the top of the loaf and transfer to the baking sheet, seam-side down. I used two large spatulas, gently sliding them under the log, to transfer the dough without problem.
- Bake for 25-30 minutes or until golden brown.
- Let cool for 10 minutes before slicing as thin or thick as desired.
Notes
Nutrition
Nutritional values are approximate.