Bread Machine Brioche

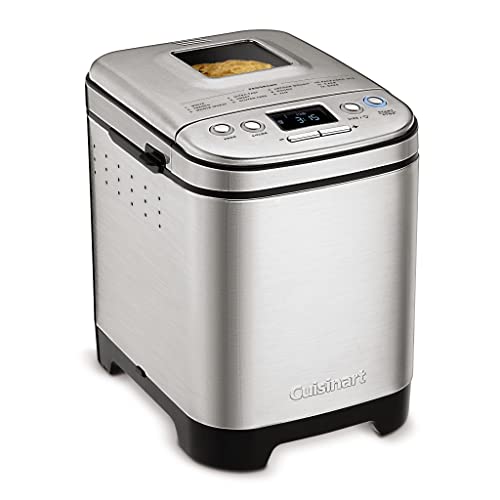
I woke up one morning and said “That’s it. I am not ignoring my bread machine any longer”. Like a lot of folks, I keep my bread machine at the back of the pantry. Way in the back. Well, no more. I’ve been using it to make fantastic po boy bread dough and since my wife requested French toast, I also made a great loaf of bread machine brioche bread. My first time. And yeah, though it’s not like I worked the dough by hand, it still feels homemade and boy, was the French toast out of this world!

Bread Machine Brioche

The Perfect Bread For French Toast

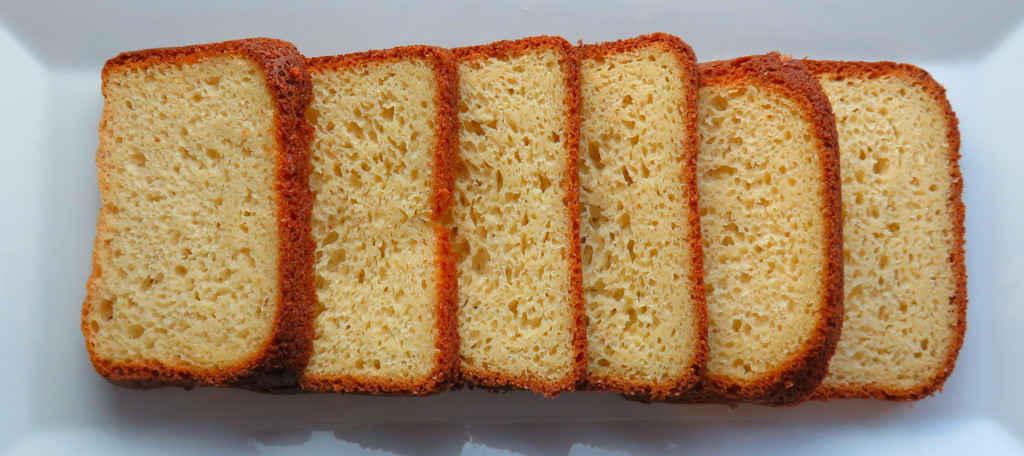
This bread machine brioche is so soft and eggy inside. The crust is thin but a little crunchy. It holds up well for making French toast.

The key to this bread is determining when to add the butter. You’ll be adding 8 tablespoons (a stick), one tablespoon at a time at 1 minute intervals, during the last kneading cycle. For our bread maker the second (last) kneed cycle ends 35 minutes after starting the machine. That means I add the first tablespoon of butter after 27 minutes. You’ll want to consult your bread machine manual to know when the kneading cycle ends.

Also try my bread machine hamburger buns.

Bread Machine Brioche
Print Pin
5 from 1 vote

Bread Machine Brioche

I made a great loaf of bread machine brioche bread. My first time and boy, was the French toast I made from it out of this world!
Course Bread
Cuisine American
Keyword bread, homemade
Prep Time 5 minutes
Cook Time 2 hours 50 minutes
Total Time 2 hours 55 minutes
Servings 1 loaf
Calories 1926kcal
Author Mike

Ingredients

  • ¼ cup lukewarm water plus 2 tablespoons
  • 2 eggs plus 1 egg yolk, lightly whisked
  • ¾ teaspoon kosher salt
  • 1 ¾ cups bread flour plus 2 tablespoons
  • 3 tablespoons sugar
  • 1 ¾ teaspoons active dry yeast
  • 8 tablespoons unsalted butter cut into tablespoon-sized pats, softened

Instructions

  • Add all ingredients except for the softened butter to the bread machine in the order specified by your bread machine maker. I have listed the ingredients in the order for my older model Regal bread maker.
  • Set your bread machine to ‘sweet’ or ‘regular’ if yours doesn’t have a ‘sweet’ setting and begin processing.
  • minutes before the second kneed cycle is completed start adding the butter, 1 tablespoon at a time, 1 minute between adding each one. NOTE: My bread machine book has a chart showing the various cycle times. For mine, making sweet bread, the 2nd kneed begins after 15 minutes and last 20 minutes. So, I began adding the butter 27 minutes (15 minutes + 20 minutes – 8 minutes) after starting the bread.
  • Let machine finish and then open the top. Let the bread cool 20 minutes before removing to slice.

Notes

Follow the measurement amounts exactly to get the proper texture.

Nutrition

Calories: 1926kcal | Carbohydrates: 204g | Protein: 47g | Fat: 104g | Saturated Fat: 61g | Trans Fat: 4g | Cholesterol: 568mg | Sodium: 1897mg | Potassium: 569mg | Fiber: 11g | Sugar: 37g | Vitamin A: 3278IU | Vitamin C: 1mg | Calcium: 117mg | Iron: 4mg

Nutritional values are approximate.

Slow Cooker Pot Pie

It was a cold and crappy day in Indiana. I didn’t really feel like cooking much, so I threw all of the ingredients for pot pie into the slow cooker and let it go for 6 hours. Into pie pans, topped with dough, and a few minutes later… bingo! Slow cooker pot pie! Yummy and creamy and with just a little bit of that crunchy crust that I think is pretty much required by law. The chicken is tender and tasty. The vegetables are cooked perfectly, still having a bit of that ‘bite’ you want.

Slow Cooker Pot Pie

Nothing Fancy. Just Goodness.

There’s nothing fancy about this dish. It takes minimal time to throw together, and it makes a nice big batch. That’s the idea here. We aren’t making a fru-fru baked dish. But we’re not skimping on flavor, either.

This is great on a cold day. And it’s perfectly good on a warm day too.

Also try my slow cooker beef stroganoff.

Slow Cooker Pot Pie
Print Pin
5 from 1 vote

Slow Cooker Pot Pie

It was a cold and crappy day. I didn’t really feel like cooking much, so I threw all of the ingredients for pot pie into the slow cooker and let it go for 6 hours. Into pie pans, topped with dough, and a few minutes later… bingo! 
Course Main
Cuisine American
Keyword crockpot, pot pie, slow cooker
Prep Time 15 minutes
Cook Time 7 hours
Total Time 7 hours 15 minutes
Servings 8
Calories 107kcal

Ingredients

Instructions

  • Place the chicken, soup, milk, potatoes, onion and the seasonings into your slow cooker.
  • Stir to combine, cover and cook on low for 6 hours, stirring occasionally.
  • Preheat oven to 350 F (or per the crescent dough package instructions).
  • Add the peas and carrots. Stir and cook another 10 minutes.
  • Divide chicken mixture between two pie plates.
  • Open the dough packages and pinch the seams to form two large rectangular pieces of dough.
  • Place dough on top of pie plates. Trim edges.
  • Bake per package instructions until golden brown and crispy.

Notes

Serve hot.

Nutrition

Calories: 107kcal | Carbohydrates: 21g | Protein: 3g | Fat: 1g | Saturated Fat: 1g | Cholesterol: 3mg | Sodium: 23mg | Potassium: 509mg | Fiber: 3g | Sugar: 3g | Vitamin A: 78IU | Vitamin C: 22mg | Calcium: 55mg | Iron: 1mg

Nutritional values are approximate.

Whiskey Pepper Ground Beef Jerky on the Nesco Snackmaster Pro

I have been loving making jerky. Like this whiskey pepper ground beef jerky on the Nesco Snackmaster Pro. I’ve been using ground top round for my ground beef jerky, but any lean ground meat will work. This whiskey pepper ground beef jerky has a really great peppery flavor, with a hint of whiskey. For me, the peppery flavor was a big hit. I could eat this jerky all day long (and did).

Whiskey Pepper Ground Beef Jerky on the Nesco Snackmaster Pro

Remember To Rotate Your Trays

Make sure you rotate your trays every 2 hours or so when you make whiskey pepper ground beef jerky on the Nesco Snackmaster Pro. The bottom trays will not dry as quickly as those on top. Rotating the trays will give you nice, even drying and perfect jerky on every level.

I like to load up my dehydrator. To do that I picked up a handful of extra trays. They really add a whole lot more drying space! Since I have to rotate my trays, I write a number on each one on a piece of blue painter’s tape so I can keep track of them.

Try these other great jerky flavors from Eastman Outdoors: spicy jalapenoCajunmesquitesweet habanero, and hickory.

Check out my guide to using the Nesco Snackmaster Pro. You will be making fantastic jerky at home in no time at all!

Whiskey Pepper Ground Beef Jerky on the Nesco Snackmaster Pro
Print Pin
5 from 1 vote

Whiskey Pepper Ground Beef Jerky on the Nesco Snackmaster Pro

This whiskey pepper ground beef jerky has a really great peppery flavor, with a hint of whiskey. For me, the peppery flavor was a big hit. I could eat this jerky all day long (and did).
Course Dehydrator
Cuisine Jerky
Keyword beef, dehydrator, jerky, nesco snackmaster pro, sweet
Prep Time 8 hours
Cook Time 6 hours
Total Time 14 hours
Servings 1 pound
Calories 1243kcal
Author Mike

Ingredients

Instructions

  • Place beef in a resealable bag or container.
  • In a small bowl whisk together the seasoning, curing salt and water. Pour over the meat and seal. Shake to coat.
  • Refrigerate the meat for up to 8 hours, shaking or massaging every hour or so to get the marinade distributed and absorbed evenly.
  • Remove meat from the marinade and add to a jerky gun. Squeeze out onto Nesco trays. Do not overlap meat.
  • Add the dehydrator top, set to maximum temperature setting and dehydrate for 5 hours, rotating the trays (bottom to top) every 2 hours or so.
  • To test for doneness remove a piece and let cool slightly. Try to bend the meat. If it gives and starts to tear at the bend it is done. If it bends without tearing return to the dehydrator and let it run another 15 minutes and test again. If the meat is crunchy it is overdone but still good. It’s really personal preference as to how you like your jerky. Soft, chewy, crunchy. There’s no wrong here.
  • Let cool before storing in an airtight container.

Notes

The package for the Eastman Outdoors jerky seasoning states that it makes up to 5 pounds of jerky. I personally feel that the flavor is too mellow, so I use just about an entire package for 1 pound of jerky. I end up with a little left over seasoning, which I store in a labelled air-tight container. I’ll eventually mix it with more seasoning. I think I can get 3 pounds of well-seasoning jerky out of two packages of Eastman Outdoors mix.
This recipe is for starting with 1 pound of meat. You’ll end up with about 1/2 pound in the end. You can easily double/triple/etc this recipe for large quantities of meat, however 5-6 pounds is about all you can fit onto a Nesco Snackmaster Pro fitted with 12 trays (the unit comes with 5).

Nutrition

Calories: 1243kcal | Protein: 194g | Fat: 45g | Saturated Fat: 20g | Polyunsaturated Fat: 2g | Monounsaturated Fat: 20g | Trans Fat: 3g | Cholesterol: 562mg | Sodium: 605mg | Potassium: 3139mg | Calcium: 85mg | Iron: 22mg

Nutritional values are approximate.

McIlhenny’s Chili

I love a good beefy chili. Nothing fancy. Great southwestern flavors. Oddly this McIlhenny’s chili is served with rice. I say oddly because that’s not something I would normally do. I was surprised as to how much I liked having rice in my chili.

McIlhenny's Chili

A Broth Like No Other

The chili itself is just as great as you’d want. Tender meat with a broth that you really do want to drink up with a straw. It’s my favorite part of this McIlhenny’s chili.

The original recipe (which I modified only slightly) came from McIlhenny’s, the creators of Tabasco sauce. You know right then and there that it’s going to be fantastic. I have never had the free time when in New Orleans to go over to Avery Island and take a tour of the Tabasco plant. Next time, though, I will!

I like to use my good ole trusty Dutch oven to make this chili and pretty much darned near anything like it on my stovetop. It’s nice and big and sturdy. That extra weight helps it maintain and distribute heat perfectly. As an added bonus, it’s actually pretty easy to clean up too!

Also try my beef and Italian sausage chili. I love Italian sausage in chili.

McIlhenny's Chili
Print Pin
5 from 1 vote

McIlhenny’s Chili

The chili itself is just as great as you’d want. Tender meat with a broth that you really do want to drink up with a straw. It’s my favorite part of this McIlhenny’s chili.
Course Main
Cuisine American
Keyword beef, chili
Prep Time 15 minutes
Cook Time 2 hours 30 minutes
Total Time 2 hours 45 minutes
Servings 8
Calories 568kcal

Equipment

Ingredients

Instructions

  • Working in batches, heat a tablespoon or so of the oil in a large Dutch oven over medium-high heat.
  • Season the meat and brown on all sides.
  • Remove to a plate.
  • Add the onion to the pot and cook for 5 minutes, stirring often.
  • Add the garlic. Stir and cook another minute.
  • Add the chili powder, cumin, salt and hot sauce. Stir and cook for 1 minute.
  • Add the broth and canned chiles.
  • Bring to a boil.
  • Add the cooked beef along with any accumulated juices.
  • Reduce heat to a simmer and simmer for 1 1/2 – 2 hours or until the beef is tender.
  • Serve with cooked rice and desired toppings.

Notes

Also great without the rice!

Nutrition

Calories: 568kcal | Carbohydrates: 42g | Protein: 38g | Fat: 28g | Saturated Fat: 14g | Trans Fat: 1g | Cholesterol: 117mg | Sodium: 1267mg | Potassium: 795mg | Fiber: 3g | Sugar: 2g | Vitamin A: 928IU | Vitamin C: 4mg | Calcium: 77mg | Iron: 6mg

Nutritional values are approximate.

Roasted Cauliflower on the Char-Broil Big Easy

Note: This recipe was developed using the Char-Broil Big Easy Oil-Less Fryer. If you are cooking using the Char-Broil Smoker-Roaster Grill you should cook with the lid open and the temperature set to High. You might also need to adjust the cooking time.

As much as I use my Big Easy to cook up fantastic chicken, I also use it just as much for side dishes. This roasted cauliflower on the Char-Broil Big Easy came out absolutely delicious. Tender and flavor-packed, with just a hint of smokiness from the bacon. And as with anything I cook on my Big Easy, it was easy to make.

Roasted Cauliflower on the Char-Broil Big Easy

Don’t Get A Big Head!

Make sure when you pick out the right-sized head for your roasted cauliflower on the Char-Broil Big Easy. Don’t get a really big one or it won’t fit into the cooker. Shoot for one that is about 8″ wide or a bit smaller.

For a little kick don’t be afraid to add a few pinches of dried red pepper flake to the chicken broth as you cook the cauliflower. It won’t be overwhelmingly hot, but it’ll give you a slight hint of heat.

You can roast cauliflower in the standard basket that comes with the Big Easy or a bunk bed basket (lined with foil to keep the liquid in), or the Big Easy cooking rack.

It’s always a good idea to keep a few spare grease trays on hand for your Char-Broil Big Easy.

Not in to cauliflower? Roasted carrots are amazing!

Love your Big Easy as much I love mine? Check out my Big Easy Add-Ons page and my free Big Easy eCookbook!

Roasted Cauliflower on the Char-Broil Big Easy
Print Pin
4 from 1 vote

Roasted Cauliflower on the Char-Broil Big Easy

This roasted cauliflower came out absolutely delicious. Tender and flavor-packed, with just a hint of smokiness from the bacon. And as with anything I cook on my Big Easy, it was easy to make.
Course Side
Cuisine American
Keyword Big Easy, cauliflower, Char-Broil
Prep Time 5 minutes
Cook Time 30 minutes
Total Time 35 minutes
Servings 4 servings
Calories 188kcal

Ingredients

Instructions

  • Place the cauliflower in a pot and add the chicken stock.
  • Add the thyme and bay leaves.
  • Bring to a boil and reduce heat to a simmer. Simmer for 12 minutes.
  • Drain but reserve some of the cooking liquid.
  • Fire up your big easy.
  • Place the cauliflower into a pie pan and place into the cooking rack.
  • Pour 1/4 cup of the cooking liquid over the cauliflower.
  • Pour half of the butter over the cauliflower.
  • Sprinkle with more thyme and a few pinches of salt and pepper.
  • Place rack into the Big Easy and cook 10-15 minutes or until the cauliflower starts to turn golden in color.
  • Remove from cooker and drizzle with remaining butter.
  • Transfer to a serving platter and sprinkle with bacon and more thyme, salt and pepper to taste.

Notes

Serve immediately.

Nutrition

Calories: 188kcal | Carbohydrates: 10g | Protein: 9g | Fat: 12g | Saturated Fat: 4g | Trans Fat: 1g | Cholesterol: 23mg | Sodium: 505mg | Potassium: 317mg | Fiber: 1g | Sugar: 5g | Vitamin A: 43IU | Vitamin C: 1mg | Calcium: 26mg | Iron: 1mg

Nutritional values are approximate.

Black Forest Cheesecake

I can’t bake, and I’m not afraid to admit it. But that doesn’t mean I can’t throw together a simple delicious pie or cheesecake. I haven’t yet graduated to making my own crusts, so I ‘cheat’ and grab those pre-made ones from the store. I have to, it’s just the way it is. This Black Forest cheesecake came out fantastic despite my lack of baking skills. A nice chocolatey flavor, perfect texture, and topped with yummy tart cherries. Dangerously good. Heck, I’m pretty darned proud of my total lack of baking skills now!

Black Forest Cheesecake

Don’t Mess With Perfection

What I do differently next time I make a Black Forest cheesecake? Nothing. Not a thing. Well, ok, I might double the recipe and make four cheesecakes instead of just two. I’ll be taking a few of these to our next family holiday get-together, that’s for sure! I’m a huge, huge fan of cheesecakes and this version is just another great reason why. You just can’t beat them for flavor, appearance and simplicity!

Also try my no-bake red velvet cheesecake. It’s one of my wife’s all-time favorites! She’s always on the look-out for something red velvet and the cheesecake more than satisfied her taste buds!

Inspired by a recipe from Kraft.

Black Forest Cheesecake
Print Pin
5 from 1 vote

Black Forest Cheesecake

 This Black Forest cheesecake came out fantastic despite my lack of baking skills. A nice chocolatey flavor, perfect texture, and topped with yummy tart cherries. Dangerously good.
Course Dessert
Cuisine American
Keyword cheesecake
Prep Time 30 minutes
Cook Time 5 hours 30 minutes
Total Time 6 hours
Servings 2 pies
Calories 2146kcal

Equipment

Ingredients

Instructions

  • Pre-heat your oven to 325º F.
  • Place cream cheese, sugar and vanilla into the bowl of a mixer and mix until blended.
  • Add the sour cream and chocolate and blend.
  • With the blender running, add the eggs one at a time until blended.
  • Divide mixture between the two pie pans (they’ll be pretty full) and bake 40 minutes or until the center is almost set.
  • Let cool completely then refrigerate for 4 hours.
  • Spread Cool Whip over tops of cheesecakes.
  • Serve slices with a spoonful or two of the cherry pie filling.

Notes

Worth every calorie!

Nutrition

Calories: 2146kcal | Carbohydrates: 250g | Protein: 33g | Fat: 114g | Saturated Fat: 51g | Trans Fat: 1g | Cholesterol: 451mg | Sodium: 999mg | Potassium: 1037mg | Fiber: 11g | Sugar: 147g | Vitamin A: 1460IU | Vitamin C: 1mg | Calcium: 352mg | Iron: 12mg

Nutritional values are approximate.

Loaded Italian Sausage Sandwiches

These loaded Italian sausage sandwiches have become somewhat of a tradition in our house around New Year’s and the Super Bowl. I make a nice big batch of them and let them slow cook either on the stove or in a slow cooker, ready to eat at any time. Perfect eats for watching football games, specially college bowl games. Spicy sausage with a flavorful tomato sauce loaded with peppers, onions, and mushrooms. All topped (of course) with ooey-gooey cheese.

Loaded Italian Sausage Sandwiches

My Superbowl Go-To Sandwich

I’m not sure I’ve ever made my loaded Italian sausage sandwiches exactly the same way each year. Sometimes I go the spicy route, sometimes I use sweet sausages. Sometimes I add more bell peppers, sometimes I just add more mushrooms. It just kind of depends on how I feel that day. If you don’t mind spicy, add more red pepper flake and a good amount of hot sauce.

I highly recommend that you shred or grate your own cheese at home. Don’t buy the pre-shredded or pre-grated stuff. It has stuff added to it to keep it from sticking together. That ‘stuff’ affects how the cheese melts. Shred it yourself and use the good stuff.

Also try my other version of Italian sausage sandwiches, all fantastic: my class version and the deluxe version.

Italian Sausage Sandwiches Version 3.0
Print Pin
5 from 1 vote

Loaded Italian Sausage Sandwiches

These loaded Italian sausage sandwiches have become somewhat of a tradition in our house around New Year’s and the Superbowl. I make a nice big batch of them and let them slow cook either on the stove or in a slow cooker, ready to eat at any time.
Course Main
Cuisine American
Keyword Italian, sandwich, sausage
Prep Time 15 minutes
Cook Time 6 hours 30 minutes
Total Time 6 hours 45 minutes
Servings 10 sandwiches
Calories 540kcal
Author Mike

Ingredients

Instructions

  • Place the pizza and tomato sauces into a large pot over medium heat.
  • In a large Dutch oven, heat a splash or two of oil over medium-high heat.
  • Working in batches, add the sausages, browning on all sides.
  • Transfer browned sausages to the pot of sauce.
  • Add more oil to the Dutch oven and add all of the vegetables.
  • Saute until just starting to get soft, then transfer to the pot of sauce along with the sausages.
  • Season with salt and pepper, Italian seasoning and red pepper flake.
  • Cover, reduce heat to medium-low and simmer for 5-6 hours, stirring occasionally.
  • Slice the bread in half. I prefer to do this by cutting a ‘V’ down the top of the bread, making a trench for the sausages and sauce. I find that the bread doesn’t split so easily this way. I also remove some of the bread inside just to make more room for the great toppings.
  • Cut bread into lengths a tad shorter than the sausages.
  • Add meat and top with sauce and a little bit of the vegetables.
  • Top with cheese and place on a sheet pan under the oven broiler just long enough to melt the cheese.

Notes

Serve with plenty of napkins nearby!

Nutrition

Calories: 540kcal | Carbohydrates: 20g | Protein: 25g | Fat: 41g | Saturated Fat: 16g | Cholesterol: 103mg | Sodium: 1752mg | Potassium: 1099mg | Fiber: 5g | Sugar: 12g | Vitamin A: 2158IU | Vitamin C: 106mg | Calcium: 183mg | Iron: 4mg

Nutritional values are approximate.

Beef Summer Sausage

Well, hot diggity dog! Get me some cheese and crackers and get them fast! This beef summer sausage came out tasting fantastic! Perfect texture, too. Boy, I could not have been happier with it. For my first time (of many) this was one of the best things I’ve ever made! I’m just giddy as can be! Great beefy flavor with a hint of smoke and pepper.

Beef Summer Sausage

This Is One Tasty Summer Sausage

I made my beef summer sausage ‘log’ a bit bigger round than I had thought, close to 2 inches. Not that that was a bad thing, but next time I’ll shoot for a size that fits more perfectly onto a cracker. A little meaty overhang isn’t a bad thing, mind you.

And I might add a bit of heat next time. I’m thinking that a few good sized pinches of red pepper flake ought to do it!

Also try my homemade Italian sausage. I love serving smoked sausage with my Sriracha mustard dipping sauce.

Beef Summer Sausage
Print Pin
5 from 1 vote

Beef Summer Sausage

Well, hot diggity dog! Get me some cheese and crackers and fast! This beef summer sausage came out tasting fantastic! Perfect texture, too. 
Course Appetizer
Cuisine American
Keyword beef, sausage
Prep Time 5 minutes
Cook Time 16 hours
Total Time 16 hours 5 minutes
Servings 1 pound
Calories 2304kcal

Ingredients

  • 2 pounds ground beef the leanest you can find, preferably
  • 2 tablespoons Morton's Tender Quick
  • 1 tablespoon liquid smoke
  • 1 teaspoon smoked black pepper or use regular black pepper and add a bit more Liquid Smoke
  • 1 teaspoon garlic salt

Instructions

  • Place the meat into a bowl and add the Tender Quick. Mix well. Cover and refrigerate overnight.
  • The next day, start by preheating your oven to 225 F.
  • Add the Liquid Smoke, pepper and garlic salt to the meat and mix very well.
  • Divide the meat into two equally-sized halves and form into logs.
  • Transfer to a baking sheet and bake for 4 hours.
  • Remove and let cool completely before slicing thin and serving with sliced cheeses and crackers.

Notes

Refrigerate any leftovers.

Nutrition

Calories: 2304kcal | Protein: 156g | Fat: 181g | Saturated Fat: 70g | Trans Fat: 11g | Cholesterol: 644mg | Sodium: 2967mg | Potassium: 2450mg | Calcium: 165mg | Iron: 18mg

Nutritional values are approximate.

Salami Chips with White Bean Dip

Salami chips with a white bean dip are a dangerously tempting thing. Crunchy meaty yummy. It’d be difficult to make them even taste even better, but you can by serving them with a roasted garlic white bean dip. The creamy dip (almost like a hummus) complements the salami perfectly. This makes for a great easy appetizer or snack for the big game. Whomever said that you can’t have a super-meaty appetizer was wrong. Actually, I don’t know if anyone ever said that. Someone probably did at some point. And they were wrong!

Salami Chips with White Bean Dip

Remove The Casing

Most grocery stores sell a variety of different styles of salami. Grab a few different flavors and mix them up on the plate of salami chips with white bean dip. Many salamis have a very thick casing, which not all people enjoy. You can remove it quite easily after slicing the salami thin. I just use a small pairing knife to get it started then pull it off with my fingers.

I like my dip to be fairly smooth but not creamy. If you like yours to be smoother, just process it a bit longer in your food processor. Don’t go crazy. Process just a bit at a time. Remember you can process it longer, but you can’t un-process it!

Also try my smoked glazed salami.

Salami Chips with White Bean Dip
Print Pin
4 from 1 vote

Salami Chips with White Bean Dip

Salami chips with a white bean dip are a dangerously tempting thing. Crunchy meaty yummy. It’d be difficult to make them even better, but you can by serving them with a roasted garlic white bean dip.
Course Appetizer
Cuisine American
Keyword beans, dip, salami
Prep Time 10 minutes
Cook Time 1 hour
Total Time 1 hour 10 minutes
Servings 4 servings
Calories 138kcal
Author Mike

Ingredients

For the white bean dip

For the salami chips

  • 4 ounces salami sliced thin

Instructions

For the white bean dip

  • Pre-heat oven to 375 F.
  • Cut top off the garlic and drizzle with 1 teaspoon of the olive oil.
  • Wrap in foil and place in oven for 40-45 minutes or until soft.
  • Remove and let cool slightly.
  • Squeeze garlic from the cloves and add to a food processor.
  • Add remaining ingredients and puree until smooth. Add more water if the mixture is too thick.
  • Serve with the salami chips.

For the salami chips

  • Place salami on a parchment-lined baking sheet or on a rack over a baking sheet.
  • Bake for 10-15 or until starting to crisp and curl at the edges.
  • Remove and let cool and crisp more.

Notes

The technique also works on other dried meats, even pepperoni!

Nutrition

Calories: 138kcal | Carbohydrates: 3g | Protein: 7g | Fat: 11g | Saturated Fat: 4g | Cholesterol: 22mg | Sodium: 900mg | Potassium: 145mg | Fiber: 1g | Sugar: 1g | Vitamin A: 30IU | Vitamin C: 4mg | Calcium: 21mg | Iron: 1mg

Nutritional values are approximate.

Italian Hoagie

My wife and I recently returned from the Pittsburgh, PA area. My wife was there for a conference, and I was there for food. Right down the street from our hotel was Pizza Bella. They made the most amazingly good Italian hoagie that as soon as we returned home I had to make hoagies. And here it is in all of its glory. Great meats, cheese, and fresh toppings, all with a fantastic dressing.

Italian Hoagie

Oh, What A Hoagie!

I hope I never have to decide between which is my favorite: hoagies or muffulettas. They are both fantastic sandwiches, both with a lot of Italian influence in the ingredients. One thing is for sure, though. The next time we are in the Pittsburgh area we’ll swing by Pizza Bella and grab more hoagies.

Also try my other version of hoagie dressing and my Italian grinders. And my Philly style Italian hoagies are great too!

Italian Hoagie
Print Pin
5 from 1 vote

Italian Hoagie

Here it is in all of its glory. Great meats, cheese, and fresh toppings, all with a fantastic dressing.
Course Main
Cuisine American
Keyword Italian, sandwich
Prep Time 10 minutes
Cook Time 12 minutes
Total Time 22 minutes
Servings 4 servings
Calories 1525kcal
Author Mike

Ingredients

For the hoagie

  • 4 Hoagie rolls 12" long
  • ½ pound deli ham thinly sliced
  • ½ pound capicola thinly sliced
  • ½ pound Genoa salami thinly sliced
  • ½ pound Provolone cheese
  • Hoagie dressing from below
  • 4 cups iceberg lettuce shredded
  • 2 tomatoes sliced thin
  • 1 medium white onion sliced thin (soak in cold water first if desired)
  • Hot peppers or sweet

For the hoagie dressing (makes enough for 4 or more hoagies)

Instructions

For the hoagie

  • Preheat oven to 350 F.
  • Slice bread rolls horizontally. Do not cut all the way through.
  • Brush insides of bread with dressing.
  • Add meats and cheese.
  • Wrap in foil and place in oven for 12 minutes or until hot and the bread is a little crunchy.
  • Remove from foil. Add remaining ingredients, plus a little more of the dressing.
  • Serve.

For the hoagie dressing

  • Whisk together all ingredients.

Notes

The dressing is great on any sandwich, sub or hoagie!

Nutrition

Calories: 1525kcal | Carbohydrates: 153g | Protein: 77g | Fat: 69g | Saturated Fat: 25g | Cholesterol: 170mg | Sodium: 5005mg | Potassium: 762mg | Fiber: 7g | Sugar: 34g | Vitamin A: 1434IU | Vitamin C: 13mg | Calcium: 515mg | Iron: 46mg

Nutritional values are approximate.