Potato and Green Bean Salad

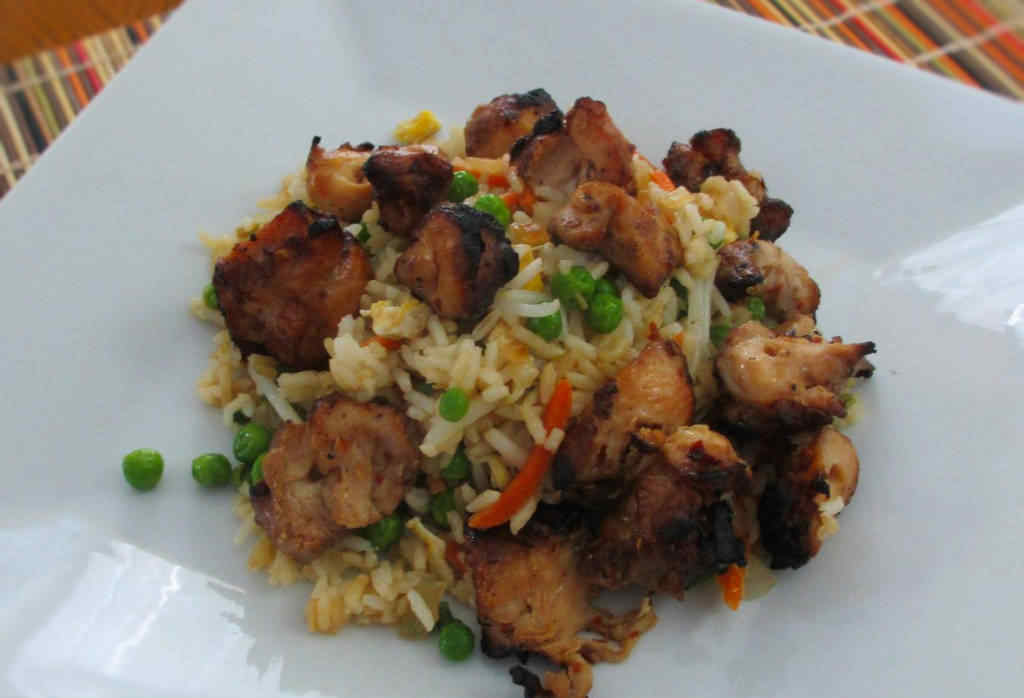
Here lately I’ve found myself watching The Best Recipes Ever on CBC. I didn’t really need to watch another cooking show, but the recipes on this one caught my eye. This potato and green bean salad is the first one I’ve made and although my version came out looking a bit different than the original, it was pretty good.

Potato and Green Bean Salad

Don’t Over-Dress

There are two things you have to keep in mind when making this potato and green bean salad. Some people have an aversion to cilantro, so you might want to use parsley instead, or at least cut back on the cilantro. Also, don’t just toss the dressing into the salad all willy-nilly. Add a little. Stir, taste, and check the consistency. It’s easy to add too much dressing (and I was dangerously close to having too much dressing on mine!).

I almost always use Blue Plate mayonnaise in the dishes I make. I think it is the best around. If you can’t find it locally you can pick it up online for a fair price.

Also try my country green beans.

Potato and Green Bean Salad
Print Pin
4 from 1 vote

Potato and Green Bean Salad

A nice twist on the traditional potato salad.
Course Side Dish
Cuisine American
Keyword green beans, potato salad, salad
Prep Time 10 minutes
Cook Time 4 hours 15 minutes
Total Time 4 hours 25 minutes
Servings 10
Calories 90kcal
Author Kary Osmand

Ingredients

Instructions

  • Salt a large pot of water and bring to a boil. Add potatoes and cook until just tender, 10-15 minutes. Drain and let cool slightly.
  • Add beans and 1/2 cup of the cilantro to the potatoes and gently toss to mix.
  • Mix together the mayo, sour cream and vinegar. Season with salt and pepper to taste. Stir into potato mixture.
  • Refrigerate for 4 hours.
  • Serve garnished with remaining cilantro.

Notes

Stir before serving.

Nutrition

Calories: 90kcal | Carbohydrates: 11g | Protein: 2g | Fat: 4g | Saturated Fat: 1g | Trans Fat: 1g | Cholesterol: 5mg | Sodium: 134mg | Potassium: 262mg | Fiber: 2g | Sugar: 2g | Vitamin A: 264IU | Vitamin C: 12mg | Calcium: 24mg | Iron: 1mg

Nutritional values are approximate.

Italian Dressing Mix

This Italian dressing mix is just like the stuff you buy in packets at the store. Now you can make your own at home for much less. I make a big batch and keep it in an airtight container in the pantry. This seasoning also makes for a great substitute when a recipe calls for Italian seasoning.

Homemade Catalina and Italian Salad Dressings

A Great Dressing Any Time

This dressing is great on my Mason jar salad. Anything in a Mason jar is good. Sometimes I like to make it a little different. I might add a bit of red pepper flake to give the dressing a little bit of a kick. Not too much though. You still want your Italian dressing mix to taste like the original. At least, mostly.

Check out my new site, Dress My Salad, for more great salad dressing ideas!

Homemade Catalina and Italian Salad Dressings
Print Pin
5 from 1 vote

Italian Dressing Mix

This Italian dressing mix is just like the stuff you buy in packets at the store. Now you can make your own at home for much less.
Author Mike

Equipment

Ingredients

Instructions

  • Combine all ingredients.
  • Two tablespoons of this mixture equals one packet.

Notes

Store in an air-tight container.

Nutritional values are approximate.

Spicy Oyster Crackers

Oyster crackers are a favorite snack in our household. No, not right out of the bag. Those are rather boring. No, we flavor them up! They’re easy to make, inexpensive, and there are a lot of ways to flavor them. And they’re crunchy. Good-n-crunchy. And since we both like a little kick, spicy oyster crackers are a recurring favorite.

Spicy Oyster Crackers

No Wimpy Crackers Here

These spicy oyster crackers have a lot of kick. You might want to tone it back a bit if you’re taking a batch to co-workers! Or not. I wouldn’t. Heck they’re called spicy for a reason. Just put a sign by the bowl that says ‘spicy’. I think that frees you from any legal responsibility, right?

Also try my Sriracha oyster crackers and my mini Churros, also made with oyster crackers.

Spicy Oyster Crackers
Print Pin
5 from 1 vote

Spicy Oyster Crackers

Oyster crackers are a favorite snack in our household. No, not right out of the bag. Those are rather boring. No, we flavor them up! 
Course Appetizer
Cuisine American
Keyword oyster crackers, spicy
Prep Time 5 minutes
Cook Time 25 minutes
Total Time 30 minutes
Servings 8
Calories 356kcal

Ingredients

Instructions

  • Preheat your oven to 300 F.
  • Combine all ingredients except for the crackers in a large bowl.
  • Add in the crackers and toss to coat well.
  • Line a large baking sheet (or two) with parchment paper.
  • Pour the cracker mixture onto the baking sheets and spread out evenly.
  • Bake for 15 minutes. Stir and flip and bake another 10 minutes or longer until golden brown.
  • Let cool before serving. The crackers will crisp up more once cooled.

Notes

Store in an air-tight container.

Nutrition

Calories: 356kcal | Carbohydrates: 43g | Protein: 6g | Fat: 18g | Saturated Fat: 5g | Trans Fat: 1g | Cholesterol: 15mg | Sodium: 669mg | Potassium: 126mg | Fiber: 2g | Sugar: 1g | Vitamin A: 584IU | Vitamin C: 1mg | Calcium: 21mg | Iron: 3mg

Nutritional values are approximate.

Zesty Grilled Ham Steak

The glaze on this zesty grilled ham steak is easy to throw together. It combines the sweetness of brown sugar, the tartness of lemon, and the kick of horseradish. It really wakes up a good piece of grilled ham. It’s not overly sweet, which sometimes ham glazes are for me.

This ham steak makes for a great side for breakfast-for-dinner.

Zesty Grilled Ham Steak

Great Glaze For Not Just Ham

The glaze on this zesty grilled ham steak would be great on other pork dishes… such as grilled pork loin or tenderloin. And bacon. Just brush the glaze on the meat a few minutes before it’s done. Ham heats quickly so you can put it on early. You don’t want to glaze pork loin, tenderloin or even bacon early. The brown sugar in the glaze might burn, ruining your dish. Save it for near the end.

I love cooking up breakfast on the grill, even if it’s just a side dish or an ingredient I’ll use as part of a bigger dish, like my smoked crumbled breakfast sausage.

My pepper onion beer sauce makes for a great topping for ham!

Zesty Grilled Ham Steak
Print Pin
5 from 1 vote

Zesty Ham Steak

The glaze on this zesty grilled ham steak is easy to throw together. It combines the sweetness of brown sugar, the tartness of lemon, and the kick of horseradish. It makes for a great side for breakfast-for-dinner.
Course Side
Cuisine American
Keyword ham
Prep Time 5 minutes
Cook Time 20 minutes
Total Time 25 minutes
Servings 4
Calories 289kcal

Equipment

Ingredients

Instructions

  • Fire up a grill for medium-heat cooking.
  • In a small saucepan, combine the brown sugar, horseradish, lemon, and Cajun seasoning (if desired). Stir.
  • Bring to a boil and reduce the heat to a simmer.
  • Stir, and continue simmering until thickened. Remove from heat.
  • Place the ham steak over the medium heat on the grill.
  • Brush with the glaze.
  • Grill for about 5 minutes, then rotate to get those great grill marks.
  • Add more glaze and cook another 5 minutes.
  • Flip, glaze, and cook another 10 or so minutes.
  • Add more glaze just before removing.

Notes

Remember the ham steak is already cooked, you’re just reheating it and adding flavor.

Nutrition

Calories: 289kcal | Carbohydrates: 57g | Protein: 12g | Fat: 3g | Saturated Fat: 1g | Cholesterol: 25mg | Sodium: 764mg | Potassium: 312mg | Fiber: 1g | Sugar: 55g | Vitamin A: 6IU | Vitamin C: 34mg | Calcium: 59mg | Iron: 1mg

Nutritional values are approximate.

Putting up corn for the Winter

Winters here can be rather long. We like to put up some sweet corn for those cold, gray months – it’s like summer in a bag. Just as sweet and juicy as the day it was picked.

The only corn we buy is from My Dad’s Sweet Corn, from nearby Tipton, Indiana. Fortunately for us we don’t have to drive to Tipton since MDSC is at all of our local farmer’s markets.

I wait until the corn is at its peak. This year it was the week after July 4th. Last year, I bought 5 dozen ears (they actually sell them as baker’s dozens). Because of the drought in 2012, the corn, although as sweet as always, was certainly smaller than it is most years. This year, the weather has been great and the corn was absolutely fantastic. So… I bought over 100 ears! Yes, 8 dozen. Two 100 pound potato sacks worth (fortunately they helped me get it to my car)! Well, we now have enough corn for winter, that’s for sure!

There are probably other ways of putting corn up for the winter. This is how I do it. I am always looking for ideas, though, so if you also put corn up and you do it differently, please respond in the comments so we can share ideas.

Eight dozen corn ears. Actually, it came to 108 ears total. Quite the load!

Putting up corn for the Winter

Beautiful corn harvest this year. Sweet and yummy!

Putting up corn for the Winter

Boiling a batch in a 30-quart stock pot over a Bayou Classic Outdoor Gas Cooker. You can do this inside on a stove too, of course, but it’s a little less messy outdoors.

Putting up corn for the Winter

Print Pin
5 from 1 vote

Putting up corn for the Winter

Winters here can be rather long. We like to put up some sweet corn for those cold, gray months – it’s like summer in a bag. Just as sweet and juicy as the day it was picked.
Course Side
Cuisine American
Author Mike

Ingredients

  • 100 ears fresh sweet corn picked that day
  • A large pot I used a 30 quart stock pot with a basket
  • 1 tablespoon sugar
  • 2 22 pound bags ice
  • 1 large cooler I used an old 60 quart Igloo
  • 1 large bath towel
  • 1 large bowl
  • 1 small glass bowl
  • 1 small towel
  • sharp chef's knife
  • Vacuum freezer bags and vacuum sealer

Instructions

  • Shuck the corn. Yes, it might take a while. Just pull up a chair and get to it. And the silk? I’ve found it’s just easier to remove them by hand, even though there are tons of gadgets out there that supposedly do it better. Shucking corn is quality time for me. Enjoy it!
  • Put the ice into the cooler and add water to nearly fill it to the top. This will be the ice bath used to stop the corn from cooking after you remove it from the boiling water.
  • Fill your pot with water and place over high heat and bring to a boil. I use an outdoor propane burner from Bayou Classics. It boils water in a jiffy, and as an added bonus it sounds really cool.
  • Add the sugar to the water. I do this because I believe that the first batch of corn loses some sweetness to the water, so I add a bit of sugar. After the first batch, the water gets flavor from the corn so I no longer add any more sugar.
  • Add the corn in batches, but do not overcrowd. Let it boil for 5 minutes.
  • Remove corn to the ice bath and start your next batch boiling.
  • As soon as the corn is cold remove it to the bath towel and dry it just slightly. You don’t have to get it perfect,you just want to sop up and excess water. You can also just shake the excess water off.
  • Put the small bowl, upside down, in the center of the large bowl. Cover the small bowl with the small towel. This is where you will cut the kernels from the corn. The towel keeps the ears from sliding around (and you getting cut).
  • Take each ear and stand it straight up (shank side down) on the small bowl and towel. Holding it at the very tip, run your knife down the sides, close to the ear, cutting off all of the kernels. The kernels will fall into the big bowl, preventing you from making a big mess! Get as much as the kernel goodness as you can.
  • Continue working in batches until all of the corn has been boiled and the kernels removed.
  • Now, place the kernels into the vacuum bags. I use quart-sized bags and put about 4 cups in each bag. This is roughly the equivalent of 2 cans of corn.
  • Place the bags into the freezer unsealed. You want the corn to nearly freeze first. Otherwise the moisture will make it impossible to seal them.
  • After a few hours, remove the bags and seal them per your sealer’s instructions.
  • Note: If you have room in your freezer, it is worth saving some of the water you boiled the corn in for soups or chowders.

Nutritional values are approximate.

Roasted Chicken Breasts on the Char-Broil Big Easy

Note: This recipe was developed using the Char-Broil Big Easy Oil-Less Fryer. If you are cooking using the Char-Broil Smoker-Roaster Grill you should cook with the lid open and the temperature set to High. You might also need to adjust the cooking time.

I’m a huge fan of my Char-Broil Big Easy. I was pessimistic when I bought it (I’m more a Weber-brand grill guy), but I have really loved using the Big Easy from Char-Broil. Heck, I have 3 Big Easys now and I’d be happy with more! It does a fantastic job on whole turkeys and chickens, wings, and yes, split chicken breasts like these. I was unable to resist temptation and had to pull off a piece of that delicious, crunchy chicken skin! Roasted chicken breasts on the Char-Broil Big Easy is a wonderful thing!

Roasted Chicken Breasts on the Char-Broil Big Easy

How Chicken Is Done

Using the Big Easy is… well, easy. I marinade the chicken, fire up the fryer, put the chicken in, and a little over an hour later I have perfectly cooked roasted chicken. No fussing with fryer temperatures, or checking the meat temperature every 15 minutes, just walk away (ok, you shouldn’t leave a lit grill unattended) and come back later. I love making roasted chicken breasts on the Char-Broil Big Easy!

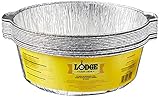
It’s always a good idea to keep a few spare grease trays on hand for your Char-Broil Big Easy.

Love your Big Easy as much I love mine? Check out my Big Easy Add-Ons page and my free Big Easy eCookbook!

Roasted Chicken Breasts on the Char-Broil Big Easy
Print Pin
5 from 1 vote

Roasted Chicken Breasts on the Big Easy

I have 3 Big Easys now and I’d be happy with more! It does a fantastic job on whole turkeys and chickens, wings, and yes, split chicken breasts like these.
Course Main
Cuisine American
Keyword Big Easy, Char-Broil, chicken
Prep Time 3 hours 10 minutes
Cook Time 1 hour 20 minutes
Total Time 4 hours 30 minutes
Servings 4
Calories 300kcal
Author Mike

Ingredients

Instructions

  • Combine all but the chicken breasts. Taste the marinade and add more dill or rosemary if you wish.
  • Rub the marinade all over the chicken. If you left the skin on, try to slide your fingers in between the skin and meat and smear the marinade into the resulting pocket.
  • Let the breasts marinade in a large resealable container or baggie for at least 3 hours.
  • Fire up the Big Easy fryer. You’ll need a bunk bed basket to fit all 4 breasts in at once.
  • Place 2 breasts in the bottom Big Easy basket and two in the top basket.
  • Let cook at least an hour (with the top on the Big Easy so the chicken gets good and brown and the skin crisps up nice) before checking the meat temperature, which you want to get to 165 F.
  • Remove the breasts and let rest until slightly cooled, then slice.

Notes

You can use your favorite cuts of chicken.

Nutrition

Calories: 300kcal | Carbohydrates: 2g | Protein: 49g | Fat: 9g | Saturated Fat: 3g | Trans Fat: 1g | Cholesterol: 152mg | Sodium: 920mg | Potassium: 903mg | Fiber: 1g | Sugar: 1g | Vitamin A: 234IU | Vitamin C: 4mg | Calcium: 56mg | Iron: 1mg

Nutritional values are approximate.

Cajun Rainbow Slaw

Boy, this Cajun rainbow slaw has some kick! If you’re a fan of horseradish you’ll be all over this salad. If you’re not a fan of horseradish, cut the amount in half and you’ll still get to enjoy a great salad! I make a lot (and I do mean a lot) of slaws and this one is a pleasant change from the usual vinegar- or mayonnaise-based versions.

Cajun Rainbow Slaw

Great On A BBQ Pork Sandwich

My favorite way to eat a good slaw is heaped on top of a smoked pulled pork or brisket sandwich. I love the contrast between the crunchy slaw and the tender meat. You just can’t beat it.

I almost always use Blue Plate mayonnaise in the dishes I make. I think it is the best around. If you can’t find it locally you can pick it up online for a fair price.

Also try my Sriracha slaw. Just like this Cajun rainbow slaw, it packs a good bit of a kick.

This recipe was inspired by a recipe from the Food Network.

Cajun Rainbow Slaw
Print Pin
4 from 1 vote

Cajun Rainbow Slaw

Boy, this Cajun rainbow slaw has some kick! If you’re a fan of horseradish you’ll be all over this salad
Course Side
Cuisine Cajun
Keyword cole slaw, coleslaw, slaw
Prep Time 15 minutes
Cook Time 5 minutes
Total Time 20 minutes
Servings 4
Calories 220kcal

Equipment

Ingredients

  • 2 teaspoons Cajun seasoning
  • ½ cup mayonnaise
  • 2 tablespoons Creole mustard spicy brown works fine, or combine a few drops of Worcestershire sauce with Dijon mustard
  • ½ lemon juiced (to taste, depending on the size of the lemon)
  • 2 tablespoons prepared horseradish more or less, to taste
  • 1 12 ounce broccoli slaw mix
  • 1 small red bell pepper minced
  • 1 small orange bell pepper minced
  • 3 green onions chopped

Instructions

  • Combine the seasoning, mayo, mustard, lemon and horseradish in a medium bowl.
  • Add in the remaining ingredients and fold to coat.

Notes

You can substitute 2 tablespoons chopped red onion for the green onion.

Nutrition

Calories: 220kcal | Carbohydrates: 6g | Protein: 2g | Fat: 22g | Saturated Fat: 3g | Trans Fat: 1g | Cholesterol: 12mg | Sodium: 298mg | Potassium: 180mg | Fiber: 2g | Sugar: 3g | Vitamin A: 1768IU | Vitamin C: 58mg | Calcium: 26mg | Iron: 1mg

Nutritional values are approximate.

Cantaloupe Salsa

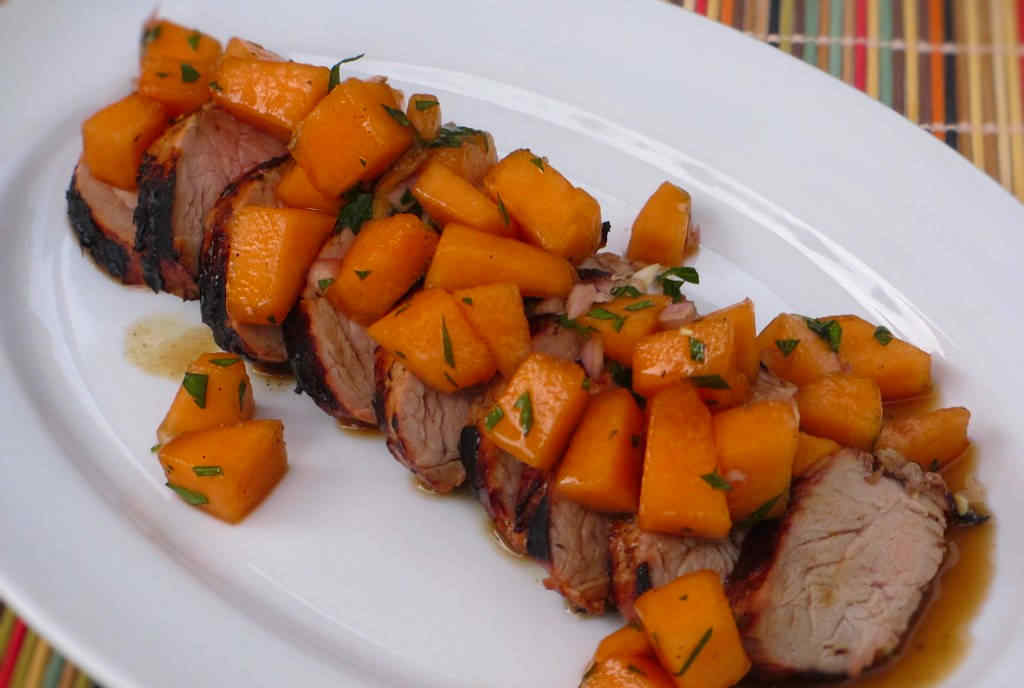
This is great salsa. Tired of the same old tomato-based salsa? This cantaloupe salsa will cure you! You could serve it with chips, though you might want to chop the cantaloupe a little smaller. Or do as I did and serve it over a fantastic grilled pork tenderloin.

Grilled Pork Tenderloin with Cantaloupe Salsa

Perfect With Grill Pork

I liked the chunkier pieces of fruit in my cantaloupe salsa when served with tender, juicy pork tenderloin. Smaller pieces would’ve been lost in the dish, I think.

I serve a similar dish but use a cherry salsa instead. Either salsa pairs perfectly with the pork.

Add a little minced jalapeno or serrano for an extra kick!

This recipe was inspired by a recipe from Patio Daddio.

Grilled Pork Tenderloin with Cantaloupe Salsa
Print Pin
4 from 1 vote

Cantaloupe Salsa

This is great salsa. Tired of the same old tomato-based salsa? This cantaloupe salsa will cure you! 
Course Appetizer
Cuisine American
Keyword cantaloupe, salsa
Prep Time 10 minutes
Cook Time 2 hours
Total Time 2 hours 10 minutes
Servings 6
Calories 63kcal

Equipment

Ingredients

Instructions

  • Combine all ingredients.
  • Refrigerate for 2 hours before serving.

Notes

Stir again before serving.

Nutrition

Calories: 63kcal | Carbohydrates: 15g | Protein: 1g | Fat: 1g | Saturated Fat: 1g | Sodium: 407mg | Potassium: 297mg | Fiber: 1g | Sugar: 14g | Vitamin A: 3533IU | Vitamin C: 41mg | Calcium: 20mg | Iron: 1mg

Nutritional values are approximate.

Roasted Green Pepper Mayonnaise

I’ve had BLT sandwiches on my mind for days now, since I saw some really nice, big tomatoes at the market. I finally got the time to make them. I wanted a little something special beyond just the usual mayonnaise, so I made up a small batch of this simple roasted green pepper mayonnaise. It doesn’t take long to make. It adds a nice grilled flavor to the sandwich.

Roasted Green Pepper Mayonnaise

Creamy Pepper Goodness

I also used this roasted green pepper mayonnaise on roasted chicken sandwiches, which came out fantastic too. If you don’t want to roast a pepper, you can use roasted red peppers in a jar, available at your local grocery store (ours has them by the Italian foods and also by the olives).

I almost always use Blue Plate mayonnaise in the dishes I make. I think it is the best around. If you can’t find it locally you can pick it up online for a fair price.

Good on a club sandwich, too!

Roasted Green Pepper Mayonnaise
Print Pin
4 from 1 vote

Roasted Green Pepper Mayonnaise

I made a small batch of this simple roasted green pepper mayonnaise. It doesn’t take long to make. It adds a nice grilled flavor to any sandwich.
Course Sauce
Cuisine American
Keyword bell pepper, mayonnaise
Cook Time 15 minutes
Total Time 15 minutes
Servings 1 cup
Calories 1556kcal
Author Mike

Ingredients

Instructions

  • Roast the pepper over direct heat on a grill or in an oven (I prefer to crank up the heat on my gas grill and place the pepper directly over the hottest part of the grill. I rotate it every few minutes until it is very charred on all sides).
  • Let the pepper cool then seed it and chop it very fine.
  • Add to the mayonnaise and combine well.

Notes

Store in the fridge. Stir before using.

Nutrition

Calories: 1556kcal | Carbohydrates: 9g | Protein: 4g | Fat: 168g | Saturated Fat: 26g | Trans Fat: 1g | Cholesterol: 94mg | Sodium: 1427mg | Potassium: 332mg | Fiber: 3g | Sugar: 8g | Vitamin A: 752IU | Vitamin C: 132mg | Calcium: 34mg | Iron: 1mg

Nutritional values are approximate.

Strawberry Cheesecake Salad

Wow, this strawberry cheesecake salad is good. It’s sort of like a salad but you’ll want this for dessert… so it is a dessert salad!

I made this using lighter ingredients than the original recipe. It would be perfect for a picnic or family get-together. It’s like having a banana split… Oh! Great idea! Maybe add a little drizzle of chocolate syrup and top it with a maraschino cherry!

Strawberry Cheesecake Salad

It’s Berry Delicious!

I am going to make this salad again soon. I might try a few variations, like using blueberries and blueberry yogurt… or even chocolate chips and chocolate pudding! The possibilities are endless. But this strawberry cheesecake salad is great just as it is. It is absolutely perfect with in-season ripe strawberries.

Also try my black pepper strawberries.

Strawberry Cheesecake Salad
Print Pin
5 from 1 vote

Strawberry Cheesecake Salad

Wow, this strawberry cheesecake salad is good. It’s sort of like a salad but you’ll want this for dessert… so it is a dessert salad!
Course Dessert
Cuisine American
Keyword dessert
Prep Time 5 minutes
Cook Time 1 hour 5 minutes
Total Time 1 hour 10 minutes
Servings 8
Calories 205kcal

Equipment

Ingredients

Instructions

  • Place the whipped topping, pudding mix and yogurt into a large bowl.
  • Whisk together.
  • Cover and refrigerate for 1 hour.
  • When you are ready to serve, slice the strawberries and bananas.
  • Add them along with the marshmallows to the pudding mixture and stir gently to combine.
  • Serve garnished with additional fresh sliced strawberries.

Notes

Also great using blueberry yogurt and fresh blueberries. Or raspberries.

Nutrition

Calories: 205kcal | Carbohydrates: 33g | Protein: 3g | Fat: 8g | Saturated Fat: 6g | Cholesterol: 1mg | Sodium: 49mg | Potassium: 303mg | Fiber: 2g | Sugar: 25g | Vitamin A: 77IU | Vitamin C: 37mg | Calcium: 52mg | Iron: 1mg

Nutritional values are approximate.