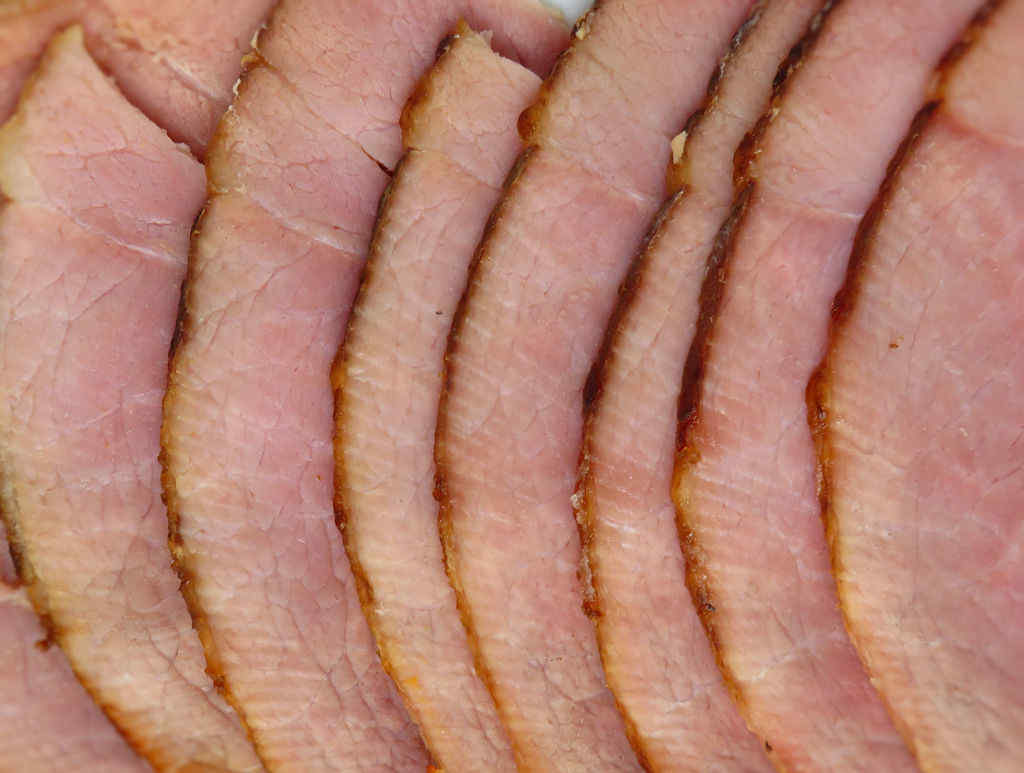
Quick Fix Italian Salad

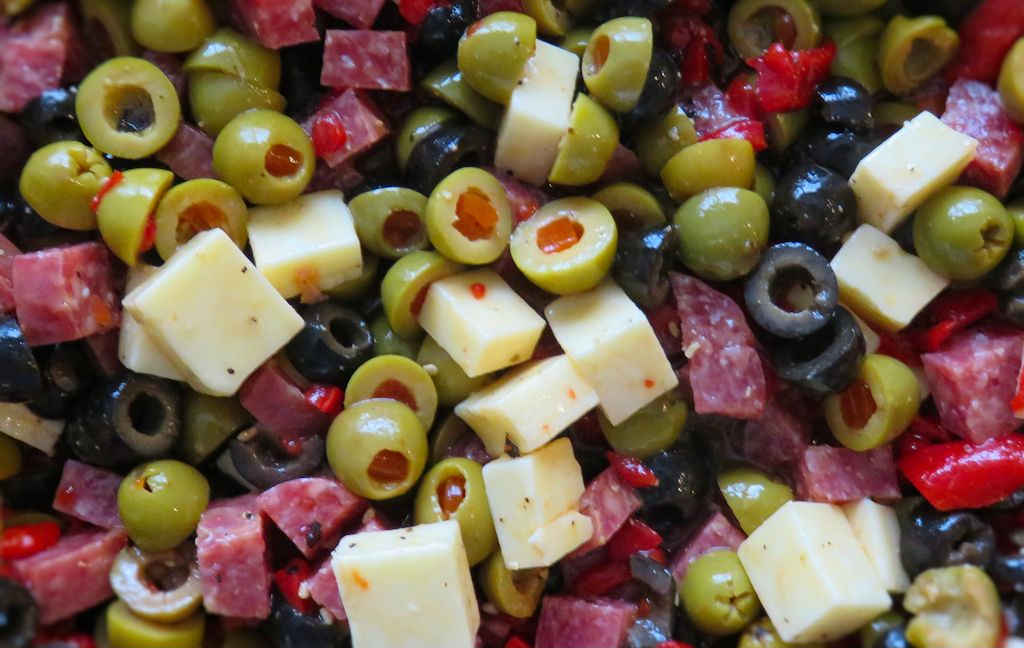
My wife was looking for a simple, low-carb side dish to take in her lunches to work. The pasta salads we normally made were just a bit too high in carbs. So I suggested we try a quick fix Italian salad instead. Tasty, easy, and low-carb, this salad was a welcome change and luckily, packed with flavor too! It’s delicious and hard to stop eating that’s for sure!
Quick Fix Italian Salad

Great For Picnics And Parties

This quick fix Italian salad is just a simple variation on a traditional side salad often found at picnics and family get-togethers. I keep the portion size small, making a week’s-worth of salads at once Sunday evening. I use little 1.2-cup sized seal-able reusable containers with screw-on lids. The lids keep the dressing from leaking out in case the containers are overturned. And you can give the salads a quick shake before opening to get the dressing stirred up.

Sometimes I mix things up just a big. Leave out the meat (making it the perfect side dish for my toasted Italian sandwich). Substitute spicy pepperjack cheese. Try a different Italian dressing. I still keep the salad low-carb, but you do have to mix things up (even if only slightly) to keep them from getting too boring.

Mezzetta Roasted Red Bell Peppers, 16 Ounce
  • A VERSITLE FAVORITE – Sweet and earthy flavor adds…
  • FROM FAMILY FARMS – Over the years Mezzetta has…

Also try my creamy pasta salad.
Quick Fix Italian Salad
Print Pin
5 from 1 vote

Quick Fix Italian Salad

Course Salad
Cuisine American
Prep Time 10 minutes
Total Time 10 minutes
Author Mike

Equipment

Ingredients

Instructions

  • Combine all ingredients. Refrigerate until ready to use.

Notes

Stir before serving.

Nutritional values are approximate.

Sale
Mueller Pro-Series All-in-One, 12 Blade Mandoline…
  • Meal Prep MVP – A practical and innovative way to…
  • 12 Diverse Blades – With nine interchangeable…
OXO Good Grips 4 Piece Stainless Steel Measuring…
  • Set includes: 1/4 cup, 1/3 cup, 1/2 cup and 1 cup
  • Magnetic handles keep Cups together for storage…

Beef Enchilada Dip

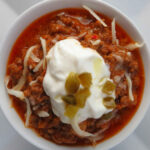
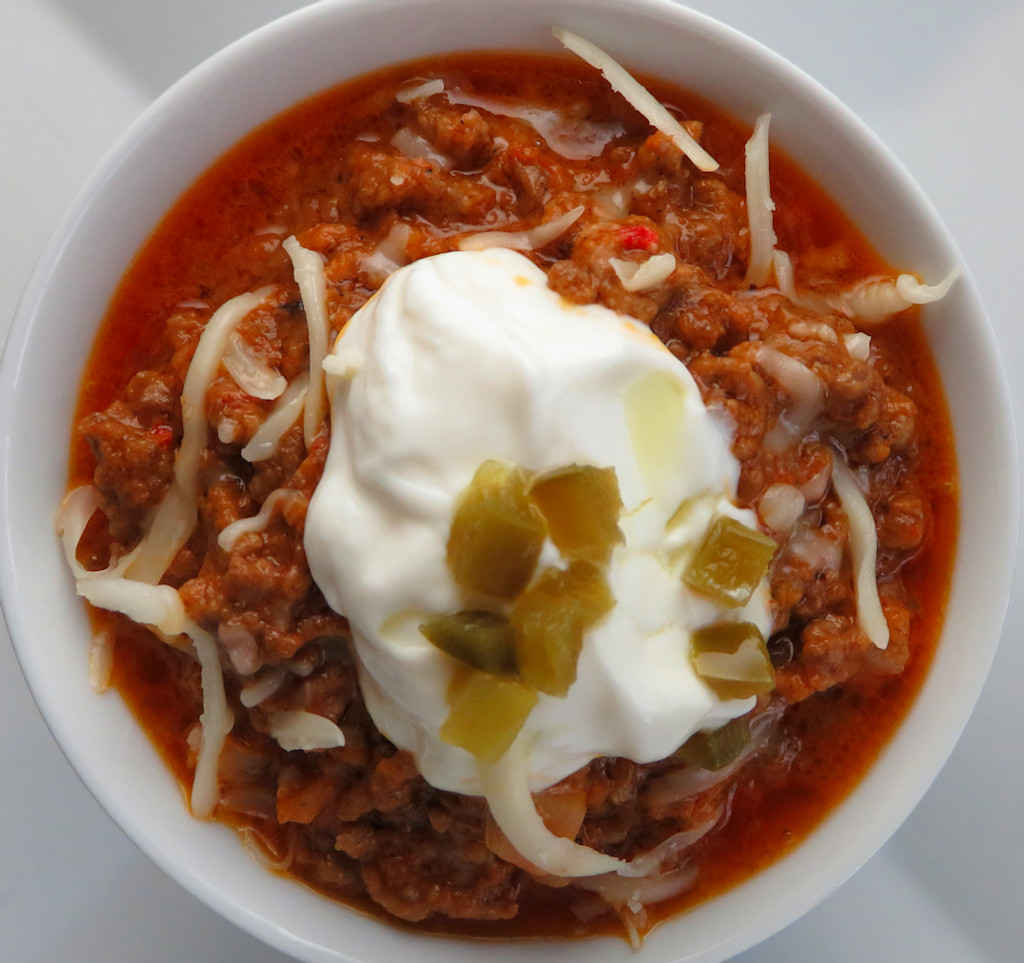
It’s ok if after you make this beef enchilada dip you decide to put down your tortilla chip and grab a spoon and eat it just like chili. I’m not going to blame you one single bit. The enchilada sauce has that great southwestern spiciness to it. Adding some ground beef and toppings makes it not only a great dip but also a great chili. The beef mixture is also great on corn or flour tortillas, or served on taco shells.

Beef Enchilada Dip

A Different Kind Of Dip

I used my fire-roasted enchilada sauce when I made this dip. The char flavor comes thru, making the tomato sauce oh so much better. I often find myself substituting fire-roasted versions of peppers and tomatoes in recipes. Especially when the recipes call for chiles or jalapenos. You can use canned sauce, also.

I like to use my good ole trusty Dutch oven to make this dip and pretty much darned near anything like it on my stovetop. It’s nice and big and sturdy. That extra weight helps it maintain and distribute heat perfectly. As an added bonus, it’s actually pretty easy to clean up too!

Amazon Basics Enameled Cast Iron Dutch Oven Pot…
  • OVEN SAFE DESIGN: Withstand temperatures up to…
  • EXCELLENT HEAT RETENTION: This heavy-duty cast…

I also like to top my beef enchilada dip with some green enchilada sauce.

Beef Enchilada Dip
Print Pin
4 from 1 vote

Beef Enchilada Dip

It’s ok if after you make this beef enchilada dip you decide to put down your tortilla chip and grab a spoon and eat it like chili. I’m not going to blame you one single bit. 
Course Appetizer
Cuisine American
Keyword dip, southwestern
Prep Time 5 minutes
Cook Time 10 minutes
Total Time 15 minutes
Servings 10
Calories 286kcal

Equipment

Ingredients

  • 1 ½ pounds ground beef
  • ½ medium onion diced
  • 2 cloves garlic minced
  • 2 cups enchilada sauce I used my fire-roasted enchilada sauce
  • 2 cups cheese grated . Monterey Jack or cheddar cheeses work best
  • sour cream for garnish
  • pickled jalapenos diced, for garnish
  • Tortilla chips for serving

Instructions

  • Brown the ground beef in a large skillet over medium-high heat.
  • Drain most of the fat and add the onion and cook until just tender.
  • Add the garlic and cook another minute.
  • Turn off the heat.
  • Stir in the enchilada sauce.
  • Sprinkle with the cheese.
  • Cover and wait until the cheese melts, 2-3 minutes.
  • Serve topped with sour cream and diced jalalpenos, with chips for dipping.

Notes

Fritos Scoops are great for this dip too!

Nutrition

Calories: 286kcal | Carbohydrates: 5g | Protein: 18g | Fat: 21g | Saturated Fat: 10g | Trans Fat: 1g | Cholesterol: 72mg | Sodium: 602mg | Potassium: 216mg | Fiber: 1g | Sugar: 4g | Vitamin A: 547IU | Vitamin C: 2mg | Calcium: 178mg | Iron: 2mg

Nutritional values are approximate.

Sale
Mueller Pro-Series All-in-One, 12 Blade Mandoline…
  • Meal Prep MVP – A practical and innovative way to…
  • 12 Diverse Blades – With nine interchangeable…
OXO Good Grips 4 Piece Stainless Steel Measuring…
  • Set includes: 1/4 cup, 1/3 cup, 1/2 cup and 1 cup
  • Magnetic handles keep Cups together for storage…
Beer n’ Butter Turkey on the Char-Broil Big Easy

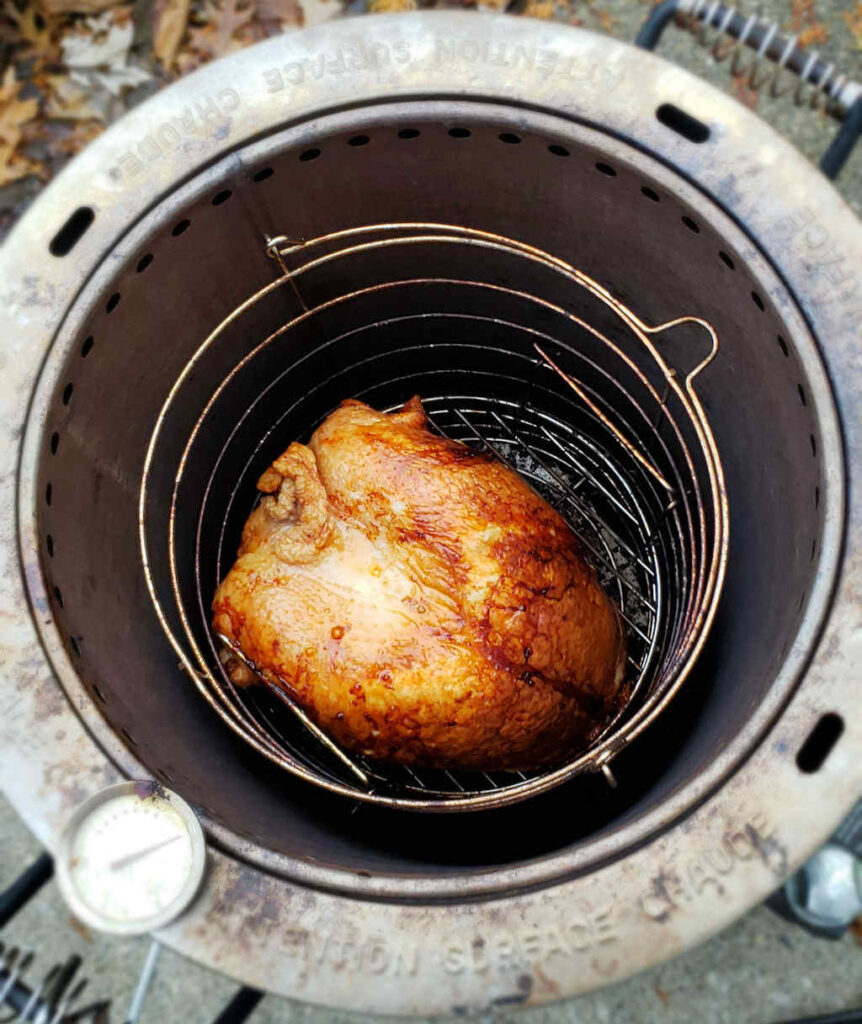
Ahhhhhh. Yummy. Tender, juicy, flavorful beer n’ butter turkey on the Char-Broil Big Easy proves again that there is no better cooker when it comes to poultry. No fussing with an oven, no messes in the kitchen. Just easy and fantastic. Every single time. The injection for this turkey is incredible. I would definitely call it my ‘go-to’ for Thanksgiving, Christmas, or any time I want to wow my guests with a great meal.

Note: This recipe was developed using the Char-Broil Big Easy Oil-Less Fryer. If you are cooking using the Char-Broil Smoker-Roaster Grill you should cook with the lid open and the temperature set to High. You might also need to adjust the cooking time.

Beer n' Butter Turkey on the Char-Broil Big Easy

This Is One Fantastic Turkey

I wouldn’t change a thing about this beer n’ butter turkey on the Char-Broil Big Easy. This recipe needs no modifications, nothing. Make it as-is and you’ll be happy with every turkey you ever make.

Injecting A Turkey Is Easier Than You Might Think

If you’ve never injected a turkey, don’t be intimidated by the process. To ensure success, take your time, be patient and definitely use a quality injector. I use one similar to this. It is heavy-duty, made of metal. Not plastic. It has several injection needles, which is a definite must. Just load it up with the liquid and slowly inject into the turkey. And pull the needle back out SLOWLY. Or else you’ll have an injection explosion. Trust me on this. Walls, cabinets, you name it. You pull that needle out quickly and stuff is gonna fly. You’ll get the hang of it.

Ofargo Stainless Steel Meat Injector Syringe Kit…
  • Safe Kitchen/BBQ Tool: stainless steel for meat…
  • Leak & Heavy Duty for Years: Culinary stainless…

Also try my buttermilk-marinated turkey on the Big Easy. You’ll love my savory turkey too!.

Char-Broil The Big Easy Better Basket , Silver
  • An upgrade for the standard basket that comes with…
  • Collapsible design makes loading and unloading…

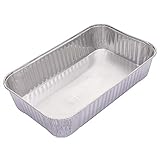
It’s always a good idea to keep a few spare grease trays on hand for your Char-Broil Big Easy.

Char-Broil 2425514W12 Big Easy Grease Tray…
  • MATERIAL: Disposable aluminum liners made…
  • SIZE: Measures 6” x 10” across the top and…

Love your Big Easy as much I love mine? Check out my Big Easy Add-Ons page and all 3 of my huge free Big Easy eCookbooks!

Beer n' Butter Turkey on the Char-Broil Big Easy
Print Pin
4.50 from 2 votes

Beer n’ Butter Turkey on the Char-Broil Big Easy

Ahhhhhh. Yummy. Tender, juicy, flavorful beer n’ butter turkey on the Char-Broil Big Easy proves again that there is no better cooker when it comes to poultry.
Course Main
Cuisine American
Keyword Big Easy, Char-Broil, turkey
Prep Time 15 minutes
Cook Time 3 hours
Total Time 3 hours 15 minutes
Servings 1 turkey
Calories 3923kcal

Ingredients

Instructions

  • Fire up your Big Easy.
  • Place turkey on a rimmed baking sheet.
  • In a small sauce pan combine all remaining ingredients over medium heat. Stir until the salt has dissolved.
  • Working in batches, inject the mixture into the turkey. Make sure to get even coverage.
  • Transfer the turkey to your Big Easy basket and place into the hot cooker.
  • Cook for 10 minutes per pound or until the turkey reaches 165 F as measured in several locations. Cook time will depend on the size of the turkey.
  • Remove the turkey from the Big Easy and the basket and let rest 15 minutes before carving.

Notes

Always use caution removing your turkey from the cooker. The basket is hot!

Nutrition

Calories: 3923kcal | Carbohydrates: 33g | Protein: 569g | Fat: 153g | Saturated Fat: 42g | Trans Fat: 2g | Cholesterol: 1880mg | Sodium: 19116mg | Potassium: 6586mg | Fiber: 1g | Sugar: 17g | Vitamin A: 1886IU | Vitamin C: 25mg | Calcium: 622mg | Iron: 25mg

Nutritional values are approximate.

Charbroil The Big Easy Bunk Bed Basket…
  • Expands the cooking space of The Big Easy
  • Perfect for cooking two chickens at once

Carolina Cocktail Sauce

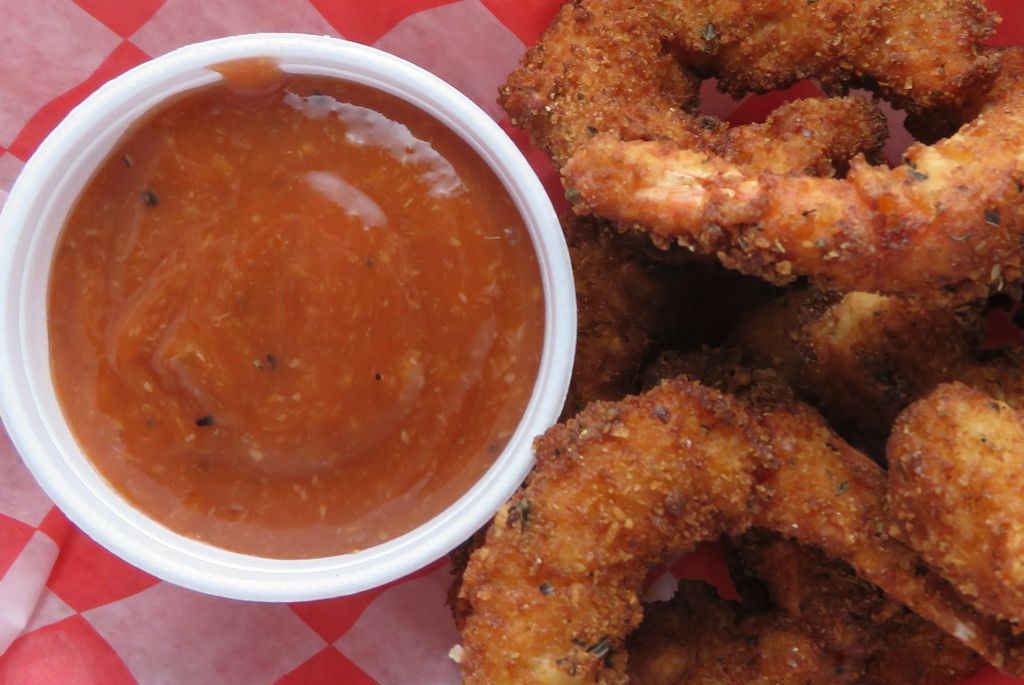
As much as I enjoy a traditional cocktail sauce with my (darned good) deep-fried shrimp, I’ll take a twist on the classic any ole time. This Carolina cocktail sauce is fantastic, the perfect dipping sauce for my shrimp. In many ways it’s like the ‘usual’ yummy cocktail sauce. The addition of vinegar makes for a really subtle but delicious difference. This is really great stuff.

Carolina Cocktail Sauce

A Decidedly Different, Delish Sauce

I didn’t used to care for horseradish in anything, let alone cocktail sauce. But somehow I’ve come to enjoy it more and more. So much so that I actually added a bit more to this Carolina cocktail sauce than the recipe calls for. If you love it too, add more. If not, it’s going to be great with a little less. Just don’t skimp on the vinegar. That’s what makes this sauce different and very, very good.

Zatarain’s Prepared Horseradish, 8.3 lb – One…
  • RICH, CREAMY FLAVOR: Creamy horseradish sauce…
  • CONSISTENT QUALITY: Contains carefully sourced…

This cocktail sauce is perfect for dipping my crispy fried shrimp.

This recipe was inspired by a recipe on The Cooking Channel.

Carolina Cocktail Sauce
Print Pin
5 from 1 vote

Carolina Cocktail Sauce

This Carolina cocktail sauce is fantastic, the perfect dipping sauce for my shrimp. In many ways it’s like the ‘usual’ yummy cocktail sauce, but the addition of vinegar makes for a really subtle but delicious difference. 
Course Dipping Sauce
Cuisine American
Keyword cocktail, sauce
Prep Time 15 minutes
Cook Time 1 hour
Total Time 1 hour 15 minutes
Servings 2.5 cups
Calories 234kcal

Ingredients

Instructions

  • Whisk together the ketchup, Worcestershire, horseradish, lemon juice and vinegar.
  • Add hot sauce to taste, stir.
  • Season with salt and pepper, to taste. Stir.
  • Cover and refrigerate for at least 1 hour before serving.

Notes

Stir again before serving.

Nutrition

Calories: 234kcal | Carbohydrates: 55g | Protein: 3g | Fat: 1g | Saturated Fat: 1g | Sodium: 1926mg | Potassium: 752mg | Fiber: 1g | Sugar: 44g | Vitamin A: 996IU | Vitamin C: 15mg | Calcium: 53mg | Iron: 2mg

Nutritional values are approximate.

Sale
Mueller Pro-Series All-in-One, 12 Blade Mandoline…
  • Meal Prep MVP – A practical and innovative way to…
  • 12 Diverse Blades – With nine interchangeable…
OXO Good Grips 4 Piece Stainless Steel Measuring…
  • Set includes: 1/4 cup, 1/3 cup, 1/2 cup and 1 cup
  • Magnetic handles keep Cups together for storage…

White Pizza Grilled Cheese Sandwiches

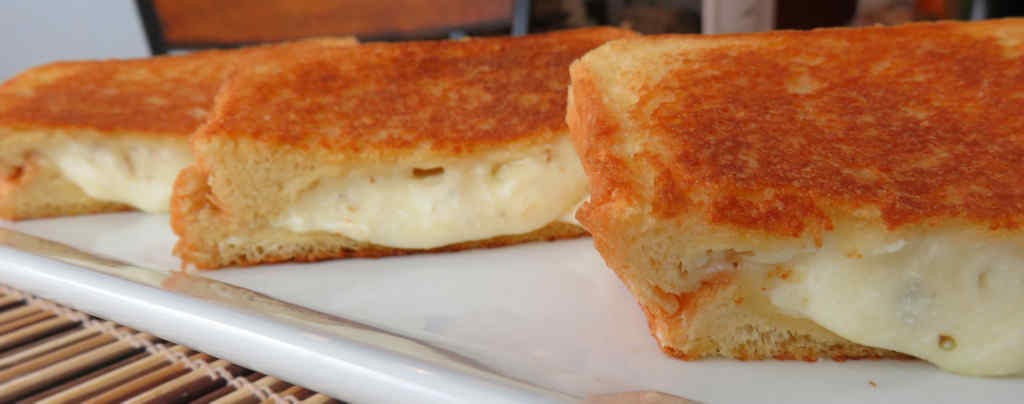
There’s a scene in the movie Chef where the star, Jon Favreau, makes a grilled cheese sandwich. It was the perfect grilled cheese sandwich. Perfectly toasted on both sides. And it crunched, oh how it crunched, when he sliced it. I have to admit, I’m still working on my grilled cheese toasting skills. But I sure do enjoy a great grilled cheese sandwich for lunch. These white pizza grilled cheese sandwiches have a great pizza-ish herby flavor to them, with ooey-gooey melted mozzarella and a little Parmesan to boot. Very good, and a little different.

White Pizza Grilled Cheese Sandwiches

No Wimpy Bread Need Apply

I prefer to use Texas toast for my grilled sandwiches. It holds up and holds up well to just about anything you want to pile up on it. No one likes a grilled cheese that just dissolves once you get past the crust. Nope, you need a bread that will be there till the end, and for me that’s Texas toast. Oh, and I love to make smoked paprika and garlic croutons out of any leftover pieces of Texas toast I might have.

Cuisinart Panini Press and Grill, 1500W 5-in…
  • SUPERIOR PERFORMANCE: The Cuisinart Griddler…
  • 5-IN-1 COOKING: This Cuisinart panini press and…

The Griddler is a champ at making grilled cheese sandwiches, like my muffuletta grilled cheese, grilled caramel apply cheese, grilled spinach and artichoke cheese, and pepperoni pizza grilled cheese.

White Pizza Grilled Cheese Sandwiches
Print Pin
5 from 1 vote

White Pizza Grilled Cheese Sandwiches

These white pizza grilled cheese sandwiches have a great pizza-ish herby flavor to them, with ooey-gooey melted mozzarella and a little Parmesan to boot. Very good, and a little different.
Course Main
Cuisine American
Keyword grilled cheese, sandwich
Prep Time 10 minutes
Cook Time 20 minutes
Total Time 30 minutes
Servings 6 sandwiches
Calories 321kcal

Equipment

Ingredients

Instructions

  • Turn on your Griddler to the griddle setting and 350 F, or heat a large skillet over medium heat.
  • Mix the ricotta and oil together in a large bowl.
  • Stir in the garlic, basil, oregano, salt, pepper and Parmesan cheese.
  • Mix in the mozzarella cheese. The mixture will be thick. Don’t be afraid to use your hands to mix it well.
  • Lightly butter each slice of bread on one side.
  • Working in batches, place slices of bread butter-side down on the Griddler or into the skillet. Top with the cheese mixture, spreading out evenly.
  • Add the top piece of bread butter-side up.
  • Cook until the bottom bread is golden brown. Flip and cook the other side until golden brown.
  • Let rest for 5 minutes before slicing.

Notes

Use thick bread for the best results.

Nutrition

Calories: 321kcal | Carbohydrates: 30g | Protein: 18g | Fat: 14g | Saturated Fat: 8g | Trans Fat: 1g | Cholesterol: 43mg | Sodium: 724mg | Potassium: 170mg | Fiber: 3g | Sugar: 4g | Vitamin A: 393IU | Vitamin C: 1mg | Calcium: 371mg | Iron: 2mg

Nutritional values are approximate.

OXO Good Grips Electric Indoor Grill and Panini…
  • Ideal for cleaning air fryers, electric indoor…
  • Soft, flexible bristles are safe for non-stick…

Slow Cooker Beans ‘n Wieners

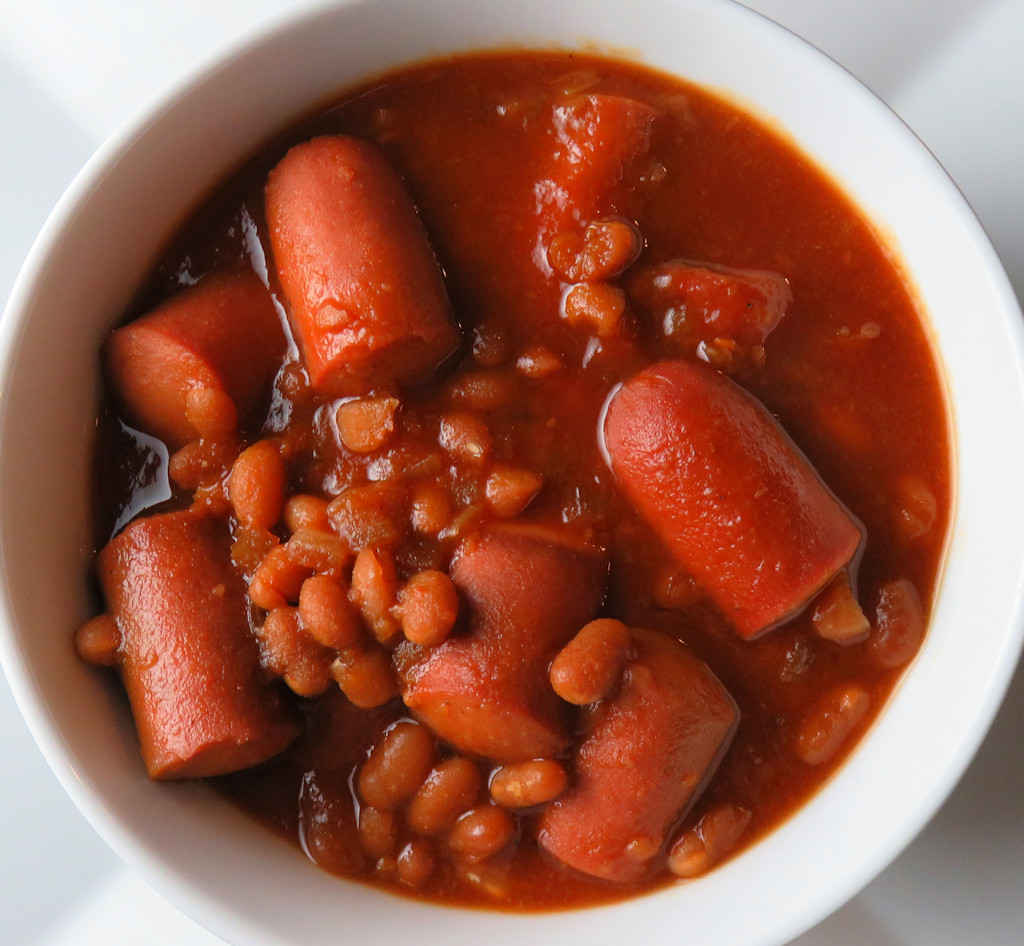
When I was a kid beans n’ wieners were one of my favorites. Here I am many years later and well, nothing much has changed because I still love them. I still eat most of the sauce first, saving the hot dogs for last. My grown-up version is slow cooker beans ‘n wieners. Cooked for hours so that that great sauce flavors the beans and hot dogs just perfectly. A big bowl can chase away the cold weather, and quick. I call it the perfect dish after shoveling the snow off the driveway! Heck, it’s perfect without going outside. Looking out the window on a cold winter’s day is enough to make me want a big bowl!

Slow Cooker Beans 'n Wieners

A Bowl Of Tasty Memories

This recipe for slow cooker beans ‘n wieners is perfect as it is, but you can add a bit of heat if you want. Just add a small can of chopped roasted jalapenos in at the start and let that great heat get slow cooked into the rest of the ingredients. Starting with quality canned pork and beans gives you a better end result, but you can get by with your store’s generic too (I did)!

See You Tomorrow

This dish re-heats well the next day. Don’t be afraid of having some leftovers. In fact, hope for them. Because its just as crazy good the next day. Just put it in a medium pot on the stovetop over medium heat. You might want to add a (little) bit of water, and stir.

Who Took My Hot Dogs?

If you want a more ‘grown up’ version of this dish, use smoked sausage instead. Just cut into into small rounds first. I like to brown it a bit in a skillet with a splash of oil. It also adds a bit of texture to the sausage.

Sale
Crock-Pot 7-Quart Manual Slow Cooker, Family Size…
  • Generous Capacity: 7-quart slow cooker that…
  • Cooking Flexibility: High or low slow cooking…

Also try my quick fix BBQ beans!

Slow Cooker Beans 'n Wieners
Print Pin
5 from 1 vote

Slow Cooker Beans ‘n Wieners

When I was a kid bean n’ wieners were one of my favorites. Here I am many years later and well, nothing much has changed because I still love them. 
Course Main
Cuisine American
Keyword beans, crockpot, hot dogs, slow cooker
Prep Time 5 minutes
Cook Time 6 hours
Total Time 6 hours 5 minutes
Servings 8 servings
Calories 193kcal

Equipment

Ingredients

Instructions

  • Place all ingredients into a slow cooker.
  • Stir and cook on low for 6 hours, stirring occasionally.

Notes

I like to add diced jalapeno or a few good shakes of hot sauce, too.

Nutrition

Calories: 193kcal | Carbohydrates: 23g | Protein: 6g | Fat: 9g | Saturated Fat: 3g | Cholesterol: 26mg | Sodium: 544mg | Potassium: 302mg | Fiber: 1g | Sugar: 12g | Vitamin A: 78IU | Vitamin C: 1mg | Calcium: 41mg | Iron: 2mg

Nutritional values are approximate.

Sale
Reynolds Kitchens Slow Cooker Liners, Regular…
  • Package Includes: Six (6) Reynolds Kitchens Slow…
  • Easy Cleanup: These strong, reliable slow cooker…

Honey Spice Fried Chicken using the Vortex

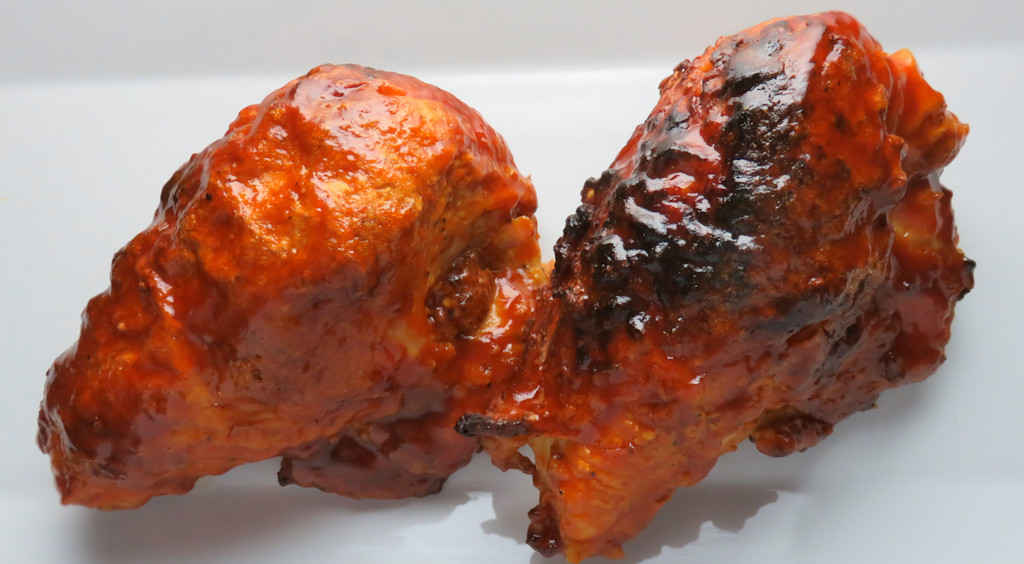
Making “fried’ chicken on my Weber charcoal grill using the Vortex insert has become a big addiction of mine. I make it often, many different ways, like this honey spice fried chicken using the Vortex. The end result tastes and feels like real fried chicken, but of course you don’t deep fry it in oil. It’s amazingly easy to make. You can change up the sauce at the end and make a new dish every time. Its really great stuff!

Honey Spice Fried Chicken using the Vortex

Crispy Sweet Deliciousness

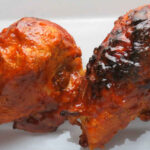
This time I brushed the chicken with a wonderful honey spicy sauce. The skin crisped up perfectly and the sauce gave it a nice sweet and spicy kick.
Since I was using bone-in split chicken breasts when I made this honey spice fried chicken I opted to use my bigger grill, the Performer For legs or thighs or wings you can use a smaller grill (using the smaller Vortex insert and not the one for larger grills) if you wish, but for breasts you’ll need the larger space of the Performer (or the 22″ Weber Kettle).

The batter for the chicken does crisp up, so if you wish you can use skinless chicken breasts and still enjoy that wonderful crispy fried crunch.

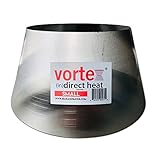
Vortex Small (in) Direct Cooking Charcoal Grill…
  • ✅ 【SMALL SIZE】 4 methods of cooking…
  • ✅ 【STAINLESS STEEL】 Long Lasting Stainless…

What’s The Trick?

Well, there isn’t one. Fried chicken on the Vortex isn’t smoke and mirrors and magic and what-not. I mean it’s really really easy. You can prepare the chicken any way you want. Any traditional (or non-traditional) fried chicken recipe will work just fine. And it really just as easy as battering up the chicken and putting it on the crazy-hot grill. Then you go away for 45 minutes, though the time might vary depending on how large your chicken cuts are, wind, temperatures, solar activity, etc. You come back to perfectly cooked chicken that you’ll swear was deep-fried in oil.

I have a not-even-spicy honey fried chicken recipe too! And my buttery garlic fried chicken using the Vortex is always a hit!

Honey Spice Fried Chicken using the Vortex
Print Pin
5 from 1 vote

Honey Spice Fried Chicken using the Vortex

The batter for the chicken does crisp up, so if you wish you can use skinless chicken breasts and still enjoy that wonderful crispy fried crunch.
Course Main
Cuisine American
Keyword fried chicken, Vortex
Prep Time 10 minutes
Cook Time 1 hour
Total Time 1 hour 10 minutes
Servings 6
Calories 246kcal
Author Mike

Ingredients

For the “Fried” Chicken

For the sauce

Instructions

For the “Fried” Chicken

  • Set up your grill for cooking with the Vortex insert. Get the coals good and lit before starting.
  • In a pie pan, beat the eggs with the water.
  • In another pie pan, combine the flour, salt, pepper and garlic powder.
  • Working in batches, dip the chicken in the egg mixture and coat well.
  • Transfer the chicken to the flour mixture and coat well. Shake off any excess flour.
  • Transfer chicken to the grill, placing along the edges with the thickest parts of the chicken towards the center where the Vortex is located.
  • Cover the grill and cook for 15 minutes.
  • Rotate the lid 90 degrees and continue cooking for 15 more minutes.
  • Rotate the lid 90 degrees and continue cooking for 15 more minutes.
  • Check for doneness in the thickest parts of the chicken. If it needs more time, rotate the lid 90 degrees and continue cooking for 15 more minutes.
  • Brush with sauce and cook another 5 minutes.

For the sauce

  • Whisk together all ingredients.

Notes

The sauce is delicious and can be used on steaks, burgers and grilled chicken.

Nutrition

Calories: 246kcal | Carbohydrates: 47g | Protein: 8g | Fat: 3g | Saturated Fat: 1g | Trans Fat: 1g | Cholesterol: 82mg | Sodium: 1133mg | Potassium: 152mg | Fiber: 1g | Sugar: 14g | Vitamin A: 180IU | Vitamin C: 1mg | Calcium: 26mg | Iron: 1mg

Nutritional values are approximate.

Genuine Medium BBQ Vortex Gift Pack for wsm Kettle…
  • ULTIMATE GIFT PACK Medium size BBQ Vortex…
  • VORTEX Brand Rub is great for Perfect crispy wings…

Deep-Fried Pepper Rings

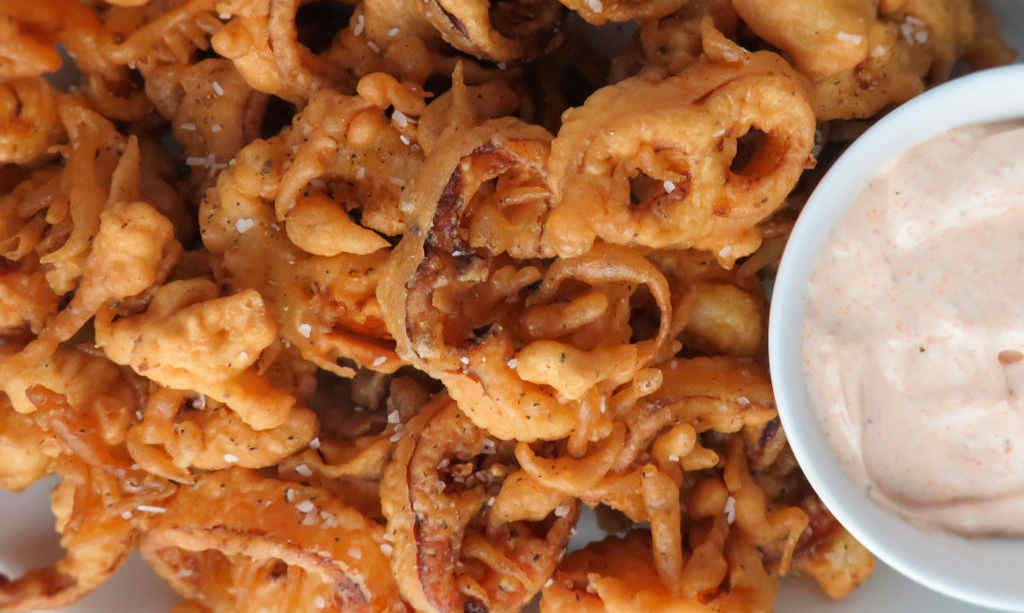
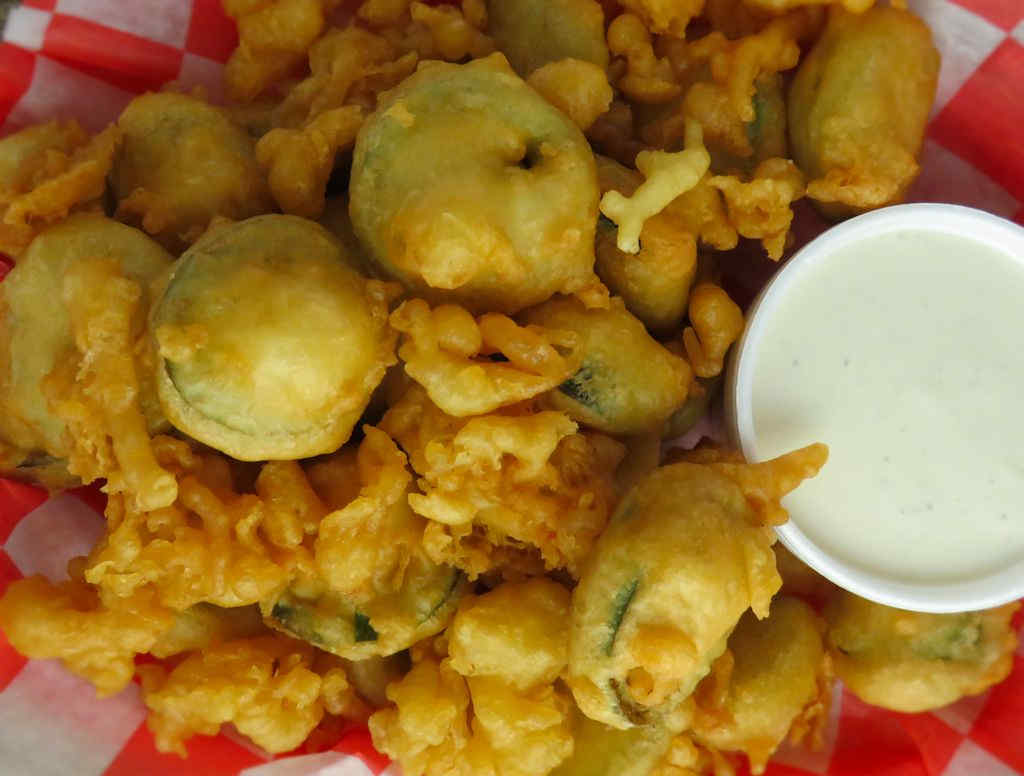
I’ve fried (and devoured) my share of deep-fried onion rings. And deep-fried pickles. And deep-fried jalapenos. Heck I’ve even deep-fried radishes. These deep-fried pepper rings were different. The peppers are a bit crunchy. Nice and crunchy. And they’re a bit sweet. Nice and sweet. You get that great pepper flavor, all surrounded in a great crunchy coating that sticks to each and every pepper bite perfectly. Great for dipping. Great for devouring. These didn’t last long at all. They’re a great appetizer and a great change from my usual deep-fried favorites!

Deep Fried Pepper Rings

And A Great Dipping Sauce, Too!

I absolutely loved the dipping sauce for these deep-fried pepper rings. I’m a huge fan of Old Bay. My wife doesn’t like it if it’s too strong. But she loved this sauce. It has the just the right amount of Old Bay. It’d be great for dipping much more than just these rings. Make extra and use it with chips, fries and fresh veggies.

These pepper rings disappear like popcorn. One after another. Before you know it they’ll gone. If you’re making a batch for a crowd I recommend making extra. You can keep them on a wire rack-lined baking sheet in a warm (not hot) oven until you’re ready to serve them.

Choose Your Fryer

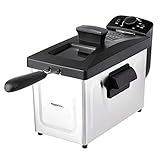
I fired up my Fry Daddy fryer to make these delectable treats. It’s the perfect size for both of us. It fries everything perfectly. And as an added bonus, it doesn’t use a lot of oil, which saves me money. Most of the time, it’s all I need!

I get out my big deep fryer when it’s time to fry a large batch of food. It comes to temperature quickly and it maintains that temperature perfectly. It has a built-in oil filter and storage unit so I can re-use the oil several times.

Amazon Basics 3.2-Qt (3.0L) Electric Deep Fryer…
  • FAST-HEATING & FAMILY-SIZE: This powerful…
  • ADJUSTABLE TEMPERATURE & VERSATILE COOKING: With…

Also try my deep-fried jalapeno slices.

Deep Fried Pepper Rings
Print Pin
5 from 1 vote

Deep-Fried Pepper Rings

I’ve fried (and devoured) my share of deep-fried onion rings. And deep-fried pickles. And deep-fried jalapenos. These deep-fried pepper rings were different. 
Course Appetizer
Cuisine American
Keyword deep-fried, pepper rings
Prep Time 5 minutes
Cook Time 15 minutes
Servings 6 servings
Calories 83kcal

Ingredients

For the pepper rings

For the dipping sauce

Instructions

For the dipping sauce

  • Whisk together all ingredients. Refrigerate until ready to use.

For the pepper rings

  • Heat 2" of oil to 350 F.
  • Combine the flour, water, and beaten egg together in a shallow bowl or pie plate. Whisk until smooth.
  • Add peppers to the batter and use a spatula to carefully stir and coat them completely.
  • Working in batches if necessary, deep fry the coated rings 5-8 minutes or until golden brown. Remove to a paper towel-lined plated to drain and cool.
  • Season rings with salt and pepper and serve with the dipping sauce.

Notes

The dipping sauce is great for anything, from potato chips to deep-fried anything!

Nutrition

Calories: 83kcal | Carbohydrates: 13g | Protein: 3g | Fat: 2g | Saturated Fat: 1g | Trans Fat: 1g | Cholesterol: 33mg | Sodium: 116mg | Potassium: 190mg | Fiber: 2g | Sugar: 3g | Vitamin A: 2417IU | Vitamin C: 95mg | Calcium: 23mg | Iron: 1mg

Nutritional values are approximate.

Amazon Basics 3.2-Qt (3.0L) Electric Deep Fryer…
  • FAST-HEATING & FAMILY-SIZE: This powerful…
  • ADJUSTABLE TEMPERATURE & VERSATILE COOKING: With…

Deep-Fried Jalapeno Slices

I didn’t plant a pepper garden this year. But on what I now call “Christmas in Summer”, our neighbor brought us a big ole batch of jalapenos. I knew exactly what I was going to make because I’ve been jonesin’ for deep-fried jalapeno slices for a while. Sure, they pack a bit of heat, but honestly, they aren’t that hot. The batter is perfect, not hiding that great pepper flavor. And just in case we find a hot ring or two, we serve them with Ranch dressing for dipping and cooling.

Deep-Fried Jalapeno Slices

Those Little Crunchies

I admit it. Just like I do with my copycat Long John Silver’s fish-and-chips, I made extra ‘crunchies’ when I made these deep-fried jalapeno slices. Ya know, the little pieces of crunchy fried batter that end up in the basket. They’re almost as good as the peppers. Almost.

If I’m cooking for a crowd, I’ll break out my big deep fryer. But, if it’s just the two of us, I’ll fire up my Fry Daddy fryer. It’s the perfect size for both of us. It fries everything perfectly. And as an added bonus, it doesn’t use a lot of oil, which saves me money.

I get out my big deep fryer when it’s time to fry a large batch of food. It comes to temperature quickly and it maintains that temperature perfectly. It has a built-in oil filter and storage unit so I can re-use the oil several times.

Amazon Basics 3.2-Qt (3.0L) Electric Deep Fryer…
  • FAST-HEATING & FAMILY-SIZE: This powerful…
  • ADJUSTABLE TEMPERATURE & VERSATILE COOKING: With…

Also try my deep-fried pepper rings.

Deep-Fried Jalapeno Slices
Print Pin
5 from 1 vote

Deep-Fried Jalapeno Slices

I’ve been jonesin’ for deep-fried jalapeno slices for a while. Sure, they pack a bit of heat, but honestly, they aren’t that hot. The batter is perfect, not hiding that great pepper flavor. 
Course Appetizer
Cuisine American
Keyword deep-fried, jalapeno
Prep Time 10 minutes
Cook Time 20 minutes
Servings 6 servings
Calories 177kcal

Ingredients

Instructions

  • In a large bowl whisk together the egg, beer and baking powder.
  • Add the seasoned salt and flour and whisk until smooth.
  • Heat 2-3" of oil to 365 F in a deep fryer or Dutch oven.
  • Add jalapeno slices to the batter.
  • Stir to coat completely.
  • Working in batches, remove the jalapeno slices from the batter and transfer to the oil. Fry until golden brown, flipping once.
  • Remove to a paper towel-lined platter to drain.

Notes

Serve with Ranch dressing for dipping.

Nutrition

Calories: 177kcal | Carbohydrates: 32g | Protein: 5g | Fat: 1g | Saturated Fat: 1g | Trans Fat: 1g | Cholesterol: 31mg | Sodium: 615mg | Potassium: 124mg | Fiber: 2g | Sugar: 1g | Vitamin A: 297IU | Vitamin C: 28mg | Calcium: 133mg | Iron: 2mg

Nutritional values are approximate.

Amazon Basics 3.2-Qt (3.0L) Electric Deep Fryer…
  • FAST-HEATING & FAMILY-SIZE: This powerful…
  • ADJUSTABLE TEMPERATURE & VERSATILE COOKING: With…

Honey-Glazed Ham on the Char-Broil Big Easy

This honey-glazed ham on the Char-Broil Big Easy is my go-to approach for making pre-cooked hams, just like I have many times before. You’re not really cooking the ham, you’re just heating it and adding more flavor by adding a glaze. You can use the glaze that comes with your ham (if it includes one) but I prefer to make my own, being able to make it more for my tastes. Plus, that bag of frozen glaze kind of …. scares me really.

Note: This recipe was developed using the Char-Broil Big Easy Oil-Less Fryer. If you are cooking using the Char-Broil Smoker-Roaster Grill you should cook with the lid open and the temperature set to High. You might also need to adjust the cooking time.

Honey-Glazed Ham on the Char-Broil Big Easy

Easy And So Amazing

This honey-glazed ham on the Char-Broil Big Easy could not get any easier. It’s why I load up on those cheap spiral hams whenever I can. We can get a number of meals out of a single ham, from sandwiches to omelets.

Grab A Pre-Cooked Ham

I used a smoked spiral-sliced ham for my honey-glazed ham. You can also use a whole ham, sliced or not. But you must use one that is pre-cooked. If it’s not sliced you’ll want to score it first with a knife so that the glaze adheres to the ham. If you don’t it will just roll right on off into the bottom of the foil pouch and just sit there doing nothing, not adding flavor or anything to your ham.

Char-Broil The Big Easy Better Basket , Silver
  • An upgrade for the standard basket that comes with…
  • Collapsible design makes loading and unloading…

Also try my southern glazed honey ham on the Big Easy.

It’s always a good idea to keep a few spare grease trays on hand for your Char-Broil Big Easy.

Char-Broil 2425514W12 Big Easy Grease Tray…
  • MATERIAL: Disposable aluminum liners made…
  • SIZE: Measures 6” x 10” across the top and…

Love your Big Easy as much I love mine? Check out my Big Easy Add-Ons page and all 3 of my huge free Big Easy eCookbooks!

Honey-Glazed Ham on the Char-Broil Big Easy
Print Pin
5 from 1 vote

Honey-Glazed Ham on the Char-Broil Big Easy

This is one fantastic ham!
Course Main
Cuisine American
Keyword Big Easy, Char-Broil, ham, honey ham
Prep Time 10 minutes
Cook Time 2 hours
Total Time 2 hours 10 minutes
Servings 1 ham
Calories 4924kcal
Author Mike

Ingredients

  • 6-8 pound spiral sliced cooked ham bone-in

For the glaze

Instructions

  • Fire up your Big Easy.
  • Remove the ham from the packaging and place on a large piece of foil. Place it like you would in the Big Easy basket. Larger hams will have to be stood on edge.
  • Combine the remaining ingredients in a small saucepan over medium heat.
  • Pour or brush HALF of the glaze over the ham, getting some of the glaze in between the ham slices.
  • Keep the remaining glaze warm over low heat.
  • Seal tightly in the foil, leaving the seam at the top.
  • Transfer to the Big Easy and cook (heat) for approximately 10 minutes per pound or until the ham reaches 145 F as tested in several places.
  • Remove the basket from the Big Easy.
  • Carefully remove the ham to a cutting board and brush with the remaining glaze.
  • Cover with foil and let rest at least 15 minutes before slicing.

Notes

Use hot honey for a slight hint of heat.

Nutrition

Calories: 4924kcal | Carbohydrates: 389g | Protein: 424g | Fat: 185g | Saturated Fat: 61g | Trans Fat: 2g | Cholesterol: 1408mg | Sodium: 1178mg | Potassium: 7344mg | Fiber: 1g | Sugar: 385g | Vitamin A: 126IU | Vitamin C: 2mg | Calcium: 516mg | Iron: 15mg

Nutritional values are approximate.

Charbroil The Big Easy Bunk Bed Basket…
  • Expands the cooking space of The Big Easy
  • Perfect for cooking two chickens at once