Perfect Pot Roast

The original recipe for this pot roast called it “perfect”. I was thinking well maybe it’s really just almost-perfect. So I made it. And yes, it is the perfect pot roast. Simple and unbelievably flavorful thanks to the Merlot and the spices. And oh-so-tender. It is the pot roast that dreams are made of. It’s amazing sometimes how such a simple recipe with so few ingredients can be so spectacular. Will this one is.
Perfect Pot Roast

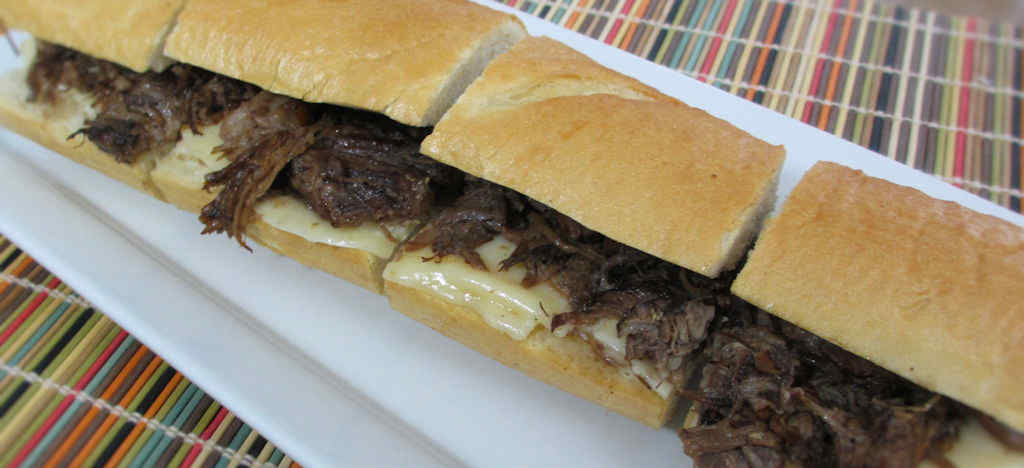
The Perfect Pot Roast Sandwiches

For most, I’m sure the ideal pot roast dinner is a meat-and-potatoes affair. Maybe some roasted vegetables on the side. Not me. I love this piled high on a big ole loaf of French bread. Almost like a French dip, but oh so much better. I follow a recipe I made after visiting the Hobnob Corner Restaurant in Nashville, Indiana. The sandwich is topped with a horseradish sauce and caramelized onions. And a little provolone cheese. It’s really good and I highly recommend it. If I end up with any leftover juices I’ll serve those on the side in a bowl for dipping.

Also try my smoked pot roast.

Perfect Pot Roast
Print Pin
5 from 1 vote

Perfect Pot Roast

The original recipe for this pot roast called it “perfect”. I was thinking well maybe it’s really just almost-perfect, but no, it is the perfect pot roast.
Course Main
Cuisine American
Keyword pot roast
Prep Time 10 minutes
Cook Time 4 hours 30 minutes
Total Time 4 hours 40 minutes
Servings 8
Calories 377kcal

Equipment

Ingredients

Instructions

  • Preheat your oven to 275 F.
  • Generously sprinkle the roast with salt and pepper on all side.
  • Heat 1 1/2 tablespoons of oil in a large pot or Dutch oven.
  • Add the onions and brown on all sides. Remove.
  • Add the carrots and cooking until just getting some color. Remove.
  • Add the remaining oil and once it is hot, add the meat.
  • Brown the meat on all sides. Remove.
  • Add the wine and scrape the bottom of the pot, getting all of the flavor pieces unstuck.
  • Add the meat back into the pot.
  • Add enough beef broth to cover the meat about halfway up the sides.
  • Add the onions and carrots and sprinkle with the spices.
  • Cover and place in the oven for 3-4 hours until the meat begins to fall apart.
  • Remove and let rest 10-15 minutes before carving (or shredding).

Notes

You can freeze any leftovers for a cold day.

Nutrition

Calories: 377kcal | Carbohydrates: 9g | Protein: 35g | Fat: 20g | Saturated Fat: 9g | Trans Fat: 1g | Cholesterol: 117mg | Sodium: 561mg | Potassium: 877mg | Fiber: 2g | Sugar: 4g | Vitamin A: 9522IU | Vitamin C: 6mg | Calcium: 71mg | Iron: 5mg

Nutritional values are approximate.

Blackberry Jalapeno Glazed Pork Tenderloin

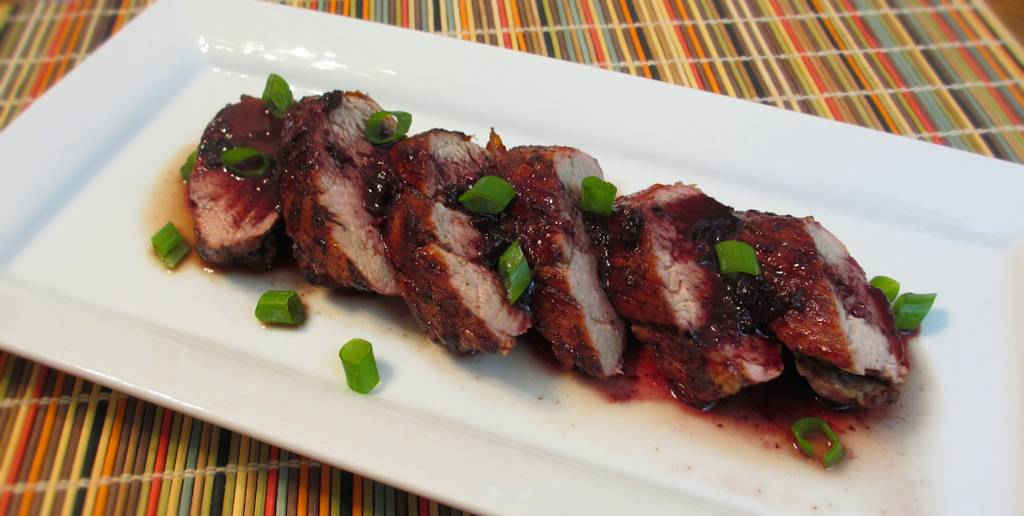
I can’t get over just how good this pork tenderloin was. The brine made the meat tender and juicy. And the blackberry jalapeno glaze was out of this world. Not hot and spicy, just a nice berry flavor. The sauce is mildly tart. You are eating blackberries, after all. It’s a deep, satisfying flavor that makes for one big time winning dish.

Blackberry Jalapeno Glazed Pork Tenderloin

Rich Flavors without too much Heat

The wine adds such a great richness to the glaze. I’m quite sure I’ll find other dishes that will really shine by adding some of this same glaze. We both found this blackberry jalapeno glazed pork tenderloin to be something rich and delightful. We both love a little kiss of heat and that’s what this brought. Perfectly.

Tenderloin is my favorite cut of meat to grill. Treated right, it comes out so tender and juicy. The key is to just don’t overcook it. Pork tenderloin is a wonderful cut that loves to be grilled and glazed.

Also try my grilled pork tenderloin sliders with chipotle lime mayonnaise.

Inspired by a recipe from The Food Network.

Blackberry Jalapeno Glazed Pork Tenderloin
Print Pin
5 from 1 vote

Blackberry Jalapeno Glazed Pork Tenderloin

I can’t get over just how good this pork tenderloin was. The brine made the meat tender and juicy. And the blackberry jalapeno glaze was out of this world. Not hot, just a nice berry flavor.
Course Main
Cuisine American
Keyword grilled, spicy, tenderloin
Prep Time 15 minutes
Cook Time 30 minutes
Total Time 45 minutes
Servings 8
Calories 167kcal

Ingredients

For the brine

For the pork

For the blackberry jalapeno glaze

Instructions

  • Place the salt and warm water into a large resealable baggie and shake to dissolve the salt.
  • Add the vinegar, pepper flakes, brown sugar, and ice. Shake to combine.
  • Add pork, seal, and place baggie into a large bowl.
  • Let pork brine for 15-20 minutes, but no longer.
  • Remove from liquid and pat dry with a towel.
  • Fire up your grill for direct and indirect cooking.
  • Brush the pork with the oil and sprinkle with salt and pepper.
  • Add pork to grill. Brown on all sides over direct heat then move to indirect heat.
  • Cook until pork temperature reaches 135 F.
  • Brush with blackberry glaze on all sides and continue cooking until temperature reaches 145-150 F.
  • Remove pork and cover in foil for 10 minutes.
  • Slice and serve topped with remaining glaze.

For the glaze

  • Roast the jalapenos on your grill. Remove stems and chop the peppers.
  • Melt the butter in a medium saucepan.
  • Add garlic and jalapenos and saute for 3 minutes.
  • Add the preserves and 1 cup of the wine. Whisk to combine well.
  • Bring to a slow boil and continue boiling until reduced by half, stirring often.
  • In a small bowl, combine the remaining 1/4 cup of wine and the cornstarch. Slowly pour into the saucepan while stirring.
  • Cook another 5 minutes then reduce heat and keep warm until ready to use.

Notes

You can substitute jarred or canned diced roasted jalapeno for the freshly-roasted ones.

Nutrition

Calories: 167kcal | Carbohydrates: 4g | Protein: 24g | Fat: 6g | Saturated Fat: 2g | Trans Fat: 1g | Cholesterol: 77mg | Sodium: 3911mg | Potassium: 471mg | Fiber: 1g | Sugar: 3g | Vitamin A: 108IU | Vitamin C: 5mg | Calcium: 20mg | Iron: 1mg

Nutritional values are approximate.
Southern Spicy Roasted Peanuts

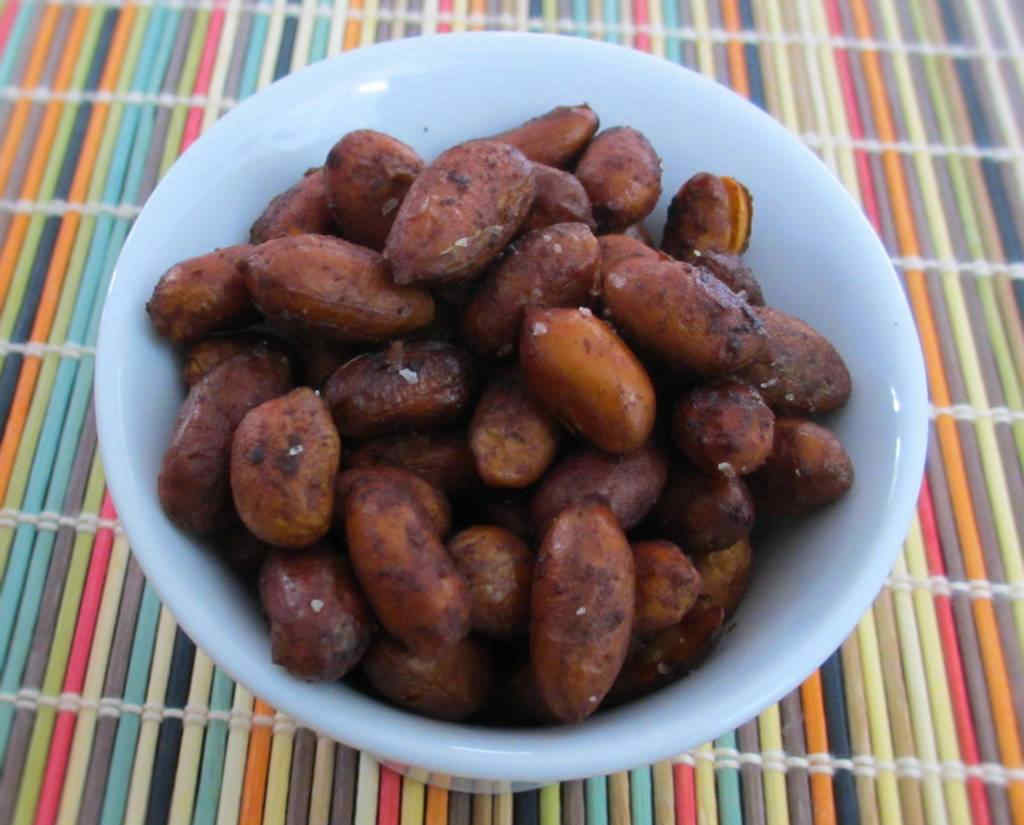
It’s that time of year when there are lots and lots of sports on TV. That calls for game snacks, like this tasty treat. The Worcestershire sauce and liquid smoke really make these southern spicy roasted peanuts taste different from your usual roasted nuts. It’s a great flavor combination that gets better the longer the peanuts set. I recommend waiting at least 6 hours before diving in. The wait is more than worth it.

Southern Spicy Roasted Peanuts

Tasty. But Maybe Not Sexy.

I found it difficult to make a bowl of golden brown roasted peanuts look sexy. But believe me, these southern spicy roasted peanuts are mighty good. The flavors are different in a very good way. Me, I like my peanuts a bit on the spicy side. So I added a bit more of the cayenne pepper.

Also try my chipotle honey roasted nuts.

Southern Spicy Roasted Peanuts
Print Pin
4 from 1 vote

Southern Spicy Roasted Peanuts

It’s that time of year when there are lots and lots of sports on TV. That calls for game snacks, like this tasty treat.
Course Appetizer
Cuisine American
Keyword peanuts, roasted, southern, spicy
Prep Time 5 minutes
Cook Time 6 hours 30 minutes
Total Time 6 hours 35 minutes
Servings 2 cups
Calories 1313kcal
Author Mike

Ingredients

Instructions

  • Place the peanuts in a large bowl. Add the Worcestershire sauce and liquid smoke and toss to coat. Let set for 30 minutes, tossing every 10 minutes.
  • Preheat your oven to 325 F.
  • Lightly spray a baking sheet with non-stick spray.
  • Add butter to a large skillet and melt over medium low heat.
  • Reduce heat to low.
  • Stir in the vinegar, hot sauce, salt and cayenne.
  • Add in the peanuts and stir to coat well.
  • Pour nuts out evenly onto the baking sheet.
  • Bake for 20 minutes or so, stirring every 5 minutes, until the nuts are a dark golden brown.
  • Remove to a rack or another (dry) baking sheet and let cool, uncovered, for 5-6 hours.

Notes

Store in an air-tight container until ready to use.

Nutrition

Calories: 1313kcal | Carbohydrates: 39g | Protein: 60g | Fat: 113g | Saturated Fat: 18g | Cholesterol: 2mg | Sodium: 1244mg | Potassium: 1816mg | Fiber: 22g | Sugar: 2g | Vitamin A: 97IU | Vitamin C: 7mg | Calcium: 272mg | Iron: 10mg

Nutritional values are approximate.
Smoked Chicken Cobb Salad

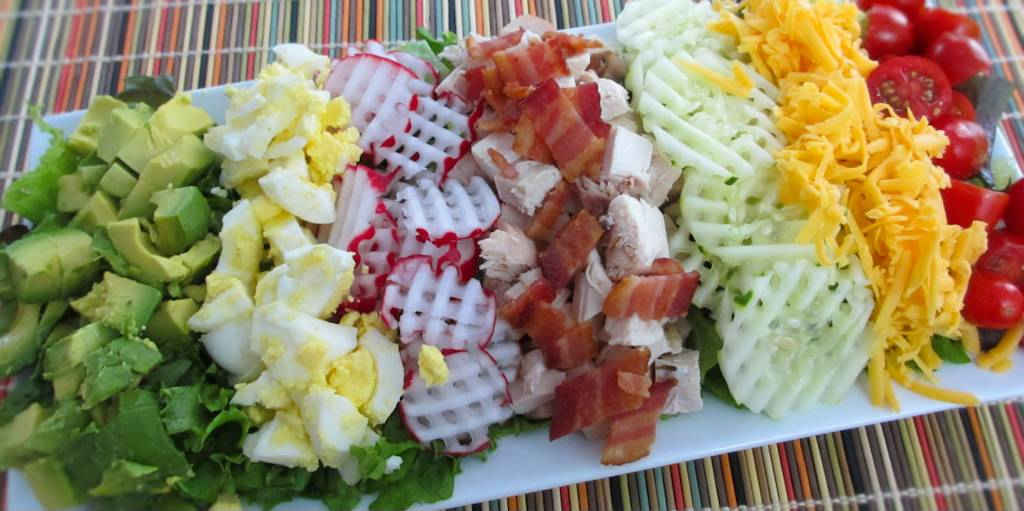
A big Cobb salad makes for a great side dish. Or main dish for that matter. I had some smoked chicken left over and decided to make it the center of this smoked chicken Cobb salad. Of course you can go crazy with a Cobb with whatever meats and veggies or fruits you want. That’s the beauty of a Cobb. No rules. No judgement.

Smoked Chicken Cobb Salad

My Kind Of Salad

I was feeling particularly artsy, so I waffle cut some radish and cucumbers for this smoked chicken Cobb salad. It’s nice to always do something a little different. It doesn’t have to be big, it can be something as subtle as a waffle cut. People will remember it and it really didn’t take any extra effort.

I highly recommend that you shred or grate your own cheese at home. Don’t buy the pre-shredded or pre-grated stuff. It has stuff added to it to keep it from sticking together. That ‘stuff’ affects how the cheese melts. Shred it yourself and use the good stuff.

Also try my smoked shrimp cobb salad.

Smoked Chicken Cobb Salad
Print Pin
5 from 1 vote

Smoked Chicken Cobb Salad

A big Cobb salad makes for a great side dish. Or main dish for that matter. I had some smoked chicken left over and decided to make it the center of this smoked chicken Cobb salad
Course Main
Cuisine American
Prep Time 20 minutes
Total Time 20 minutes
Author Mike

Ingredients

  • Green and red leaf lettuce chopped
  • Smoked chicken cubed (any cooked chicken will do)
  • Bacon cooked, drained, chopped
  • Eggs hard boiled and rough chopped
  • Avocado rough chopped
  • Cucumber sliced thin
  • Radishes sliced thin
  • Extra sharp cheddar shredded
  • Cherry tomatoes halved

Other toppings

Instructions

  • Layer lettuce on a large platter.
  • Top with remaining ingredients, placing in rows.
  • Serve.

Notes

Choose your favorite toppings.

Nutritional values are approximate.

Ritzy Brussels Sprouts

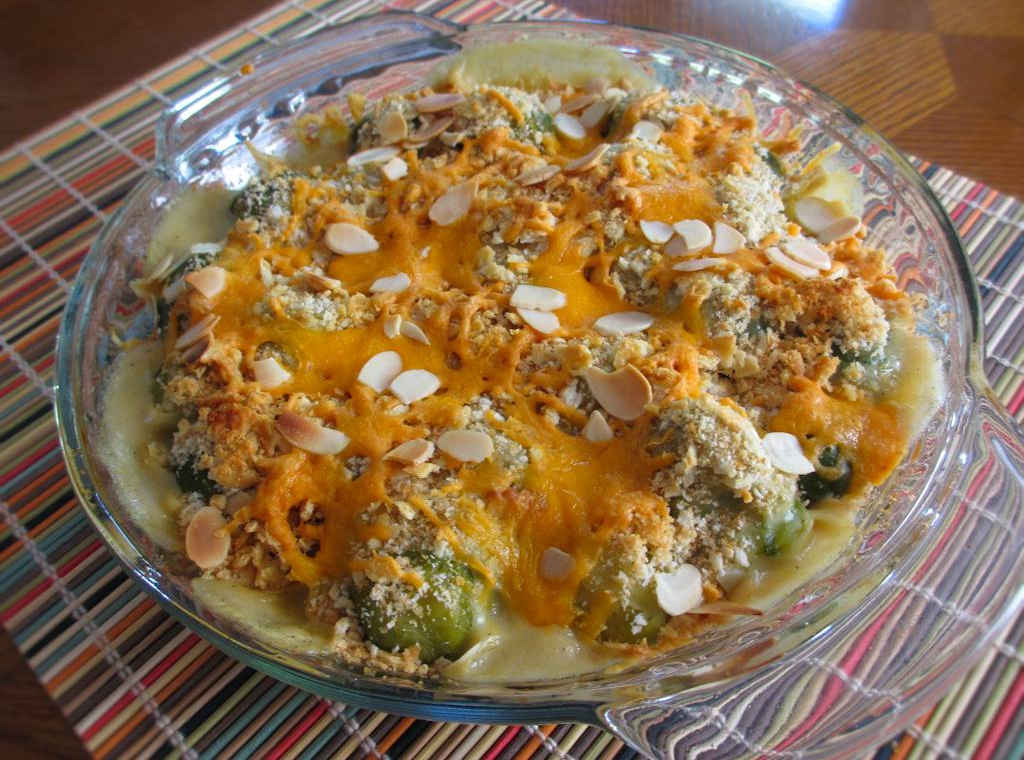
I should’ve doubled this recipe for ritzy Brussels sprouts when I made it. These tasty little bites didn’t last long at all. Normally, I just roast Brussels sprouts, but this version is so cheesy good. The crackers and nuts add a nice light crunch, contrasting the smooth cheese and tender sprouts. This is the kind of dish that has changed my mind about eating Brussels sprouts!

Ritzy Brussels Sprouts

A Different Kind Of Holiday Casserole

These Ritzy Brussels sprouts are almost like a green bean casserole, really, but with a nice nutty crunch to boot. Why serve that old ‘boring’ Thanksgiving side dish when you can serve something new and awesome!

I highly recommend that you shred or grate your own cheese at home. Don’t buy the pre-shredded or pre-grated stuff. It has stuff added to it to keep it from sticking together. That ‘stuff’ affects how the cheese melts. Shred it yourself and use the good stuff.

Also try my sauteed shredded Brussels sprouts and my creamy garlic Parmesan Brussels sprouts.

Ritzy Brussels Sprouts
Print Pin
4 from 1 vote

Ritzy Brussels Sprouts

I should’ve doubled this recipe for ritzy Brussels sprouts when I made it. These tasty little bites didn’t last long at all. Normally, I just roast Brussels sprouts, but this version is so cheesy good. 
Course Side
Cuisine American
Keyword Brussels sprouts
Prep Time 5 minutes
Cook Time 35 minutes
Total Time 40 minutes
Servings 4
Calories 122kcal

Equipment

Ingredients

Instructions

  • Preheat oven to 400 F.
  • Spray a 1 quart casserole dish (I used a pie plate) with non-stick spray.
  • Spread the Brussels sprouts out evenly in the bottom of the dish.
  • In a bowl, combine the soup, milk, minced onion, garlic powder, pepper, and chili powder. Pour over top of the Brussels sprouts and spread out evenly.
  • Sprinkle top with the crumbled crackers, cheese and the nuts.
  • Bake 30-35 minutes or until bubbly hot.

Notes

Store leftovers in the fridge and reheat in a 350 F oven for 15-20 minutes.

Nutrition

Calories: 122kcal | Carbohydrates: 13g | Protein: 8g | Fat: 6g | Saturated Fat: 3g | Cholesterol: 16mg | Sodium: 127mg | Potassium: 506mg | Fiber: 5g | Sugar: 4g | Vitamin A: 1061IU | Vitamin C: 97mg | Calcium: 172mg | Iron: 2mg

Nutritional values are approximate.
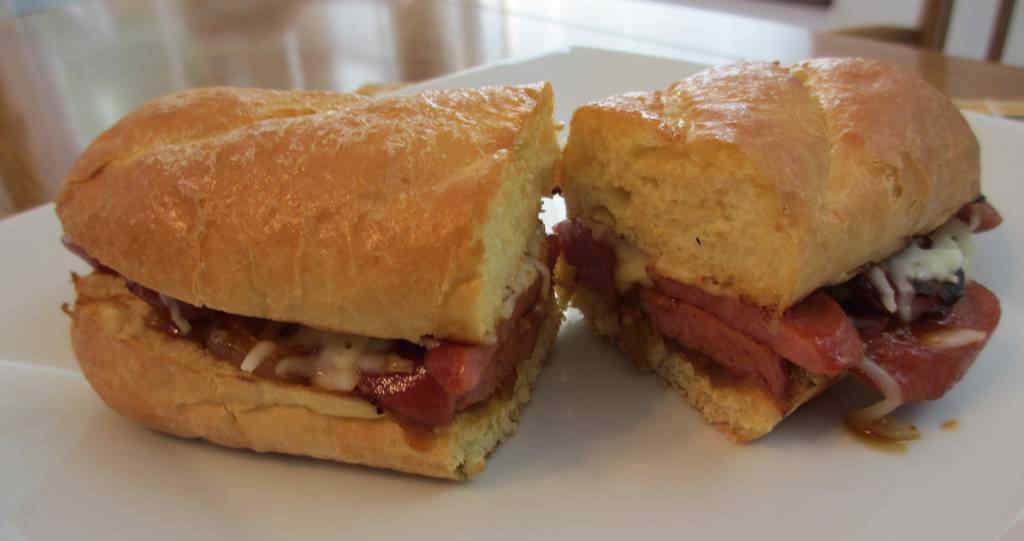
Spicy Hobo Sausage Packet Sandwiches

Hobo packets are a great thing when you’re in a hurry to make dinner. Usually you can make them ahead and just toss them onto the grill (or into the oven). These spicy Hobo sausage packet sandwiches combine smoked sausage, sweet onions and kicked-up BBQ sauce. Served on top of hoagie rolls with melted cheese for a really quick and easy lunch or dinner dish. Grab a few napkins, you’re going to need them!

Spicy Hobo Sausage Packet Sandwiches

Easy And Delicious

If you prefer to make your spicy hobo sausage packet sandwiches not so spicy, just substitute regular ole BBQ sauce. I like a nice hickory smoked BBQ sauce. The smoke flavor kind of ups the cooked-outdoors feel. These are great sandwiches for that campout dinner or lunch. There’s nothing fancy in them. When you’re done, just toss the foil into the trash.

For a little more crunch, add fresh-made coleslaw. The onions are cooked down so they won’t really add any crunch. You could add a bit of extra onion to the sandwiches instead.

Also try my grilled hobo packets.

Spicy Hobo Sausage Packet Sandwiches
Print Pin
4 from 1 vote

Spicy Hobo Sausage Packet Sandwiches

Hobo packets are a great thing when you’re in a hurry to make dinner. Usually you can make them ahead and just toss them onto the grill (or into the oven). These spicy Hobo sausage packet sandwiches combine smoked sausage, sweet onions and kicked-up BBQ sauce. 
Course Main
Cuisine American
Keyword breakfast, packets, sandwich, spicy
Prep Time 5 minutes
Cook Time 20 minutes
Total Time 25 minutes
Servings 4
Calories 572kcal

Ingredients

  • 1 pound smoked sausages cut into 1/2″ rounds
  • 1 Vidalia onion sliced
  • ¼ cup your favorite BBQ sauce the spicier the better!
  • 2 tablespoons cilantro chopped
  • ½ ground black pepper
  • 4 Hoagie buns
  • Mozzarella cheese shredded

Instructions

  • Tear off a large sheet of aluminum foil.
  • Place the sausage, onion, BBQ sauce, cilantro and black pepper in the center of the foil.
  • Fold up the sides and seal. Place the packet over indirect heat on the grill and cook about 20 minutes or until the sausage is hot and the onions are slightly tender.
  • Serve sausage over buns topped with cheese.

Notes

You can also make these using hot dogs.

Nutrition

Calories: 572kcal | Carbohydrates: 48g | Protein: 20g | Fat: 33g | Saturated Fat: 10g | Cholesterol: 81mg | Sodium: 1444mg | Potassium: 357mg | Fiber: 2g | Sugar: 14g | Vitamin A: 55IU | Vitamin C: 4mg | Calcium: 37mg | Iron: 12mg

Nutritional values are approximate.

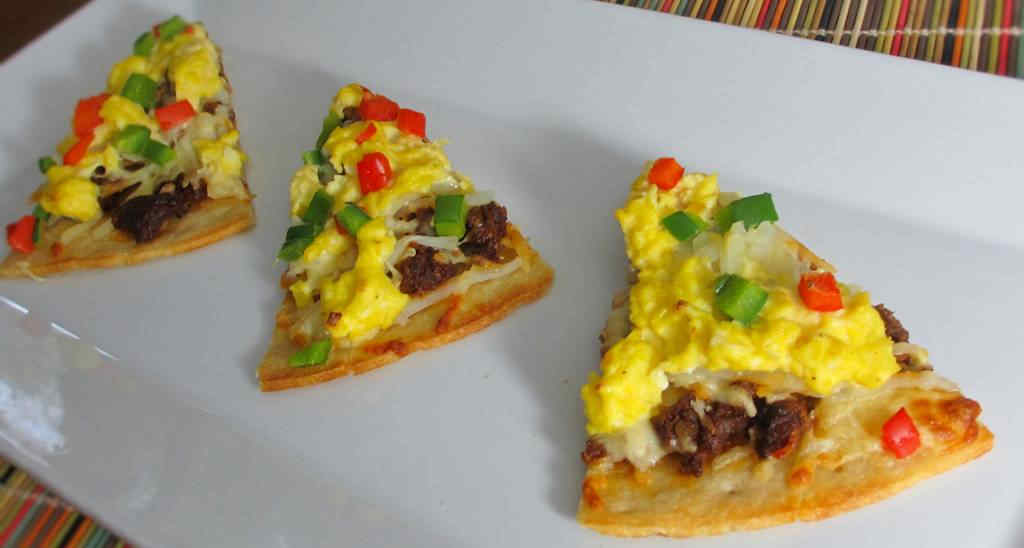
Mexican Breakfast Pizza

A pizza crust can be a blank canvas for whatever dish you want to “paint” onto it. This Mexican breakfast pizza is a great example. We took a store-bought thin crust and just topped it with some of our favorite breakfast ingredients. It made for the perfect, very quick-to-make breakfast-for-dinner meal.

Mexican Breakfast Pizza

Grab The Hot Sauce

Serve this Mexican breakfast pizza with a big ole bottle of Cholula hot sauce on the table. Nothing goes better with breakfast than a few good shakes of hot sauce. Cholula is one of my favorites. It’s not too spicy and it has a fantastic pepper flavor.

I highly recommend that you shred or grate your own cheese at home. Don’t buy the pre-shredded or pre-grated stuff. It has stuff added to it to keep it from sticking together. That ‘stuff’ affects how the cheese melts. Shred it yourself and use the good stuff.

For dinner, serve up some of my tortilla pizzas.

Mexican Breakfast Pizza
Print Pin
4 from 1 vote

Mexican Breakfast Pizza

A pizza crust can be a blank canvas for whatever dish you want to “paint” onto it. This Mexican breakfast pizza is a great example. We took a store-bought thin crush crust and just topped it with some of our favorite breakfast ingredients. It made for the perfect, very quick-to-make breakfast-for-dinner meal.
Course Main
Cuisine American
Keyword breakfast, pizza
Prep Time 10 minutes
Cook Time 10 minutes
Total Time 20 minutes
Servings 4
Calories 608kcal

Ingredients

  • ½ pound Mexican chorizo
  • 4 eggs
  • 2 tablespoons milk
  • kosher salt
  • ground black pepper
  • 1 pizza crust pre-made thin
  • 1 cup hash browns frozen shredded, thawed
  • ½ cup Mexican cheese more or less shredded. I used Chihuahua
  • ¼ cup red bell pepper chopped
  • ¼ cup green bell pepper chopped

Instructions

  • Preheat oven as directed on the pizza crush package.
  • Brown the chorizo in a skillet.
  • Drain well.
  • Lightly beat the egg with the milk in a small bowl.
  • Season with salt and pepper.
  • Add to the skillet and lightly scramble until the eggs just start to set.
  • Remove from heat.
  • Layer pizza crust with the hash browns.
  • Add the chorizo and cheese, followed by the eggs and peppers.
  • Bake as directed. Slice and serve.

Notes

Add in a little minced jalapeno to the peppers for a nice little kick.

Nutrition

Calories: 608kcal | Carbohydrates: 61g | Protein: 27g | Fat: 27g | Saturated Fat: 11g | Trans Fat: 1g | Cholesterol: 213mg | Sodium: 1105mg | Potassium: 268mg | Fiber: 3g | Sugar: 3g | Vitamin A: 972IU | Vitamin C: 24mg | Calcium: 222mg | Iron: 4mg

Nutritional values are approximate.
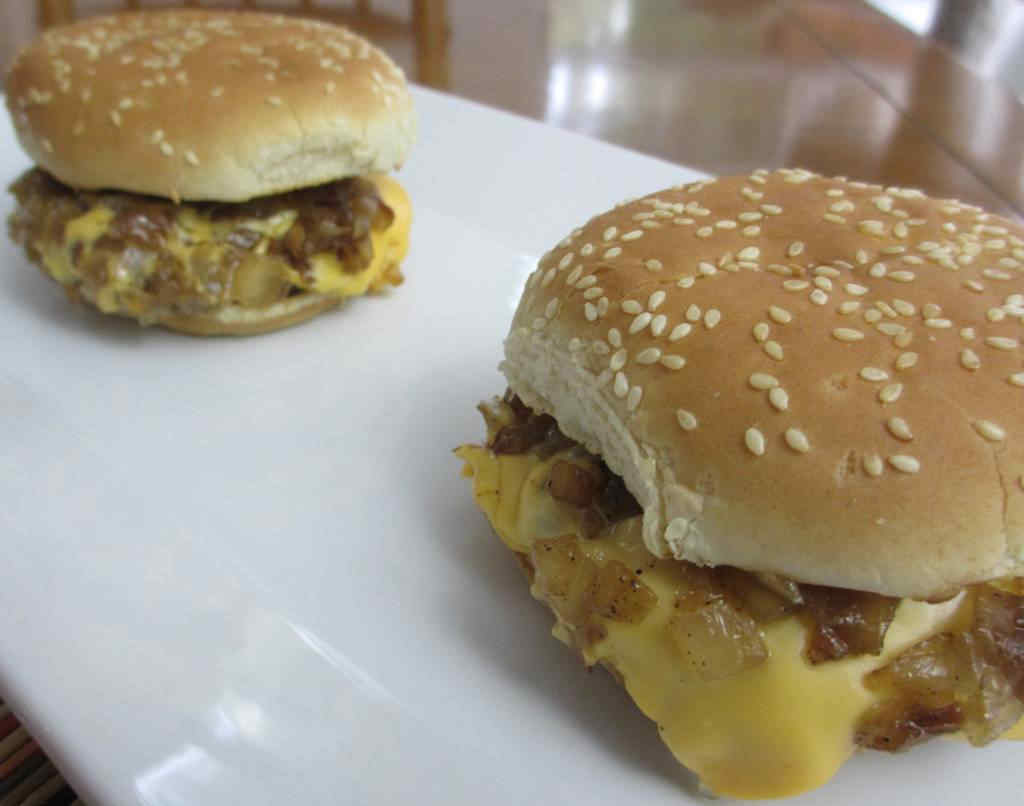
Onion Burgers

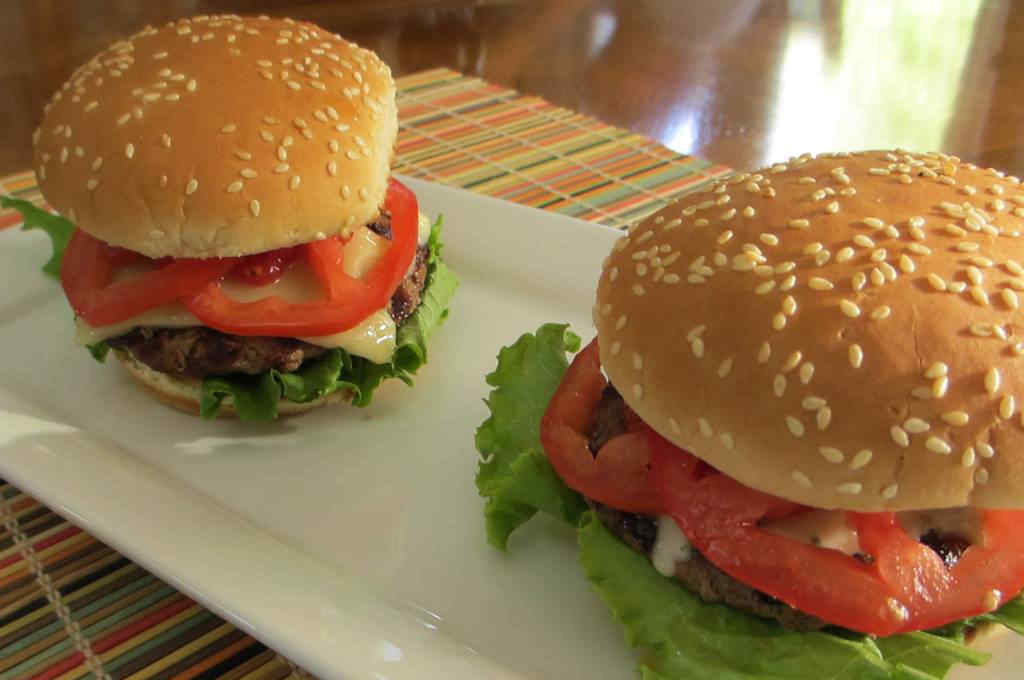
I have to admit, I can eat more than one of these delicious onion burgers without even blinking. There’s something about the sautéed onions and American cheese that just screams hamburger greatness! Simple, cheesy, dripping, messy. Just what a hamburger should be! These are the burgers dreams are made of. It’s how they should be!

Onion Burgers

Crazy-Good Burgers

These onion burgers remind me a bit of the old diner-style ones I used to get as a child, except that then the onions were sliced. They were cooked quickly on a flat-top griddle. Incredibly good, and dripping with flavor. Instead, these onions are caramelized, bringing an almost sweetness to the burgers. Add some cheese and I’m one happy guy!

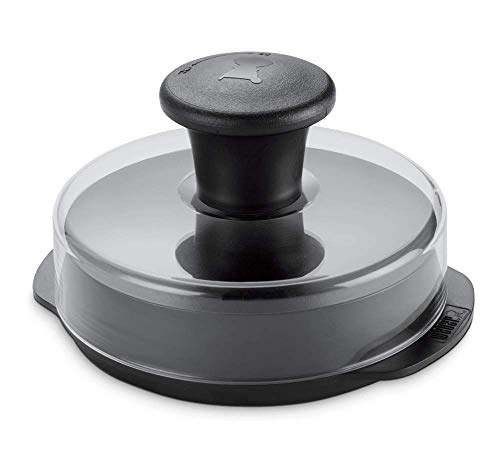
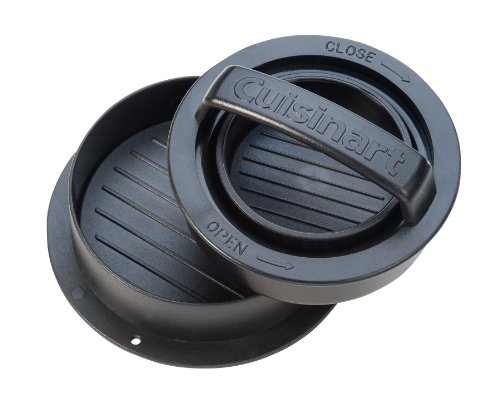
I like to use a burger press when I make burgers. It, in combination with some patty papers, enables me to crank out a whole bunch of equally-sized burger patties in no time at all with little cleanup.

Looking for a little different way to make these? Check out my other version of onion burgers!

Onion Burgers
Print Pin
5 from 1 vote

Onion Burgers

I have to admit, I can eat more than one of these delicious burgers without even blinking. There’s something about the sautéed onions and American cheese that just screams greatness! 
Course Main
Cuisine American
Keyword burgers, onion
Prep Time 10 minutes
Cook Time 25 minutes
Total Time 35 minutes
Servings 4
Calories 653kcal

Equipment

Ingredients

Instructions

  • Heat oil in a medium saucepan over medium-high heat.
  • Add the onions and half of the salt and pepper.
  • Saute until the onions are soft and lightly brown, 10-15 minutes.
  • Stir in the Worcestershire sauce a hot sauce, to taste.
  • Cover and remove from heat.
  • Form 4 burger patties and season with remaining salt and pepper.
  • Grill burgers until done.
  • Top each burger with 1 slice of cheese and a good amount of onion.
  • Add another piece of cheese and the remaining onion. Serve.

Notes

The onion mixture is great on hot dogs, too.

Nutrition

Calories: 653kcal | Carbohydrates: 37g | Protein: 33g | Fat: 41g | Saturated Fat: 20g | Trans Fat: 2g | Cholesterol: 123mg | Sodium: 2780mg | Potassium: 657mg | Fiber: 3g | Sugar: 12g | Vitamin A: 410IU | Vitamin C: 9mg | Calcium: 578mg | Iron: 5mg

Nutritional values are approximate.

Grilled Pork Tenderloins with Garlic Mustard Compound Butter

I make grilled pork tenderloins with garlic mustard compound butter often. Whether in the skillet or on the grill, they’re easy to make. They are tender, tasty, and moist. They are the pork equivalent of filet mignon, and for a lot less money. And like filet mignon, I am careful to not overcook them. Nice thing too is that they are like little blank canvases just waiting to be flavored. This butter has an amazing combination of garlic and mustard. I knew garlic and pork were great together. Ditto mustard and pork. But put all three together and you’ve got an amazing dish.

Grilled Pork Tenderloins with Garlic Mustard Compound Butter

Tenderloins Elevated

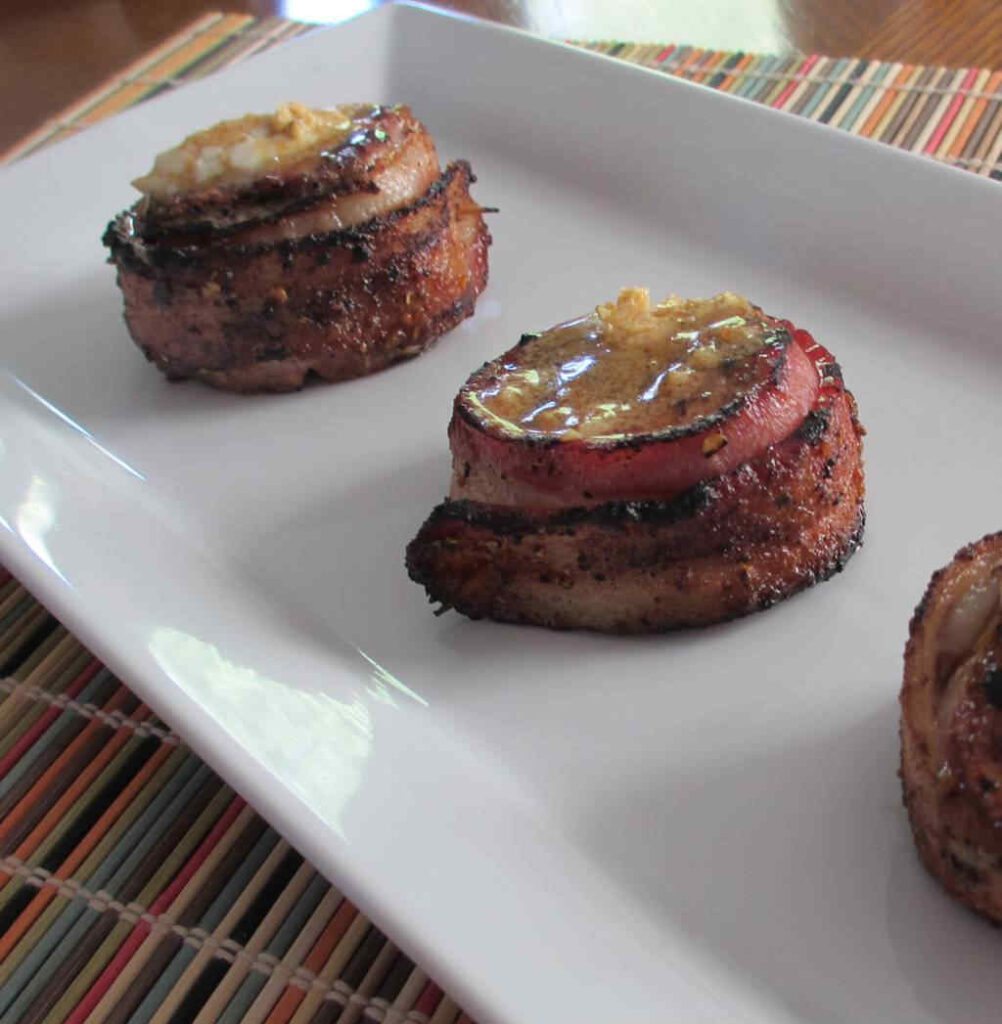
Usually, I just salt and pepper the medallions, wrap them in bacon, and cook them. These grilled pork tenderloins with garlic mustard compound butter variation from Griffin’s Grub steps it up even further by topping the medallions with a fantastic garlic and Dijon compound butter that pairs perfectly with the pork. The pork stays crazy moist and tender. And it’s oh so delicious!

Also try my grilled blackberry jalapeno glazed pork tenderloin.

Grilled Pork Tenderloins with Garlic Mustard Compound Butter
Print Pin
5 from 1 vote

Grilled Pork Tenderloins with Garlic Mustard Compound Butter

I make grilled pork tenderloins with garlic mustard compound butter often. Whether in the skillet or on the grill, they’re easy to make. They are the pork equivalent of filet mignon, and for a lot less money.
Course Main
Cuisine American
Keyword butter, grilled, mustard, pork
Prep Time 10 minutes
Cook Time 25 minutes
Total Time 35 minutes
Servings 6
Calories 1017kcal

Equipment

Ingredients

Instructions

  • To make the compound butter, combine the butter, mustard, garlic and 2 teaspoons of rub in a small bowl.
  • Spoon mixture onto a piece of plastic wrap.
  • Roll the wrap up like a cigar, twisting the ends until the butter forms a log.
  • Refrigerate until ready to use.
  • Prepare your grill for direct and indirect cooking.
  • Slice the tenderloins into medallions that are the same thickness as the bacon is wide.
  • Wrap the bacon around the pork, securing with a toothpick inserted almost all the way into the meat.
  • Sprinkle all sides of the medallions with rub.
  • Place pork onto grill over direct heat.
  • Rotate after two minutes to get grill marks, always watching for flareups from the bacon drippings.
  • Grill another 2-3 minutes then flip and grill the other side in the same fashion.
  • Remove pork to indirect heat and let cook until internal temperature reaches 130 F.
  • Take tongs and pick up medallions on their non-bacon sides like they are hockey pucks. Roll the pucks over direct heat to brown and crisp the bacon.
  • Check for doneness (145 F more or less depending on how you like them).
  • Remove meat and let rest for 5 minutes.
  • Serve topped with a thin slice of the compound butter.

Notes

Yellow mustard can be used instead.

Nutrition

Calories: 1017kcal | Carbohydrates: 1g | Protein: 130g | Fat: 51g | Saturated Fat: 22g | Trans Fat: 1g | Cholesterol: 458mg | Sodium: 588mg | Potassium: 2461mg | Fiber: 1g | Sugar: 1g | Vitamin A: 498IU | Vitamin C: 1mg | Calcium: 46mg | Iron: 6mg

Nutritional values are approximate.
Roasted Garlic

Roasted garlic is just one of those things that are great to keep on hand. It can be added to a lot of things to really kick them up. Boring mayonnaise? Add a bit of garlic and make a great sandwich super! Boring burger? Add some more. You can mix into the beef patties before you cook them. Or mix it in with some mayonnaise and slather the buns with it. Make sure you get both buns, too!

Roasted Garlic Burgers

More Garlic, More Better

Roasted garlic is also fantastic in my roasted garlic salad dressing. There are so many uses for it that I recommend making several heads at once. Just substitute it for ‘regular’ garlic in any dish. And add it to any dish that needs more flavor.

You can also make roasted garlic in a slow cooker!

Roasted Garlic Burgers
Print Pin
5 from 1 vote

Roasted Garlic

Roasted garlic is just one of those things that are great to keep on hand. It can be added to a lot of things to really kick them up.
Course Sauce
Cuisine American
Prep Time 5 minutes
Cook Time 45 minutes
Total Time 50 minutes
Author Mike

Ingredients

Instructions

  • Preheat oven to 400 F.
  • Peel away the outer layers of the garlic skin, leaving the cloves intact.
  • Cut off about 1/2″ of the top of the head, exposing all of the tops of the cloves.
  • Place head on a piece of foil and drizzle with olive oil and sprinkle with salt.
  • Wrap in foil and place in oven 30-35 minutes or until the garlic feels a little soft.
  • Remove from oven, open foil packet, and let cool.
  • Squeeze garlic from head onto a cutting board. Don’t miss any of the roasted yumminess! Squeeze hard!
  • Mash the garlic into a paste using the back of your knife, making sure to break up any large chunks.

Notes

Store in the fridge until ready to use.

Nutritional values are approximate.