Rapid Rolls

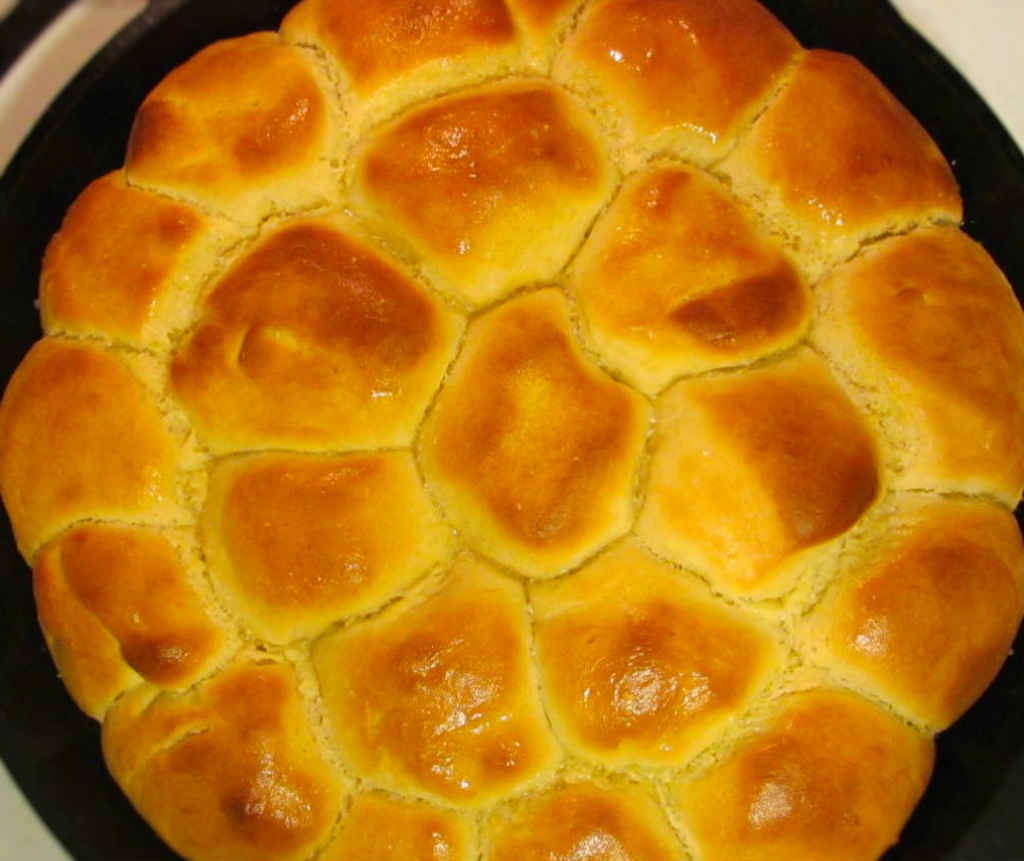
These rapid rolls from Kelsey Nixon are superb! They are flaky and sweet. Perfect for soppin’, or biscuits and gravy, or even as slider rolls. They are also very easy to make. All you need is a mixer and a 12″ cast-iron skillet. The heck with buying pre-made rolls. These are way, way better!

And let me tell you, I am no baker. I can barely open a bag of flour without there being some sort of catastrophe. These are easy enough to make that even I could do them. About the hardest part is trying to get the balls of dough for each roll roughly the same sizes. They don’t have to be perfect. In fact, non-perfect dough balls kind of adds to the ‘made at home’ feel that these rolls have.
Rapid Rolls

Perfect For The Holidays

This recipe for rapid rolls makes a big ole batch. So it is perfect for a family get-together! The rolls are just as great the next day so don’t worry that it makes so many.

You can freeze any leftovers and re-heat later.

Lodge Seasoned Cast Iron 3 Skillet Bundle…
  • Durable Cast Iron Construction: Made from…
  • Set of 3 Skillets: Includes 12 inch and 10.25 inch…

Also, the dough is (supposedly) great as a pizza dough. I’ll try that next!

Also try my Italian herb skillet bread.
Rapid Rolls
Print Pin
5 from 1 vote

Rapid Rolls

These rapid rolls are superb! They are flaky and sweet. Perfect for soppin’, or biscuits and gravy, or even as slider rolls. They are also very easy to make.
Course Side
Cuisine American
Keyword rolls
Prep Time 45 minutes
Cook Time 25 minutes
Total Time 1 hour 10 minutes
Servings 24
Calories 165kcal

Ingredients

  • 3 packets active dry yeast .25 ounce packets, or about 6 3/4 teaspoons jarred yeast
  • 1 ¾ cups warm water
  • ½ cup honey
  • ½ cup unsalted butter melted
  • 2 tablespoons unsalted butter melted
  • 3 teaspoons kosher salt divided, plus more for sprinkling
  • 2 large eggs beaten
  • 5 cups all-purpose flour you might need more

Instructions

  • Preheat oven to 400 F.
  • Place warm water into the bowl of a mixer fitted with a mixing paddle.
  • Add the yeast and let sit for 5 minutes until bubbling.
  • Add in the honey,
  • Turn the mixer on low.
  • Pour in 1/2 cup of the butter, 2 teaspoons of the salt, and both eggs.
  • Begin adding the flour, slowly. After about 4 cups keep an eye on the mixture as you add more dough. You want the dough to be only slightly sticky, forming a ball that does not stick to the sides of the bowl.
  • Lightly dust a work surface with flour.
  • Shape the dough into a large log and cut into thirds.
  • Then cut each third in half, for a total of 6 pieces. Cut each portion in half again, and then one more time. You'll end up with 24 pieces all roughly the same size.
  • Form dough pieces into small balls.
  • Lightly butter a 12″ cast-iron skillet.
  • Add dough balls. Let rise for 20 minutes or until they double in size.
  • Brush tops of dough with melted butter.
  • Bake for 20-25 minutes or until golden brown.
  • Brush with more melted butter and sprinkle with salt.

Notes

Best served hot.

Nutrition

Calories: 165kcal | Carbohydrates: 26g | Protein: 3g | Fat: 5g | Saturated Fat: 3g | Trans Fat: 1g | Cholesterol: 28mg | Sodium: 298mg | Potassium: 40mg | Fiber: 1g | Sugar: 6g | Vitamin A: 170IU | Vitamin C: 1mg | Calcium: 8mg | Iron: 1mg

Nutritional values are approximate.

Bambüsi Bread Slicer with Knife, Homemade…
  • SLICES EVERY LOAF EVEN, LIKE A BAKERY: This bread…
  • PICK YOUR THICKNESS, THIN MEDIUM OR THICK: Choose…
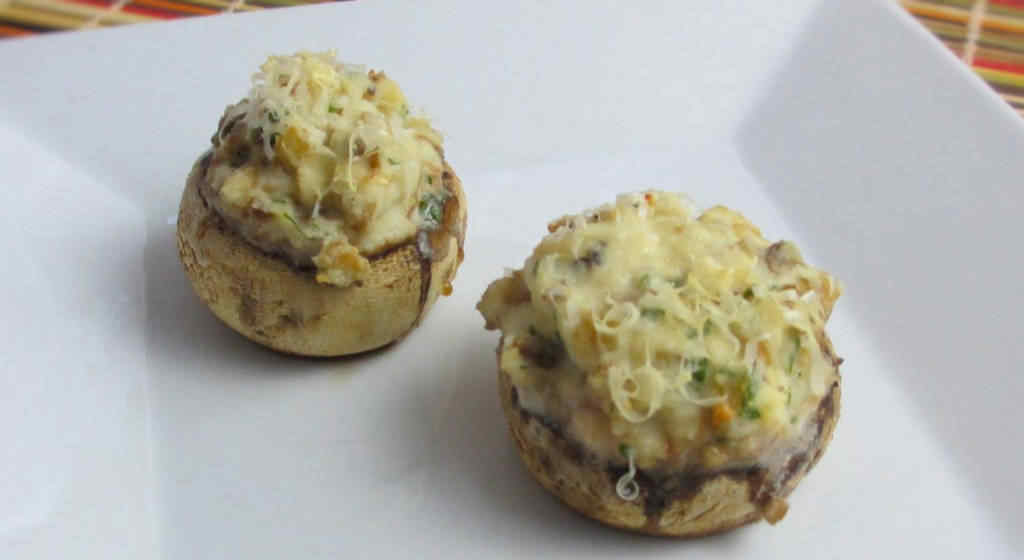
Garlic Ricotta Stuffed Mushrooms

Well, these garlic ricotta stuffed mushrooms sure didn’t last long. We are both big fans of mushrooms, stuffed or not. You can make them in the oven or on the grill. They make for a great, easy side to whatever we  might be cooking on the grill (or indoors). Sometimes we marinate them. Sometimes we stuff them. Either way, they’re fantastic.

Garlic Ricotta Stuffed Mushrooms

Creamy Deliciousness

These garlic ricotta stuffed mushrooms have a wonderfully creamy filling. They’re great as sides or appetizers. Or both. Substitute Creole seasoning for the salt and pepper and shredded pepperjack cheese for the Mozzarella for a twist with a kick!

I highly recommend that you shred or grate your own cheese at home. Don’t buy the pre-shredded or pre-grated stuff. It has stuff added to it to keep it from sticking together. That ‘stuff’ affects how the cheese melts. Shred it yourself and use the good stuff.

Geedel Rotary Cheese Grater, Kitchen Mandoline…
  • Makes Everything Simple : Just forget your bagged…
  • Premium Material : All parts of the rotary cheese…

Also try my crazy-good easy marinated mushrooms.

Garlic Ricotta Stuffed Mushrooms
Print Pin
5 from 1 vote

Garlic Ricotta Stuffed Mushrooms

These garlic ricotta stuffed mushrooms have a wonderfully creamy filling. They’re great as sides or appetizers. 
Course Side or Appetizer
Cuisine American
Keyword cheese, garlic, grilled, mushroom
Prep Time 10 minutes
Cook Time 35 minutes
Total Time 45 minutes
Servings 4
Calories 64kcal

Ingredients

Instructions

  • Preheat oven to 350 F. Alternatively, you can cook these on a medium-high heat grill. Just stuff the mushrooms and toss onto the grill until just tender.
  • Clean the mushrooms and remove the stems. Chop the stems along with one of the mushrooms (keeping the other 6 mushrooms whole).
  • Heat olive oil in a medium skillet over medium-high heat.
  • Add the chopped mushroom and stems and cook for 2-3 minutes.
  • Add the garlic and season with salt and pepper and cook another 2-3 minutes.
  • Remove from heat and let cool.Place into a medium bowl.
  • Add the ricotta and 2 tablespoons of the Mozzarella cheese and stir to combine.
  • Spray a baking sheet with non-stick spray.
  • Spoon the mushroom and cheese mixture into the mushroom caps and place onto the baking sheet.
  • Bake for 20-25 minutes.

Notes

You can substitute mozzarella or Pecorino Romano for the Parmesan.

Nutrition

Calories: 64kcal | Carbohydrates: 3g | Protein: 5g | Fat: 4g | Saturated Fat: 2g | Cholesterol: 11mg | Sodium: 272mg | Potassium: 168mg | Fiber: 1g | Sugar: 1g | Vitamin A: 115IU | Vitamin C: 2mg | Calcium: 100mg | Iron: 1mg

Nutritional values are approximate.

Sale
Mueller Pro-Series All-in-One, 12 Blade Mandoline…
  • Meal Prep MVP – A practical and innovative way to…
  • 12 Diverse Blades – With nine interchangeable…
OXO Good Grips 4 Piece Stainless Steel Measuring…
  • Set includes: 1/4 cup, 1/3 cup, 1/2 cup and 1 cup
  • Magnetic handles keep Cups together for storage…

Blueberry Croissant Puff

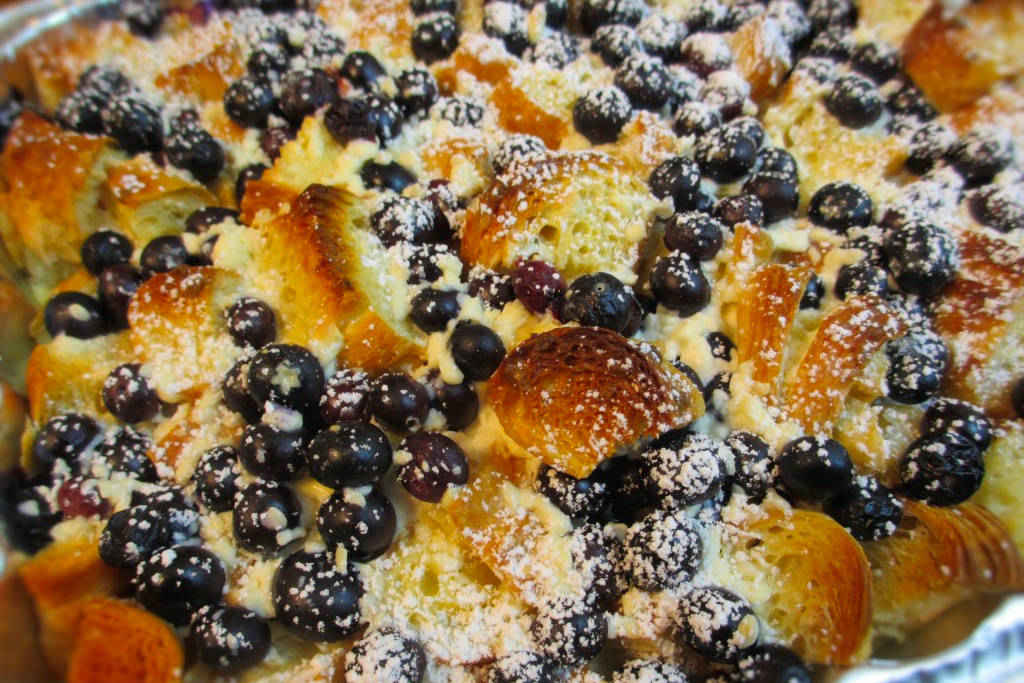
I made a big batch of this great blueberry croissant puff this morning for my wife to take to work. It disappeared so fast it made my head spin. A little sweet and a little tart, it’s definitely a great breakfast casserole that is a bit different.

Blueberry Croissant Puff

Very Easy and Very Delicious

This blueberry croissant puff was very easy to make. Our grocery store didn’t have large croissants, so I used mini croissants instead. For extra yumminess, substitute a little cream for the milk.

If you’re looking for the best recipes for breakfast all in a single cookbook, I cannot recommend John Currence’s Big Bad Breakfast: The Most Important Book of the Day enough!

Sale
NutriChef Automatic Vacuum Air Sealing System for…
  • AUTOMATIC VACUUM FOOD SEALER WITH STARTER KIT…
  • DUAL DRY & MOIST MODES FOR EVERY FOOD TYPE…

Also try my blueberry ice cream!

Inspired by a recipe from The Girl That Ate Everything.

Blueberry Croissant Puff
Print Pin
5 from 1 vote

Blueberry Croissant Puff

 A little sweet and a little tart, it’s definitely a great breakfast casserole that is a bit different.
Course Main
Cuisine American
Keyword blueberry, croissant
Prep Time 20 minutes
Cook Time 1 hour
Total Time 1 hour 20 minutes
Servings 12
Calories 1086kcal

Ingredients

  • 10 cups croissants cubed (about 15 mini croissants or 6 or so large ones)
  • 1 pint blueberries rinsed
  • 2 8 ounce cream cheese softened
  • 1 â…“ cup sugar
  • 4 eggs
  • 2 teaspoons vanilla extract
  • 2 cups milk
  • powdered sugar

Instructions

  • Preheat oven to 350 F.
  • Spray a 9″ x 13″ pan with non-stick spray.
  • Add the croissants to the pan. Top with the blueberries.
  • Place the cream cheese, sugar, eggs, and vanilla in a large bowl. Beat with a hand-held blender until smooth. You can also use a counter-top blender or a whisk.
  • With the blender still running (or while whisking), slowly pour in the milk. Blend until smooth.
  • Pour milk mixture over the croissants.
  • Let set on the counter for 20 minutes.
  • Bake for 35-45 minutes. Start checking after 30 minutes to make sure the top doesn’t get too dark. If it does, cover it with foil and continue baking until cooked through.
  • Serve sprinkled with powdered sugar.

Notes

Also try this recipe using raspberries or strawberries!

Nutrition

Calories: 1086kcal | Carbohydrates: 122g | Protein: 22g | Fat: 57g | Saturated Fat: 32g | Trans Fat: 1g | Cholesterol: 232mg | Sodium: 1081mg | Potassium: 391mg | Fiber: 6g | Sugar: 52g | Vitamin A: 2141IU | Vitamin C: 4mg | Calcium: 167mg | Iron: 5mg

Nutritional values are approximate.

Sale
Mueller Pro-Series All-in-One, 12 Blade Mandoline…
  • Meal Prep MVP – A practical and innovative way to…
  • 12 Diverse Blades – With nine interchangeable…
OXO Good Grips 4 Piece Stainless Steel Measuring…
  • Set includes: 1/4 cup, 1/3 cup, 1/2 cup and 1 cup
  • Magnetic handles keep Cups together for storage…

Shamrock Peeps Rice Krispies Treats

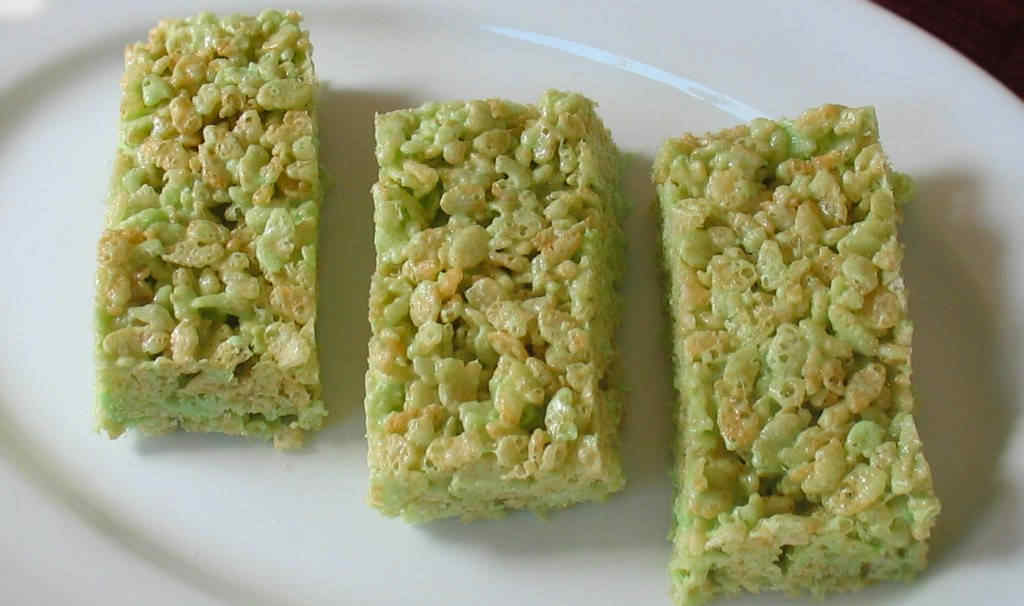
These shamrock Peeps Rice Krispies treats were fun to make…

…specially if you’re into watching poor little Peeps meet their demise in a hot pot! My wife hates when I do this to ‘them’.

Although I used green Peeps to make these for St. Patrick’s day, you can use any color, or even a combination of colors (don’t mix them together – let them melt in place). They taste just like your usual Rice Krispies treats. If you don’t have Peeps (they are now available year-round in some places), just use marshmallows and green food coloring.

Shamrock Peeps Rice Krispies Treats

Peeps melted down make for a fun syrup to add to any Rice Krispies treat.

Shamrock Peeps

Goodbye, Peeps!

These Shamrock Peeps Rice Krispies Treats are a great twist on those usual treats. If you’re in a hurry, buy the pre-made ones from the store. Make the Peeps syrup and pour it over top. Let it cool a bit and serve!

Also try my red velvet rice Krispies treats.

Shamrock Peeps Rice Krispies Treats
Print Pin
4 from 1 vote

Shamrock Peeps Rice Krispies Treats

These shamrock Peeps Rice Krispies treats were fun to make……especially if you’re into watching poor little Peeps meet their demise in a hot pot!
Course Snack
Cuisine American
Keyword Rice Krispie treats
Prep Time 5 minutes
Cook Time 45 minutes
Total Time 50 minutes
Servings 16
Calories 113kcal
Author Mike

Ingredients

Instructions

  • Spray a 9″ x 13″ baking dish with non-stick spray.
  • Melt the butter over low heat in a large non-stick saucepan.
  • Add the Peeps to the pot and melt them, stirring occasionally. Do not overcook or the butter will burn.
  • Remove pot from heat and stir in the cereal.
  • Pour the mixture into a baking dish and spread it out. I used a spatula sprayed with non-stick spray to make it easier to spread out the cereal.
  • Let cool 30 minutes and cut into bars.

Notes

Store any leftovers in the fridge.

Nutrition

Calories: 113kcal | Carbohydrates: 27g | Protein: 1g | Fat: 1g | Saturated Fat: 1g | Trans Fat: 1g | Cholesterol: 1mg | Sodium: 66mg | Potassium: 17mg | Fiber: 1g | Sugar: 18g | Vitamin A: 703IU | Vitamin C: 7mg | Calcium: 4mg | Iron: 3mg

Nutritional values are approximate.

Sale
Mueller Pro-Series All-in-One, 12 Blade Mandoline…
  • Meal Prep MVP – A practical and innovative way to…
  • 12 Diverse Blades – With nine interchangeable…
OXO Good Grips 4 Piece Stainless Steel Measuring…
  • Set includes: 1/4 cup, 1/3 cup, 1/2 cup and 1 cup
  • Magnetic handles keep Cups together for storage…

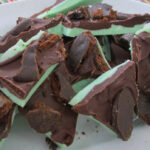
Grasshopper Thin Mint Bark

This grasshopper thin mint bark is flat-out addicting. Minty white chocolate, colored green, with semi-sweet chocolate, topped with crumbled Thin Mint Girl Scout cookies! My goodness, it was like a mint avalanche!

Grasshopper Thin Mint Bark

A Few Tips

Be careful when adding the peppermint extract. It’s some powerful stuff. A little bit goes a long, long ways. And make sure you let the mixture cool completely before breaking it up. You want it to set really good first.

This is a great bark to serve up around St. Patrick’s day. The perfect thing to drink with grasshopper thin mint bark? A shamrock shake, of course!

Sale
NutriChef Automatic Vacuum Air Sealing System for…
  • AUTOMATIC VACUUM FOOD SEALER WITH STARTER KIT…
  • DUAL DRY & MOIST MODES FOR EVERY FOOD TYPE…

For the fall you can’t go wrong with my Halloween bark.

Grasshopper Thin Mint Bark
Print Pin
5 from 1 vote

Grasshopper Thin Mint Bark

This grasshopper thin mint bark is flat-out addicting. Minty white chocolate, colored green, with semi-sweet chocolate, topped with crumbled Thin Mint Girl Scout cookies! My goodness my it was like a mint avalanche!
Course Snack
Cuisine American
Keyword bark, mint
Prep Time 30 minutes
Cook Time 30 minutes
Total Time 1 hour
Servings 24
Calories 318kcal

Ingredients

Instructions

  • Line a baking sheet (approximately 13″ x 18″) with parchment paper.
  • Melt the white chocolate in a double boiler (or use a microwave, following the instructions on the package).
  • Remove from heat and stir in the mint extract and few drops of green food coloring (more or less, depending on how green you want it).
  • Spread evenly out onto the baking sheet. Place into the fridge or freezer until hardened, 15-30 minutes.
  • Melt the semi-sweet chocolate chips and pour on top of the green chocolate, spreading out evenly.
  • Break the cookies into small pieces and push into the melted chocolate.
  • Refrigerate or freeze for 15-30 minutes or until hardened.
  • Break into pieces and serve.

Notes

Store up to two weeks in the fridge.

Nutrition

Calories: 318kcal | Carbohydrates: 32g | Protein: 3g | Fat: 20g | Saturated Fat: 12g | Trans Fat: 1g | Cholesterol: 8mg | Sodium: 28mg | Potassium: 242mg | Fiber: 2g | Sugar: 27g | Vitamin A: 23IU | Vitamin C: 1mg | Calcium: 74mg | Iron: 2mg

Nutritional values are approximate.

Sale
Mueller Pro-Series All-in-One, 12 Blade Mandoline…
  • Meal Prep MVP – A practical and innovative way to…
  • 12 Diverse Blades – With nine interchangeable…
OXO Good Grips 4 Piece Stainless Steel Measuring…
  • Set includes: 1/4 cup, 1/3 cup, 1/2 cup and 1 cup
  • Magnetic handles keep Cups together for storage…

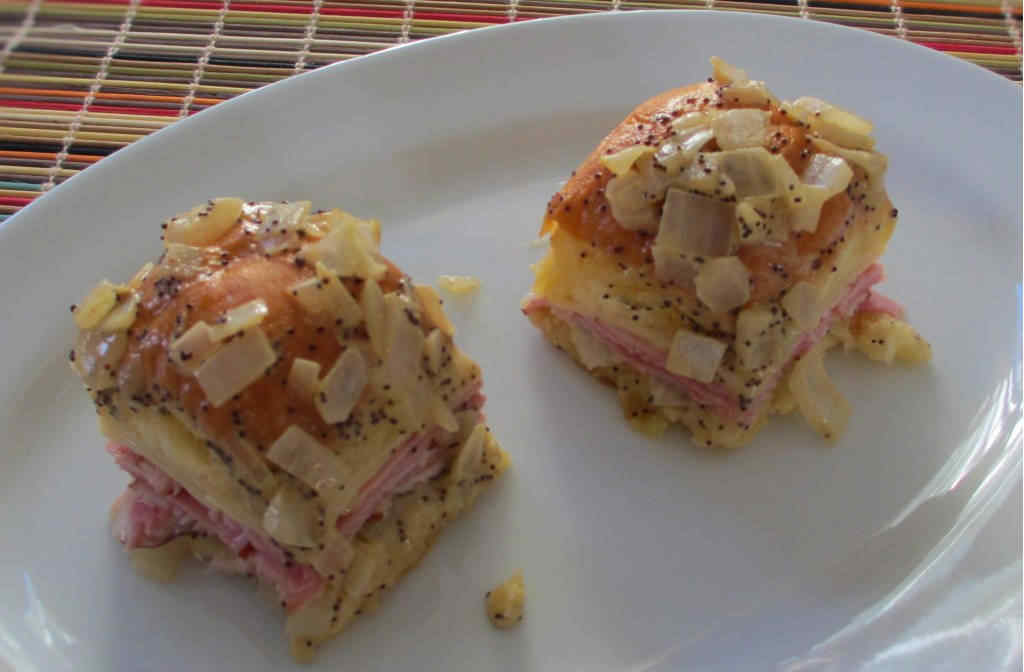
Mini Baked Ham and Swiss Sandwiches

These mini baked ham and Swiss sandwiches from King’s Hawaiian are absolutely insanely good. I found a great variation on the original over at The Kitchen Life of a Navy Wife, so I made them… and they up and disappeared in minutes! Now.. yeah, I love onion. So I mighta gone a bit nuts with the onion topping. But they were absolutely delicious.

Mini Baked Ham and Swiss Sandwiches

Messy Goodness

I will probably cut the butter in half next time, but let’s face it… butter makes them even better! They are a bit messy to eat. But I didn’t hear anything but ‘oh so good’ as they were quickly devoured. These mini baked ham and Swiss sandwiches disappeared in no time. They aren’t fancy but they taste great. And they’re a great way to feed a crowd.

Grey Poupon Mustard, Dijon, 8 oz. Jar
  • One 8 oz jar of Grey Poupon Dijon Mustard
  • Made from the same French-style recipe since…

Keep the mini theme going with some mini corn dog muffins and mini cinnamon rolls!

Mini Baked Ham and Swiss Sandwiches
Print Pin
4 from 1 vote

Mini Baked Ham Sandwiches

These mini baked ham and Swiss sandwiches from King’s Hawaiian are absolutely insanely good. 
Course Main
Cuisine American
Keyword ham, sandwich
Prep Time 10 minutes
Cook Time 20 minutes
Total Time 30 minutes
Servings 6
Calories 432kcal

Ingredients

Instructions

  • Heat oven to 350 F.
  • Melt butter in a medium skillet over medium-high heat.
  • Add the mustard and Worcestershire. Stir.
  • Add onion and poppy seed and saute until the onion just starts to soften.
  • Remove from heat.
  • Cut the rolls in half, horizontally, keeping the top and bottom halves in tact. Just lay them out on a flat surface and run your knife through the middle, parallel to the ground.
  • Spray a 9″ x 13″ baking dish with non-stick spray.
  • Spoon 1/3rd of the onion mixture over the bottom of the dish.
  • Add the bottom half of the rolls.
  • Top with ham and cheese.
  • Add the bun tops.
  • Spoon remaining onion mixture over the buns.
  • Bake for 15-20 minutes.
  • Use a sharp knife to separate the buns, cutting through the cheese and ham.

Notes

For a nice little kick, substitute sliced pepper jack for the Swiss.

Nutrition

Calories: 432kcal | Carbohydrates: 5g | Protein: 18g | Fat: 38g | Saturated Fat: 21g | Trans Fat: 1g | Cholesterol: 112mg | Sodium: 808mg | Potassium: 240mg | Fiber: 1g | Sugar: 2g | Vitamin A: 854IU | Vitamin C: 2mg | Calcium: 177mg | Iron: 1mg

Nutritional values are approximate.

Sale
Mueller Pro-Series All-in-One, 12 Blade Mandoline…
  • Meal Prep MVP – A practical and innovative way to…
  • 12 Diverse Blades – With nine interchangeable…
OXO Good Grips 4 Piece Stainless Steel Measuring…
  • Set includes: 1/4 cup, 1/3 cup, 1/2 cup and 1 cup
  • Magnetic handles keep Cups together for storage…

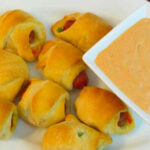
Southwestern Pigs in a Blanket

Your standard pigs-in-a-blanket are mighty good, but I felt that they needed a little ‘help’. So along came this great southwestern pigs in a blanket variation that gets devoured even faster! Get your big platter out, you’re going to need it! These lovely morsels kick up the classic by adding bell peppers and a nice spicy cheese. There’s nothing boring about them!

Southwestern Pigs in a Blanket

Go Dipping!

I served these southwestern pigs in a blanket with an easy-to-make Southwestern sauce. You could use good old Ranch dressing instead. A good, thick spicy BBQ sauce would also make for a great dipping sauce. Heck, set out a few different sauces and get ready to watch these yummy bites disappear in no time! Who wouldn’t enjoy a pigs in a blanket bar?

Sale
NutriChef Automatic Vacuum Air Sealing System for…
  • AUTOMATIC VACUUM FOOD SEALER WITH STARTER KIT…
  • DUAL DRY & MOIST MODES FOR EVERY FOOD TYPE…

Also try my BBQ pigs in a blanket.

Southwestern Pigs in a Blanket
Print Pin
4 from 1 vote

Southwestern Pigs in a Blanket

Your standard pigs-in-a-blanket are mighty good, but I felt that they needed a little ‘help’. So along came this great southwestern pigs in a blanket variation that gets devoured even faster! Get your big platter out, you’re going to need it!
Course Appetizer
Cuisine American
Keyword crescent rolls, sausage
Prep Time 15 minutes
Cook Time 15 minutes
Total Time 30 minutes
Servings 32
Calories 21kcal

Equipment

Ingredients

  • 2 tubes crescent roll dough
  • 8 slices pepper jack cheese cut into 32 squares
  • 1 small red bell pepper diced
  • 1 small green bell pepper diced
  • 1 14 ounce Hillshire Farm Lit'l Smokies
  • 1 cup Southwestern sauce

Instructions

  • Heat oven to 375 F.
  • Unroll the dough from the tubes and separate into 16 triangles. Cut each triangle lengthwise in half.
  • Add a small piece of cheese and top with some of the peppers.
  • Place the sausage at the end of each little triangle and roll up in the dough.
  • Place onto a baking sheet and bake 12-15 minutes or until golden brown.
  • Serve with Southwestern sauce.

Notes

Add a little diced jalapeno along with the bell peppers for a nice kick.

Nutrition

Calories: 21kcal | Carbohydrates: 1g | Protein: 1g | Fat: 2g | Saturated Fat: 1g | Cholesterol: 5mg | Sodium: 29mg | Potassium: 13mg | Fiber: 1g | Sugar: 1g | Vitamin A: 121IU | Vitamin C: 5mg | Calcium: 40mg | Iron: 1mg

Nutritional values are approximate.

Sale
Mueller Pro-Series All-in-One, 12 Blade Mandoline…
  • Meal Prep MVP – A practical and innovative way to…
  • 12 Diverse Blades – With nine interchangeable…
OXO Good Grips 4 Piece Stainless Steel Measuring…
  • Set includes: 1/4 cup, 1/3 cup, 1/2 cup and 1 cup
  • Magnetic handles keep Cups together for storage…

Red Velvet Rice Krispies Treats

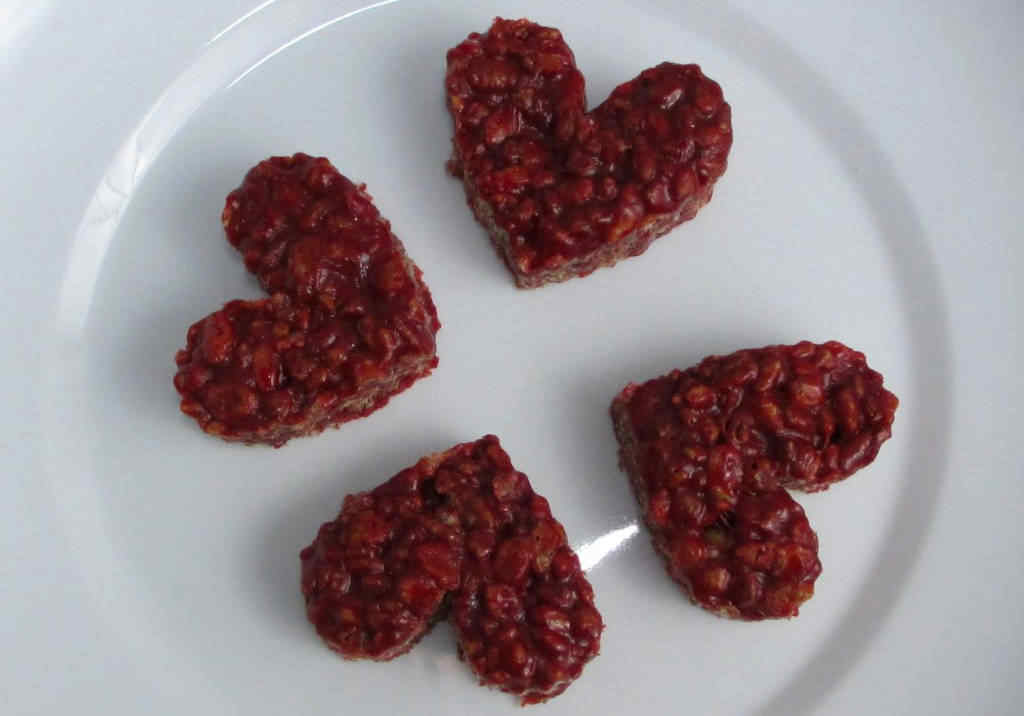
These red velvet Rice Krispies treats are as great tasting as they are great looking! They’re so very easy to make and made for a great Valentine’s Day snack. Nice and crunchy and sweet, with an amazing red velvet flavor. This was a big hit with my wife. How lucky am I?

Red Velvet Rice Krispies Treats

Treats For The Cook!

I made a batch of these Red Velvet Rice Krispies treats for my wife to take to work today. When you cut out the heart shapes you end up with little scraps, which are the perfect snack size! And by perfect snack size I mean great for me to eat while I cut them.

Sale
NutriChef Automatic Vacuum Air Sealing System for…
  • AUTOMATIC VACUUM FOOD SEALER WITH STARTER KIT…
  • DUAL DRY & MOIST MODES FOR EVERY FOOD TYPE…

I love making Rice Krispies treats with a twist. Also try my Shamrock Peeps Rice Krispies. My easy-to-make Rice Krispies with Peeps sryup are great too!

Red Velvet Rice Krispies Treats
Print Pin
5 from 1 vote

Red Velvet Rice Krispie Treats

These treats are as great tasting as they are great looking! They’re so very easy to make and made for a great Valentine’s day snack. Nice and crunchy and sweet, with an amazing red velvet flavor.
Course Dessert
Cuisine American
Keyword red velvet, Rice Krispie treats
Prep Time 5 minutes
Cook Time 30 minutes
Total Time 35 minutes
Servings 24
Calories 68kcal

Ingredients

Instructions

  • Spray a 9″ x 13″ pan with the non-stick spray. Also spray a spatula and the cookie cutter.
  • Melt the butter in a large saucepan or pot over medium heat.
  • Add in the marshmallows and stir until melted.
  • Stir in the cake mix. The mixture will get thicken as you stir.
  • Pour in the cereal and fold to combine well. The mixture will start to firm up, so work quickly but gently.
  • Pour mixture into the pan and spread out, flattening with the spatula.
  • Place in refrigerator for 15-30 minutes or until set.
  • Cut into hearts. I was able to get 24 hearts using a small Wilton heart cutter.
  • Because we were transporting them, I placed them on wax paper in Tupperware containers and refrigerated them until about 30 minutes before serving.

Notes

Store any leftovers in an air-tight container.

Nutrition

Calories: 68kcal | Carbohydrates: 1g | Protein: 1g | Fat: 8g | Saturated Fat: 5g | Trans Fat: 1g | Cholesterol: 20mg | Sodium: 1mg | Potassium: 2mg | Sugar: 1g | Vitamin A: 235IU | Calcium: 2mg | Iron: 1mg

Nutritional values are approximate.

Sale
Mueller Pro-Series All-in-One, 12 Blade Mandoline…
  • Meal Prep MVP – A practical and innovative way to…
  • 12 Diverse Blades – With nine interchangeable…
OXO Good Grips 4 Piece Stainless Steel Measuring…
  • Set includes: 1/4 cup, 1/3 cup, 1/2 cup and 1 cup
  • Magnetic handles keep Cups together for storage…

Homemade Jolly Rancher Lollipops

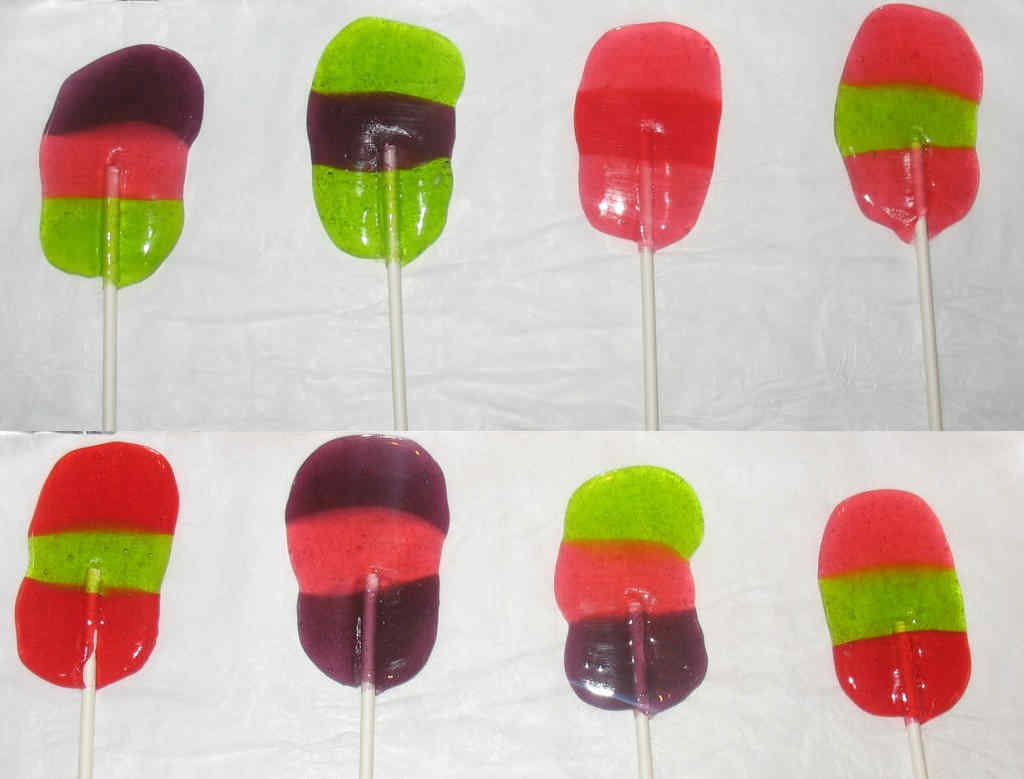
These homemade Jolly Rancher lollipops were so much fun to make, and even more fun to eat! I’ve made these several times for friends, neighbors and my wife’s co-workers. They are always a major hit. They’re just fun to eat. And there’s no denying that they are homemade. You can make whatever flavor combinations that you want. Heck, you can make them all one flavor if you want!

Homemade Jolly Rancher Lollipops

Work In Batches

The key to making these homemade Jolly Rancher lollipops is to not make too many at a time. They set up quickly. If you have too many of them they’ll cool before you can get the sticks in them. Then you’ll be in trouble. But hey, just stick them back into the oven for a bit to soften them up again.

Sale
NutriChef Automatic Vacuum Air Sealing System for…
  • AUTOMATIC VACUUM FOOD SEALER WITH STARTER KIT…
  • DUAL DRY & MOIST MODES FOR EVERY FOOD TYPE…

I also love making homemade Cheezit crackers and gummy bears!

Homemade Jolly Rancher Lollipops
Print Pin
5 from 1 vote

Homemade Jolly Rancher Lollipops

Fun to make and even more fun to eat!
Course Appetizer
Cuisine American
Cook Time 1 hour
Total Time 1 hour
Servings 20

Equipment

Ingredients

Instructions

  • Preheat your oven to 200 F.
  • Line a baking sheet with foil and then parchment paper.
  • Open the individual candies.
  • To make a lollipop, arrange 3 candies one after another on the parchment paper. Do this about 4 times on a single baking sheet. If you do too many they will set before you can get the sticks into them.
  • Bake for about 15 minutes. You’ll want to keep an eye on the first batch to get a feel for how long they take to melt in your oven. Remove them once they have melted together.
  • Take a lollipop stick and place it into the melted candy (don’t touch the candy with your fingers or you’ll get burned!) and twist it to coat it.
  • Repeat for the remaining candies.
  • Let cool before serving.

Notes

The melted candies are quite hot when they come out of the oven. Do not touch it with your fingers.

Nutritional values are approximate.

Sale
Mueller Pro-Series All-in-One, 12 Blade Mandoline…
  • Meal Prep MVP – A practical and innovative way to…
  • 12 Diverse Blades – With nine interchangeable…
OXO Good Grips 4 Piece Stainless Steel Measuring…
  • Set includes: 1/4 cup, 1/3 cup, 1/2 cup and 1 cup
  • Magnetic handles keep Cups together for storage…

Homemade Cinnamon Brown Sugar Pop Tarts

These homemade cinnamon brown sugar Pop Tarts were incredible! And they were so easy to make! They taste just like Pop Tarts. I was so impressed I think I giggled in-between bites. I loved and I do mean LOVED cinnamon Pop Tarts as a kid! Sadly, I could devour a box in no time (assuming Mom wasn’t watching). Just give me some Pop Tarts and a glass of cold milk for dunking and I was one happy boy!

Homemade Cinnamon Brown Sugar Pop Tarts

The Perfect Crusts

The crusts on these homemade cinnamon brown sugar pop tarts were flaky and light. The filling is oh-so-yummy! These are the perfect milk-dunking pop tarts! As a kid I would often eat the crunchy crusts first. I’d save the soft, warm, delicious middles for last.

Sale
NutriChef Automatic Vacuum Air Sealing System for…
  • AUTOMATIC VACUUM FOOD SEALER WITH STARTER KIT…
  • DUAL DRY & MOIST MODES FOR EVERY FOOD TYPE…

Also try my mini cinnamon rolls.

Homemade Cinnamon Brown Sugar Pop Tarts
Print Pin
5 from 1 vote

Homemade Cinnamon Brown Sugar Pop Tarts

My childhood favorite is back and it's homemade!
Course Breakfast
Cuisine American
Keyword homemade, pop tarts
Prep Time 15 minutes
Cook Time 25 minutes
Total Time 40 minutes
Servings 12
Calories 409kcal

Ingredients

For the filling

For the glaze

Instructions

  • Preheat oven to 350 F.
  • Lightly dust a work surface with flour.
  • Working one sheet at a time, roll out the pie crusts to about a 1/8″ thickness and cut into 3″ x 4″ rectangles. You should get 6 rectangles out of each dough roll.
  • Place 12 of the dough rectangles onto baking sheets. These will be the bottoms of the tarts.
  • Beat the egg with 1 tablespoon water and brush onto the crusts.
  • Make the filling by combining all ingredients and place 1 heaping tablespoon onto the center of each tart bottom. Do not get the filing within 1/4″ of the edges of the dough.
  • Place the remaining dough rectangles on top of the bottoms and press down along the edges with your fingers to seal.
  • Use a fork to then crimp the edges.
  • Brush tops with egg wash.
  • Bake 20-25 minutes or until golden brown.
  • Remove from oven and let cool completely.
  • Make the icing by combining all the of ingredients, beating with a fork. Add more milk if the mixture is too thick, but don’t add too much or it’ll be too thin.
  • Brush icing on top of tarts.
  • Serve hot.

Notes

You can freeze these and drop them in the toaster or toaster oven to reheat.

Nutrition

Calories: 409kcal | Carbohydrates: 53g | Protein: 5g | Fat: 20g | Saturated Fat: 6g | Trans Fat: 1g | Cholesterol: 16mg | Sodium: 309mg | Potassium: 93mg | Fiber: 2g | Sugar: 16g | Vitamin A: 26IU | Vitamin C: 1mg | Calcium: 30mg | Iron: 2mg

Nutritional values are approximate.

Sale
Mueller Pro-Series All-in-One, 12 Blade Mandoline…
  • Meal Prep MVP – A practical and innovative way to…
  • 12 Diverse Blades – With nine interchangeable…
OXO Good Grips 4 Piece Stainless Steel Measuring…
  • Set includes: 1/4 cup, 1/3 cup, 1/2 cup and 1 cup
  • Magnetic handles keep Cups together for storage…