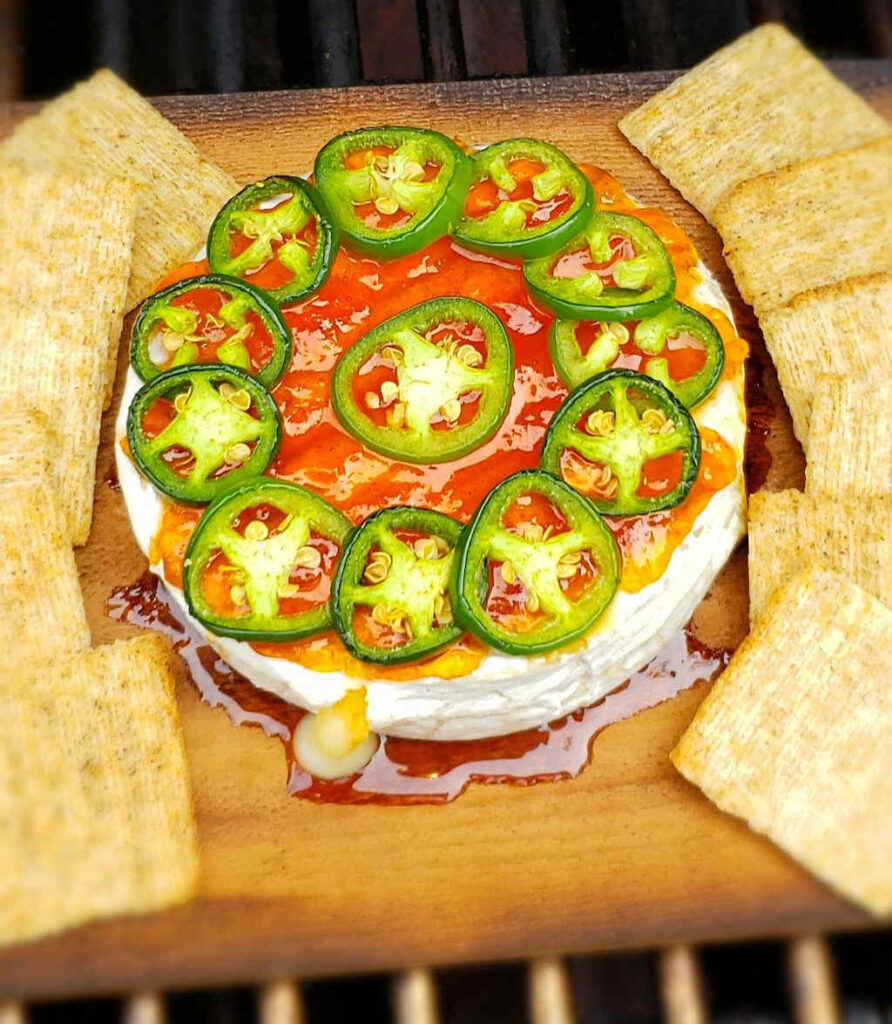
Disappeared. Like that. Plank-smoked Camembert is creamy, lightly smoky, and just incredibly delicious. Oh, and it has just a little kick. Don’t be afraid of it. That little heat offsets the sweetness perfectly. You won’t be able to get enough. I couldn’t. This is one of the best uses of a cedar plank ever!
Try It Other Ways, Too
I could easily see making several variations on this plank-smoked Camembert for a party. You have to make this recipe as-is, for sure. Then maybe try a few different jellies. Try a few without jalapenos. Or try it with more jalapenos! Mix it up. They’re super easy to make, they look absolutely amazing, and they taste fantastic. You can put several on a single cedar plank, and make a cheese buffet!
Don’t buy any el cheapo cedar planks for this or any other dish. Get the good stuff and you won’t ever look back. Cheap planks split, warm and have splinters. Good planks are thicker, stay flat and have smoother edges.

You’ll also love plank-smoked Twinkies and my cedar-planked Bloomin’ Onions. Cedar planks add a little something to just about anything you would normally grill on a grates, so don’t be afraid to cook on them instead!
Plank-Smoked Camembert
Equipment
Ingredients
- 8 ounces Camembert cheese
- 3 tablespoons jalapeno pepper jelly
- 1 large jalapeno pepper sliced thin
- Crackers for serving
Instructions
- Fire up your grill for direct and indirect cooking.
- Place the cedar plank over direct heat and grill until it is singed.
- Flip and singe the other side.
- Remove and let cool slightly.
- Unwrap the cheese and place in the center of the plank.
- Top with the jelly, spreading it out over the top.
- Add the jalapeno slices.
- Return the plank to the grill, this time over indirect heat.
- Grill until the cheese is starting to melt, 8-10 minutes.
- Remove the plank from the grill.
- Serve with crackers.
Notes
Nutrition
Nutritional values are approximate.