Visit my other site, For The Wing, for all things chicken-wing!
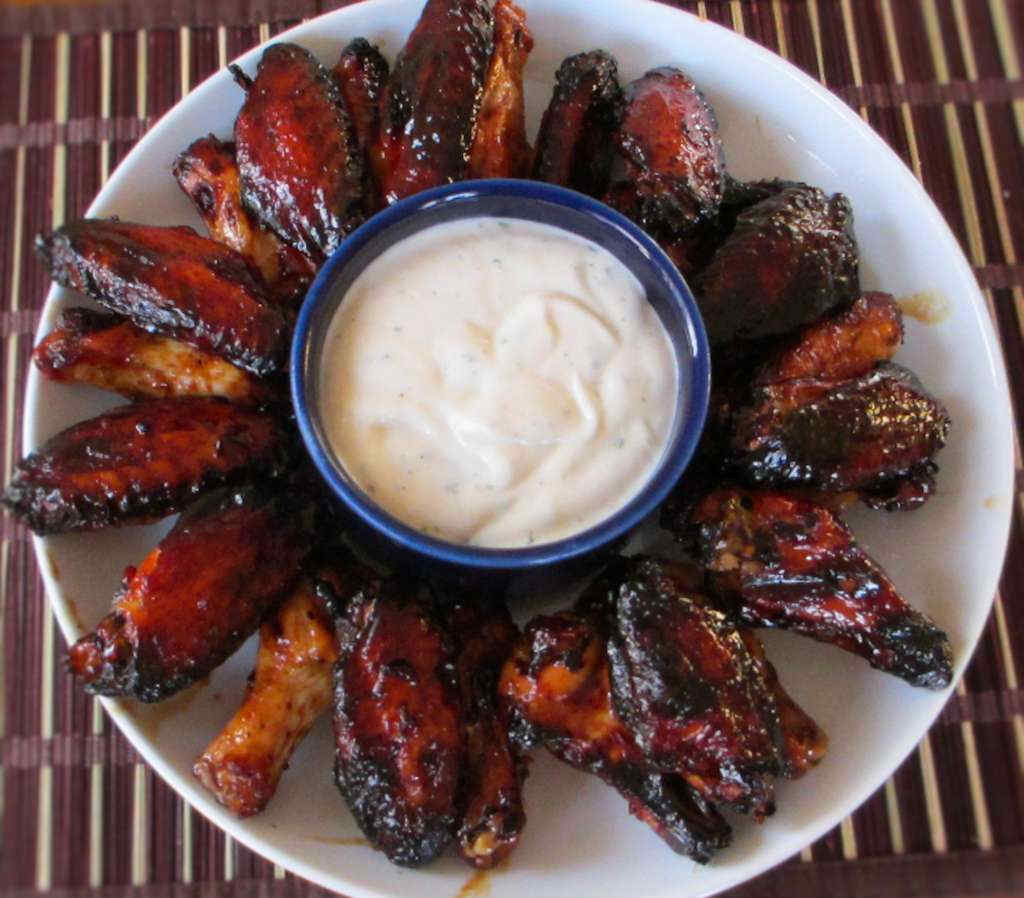
Like our other favorite version of teriyaki wings, our deluxe Teriyaki wings disappeared in no time at all. The sauce is a little sweet and sticky yummy. If I’m in a spicy-wings mood I add a bit of red pepper flake to the sauce. If i’m in a very-spicy-wings mood I’ll add hot sauce, Sriracha or hot chili paste.
I cook my wings on my Char-Broil The Big Easy TRU-Infrared Oil-less Turkey Fryer using the Wingin’ator 3000 modification, but you can grill them or cook them in the oven and they’ll come out just fine.
This teriyaki sauce is a little sweet and sticky yummy. If I’m in a spicy-wings mood I add a bit of red pepper flake to the sauce. If I’m in a very-spicy-wings mood I’ll add hot sauce, Sriracha or hot chili paste.
Visit my other site, For The Wing, for all things chicken-wing!
This Teriyaki wing sauce is a great dipping sauce for chicken wings. Or toss your wings in the sauce just before serving. This is a slightly sweeter sauce than our other Teriyaki sauce. For some kick, add some red pepper flake. Or for more heat, add Sriracha or hot chili sauce.
Click here to see the fantastic chicken wings we made using this Teriyaki wing sauce. I cook a LOT of different flavors of chicken wings, from Asian-inspired, to southwestern.
This is the world’s easiest take on a stromboli. In a little over an hour you’ll be enjoying 2 large stromboli. They’re stuffed with all of your favorite flavors. From onions and peppers to pepperoni and olives and of course, lots of cheese. You can make the stuffing ahead of time, too. And the leftovers (if you actually have any) keep well and make for a great, easy lunch.
Don’t Go Crazy Stuffing Them
You can add just about anything to the stuffing, but don’t add so much that it becomes difficult to roll. Trust me, I’ve learned this the hard way. More is NOT better. Your dough might tear and that is a bad thing. Keep your stromboli simple and they’ll come out fantastic!
This is the world’s easiest take on a stromboli. In a little over an hour you’ll be enjoying 2 large stromboli stuffed with all of your favorite flavors, from onions and peppers to pepperoni and olives and of course, lots of cheese.
Crumble the sausage into a large skillet over medium-high heat. Lightly brown. Remove to a large bowl.
Add the onion and peppers to the skillet and saute until they just start to soften.
Add in the garlic and Italian seasoning. Stir. Add to bowl.
Add the ham, pepperoni and olives to the bowl and stir to combine.
Lightly flour a work surface. Roll out one tube of crust until it is about 10″ x 14″.
Top flour with half of the toppings, leaving a 1″ border around the edges.
Sprinkle with half of the cheese.
Whisk together the egg and one tablespoon of warm water in a cup or small bowl. Brush onto edges of the dough.
Beginning along the long edge, roll up the dough to form a log. Pinch in the edges and seems. Transfer to a large baking pan that has been sprayed with non-stick spray.
Repeat with other tube of dough and remaining toppings.
Preheat oven to 375 F. Let stromboli rest while the oven heats.
Bake 20-30 minutes or until the tops get golden brown.
Let rest 10 minutes before slicing and serving.
Notes
Add some chopped pepperoni to the filling for more yummy greatness!
It might seem a bit unusual to add Fritos to a great corn salad. But trust me, chili cheese-flavored Fritos add a great flavor (and crunch) to this dish. Don’t worry if you only have ‘regular’ Fritos on hand. They work great too, just add a pinch of cayenne or chili powder to add some kick. You’ll be making this chili cheese Frito salad again and again. The crunch from the chips, onion and peppers offset the sweet creaminess of the corn.
Great Sweet Corn Makes For A Great Salad
I used corn from My Dad’s Sweet Corn, located just north of Indianapolis in Tipton, Indiana. They have outstandingly good sweet corn which can be found at most of the farmer’s markets around Indianapolis. Using great fresh sweet corn makes a different when you make this chili cheese Frito salad.
It might seem a bit unusual to add Fritos to a great corn salad, but trust me, chili cheese-flavored Fritos add a great flavor (and crunch) to this dish.
I make some great homemade meatballs if I do say so myself. Creole meatballs and Greek meatballs are some of our favorites, among others! Sometimes I’m in a rush. And sometimes I don’t have a bunch of homemade meatballs in the freezer. That’s when I reach for a bag of the new Johnsonville meatballs. They’re mighty tasty, that’s for sure. And they make great meatball sliders. They’re kind of like pigs-in-a-blanket and kind of like sliders. So they’re both!
The Best Party Food
These meatball sliders disappeared in no time while we were watching football last weekend. They’re the perfect party food. For something a little more substantial, make my spicy grilled meatball sandwiches.
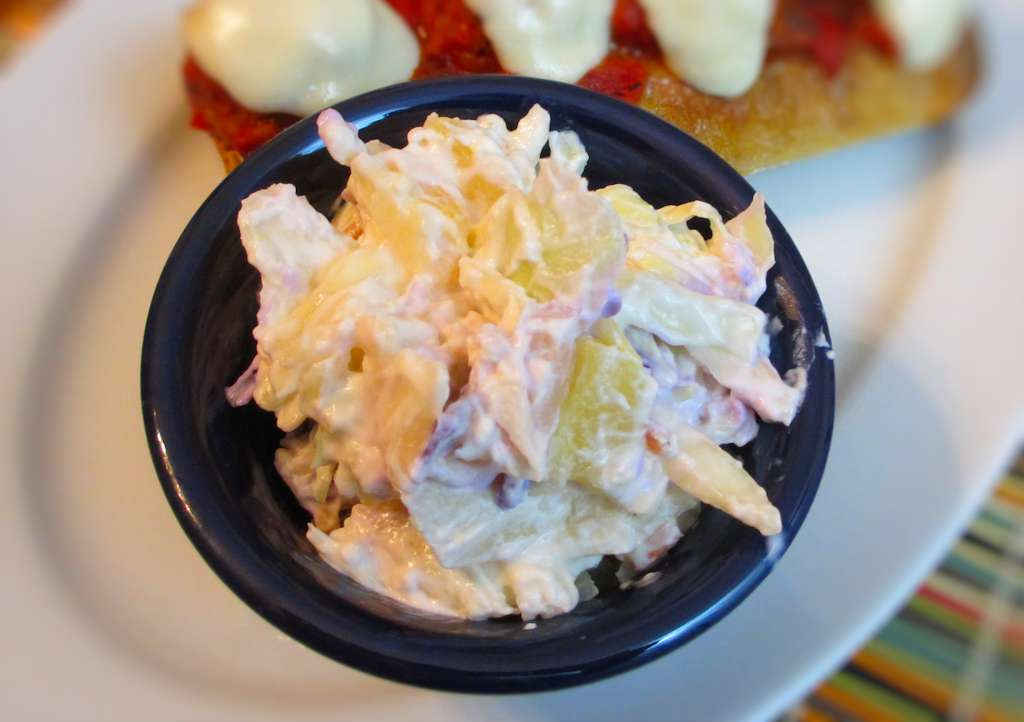
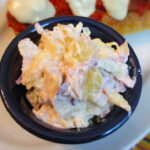
I absolutely love the contrast between the sweet pineapple and the bite of the lemon and onion in this Pineapple King coleslaw. The crunch of the cabbage and the creaminess of the mayonnaise really rocks this slaw, too. But it’s the explosion of flavor from the pineapple that really wins me over every time.
The Perfect Summer Side
This simple classic salad was a great side for our meatball sandwiches. The sweetness is a welcomed surprise. The pineapple King coleslaw is still light enough to not overwhelm. I’ve seen variations where people have substituted mandarin orange wedges. That seems like an interesting variation that would be worth a try!
I almost always use Blue Plate mayonnaise in the dishes I make. I think it is the best around. If you can’t find it locally you can pick it up online for a fair price.
I absolutely love the contrast between the sweet pineapple and the bite of the lemon and onion in this Pineapple King coleslaw. The crunch of the cabbage and the creaminess of the mayonnaise really rocks this slaw, too.
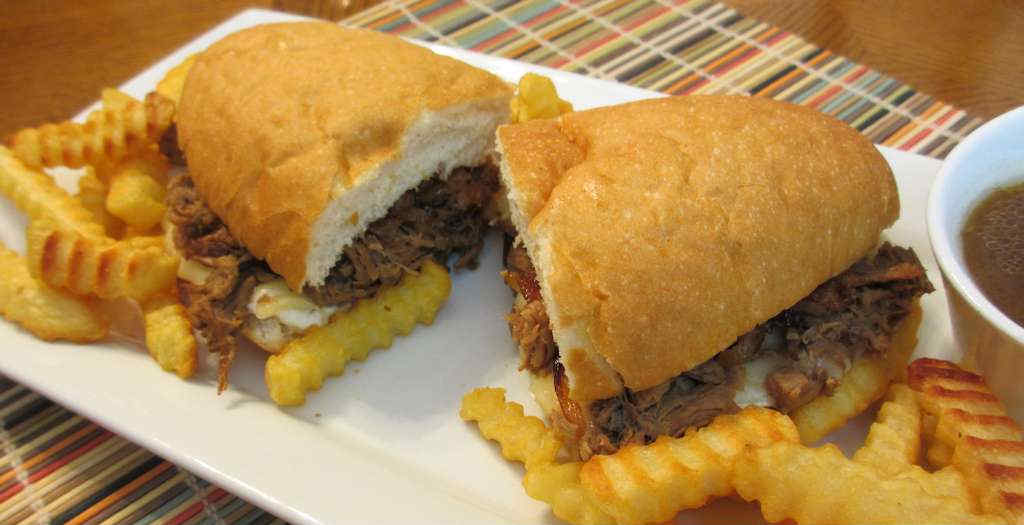
I recently made a yummy pot roast sandwich. As soon as we finished off all of the pot roast I was already jonesin’ for more. Instead of making the same thing again, I made kicked up French dip sandwiches. What’s great about them? The addition of a tasty creamy horseradish sauce and caramelized onions. The result was over-the-top good. Super tender meat with great beefy flavor, wonderful onions, and a horseradish kick to boot.
A Better French Dip
I used to make more ‘normal’ French dip sandwiches. You know, thin sliced beef with an au jus for dipping. Not ‘kicked up French dip sandwiches’, but still good stuff. But now I’m addicted to shredded beef dip sandwiches with a wonderful horseradish sauce and caramelized onions.
I got the inspiration from my pot roast sandwich, which is actually my take on the same sandwich from the Hobnob Corner Restaurant in Nashville, Indiana. Their tremendously tender super-flavorful beef sandwiches are a big favorite of mine anytime I’m in town.
I used to make more ‘normal’ French dip sandwiches. You know, thin sliced beef with an au jus for dipping. Good stuff. But now I’m addicted to shredded beef dip sandwiches with a wonderful horseradish sauce and caramelized onions.
Boy, oh, boy, I’m not sure how to even describe these little tasty treats. Sure, they’re chocolatey, and peanut buttery, and crunchy, and sweet. The first time you bite into one of these muddy buddies your eyes will get big and you’ll grin from ear to ear. Caution: You’ll want to eat these with someone else in the room to help you stop or they’ll all disappear. My wife took a batch of these to work and they were gobbled up very quickly.
The Snack You Can’t Stop Eating
I’ve never had chocolate Chex before. They’re mighty good! And even better when coated in chocolate and peanut butter! These muddy buddies ROCK! They are easily one of the tastiest, most addicting treats I’ve had or made!
Melt and combine the chocolate chips, peanut butter and butter in a double boiler. You can also microwave them, in 30 second intervals, stirring often. I prefer a double boiler, I just find it easier to melt everything without over doing it.
Pour melted mixture over the cereal and fold gently to coat the cereal.
Sprinkle the cereal with the sugar.
Seal the bowl and gently shake and roll the bowl around to coat all of the cereal.
Place a large piece of wax paper on your countertop.
Pour the cereal onto the paper, spreading it out evenly.
Let cereal cool completely before serving.
Notes
Store leftovers in the fridge but use within a few days.
How long had it been since I’d had a real, old-fashioned malted milkshake? Years and years, for sure. What in the world was I waiting for? (And no, milkshakes aren’t just for summer!)
This old-fashioned shake took only minutes to make. I savored it as long as I possibly could. Although I drank (ate?) mostly milkshakes as a kid, malteds are soooo much better. Its like eating a handful of Whopper’s while enjoying a cool shake at the same time.
Sippin’ Down Memory Lane
I love making and drinking milkshakes like this old-fashioned malted milkshake. They remind me of my days as a kid when I could drink as many of them as I could find. I have to exercise a bit more control now, but I still enjoy them.
1 ½teaspoonsextract or syrups, to taste (see note)
Real whipped cream and cherries for garnish
Instructions
Chill a large soda glass while making the shake.
Let ice cream soften slightly.
Put the ingredients into a blender. Puree until smooth. Add more milk if the mixture is too thick. If it gets too thin, add a bit more ice cream.
Serve in the chilled tall glass, topped with whipped cream and cherries.
Notes
Depending on what flavor ice cream you’re using, add vanilla extract, cherry extract, etc. For chocolate you can just add a few squirts of chocolate syrup. If you don’t have any extract or syrup on hand, don’t worry. The shakes will still turn out great!
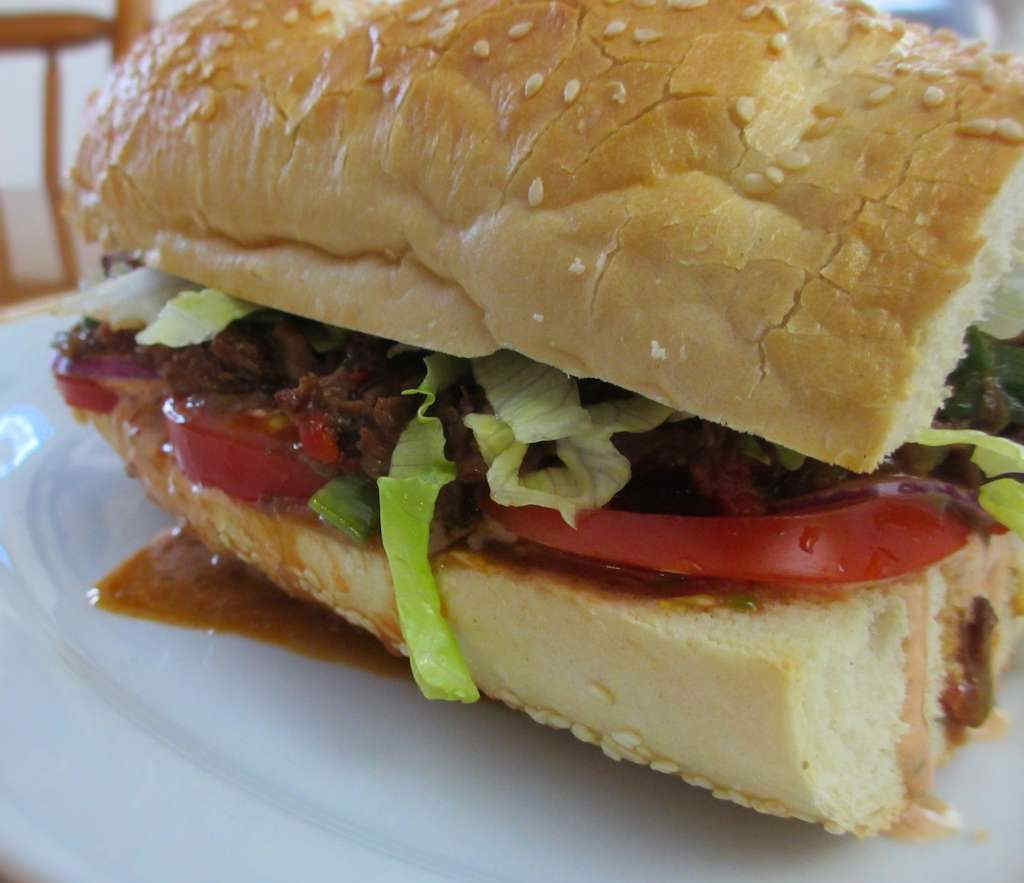
This Creole beef debris po boy came out absolutely outstandingly good. The meat is fall-apart tender with a deep beefy flavor that is boosted by a simple roux. The beef takes a while to cook, but it is oh so worth it, and as an added bonus, your house will smell terrific while it is cooking!
Pot Roast On A Bun
This is the perfect cold-weather recipe. You’re rewarded in the end with the best sandwich meat you can find. Yeah, you could eat it more like a pot roast, but for me, the real winner is a po boy. I just cannot get enough of that great flavor and the delicious juice-soaked bread. It makes for a messy sandwich, and messy is always good!
I served the Creole beef debris po boy on toasted bread, topped with Chez John’sKaw-Cajun Comeback sauce. It was a dripping, messy, fantastic sandwich. Remember my rule: the messier, the better and this sandwich is absolutely perfect. Like my Drunken Cajun chicken po boy.
This Creole beef debris po boy came out absolutely outstandingly good. The meat is fall-apart tender with a deep beefy flavor that is boosted by a simple roux.
Warm all of the beef broth in a pot over low heat.
Heat 1/2 cup of the oil in a large Dutch oven over medium heat.
Sprinkle the oil with flour and whisk continuously, 15-20 minutes or until the roux has turned the color of chocolate.
Slowly whisk in 6 cups of beef broth. Bring to a boil then reduce to a simmer and let simmer 5 minutes.
Strain roux through a wire-mesh strainer and reserve.
Wipe out the Dutch oven. Add remaining 1/2 cup of oil over medium-high heat.
Working in batches, sprinkle chuck with Creole seasoning and sear until brown. Remove to a bowl or large plate.
Add the onions to the Dutch oven along with 1 cup of water. Saute 12 minutes, stirring often.
Add the pepper, celery and garlic.Saute 5 minutes.
Add the tomato paste and hot sauce, if desired, and saute 3 minutes.
Add remaining 2 cups of beef broth and stir, simmering, for 5 minutes.
Add meat to pot.
Add the roux mixture.
Stir gently. Add water, if needed, to completely cover the meat.
Cover the Dutch oven and bake for 20 minutes. Note: If your Dutch oven lid doesn’t fit tightly, cover the pot with a piece of aluminum foil and then add the lid.
Reduce heat to 200 F and bake for 8 hours.
Remove from oven. Skim off any fat on the top.
Remove beef to a cutting board, let cool slightly, and shred.
Bring gravy mixture to a boil and simmer for 20 minutes, stirring often, until thickened.
Add the meat back along with the green onions.
Stir and serve.
For the po’boys
Lightly toast the bread, if desired.
Slather the bread halves with the Comeback sauce. Don’t be shy with it.
Add meat, tomatoes, lettuce and onions.Cut each loaf into 3 sandwiches.
Serve with lots of paper towels.
Notes
I also love these sandwiches made with mayonnaise instead of the comeback sauce.