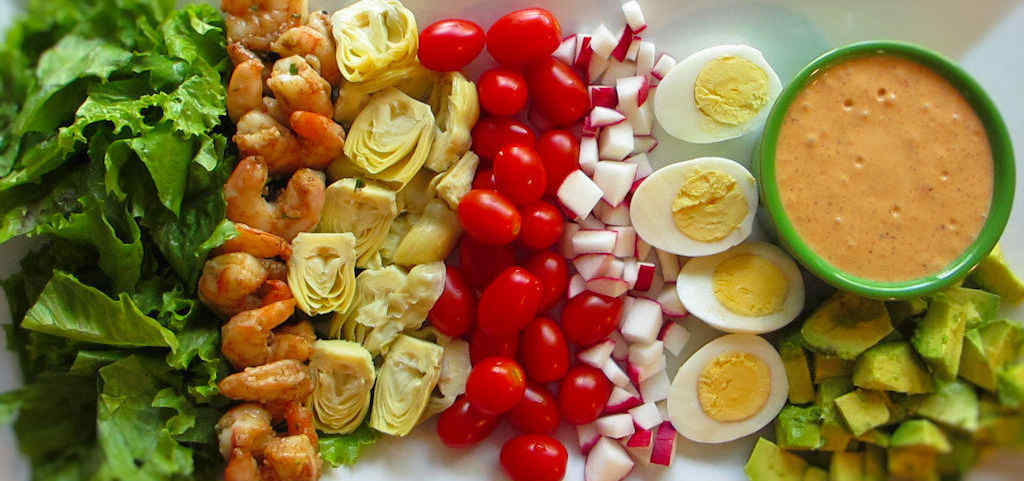
Farm-fresh vegetables and fruits scream Cobb salad to me. Add a few smoked shrimp and a great (spicy!) creamy dressing and I’m a happy guy. Any toppings will do, and the more variety, the better. You can make a smoked shrimp Cobb salad any way you want to suit your tastes. Just don’t forget the star of the show, the smoked shrimp!
This Is Not A Boring Salad
The spicy shrimp and cool, but still spicy dressing really go well with the coolness of the vegetables. And the pop of the cherry tomatoes. There’s no point in having a boring smoked shrimp Cobb salad.
I think artichoke hearts (and hearts of palm for that matter) should be a required ingredient in every Cobb salad. And shrimp. The shrimp don’t have to be smoked, of course, but that smoky flavor really changes up a salad.
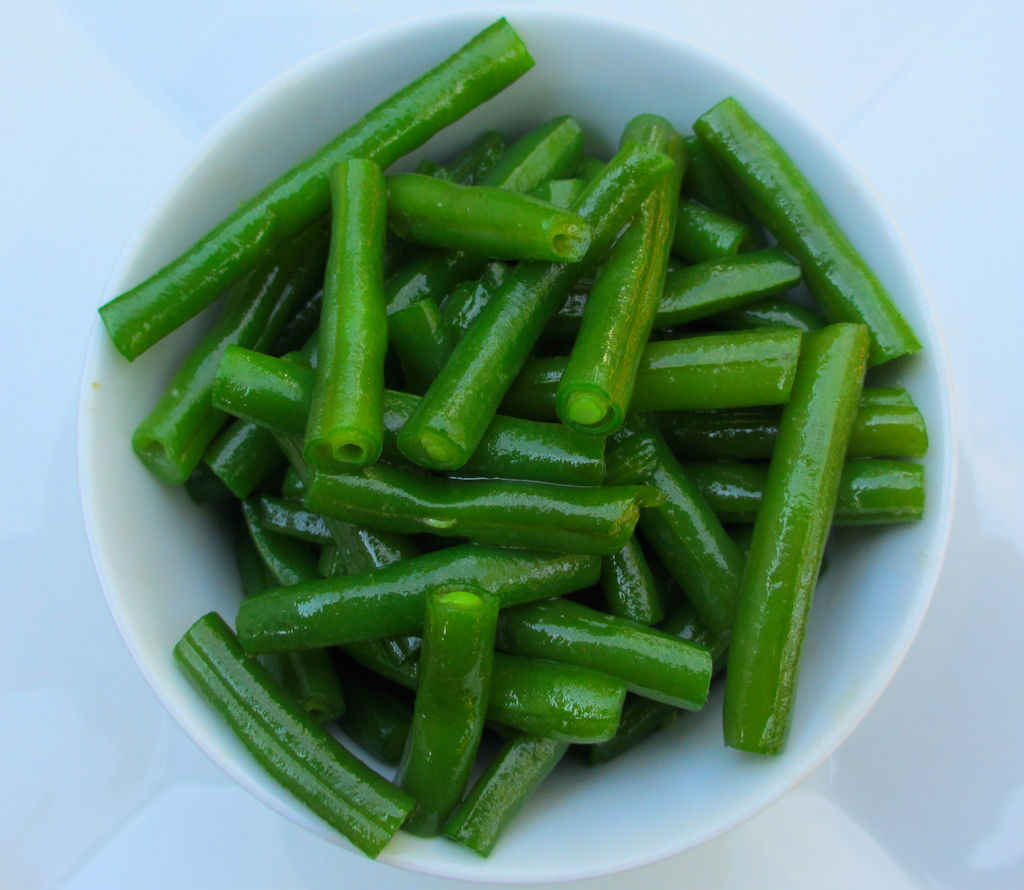
Green beans are in season, which means I usually grab a pound or so every few days at the grocery store. Although I often grill my green beans if I’m already outside grilling, this copycat Outback Steakhouse green bean recipe is a big favorite of ours. The beans take only a few minutes to make.
Add Some Orange Things
You can also add carrots to these copycat Outback Steakhouse green beans for a great twist on the restaurant classic. Just peel a few carrots and slice them thin. Put them into the boiling water for a minute or two before adding the beans so they all come out done and tender at the same time. You want the ‘bite’ to be the same between them.
I actually use my good ole trusty Dutch oven to make these beans. I was able to make the entire thing in a single pot. It’s nice and big and sturdy. That extra weight helps it maintain and distribute heat perfectly. As an added bonus, it’s actually pretty easy to clean up too!
For another variation, and one with a little kick, toss in a few pinches (or more) of dried red pepper flake when you saute the beans. Also try my awesome green bean recipe.
Although I often grill my green beans if I’m already outside grilling, this copycat Outback Steakhouse green bean recipe is a big favorite of ours. The beans take only a few minutes to make.
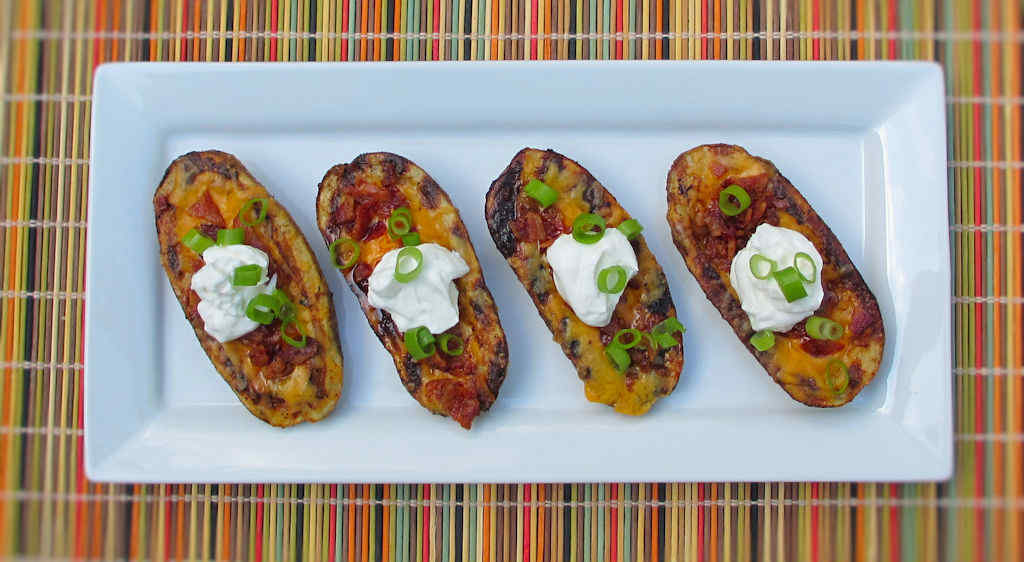
I am kind of addicted to these grilled potato skins. I’ve always loved potato skins, but I admit, I don’t think about them enough to really make them that often. Until now, when I decided to start making them on the grill (a Weber grill, in this case!). They’re one of the easiest appetizers (or side dishes) you can make, and they’re super tasty. I finish mine off with traditional toppings: cheese, sour cream, green onion and crumbled bacon.
Its The Chipotle Butter…
But there’s a bit of a twist. The potatoes are brushed with a great chipotle butter that gives them a bit more smokiness and just a little heat. It’s what makes them stand above the normal crowd of potato skins.
I recommend that you use a grill basket when making potato skins. It makes cooking easier and you don’t have to worry about anything falling through the grates. And cleanup is easier too!
I am kind of addicted to these grilled potato skins. I’ve always loved potato skins, but I admit, I don’t think about them enough to really make them that often. Until now, when I decided to start making them on the grill.
Cut each potato lengthwise into four wedges. Don’t make the wedges too thick. If you are using very large potatoes you might have a center portion leftover for other uses.
Using a spoon or melon baller, scrape out the potato insides, leaving 1/4″ or so left.
Place on a microwave safe plate and microwave on high for 6-10 minutes or until tender.
Fire up your grill for direct and indirect cooking.
Combine the butter and chipotle powder and brush on all sides of the potatoes.
Grill the potatoes, cut side down, over medium heat for 2-3 minutes or until they start to char.
Turn potatoes over and top with cheese.
Grill another 2 minutes or until the cheese is melted.
Serve topped with the bacon, green onions, and sour cream as desired.
Notes
Try to make your potato wedges all the same size so they cook at the same rate.
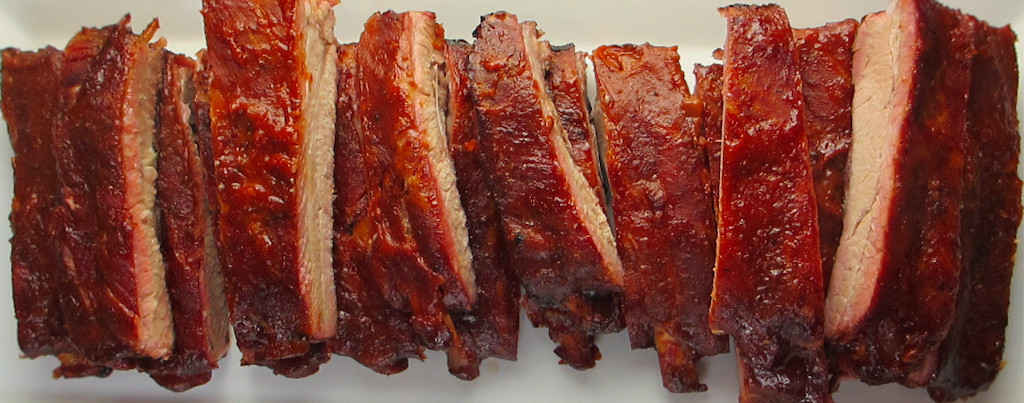
Three of my favorite things on one plate. First, smoked 3-2-1 St. Louis-style ribs. Sauced with a BBQ sauce that combines two of my other favorites: strawberries and chipotles. That great sweet berry flavor with a hint of smoky spiciness. Strawberries are in season here, and I just love using them in everything from a strawberry poppy seed salad dressing to this BBQ sauce. The strawberry flavor isn’t strong, it’s there enough for you to notice. Same goes for the chipotle. You get the smoky and you get the kick. But both are nicely balanced and not overwhelming.
A Totally Different BBQ Sauce
I cannot wait to use this strawberry chipotle BBQ sauce on smoked pulled pork. Though I think the sauce would be great on anything smoked or grilled, I feel nothing can touch its greatness on pork. There’s something about strawberry and pork. Delicious! This is a really great twist on a traditional BBQ sauce!
The strawberry flavor isn’t strong, it’s there enough for you to notice. Same goes for the chipotle. You get the smoky, you get the kick, but it’s nice and not overwhelming.
Note: This recipe was developed using the Char-Broil Big Easy Oil-Less Fryer. If you are cooking using the Char-Broil Smoker-Roaster Grill you should cook with the lid open and the temperature set to High. You might also need to adjust the cooking time.
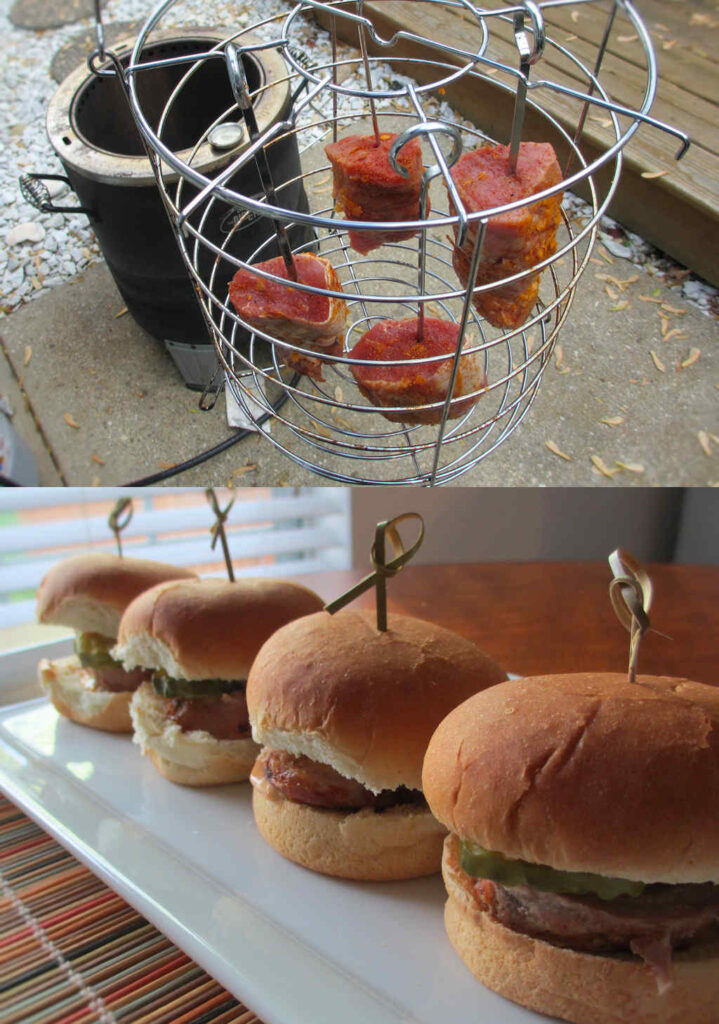
Well, heck yeah! If you follow this blog you know I’m a huge fan of the Char-Broil Big Easy. I’m not afraid to cook anything on it, from chicken to crab. But never pork tenderloin until now. And wow, what a great job my Big Easy did (again!)! I injected the pork tenderloin with a simple Cajun butter mixture (you could use store-bought), let it get happy in the fridge for a bit, then skewered it using one of the kabob add-ons (see my Char-Broil Big Easy Add-On page) and cooked it up. In no time (really) I had a perfectly cooked Cajun pork tenderloin, all ready for slicing and eating on sliders.
Go Tenderloin, Not Loin
I prefer pork tenderloin pork loin 9 times out of 10. It’s more tender and flavorful. It’s the pork equivalent of a beef tenderloin, so you know it’s the best. Like most cuts of pork it needs a little flavor boost, but I don’t go crazy with it.
Feed A Crowd
You’ll see that I had no problem fitting two 1 1/2 pound pork tenderloins into the Big Easy. I did have to cut them in half, but it was close… I probably could’ve made them fit without cutting. That means I could probably easily fit 4 (or maybe even 6) tenderloins on the Big Easy at once… enough for a crowd and then some! Note that you might want to trim the ends just a bit if they are much thinner than the rest of the tenderloin or they will be done cooking well before the rest of the meat.
Well, heck yeah! If you follow this blog you know I’m a huge fan of the Char-Broil Big Easy. I’m not afraid to cook anything on it, from chicken to crab. But never pork tenderloin until now.
If you follow this blog you know that I’m a lover of all things Buffalo-wing-flavored. From wraps to pizza to cauliflower. And of course, chicken wings! I’m not picky as long as it has that great vinegary heat with a hint of butter. So why wouldn’t I make Buffalo wing hummus? Yep, smooth hummus with that sneak-up-on-you spicy classic flavor. Perfect and as an added bonus it was a big hit at our last family get-together. As much as I liked it, I can’t say I was expecting such high praise for it! It was a happy day for sure!
A Different Tasting Hummus
There’s nothing wrong with dipping pita bread in this Buffalo wing hummus, but since there’s wing flavors in there, don’t forget to have some celery and carrot sticks around too. Just to keep it ‘classic’.
It’s up to you to decide how chunky or creamy you want your hummus to be. If this is your first time making it I suggest that you start out slow. Process it in your food processor just a bit and take a taste. Want it creamer? Keep going. Error on the side of caution, though. You can’t un-process it!
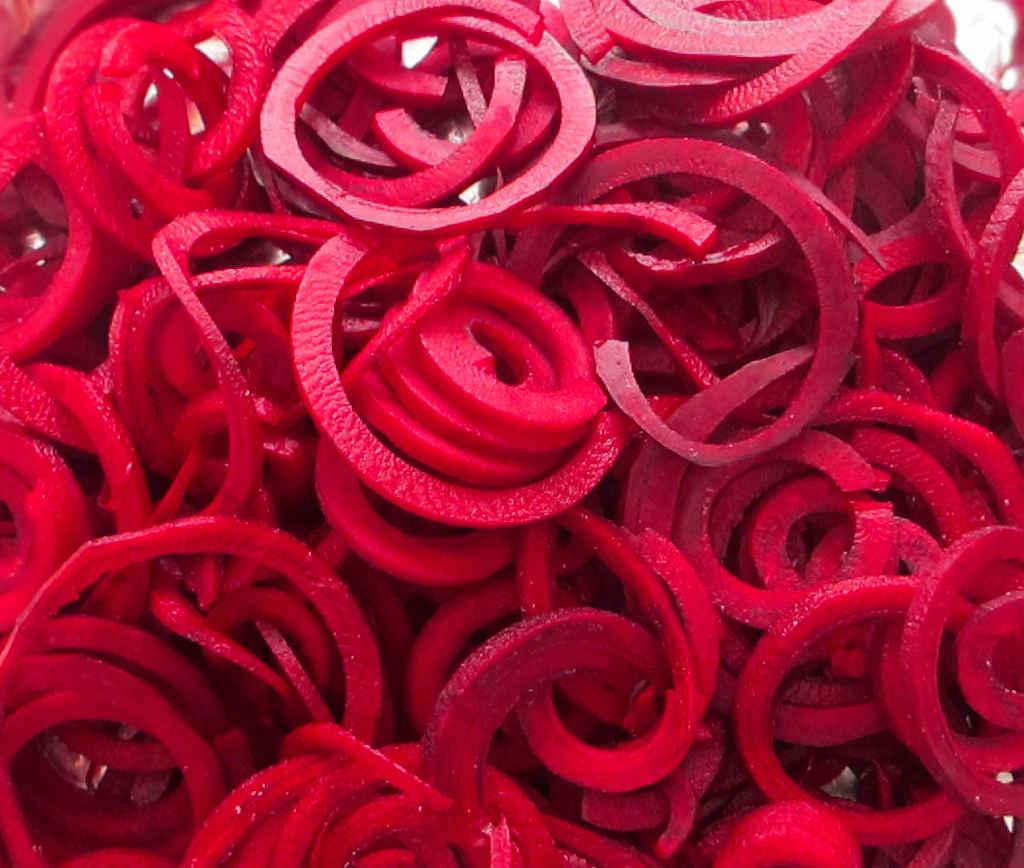
If you would’ve put beets in front of me when I was a kid I would’ve said “Ewwwww”. Then I would’ve pushed them away. And I’d make a face. Now, I find that I really like them, especially when roasted. Or pickled. Or even better, spiralized, roasted, and pickled! The aroma as the beets roast is fantastic. Spiralized roasted pickled beets are amazing. These are not the beets my mom tried to serve me when I was a kid. Sorry, Mom. These are way, way better!
Different And Very Delicious
The shallots and rosemary combine with the beets for something really special. They then go into jars with a brine, but not a normal pickling brine. The addition of red onions and tarragon add so much to the beets. Even beet haters will love them!
Make sure you wear kitchen gloves when handling the beets, and clean your spiralizer (and cutting board) immediately after using them. Roasted spiralized pickled beets can be messy.
I also learned quickly that you want to use beets with a little ‘give’ to them – not too hard. A few that I grabbed were hard to spiralize, and I ended up turning them by hand instead of using the crank. No worries, they still came out fantastic! Lesson learned!
If you would’ve put beets in front of me when I was a kid I would’ve said “Ewwwww” and pushed them away. Now, I find that I really like them, specially when roasted. Or pickled. Or even better, spiralized, roasted, and pickled! The aroma as the beets roast is fantastic. Spiralized roasted pickled beets are amazing.
Course Side
Cuisine American
Keyword beets, roasted
Prep Time 15 minutesminutes
Cook Time 3 daysdays2 hourshours
Total Time 3 daysdays2 hourshours15 minutesminutes
Note: I like to cut a small slit down the sides of the beets. This produces a single half moon spiral.
Spiralize the beets. Tougher beets can be difficult to spiralize. Make sure you put the root side into the spiralizer first and have the stem side towards the crank.
Wash your spiralizer to keep it from staining.
Place beets onto a large piece of foil.
Top with the shallots, sprinkle with rosemary, and drizzle with oil.
Seal the foil tightly and place into the oven for 30-40 minutes or until tender but not mushy. Be careful opening the packet as the steam will be hot.
Let cool completely before pickling.
For the picking brine
Bring vinegar, tarragon, salt, sugar and water to a boil in a medium saucepan.
Stir until the sugar is dissolved.
Remove from heat and let cool completely.
Alternative beets and onions in jars.
Pour in the brine.
Add more water if necessary to completely cover the beets.
Seal and store in the refrigerator for at least 3 days before serving.
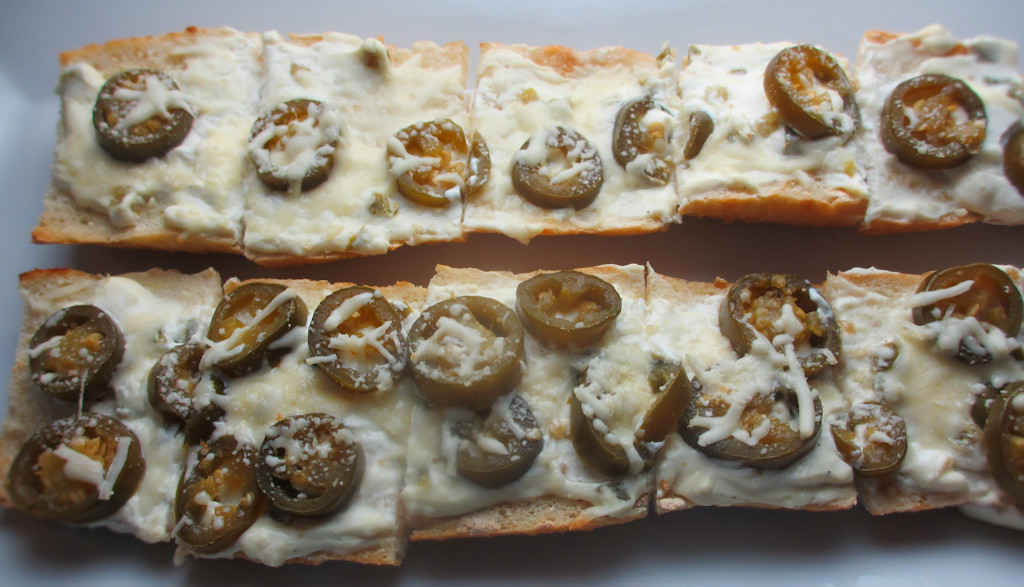
I love jalapeno poppers. Jalapenos stuffed with cream cheese are a great thing. The peppers mellow a bit. The creamy cheese cools the heat a bit. So, why not put those same great tastes together and make a jalapeno popper cheesy garlic bread? Yes, why not! Because we’re all tired of the standard garlic cheese bread. I mean hey, it’s good, but it needs some kick!
More Jalapenos. Or Less.
I made two ‘versions’ of this Jalapeno Popper Cheesy Garlic Bread. The top one was a little lighter on the jalapenos in case they would scare people off. The bottom one was loaded and loaded good. They were both fantastic and disappeared in no time at all.
Substitute Asiago or Swiss cheese for the mozzarella for a totally different taste. No matter what you use, you’re going to end up enjoying some great cheesy hot (and I do mean spicy hot) bread. This isn’t some fru-fru French restaurant bread.
I highly recommend that you shred or grate your own cheese at home. Don’t buy the pre-shredded or pre-grated stuff. It has stuff added to it to keep it from sticking together. That ‘stuff’ affects how the cheese melts. Shred it yourself and use the good stuff.
I love jalapeno poppers. Jalapenos stuffed with cream cheese are a great thing. The peppers mellow a bit. The creamy cheese cools the heat. So, why not put those same great tastes together and make a jalapeno popper cheesy garlic bread? Yes, why not!
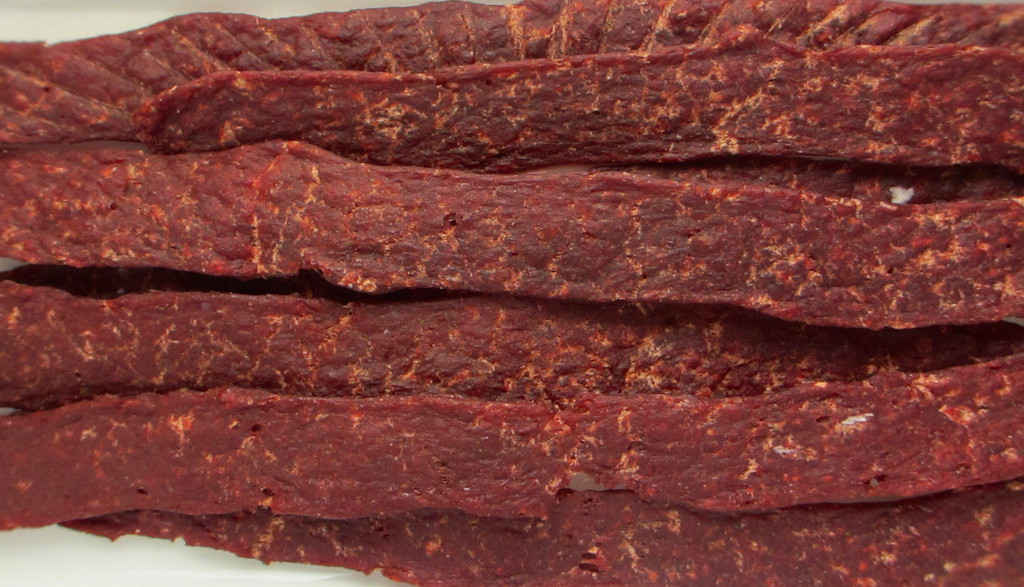
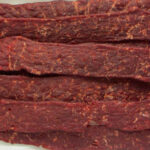
I love making jerky on my dehydrator. I’ve been using ground top round for my ground beef jerky, but any lean ground meat will work. This hickory ground beef jerky on the Nesco Snackmaster Pro has a nice mellow smoky hickory flavor that is definitely not overwhelming. The meat has the perfect ‘bite’, just a little tug.
Rotate Your Trays…
Make sure you rotate your trays every 2 hours or so when you make hickory ground beef jerky on the Nesco Snackmaster Pro. The bottom trays will not dry as quickly as those on top. Rotating the trays will give you nice, even drying and perfect jerky on every level.
… And Have Extra Trays
I like to load up my dehydrator. To do that I picked up a handful of extra trays. They really add a whole lot more drying space! Since I have to rotate my trays, I write a number on each one on a piece of blue painter’s tape so I can keep track of them.
Hickory Ground Beef Jerky on the Nesco Snackmaster Pro
This hickory ground beef jerky has a nice mellow smoky hickory flavor that is definitely not overwhelming. The meat has the perfect ‘bite’, just a little tug.
2teaspoonsPink Curing Saltcomes with the seasoning (optional if you’re going to refrigerate the finished product)
½cupwater
Instructions
NOTE: The package for the Eastman Outdoors jerky seasoning states that it makes up to 5 pounds of jerky. I personally feel that the flavor is too mellow, so I use just about an entire package for 1 pound of jerky. I end up with a little left over seasoning, which I store in a labelled air-tight container. I’ll eventually mix it with more seasoning. I think I can get 3 pounds of well-seasoning jerky out of two packages of Eastman Outdoors mix.
Place beef in a resealable bag or container.
In a small bowl whisk together the seasoning, curing salt and water.
Pour over the meat and seal.
Shake to coat.
Refrigerate the meat for up to 8 hours, shaking or massaging every hour or so to get the marinade distributed and absorbed evenly.
Remove meat from the marinade and add to a jerky gun.
Squeeze out onto Nesco trays. Do not overlap meat.
Add the dehydrator top, set to maximum temperature setting and dehydrate for 5 hours, rotating the trays (bottom to top) every 2 hours or so.
To test for doneness remove a piece and let cool slightly. Try to bend the meat. If it gives and starts to tear at the bend it is done. If it bends without tearing return to the dehydrator and let it run another 15 minutes and test again. If the meat is crunchy it is overdone but still good. It’s really personal preference as to how you like your jerky. Soft, chewy, crunchy. There’s no wrong here.
Let cool before storing in an airtight container.
Notes
This recipe is for starting with 1 pound of meat. You’ll end up with about 1/2 pound in the end. You can easily double/triple/etc this recipe for large quantities of meat, however 5-6 pounds is about all you can fit onto a Nesco Snackmaster Pro fitted with 12 trays (the unit comes with 5).
Note: This recipe was developed using the Char-Broil Big Easy Oil-Less Fryer. If you are cooking using the Char-Broil Smoker-Roaster Grill you should cook with the lid open and the temperature set to High. You might also need to adjust the cooking time.
I love cooking on my Char-Broil Big Easy. So much that I even put together a free eCookbook containing some of my favorite Big Easy recipes. Like most people, I bought my Big Easy for cooking turkey at Thanksgiving. I quickly realized that I can cook just about anything in it. Even jumbo hot dogs! Yep! Jumbo dogs on the Char-Broil Big Easy are crazy easy, and crazy good. The dogs get a great crispy crunchy casing that just pops in your mouth. The meat is tasty, moist and perfect!
Big Dogs For Big Flavor
Don’t be shy with your Jumbo Dogs on the Char-Broil Big Easy. Add some sweet onions and peppers along with the jumbo dogs and let them roast along with the dogs. Chop and add them to buns to make a great dog even better. You can also cook up a big batch of regular-sized hot dogs in your Big Easy, enough for a crowd!
Jumbo dogs are crazy easy, and crazy good. The dogs get a great crispy crunchy casing that just pops in your mouth. The meat is tasty, moist and perfect!