Cajun Grilled Baby Vegetables

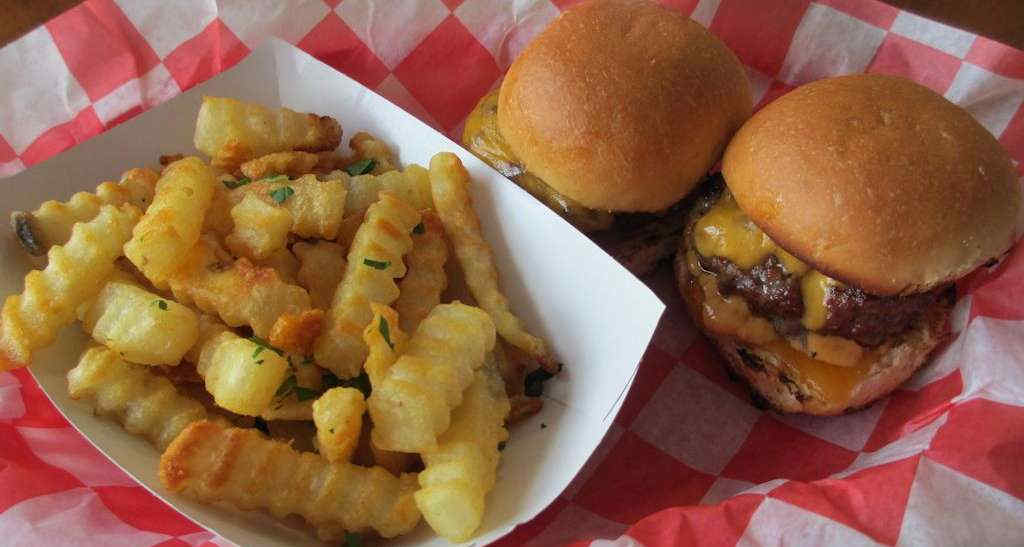
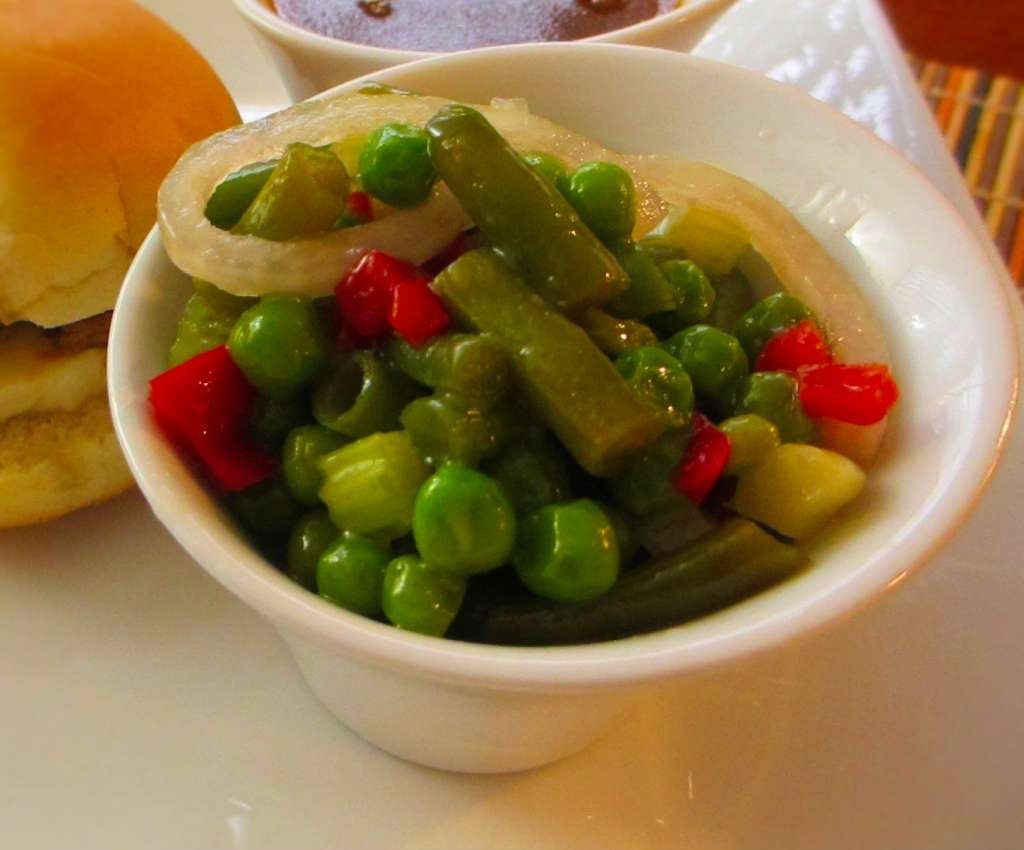
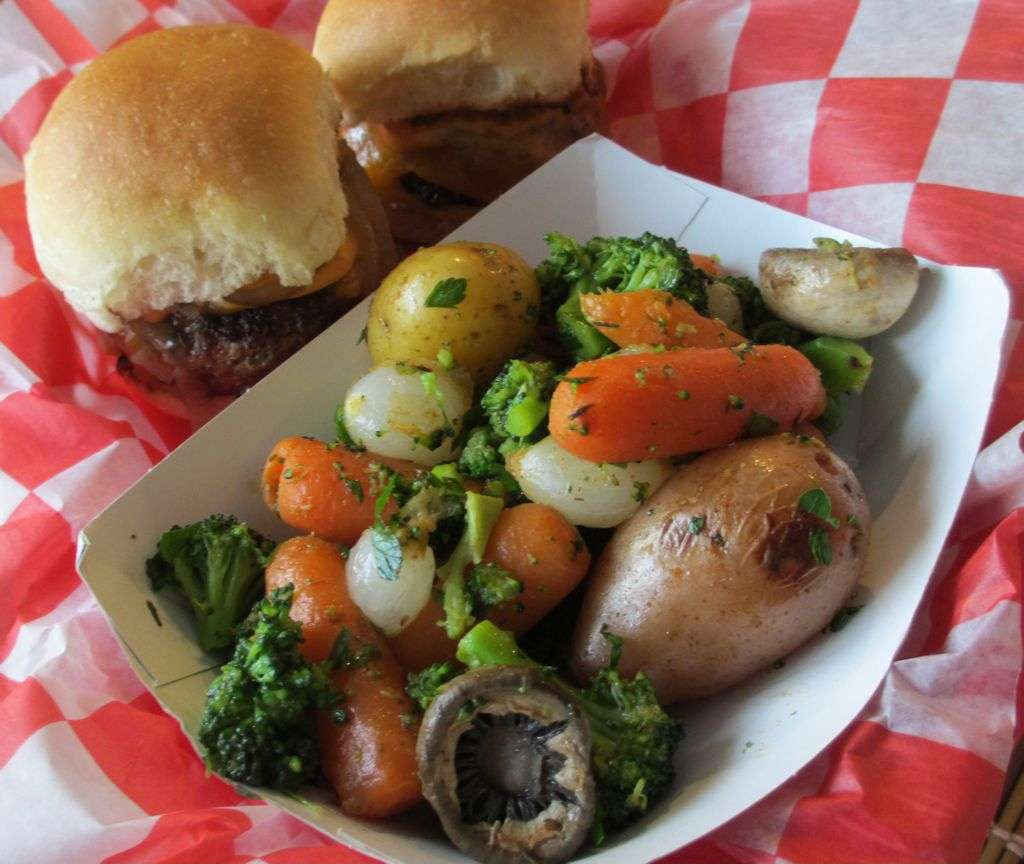
I consider these Cajun grilled baby vegetables to be the perfect side dish. They take absolutely no time to throw together and they taste fantastic. Just about any vegetable can be used, just make sure that all of them are roughly the same size so they cook evenly. I needed something light and fresh to go with my just-grilled sliders. I figured, small burgers, small veggies!

Cajun Grilled Baby Vegetables

Weber makes an absolutely fantastic vegetable basket for the grill. It heats up fast and evenly and is the perfect basket for making these Cajun grilled baby vegetables, whether you have a Weber grill or not!

Also try my Asian grilled vegetables and my grilled Tuscan vegetables.

Cajun Grilled Baby Veggies
Print Pin
5 from 1 vote

Cajun Grilled Baby Vegetables

The perfect side dish, ready in no time.
Course Side
Cuisine American
Keyword Cajun, grilled, vegetable
Prep Time 10 minutes
Cook Time 20 minutes
Total Time 30 minutes
Servings 6
Calories 55kcal

Ingredients

Instructions

  • Fire up your grill for direct cooking.
  • Bring a large pot of lightly salted water to a boil.
  • Add the potatoes and cook until just barely tender.
  • Add the remaining vegetables except for the mushrooms and boil another minute.
  • Transfer to an ice bath to stop the vegetables from cooking.
  • Put all vegetables (including the mushrooms) in a bowl.
  • Drizzle with a bit of oil and add seasoning to taste.
  • Place veggies in grill basket and grill for 15-20 minutes until tender, flipping every 5 minutes.
  • Serve garnished with fresh parsley.

Notes

You can add any vegetables you like but keep them small so they cook at the same rate.

Nutrition

Calories: 55kcal | Carbohydrates: 12g | Protein: 2g | Fat: 1g | Saturated Fat: 1g | Sodium: 28mg | Potassium: 364mg | Fiber: 2g | Sugar: 3g | Vitamin A: 3459IU | Vitamin C: 30mg | Calcium: 30mg | Iron: 1mg

Nutritional values are approximate.

Derby Hot Dog

I’m borderline addicted to food trucks. Which also means I love watching Eat Street, the show about food trucks that airs on the Cooking Channel. Host James Cunningham travels around North America visiting all of the great trucks. What a dream job that would be. An episode aired the other day on Dougie Doug, a truck in Vancouver. Every hot dog on the menu looked absolutely scrumptious, so I decided to make a few of them here at home. I started with the delicious Derby hot dog. Topped with Swiss, grilled mushrooms, onion, jalapeno and BBQ sauce, this is one mighty fine dog.

Derby Hot Dog

Go To A Bakery For The Best Buns

A great Derby hot dog needs a great bun, so I’ve ditched the grocery store offerings and have been ordering fresh buns from our local bakery, Taylor’s Bakery. The buns are so fantastic. Soft, tasty, with a wonderful bread aroma. They barely cost more than the ones in the store that just can’t even compare at all in quality or flavor.

Also try my seriously-yummy French Connection dogs.

Derby Dog
Print Pin
5 from 1 vote

Derby Hot Dog

Topped with Swiss, grilled mushrooms, onion, jalapeno and BBQ sauce, this is one mighty fine dog.
Course Main
Cuisine American
Keyword hot dogs
Prep Time 5 minutes
Cook Time 15 minutes
Total Time 20 minutes
Servings 4 servings
Calories 340kcal
Author From a menu item at Dougie Dogs

Ingredients

Instructions

  • Cook dogs as desired.
  • Since you're going to also grill the mushrooms, might as well grill the dogs too!
  • Warm buns.
  • Grill mushrooms until starting to get tender.
  • Serve dogs on buns.
  • Top with mushrooms and cheese.
  • Place under the broiler or on the grill over indirect heat for a few minutes until the cheese melts.
  • Add onion, jalapeno and BBQ sauce.

Notes

Serve with plenty of napkins.

Nutrition

Calories: 340kcal | Carbohydrates: 40g | Protein: 16g | Fat: 13g | Saturated Fat: 6g | Cholesterol: 36mg | Sodium: 740mg | Potassium: 366mg | Fiber: 2g | Sugar: 11g | Vitamin A: 182IU | Vitamin C: 2mg | Calcium: 228mg | Iron: 3mg

Nutritional values are approximate.

Homemade Applewood-Smoked Maple Bacon

Making bacon has been on my to-do list for a while now. I was able to find some nice pork belly in the butcher case, so I grabbed a few pounds and set off on making this homemade applewood-smoked maple bacon.

The end result was absolutely great. This is easily the best bacon I’ve ever had. There’s a hint of maple, a hint of smoke, and great texture and flavor. Outstandingly good and so easy that I will always make bacon from here on any time that I have my smoker going.

Homemade Applewood-Smoked Maple Bacon

Cheaper? Maybe. Better? Absolutely.

Price-wise, this homemade applewood-smoked maple bacon is also cheaper than store bought, and you can slice it any way that you like, from super thick to wafer thin. I think I paid about $1.99/pound for the pork. I did have to remove the skin (which I saved for making cracklins at a later time). That took a little effort. If you get your pork belly from a butcher you might want to ask to have the skin removed for you.

I prefer to use fruit or nut woods when I smoke unless I want a heavier smoke flavor. Pecan, apple or cherry are my favorites. I used apple for this bacon.

Also try my Sriracha and chipotle bacon.

Homemade Applewood-Smoked Maple Bacon
Print Pin
5 from 1 vote

Homemade Applewood-Smoked Maple Bacon

Making bacon has been on my to-do list for a while now. I was able to find some nice pork belly in the butcher case, so I grabbed a few pounds and set off on making this homemade applewood-smoked maple bacon.
Course Side
Cuisine American
Keyword bacon, homemade, smoked
Prep Time 7 days
Cook Time 2 hours
Total Time 7 days 2 hours
Servings 1 pound
Calories 5129kcal

Ingredients

  • 2 pound pork belly skin removed (save for making cracklins). Choose a belly that is consistent in thickness so that it cooks evenly.
  • 3 teaspoons kosher salt
  • ½ teaspoon Pink Curing Salt
  • 3 teaspoons ground black pepper
  • 2 tablespoons brown sugar
  • 6 tablespoons maple syrup Grade B if you can find it, otherwise Grade A will work do
  • ½ cup cold water

Instructions

  • Put the belly into a large resealable bag.
  • Whisk together the remaining ingredients in a medium bowl.
  • Add to the baggie.
  • Seal the bag, trying to remove as much air as possible.
  • Place in to a deep flat pan (in case the bag leaks) in the fridge for 7 days, flipping over twice a day.
  • The day you are ready to smoke, fire up your smoker for 225 F cooking over a light wood such as apple.
  • Remove belly from the bag and rinse well with cold water.
  • Place belly onto smoker and smoke for 1 1/2-2 hours or until the meat reaches 150 F.
  • Remove belly from smoker and let cool slightly before placing in the fridge for an hour.
  • Slice bacon as desired.
  • Bake, pan fry, or use however you wish!
  • Store smoked bacon in a plastic bag or container in the fridge for up to 2 weeks.

Notes

Store bacon long-term in the freezer. For best flavor, use vacuum-sealed bags for storage.

Nutrition

Calories: 5129kcal | Carbohydrates: 108g | Protein: 85g | Fat: 481g | Saturated Fat: 175g | Cholesterol: 653mg | Sodium: 7285mg | Potassium: 2061mg | Fiber: 2g | Sugar: 95g | Vitamin A: 124IU | Vitamin C: 3mg | Calcium: 227mg | Iron: 6mg

Nutritional values are approximate.

Cedar-Planked Beef Sliders

Grilling salmon on cedar planks is a pretty common thing. I’m not sure why I never thought about cooking burgers on them too, though. Bobby Flay thought about it. That means I had to make them too. These cedar-planked beef sliders were amazingly good. They’re the perfect two-bite, hand-held burgers. You’ll want to make extra because they definitely disappear fast.

Cedar-Planked Beef Sliders

A Different Kind Of Burger

The cedar adds just a bit of a twist to the burgers. They smell absolutely fantastic when cooking. The cedar flavor in the meat isn’t overwhelming. It’s there, though. It’s definitely something different and it adds a bit of a ‘wow’ factor to your cookout. The slider buns were also browned over the cedar for a little extra cedar flavor.

I served these delicious cedar-planked beef sliders with oven-baked fries and Crispers that were tossed in garlic oil and fresh choppy parsley.

I use this nifty little ole burger press to make these burgers. It’s the best thing ever for stuffing burgers with just about anything you can think of!

Cooking on cedar planks can really change the ordinary into something special, which is why I do it often. Check out my other cedar plank recipes: creamy mashed potatoes, Cajun mashed potatoes, Twinkies, chorizo portabellos, hot dogs, sausage sandwiches, shrimp and grits and spicy grilled shrimp.

Cedar-Planked Beef Sliders
Print Pin
5 from 1 vote

Cedar-Planked Beef Sliders

The cedar adds just a bit of a twist to the burgers. They smell absolutely fantastic when cooking. The cedar flavor in the meat isn’t overwhelming. It’s there, though. It’s definitely something different and it adds a bit of a ‘wow’ factor to your cookout. 
Course Main
Cuisine American
Keyword burgers, cedar plank, sliders
Prep Time 2 hours
Cook Time 15 minutes
Total Time 2 hours 15 minutes
Servings 2 servings
Calories 446kcal

Ingredients

Instructions

  • Soak the cedar plank in water for 2 hours.
  • Fire up your grill for direct and indirect cooking.
  • Season the beef with salt and pepper.
  • Place plank over direct heat for 2 minutes. Flip and heat another 2 minutes. Brush top of plank with olive oil and place over indirect heat.
  • Place burgers over direct heat and cook for 3 minutes. Flip and cook another 3 minutes.
  • Transfer burgers to plank. Add cheese and cook until done, about 5 minutes.
  • Meanwhile toast the buns as desired.
  • Slather buns with burger sauce. Add patties and serve.

Notes

Toast your buns on a plank for extra flavor!

Nutrition

Calories: 446kcal | Carbohydrates: 33g | Protein: 24g | Fat: 24g | Saturated Fat: 10g | Cholesterol: 70mg | Sodium: 179mg | Potassium: 284mg | Fiber: 3g | Sugar: 5g | Vitamin A: 170IU | Calcium: 179mg | Iron: 4mg

Nutritional values are approximate.

Marinated Vegetable Salad

I’m a big fan of vinegar-based vegetable salads. They’re easy to make and great tasting. I like mine to have a little crunch in them. Of course, fresh produce is a bit pricey in the off-season and I try to avoid buying much of it. That’s why I like this version of marinated vegetable salad which uses a few frozen vegetables.

Marinated Vegetable Salad

A Great Salad For Any Vegetables

You can leave out the red bell pepper, or substitute jarred roasted red bell pepper. And frozen (but then thawed) pearl onions could be substituted for the sweet onion. Pretty much anything can be added to this marinated vegetable salad. I would tend to use things that add a bit of a crunch.

Also try my wild rice and pineapple salad. And if fresh vegetables are in season, you can’t go wrong with my delicious fresh vegetable salad.

Marinated Vegetable Salad
Print Pin
5 from 1 vote

Marinated Vegetable Salad

Fresh produce is a bit pricey in the off-season and I try to avoid buying much of it. That’s why I like this version of marinated vegetable salad which uses a few frozen vegetables.
Course Side
Cuisine American
Keyword salad, vegetable
Prep Time 15 minutes
Cook Time 1 day
Total Time 1 day 15 minutes
Servings 10
Calories 158kcal

Ingredients

Instructions

  • Add the vinegar to a medium saucepan and bring to a boil.
  • Whisk in the sugar until dissolved.
  • Remove from heat and whisk in the oil and salt.
  • Let cool completely.
  • Place beans, peas, celery, pimentos, onions, and bell pepper to a large bowl.
  • Pour the vinegar mixture over top of the vegetables.
  • Cover and refrigerate for 24 hours.
  • Serve cold.

Notes

You can play around with using different vegetables, such as pinto beans, broccoli, etc.

Nutrition

Calories: 158kcal | Carbohydrates: 33g | Protein: 4g | Fat: 1g | Saturated Fat: 1g | Sodium: 465mg | Potassium: 314mg | Fiber: 5g | Sugar: 26g | Vitamin A: 826IU | Vitamin C: 45mg | Calcium: 32mg | Iron: 3mg

Nutritional values are approximate.

20-Minute Mac-and-Cheese

Yes, I used to make macaroni and cheese from a box. That was long ago. Now I usually make a totally different take on mac-and-cheese, like my favorite, fire eater chicken macaroni and cheese. But sometimes I just don’t have the time (or ingredients). That’s when this 20-minute mac-and-cheese version comes in real handy. Like the name says, it doesn’t take long to make and it comes out just as ooey and gooey as you’d expect (and want).

20-Minute Mac-and-Cheese

How To Re-Heat any Leftovers

Add a couple pinches of cayenne if you want a little kick in your 20-minute mac-and-cheese. If you have any leftovers, just warm them up in a pot on the stovetop. I like to add a few splashes of milk and a little butter to help break up the pasta as it tends to stick together after spending a night in the fridge. It helps keep the mac nice and creamy good!

I highly recommend that you shred or grate your own cheese at home. Don’t buy the pre-shredded or pre-grated stuff. It has stuff added to it to keep it from sticking together. That ‘stuff’ affects how the cheese melts. Shred it yourself and use the good stuff.

For something totally different, try my macaroni-and-cheese salad. Yes, salad.

20-Minute Mac-and-Cheese
Print Pin
4 from 1 vote

20-Minute Mac-and-Cheese

This 20-minute mac-and-cheese version comes in real handy. Like the name says, it doesn’t take long to make and it comes out just as ooey and gooey as you’d expect (and want).
Course Side
Cuisine American
Keyword mac and cheese, macaroni and cheese
Cook Time 20 minutes
Total Time 20 minutes
Servings 4
Calories 520kcal

Ingredients

  • Kosher salt
  • 1 ½ cups elbow macaroni
  • 1 cup heavy cream half-and-half also works well
  • 1 ounce cream cheese at room temperature
  • ¼ teaspoon garlic salt
  • ½ cup extra sharp Cheddar cheese shredded
  • 2-4 slices American cheese

Instructions

  • Bring a large pot of salted water to a boil. Add pasta and cook until al dente, about 9 minutes. Drain.
  • Meanwhile, heat cream in a large skillet.
  • Add cream cheese and salt and stir until cheese is melted.
  • Add cheddar and American cheeses and stir until melted.
  • Add cooked pasta and stir to coat well.
  • Note: Add a pinch of cayenne for extra kick.
  • Note: If you want a little crunch, sprinkle the top of the mac with panko breadcrumbs and place under the broiler for a few minutes until golden brown. Make sure you use a skillet that can stand the heat, such as a cast iron skillet.

Notes

I recommend not using any ‘light’ ingredients in this recipe for the creamiest, cheesiest mac-and-cheese.

Nutrition

Calories: 520kcal | Carbohydrates: 42g | Protein: 14g | Fat: 33g | Saturated Fat: 20g | Trans Fat: 1g | Cholesterol: 115mg | Sodium: 457mg | Potassium: 199mg | Fiber: 2g | Sugar: 2g | Vitamin A: 1211IU | Vitamin C: 1mg | Calcium: 268mg | Iron: 1mg

Nutritional values are approximate.

Fried Onion Strips with Dipping Sauce

I like these fried onion strips with dipping sauce more than I like regular ole onion rings. I think it’s because I can eat a lot of them and still feel like I didn’t eat that many. They’re dangerously addicting, with a light batter coating and the perfect dipping shape and size. A basket of these little yummy morsels disappears faster than I want to admit.

Fried Onion Strips with Dipping Sauce

Better Than Onion Rings?

The dipping sauce is equally fantastic with the fried onion strips, with a kick of cayenne and horseradish. As much as I do like horseradish, it can get a little overwhelming for me, so I cut the amount in half when I made a batch of the sauce and it still came out great. If you’re a horseradish fan like my wife is, use the full amount and you’ll be a happy person!

If I’m cooking for a crowd, I’ll break out my big deep fryer. But, if it’s just the two of us, I’ll fire up my Fry Daddy fryer. It’s the perfect size for both of us. It fries everything perfectly. And as an added bonus, it doesn’t use a lot of oil, which saves me money.

I get out my big deep fryer when it’s time to fry a large batch of food. It comes to temperature quickly and it maintains that temperature perfectly. It has a built-in oil filter and storage unit so I can re-use the oil several times.

Also try my homemade onion rings.

Fried Onion Strips with Dipping Sauce
Print Pin
5 from 1 vote

Fried Onion Strips with Dipping Sauce

I like these Fried onion strips with dipping sauce more than I like regular ole onion rings. They’re dangerously addicting, with a light batter coating and the perfect dipping shape and size.
Course Appetizer
Cuisine American
Keyword deep-fried, dipping sauce, onion
Prep Time 10 minutes
Cook Time 20 minutes
Total Time 30 minutes
Servings 4
Calories 402kcal

Ingredients

For the onion strips

For the dipping sauce

Instructions

For the onion strips

  • Heat oil to 375 F in a deep fryer or Dutch oven.
  • Whisk together buttermilk, egg and hot sauce in a large bowl.
  • Combine flour, cayenne, salt, and pepper in a medium bowl and pour into a 1 gallon re-sealable baggie.
  • Add onion slices to the buttermilk mixture and stir gently to coat.
  • Shake off excess buttermilk and add onion slices to flour mixture. Seal and gently shake to coat.
  • Working in batches, fry onions until golden brown. Remove to a paper towel-lined plate to drain.
  • Serve with dipping sauce.

For the dipping sauce

  • Whisk together all ingredients.

Notes

These are also great dipped in Ranch dressing.

Nutrition

Calories: 402kcal | Carbohydrates: 41g | Protein: 7g | Fat: 24g | Saturated Fat: 4g | Trans Fat: 1g | Cholesterol: 56mg | Sodium: 1058mg | Potassium: 342mg | Fiber: 3g | Sugar: 12g | Vitamin A: 443IU | Vitamin C: 12mg | Calcium: 89mg | Iron: 2mg

Nutritional values are approximate.

Hawaiian BBQ Meatball Fried Rice

This is what happens when you’re sitting around, dreaming about food. You start by dreaming about appetizers, like maybe some awesome Hawaiian BBQ meatballs. You know, the old party standby. Yummy. Then, your thoughts (I’m blaming the pineapple in the meatball sauce) turn to Hawaiian fried rice. Next thing you know, you’ve got Hawaiian BBQ meatball fried rice, and let me tell you, it’s good. Asian meets… uh… Well, meatballs, I guess! It’s different in a very good way.

Hawaiian BBQ Meatball Fried Rice

A Great Taste Sensation

I loved the sweetness of the pineapple, the tangy bite from the BBQ sauce, and the bite from the vegetables. This Hawaiian BBQ meatball fried rice came out really good. Not bad for just sitting around, dreaming! Who knows what I might dream up next. Sometimes the ideas are really good, like this one. Others, well, they aren’t so good. Those are the ones that don’t end up on this blog so you actually never get to see them. Consider yourself lucky!

I used frozen, pre-cooked meatballs for this dish. You can use homemade instead. Just cook them first, of course.

If I’m reaching for a bottled BBQ sauce, I often go for Sweet Baby Ray’s.

My vegetable and meatball soup is a bit different, too.

Hawaiian BBQ Meatball Fried Rice
Print Pin
4 from 1 vote

Hawaiian BBQ Meatball Fried Rice

This is what happens when you’re sitting around, dreaming about food. 
Course Main
Cuisine American
Keyword fried rice, meatballs
Prep Time 10 minutes
Cook Time 30 minutes
Total Time 40 minutes
Servings 8
Calories 357kcal
Author Mike

Ingredients

For the Hawaiian meatballs

For the Hawaiian fried rice

Instructions

For the Hawaiian meatballs

  • Place all ingredients into a medium pot over medium heat.
  • Stir and heat thoroughly.

For the Hawaiian fried rice

  • Heat a teaspoon of the oil in a large skillet over medium high heat.
  • Add the bell pepper and white parts of the green onions and cook until the peppers start to soften, about 5 minutes.
  • Add garlic and cook another minute.
  • Remove mixture to a plate.
  • Add another teaspoon of oil to the pan.
  • Add rice and warm through, stirring often.
  • Push rice to the side of the skillet and add the 3 eggs.
  • Cook, scrambling, until done.
  • Stir in to the rice.
  • Add green parts of the green onions and pineapple chunks and stir.
  • Add in the red pepper mixture and stir.
  • Serve rice with meatballs and sauce.

Notes

I like a lightly smoky BBQ sauce, but not one that is overly sweet since the pineapple is sweet.

Nutrition

Calories: 357kcal | Carbohydrates: 37g | Protein: 15g | Fat: 16g | Saturated Fat: 6g | Trans Fat: 1g | Cholesterol: 111mg | Sodium: 245mg | Potassium: 326mg | Fiber: 1g | Sugar: 7g | Vitamin A: 701IU | Vitamin C: 22mg | Calcium: 44mg | Iron: 1mg

Nutritional values are approximate.

Peeps Chips

Everyone loves Peeps. Heck you can even buy Peeps stuffed toys (I’ve noticed one or two around our house even…). So how about doing something different with Peeps? How about crazy good Peeps chips? They’re crunchy. Very crunchy. And they taste like toasted marshmallows. The kind you get over a campfire. They’re really addicting. And kind of messy.

Peep Chips

Fun To Make And Eat!

These little Peeps chips treats take a bit of work to make, but they’re worth it. You want to dehydrate them over low heat. Our oven’s lowest temperature setting is 170 F, which worked perfectly. Just slide a wooden spoon in between the door and oven frame so that any moisture can escape. Our oven also has a warming drawer which, when set to High, gets to 190 F, which is also fine. Just leave the drawer slightly ajar so steam can escape.

Also try my Peeps-stuffed Oreos.

Peep Chips
Print Pin
4 from 1 vote

Peep Chips

How about doing something different with Peeps? How about crazy good Peeps chips? They’re crunchy. Very crunchy. And they taste like toasted marshmallows. 
Course Treat
Cuisine American
Keyword crispy, peeps
Prep Time 5 minutes
Cook Time 12 hours
Total Time 12 hours 5 minutes
Servings 12 chips
Calories 28kcal

Equipment

Ingredients

Instructions

  • Heat an oven to its lowest temperature, 170-190 F.
  • Flatten out the Peeps with your hands, cast iron skillet, spatula… anything you have.
  • Place the flat Peeps onto baking sheets lined with parchment paper.
  • Insert into oven and let dehydrate for 10 or so hours, turning the pans every few hours. Keep the oven door ajar by placing a wooden spoon between the door and oven frame. You want just enough of a gap so any moisture coming off the Peeps escapes.
  • After 10 hours our Peeps were crunchy on top, but still soft inside. I flipped them and let them go another 2 hours. At that point they were pretty crunchy. I removed them from the oven and let them cool. They then hardened completely.

Notes

Best when served immediately.

Nutrition

Calories: 28kcal | Carbohydrates: 7g | Protein: 1g | Sodium: 3mg | Sugar: 7g

Nutritional values are approximate.

Copycat Joe’s Crab Shack Popcorn Shrimp

I love shrimp. Cooked any way, any time. Like the guy in Forrest Gump who listed off the many ways to enjoy shrimp. They’re all good. This copycat version of Joe’s Crab Shack popcorn shrimp is crazy good. There’s a nice crunchy breading. Tender tasty shrimp inside.

Copycat Joe’s Crab Shack Popcorn Shrimp

Get To Dippin’!

I made up a batch of these copycat Joe’s Crab Shack popcorn shrimp and served them easy style, with two bottled sauces, both from Louisiana Fish Fry Products. The remoulade sauce has a hit of horseradish. It’s almost salad dressing-like, but with a kick. The seafood sauce definitely has a kick to it. Like grown-up cocktail sauce. Of course you can just serve them with good ole store-bought cocktail sauce, spicy or regular. I like to get mine good and cold so I put it into the fridge the night before I make the shrimp.

If I’m cooking for a crowd, I’ll break out my big deep fryer. But, if it’s just the two of us, I’ll fire up my Fry Daddy fryer. It’s the perfect size for both of us. It fries everything perfectly. And as an added bonus, it doesn’t use a lot of oil, which saves me money.

I get out my big deep fryer when it’s time to fry a large batch of food. It comes to temperature quickly and it maintains that temperature perfectly. It has a built-in oil filter and storage unit so I can re-use the oil several times.

Also try my copycat of Applebee’s Sriracha shrimp. Either shrimp recipe would also be delicious in my fiesta shrimp tacos.

Copycat Joe’s Crab Shack Popcorn Shrimp
Print Pin
5 from 1 vote

Copycat Joe’s Crab Shack Popcorn Shrimp

I love shrimp. Cooked any way, any time. Like the guy in Forrest Gump who listed off the many ways to enjoy shrimp. They’re all good. This copycat version of Joe’s Crab Shack popcorn shrimp is crazy good.
Course Appetizer
Cuisine American
Keyword copycat, crispy, popcorn shrimp
Prep Time 45 minutes
Cook Time 20 minutes
Total Time 1 hour 5 minutes
Servings 4 servings
Calories 281kcal
Author Mike

Ingredients

Instructions

  • Put the shrimp into a resealable baggie or container.
  • Add the garlic powder, brown sugar and hot sauce. Seal and shake gently to coat. Marinate in fridge for 30 minutes.
  • Set up three large bowls (I used pie pans).
  • In the first bowl place the corn starch.
  • In the second bowl, beat the eggs with the water.
  • In the third bowl mix together the cracker meal, breadcrumbs, Creole seasoning, flour and paprika.
  • Heat oil to 350 F in a deep fryer or Dutch oven. You’ll need at least 2″ of oil.
  • Working in batches, coat shrimp in corn starch.
  • Shake off excess then coat in egg wash.
  • Shake off excess then coat in breadcrumb mixture.
  • Fry until golden brown (the shrimp will float to the top of the oil when done).
  • Remove to a paper towel-lined plate to drain and cool slightly.

Notes

Serve with your favorite dipping sauce.

Nutrition

Calories: 281kcal | Carbohydrates: 28g | Protein: 29g | Fat: 5g | Saturated Fat: 1g | Trans Fat: 1g | Cholesterol: 368mg | Sodium: 1064mg | Potassium: 186mg | Fiber: 1g | Sugar: 2g | Vitamin A: 349IU | Vitamin C: 7mg | Calcium: 209mg | Iron: 4mg

Nutritional values are approximate.